
Hello friends! I can't believe January is almost over. This month flew by and we have had a busy start of the year, but almost only with good stuff. I have a journal/notebook/sketchbook tutorial to share with you today.

As you know, I love to make my own notebooks and sketchbooks, and I take them along and use them. I am also trying to make fewer to-do lists and notes on printer paper. Outside my window, I often see great tits outside my window, which is why I decided to turn the bird on this journal into a great tit - which is a kind of chickadee, so the Chickadee stamp by Whimsy Stamps that I used worked very well.
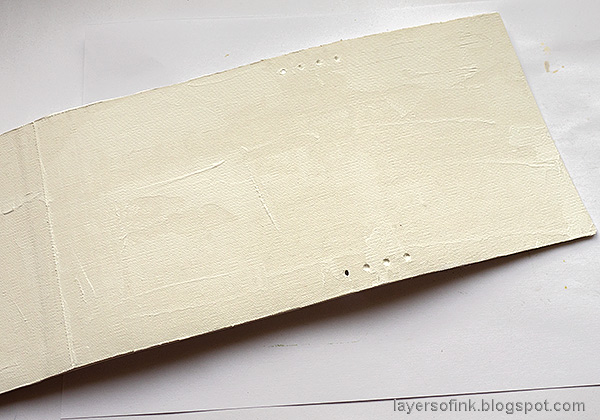
Start by die cutting the Wrapped Journal by Eileen Hull, from mat board. It's an XL die, so you need the Extended Cutting Pads, but it fits in an ordinary Big Shot or Vagabond. Die cut it from sticky-back canvas too. You need to die cut two pieces, since the canvas is a little too short. Glue the canvas to the mat board and leave under a heavy book. Coat with gesso.
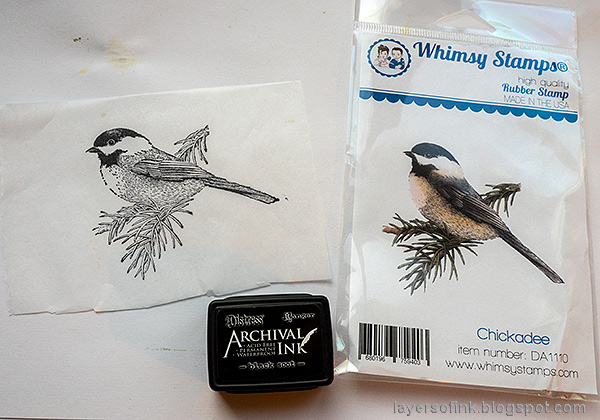
Stamp the Chickadee with permanent ink on tissue paper.

I wanted the bird to face towards the opening of the journal, and not towards the spine, which is why the tissue paper was a great solution. Flip the tissue paper over and you get a mirrored image. Apply glossy medium to the book, carefully place the bird on the book, add a second layer of glossy medium on top of the tissue paper. Don't worry if the tissue paper shows a little, we will turn it invisible.

Color the bird with Distress Paints. I used a bird book to get the colors right. You will paint over some of the stamped lines, but don't worry about it.
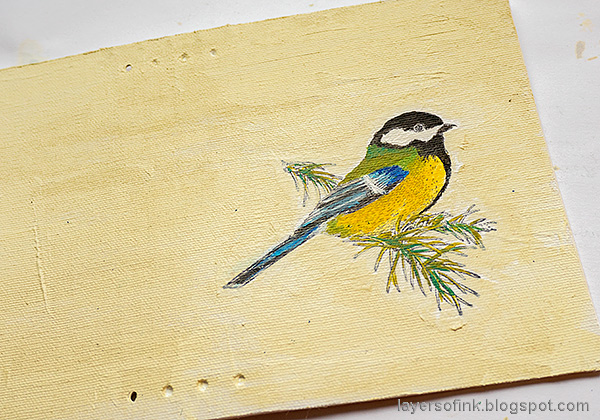
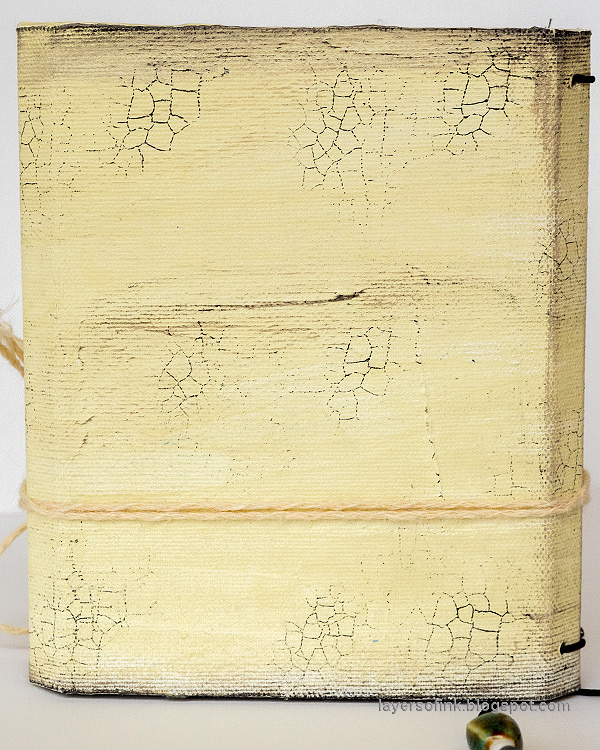
Paint the cover with Antique Linen. This hides most of the visible tissue paper around the bird.

Dry brush Pumice Stone and Black Soot around the edges, and add some shadows to the bird.

When the paint is dry, add details to the bird with a black pen, and highlights with a white gel pen.

Stamp the background here and there with Tim's Craze stamp and black ink.
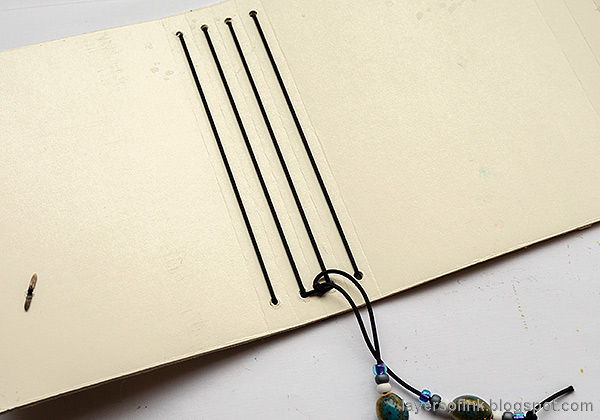
You can bind the Wrapped Journals in different ways. I used an elastic string, going back and forth through the holes created by the die. Tie at the bottom and if you want to, you can add some beads to the strings.

One of the best things with making your own journal is that you can use your favorite paper. Cut into7.7 x 4.7 in (19.5 x 12 cm), fold in half and, and place into four signatures. The weight of your paper determines how many pages you can add to each signature. I stitched down the center, but you can also leave it as is, or use staples.
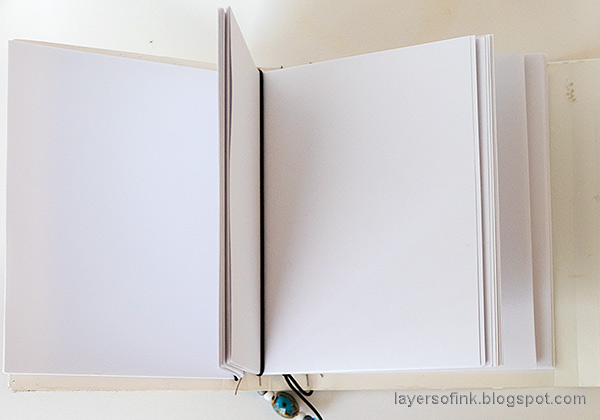
Slip the signatures under the elastic strings. You can also easily add new signatures when the old ones are full.

Here's a close up of the bird.

I aimed for a simple cover, so that the focus would be on the bird. The crackle stamp added just the right amount of texture.
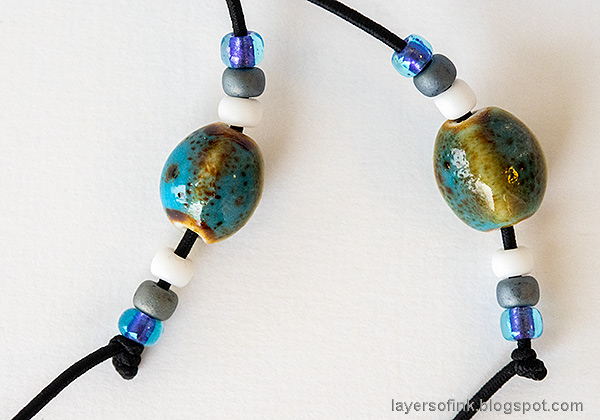
I have quite a lot of beads, from my earlier jewelry-making days, and I really should add them to projects more often.
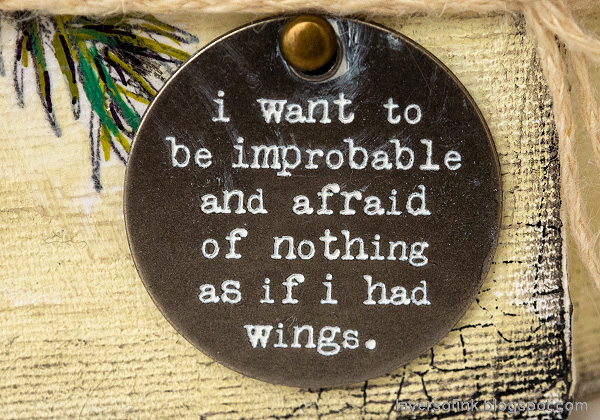
Isn't this a wonderful sentiment? It's from Tim's Quote Tokens. Rub white paint into the words to make them stand out.
I left the back plain, but you could decorate it too, if you'd like to.

Here's a look at the spine, so that you can see what it looks like with the elastic string.
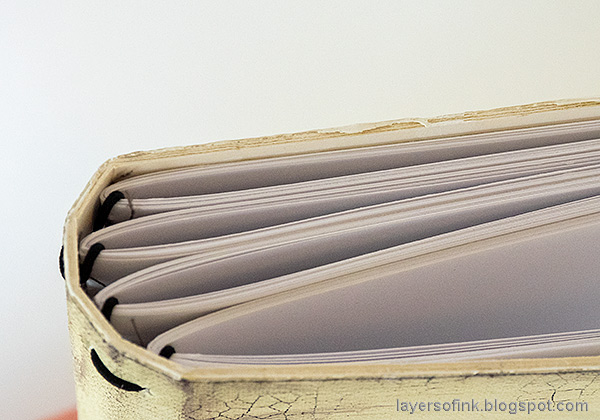
Here's a look at the journal from the top.

I hope you enjoyed this tutorial and that it inspired you to make a journal, or to do the techniques on a different surface. You don't need to use a bird stamp since the techniques work with many different types of stamps.

Thank you so much for taking the time to visit my blog today!
Happy crafting!
Anna-Karin
Supplies:
* Please note: the links are affiliate links, for which I receive a small percentage of sales generated by the link, at no extra cost to you.
* Please note: the links are affiliate links, for which I receive a small percentage of sales generated by the link, at no extra cost to you.
Lovely, thanks so much for sharing
ReplyDeleteThis is absolutely FABULOUS! Thx for showing the steps! Your bird is Beautiful!
ReplyDeleteAbsolutely charming - the subtle crackle stamping on the canvas is perfect to give just a hint of weathered texture, and I love the bird and the dangles. A really gorgeous album.
ReplyDeleteAlison x
Wonderful!
ReplyDeleteThis is just lovely!! so love that crackle stamping added to it!
ReplyDeleteWhat a great tutorial. You gave enough detail so I can try to make one that is similar. I am very new to making these books--I just got the die and have made one. VERY basic, using suede from a jacket I was about to throw away. I am going to add some beads like you did. I have a lot of them, too. QUESTION: where do people buy the elastic? I have just used hemp twine on mine. But it seems like elastic would be better. THANK YOU SO MUCH FOR YOUR TUTORIAL. Your book is gorgeous. I am a bird lover, so I would like to make a bird book. My sister would love one. She might want to draw and color birds in it. She is the artistic one of the two of us.
ReplyDeleteOh, another question: you mentioned that the sticky canvas isn't quite long enough so you had to add some. I'm not sure what you mean. Add it to which part? I don't see any spots where you had to join it....THANKS
DeleteThank you so much for your kind words Sharon! The sticky-back canvas I had at home was letter-sized, and the wrapped journal is a bit longer. If you look closely at the second photo above, you can see the joint. It might be even better to place it at the back of the journal. I die cut the cover twice from the canvas, once from each side, if that makes sense, and the cut off the extra piece, so there wouldn't be a large overlap. I also forgot to write that I usually add matte medium or white glue under the canvas, just to make sure it sticks down completely.
DeleteI got the elastic string in a local general craft shop, in the jewelry section. Are you a member of the Eileen Hull FB group? If you ask the questions about the elastic string there, I am sure you will get a better answer. The string I used is 1.2 mm thick.
Enjoy making journals!!
/ Anna-Karin