
Hello friends! I hope you had a great weekend! We visited a Christmas market at an old manor, where my Mom and I recently discovered that her grandfather was a foreman. The simple house that they lived in is still preserved almost as it was, and my grandfather was born in that very house. It was quite something to visit for the first time. My grandfather told us stories about that place, but my Mom thought the manor house and farm was situated somewhere else and that it had been destroyed. While in fact, it is preserved and fairly close by. We also visited the church where we think he was Christened.

This week at the Simon Says Stamp Monday Challenge Blog we have a Star challenge. Perfect for the season! Don't miss the gorgeous project by our December guest designer Autumn Clark, with her blog SewPaperPaint.

I made a wall-hanging with lots and lots of stars in different sizes. It's about 6 x 6 inches and will probably end up as a gift this Christmas. I love both real stars and to use stars in projects, and they work equally well any time of the year. This particular panel is meant to be Christmas themed, but if you make the background in shades of blue, it can work any time of the year. I used the Star Bright die by Tim Holtz and the pretty Starry Night background stamp by Darkroom Door.
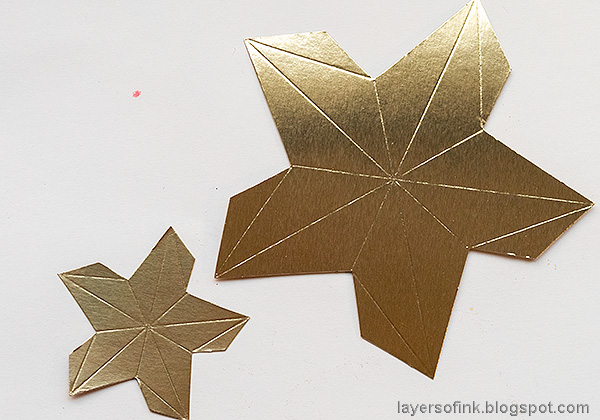
Start by die cutting the two stars from Champagne metallic paper. I have used this paper a lot lately, since it is such a lovely soft shade of gold.

Fold along the score lines and use a bone folder.

Sand the folds carefully.

Ink by smearing brown Distress Ink directly on the stars, and wipe it off from the metallic areas. If you want the stars to be even more distressed, sand more.
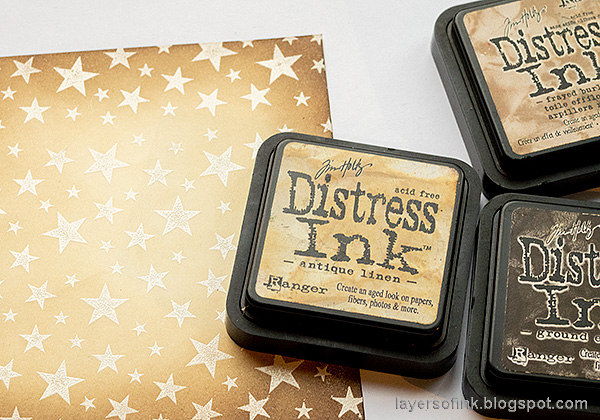
White emboss the Starry Night stamp on cream paper and ink with brown shades of Distress Ink.
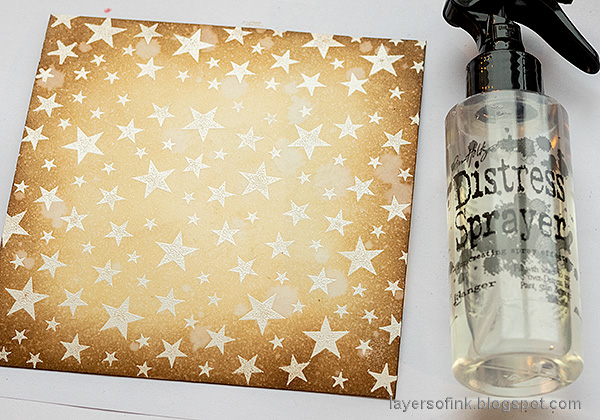
Splatter with water and let dry.

I wanted a shadow effect and used a stamp positioner, even though I wasn't aiming for perfect placement. Stamp with Frayed Burlap. Wipe the ink off from the embossed stars.

Distress and ink the edges and mount on burlap and on Little Sizzles Mat Board. Die cut stars with the Tim Holtz Stars set from old dictionary paper, ink and glue to the panel. Here you can see the effect of the stars, ink, splatters and shadow stars.

I picked sentiments among Tim's clipping stickers.

The stars are quite dimensional, as you can see here.
I hope you will join us this week in our Stars challenge. As always, you have a chance to win a $50 gift voucher to do some fun shopping at Simon Says Stamp. You have until next Monday 8am Ohio time. 1pm UK time, 2 pm CET to join in.


Do you use Instagram? If so please add #sssmchallenge so we can see your entries there too.


Thank you so much for taking the time to visit my blog today!
Happy crafting!
Anna-Karin
Supplies:
* Please note: the links are affiliate links, for which I receive a small percentage of sales generated by the link, at no extra cost to you.
* Please note: the links are affiliate links, for which I receive a small percentage of sales generated by the link, at no extra cost to you.
Gorgeous wall hanging Anna-Karin :-) the 3D stars are fabulous and I love the gold and hessian together, the whole design is stunning! :-)
ReplyDeleteIt sounds like you had a lovely weekend, how fabulous to discover some family history :-)
Hope you have a great week!
luv
Lols x x x
Wow, it sounds like you had a wonderful time with your mum over the weekend. What a beautiful wall hanging! The shadow effect on the stars looks so amazing, I'll have to give that a try 😀. Thanks for the inspiration and wishing you a Happy December! Hugs, Jo x
ReplyDeleteWonderful design! I love how you got the shadow effect and all the gold is so lovely! Thanks so much for sharing!!
ReplyDelete