Hello friends! I hope your weekend was a good one. I managed to find a second-hand gown for the Lucia celebrations on 13 December. The boys are going to be 'star boys' and I didn't want to buy brand new gowns, which they will only wear once. I was also lucky to find some plates from my set of chinaware, which is no longer made. And they cost almost nothing. The weekend was finished with a soccer game.
This week at the Simon Says Stamp Monday Challenge Blog we have a Tape It Up theme. Lots of options for this one. I hope you will join us! Don't miss the gorgeous project by our November guest designer Nikki Acton with her blog Addicted to Art.

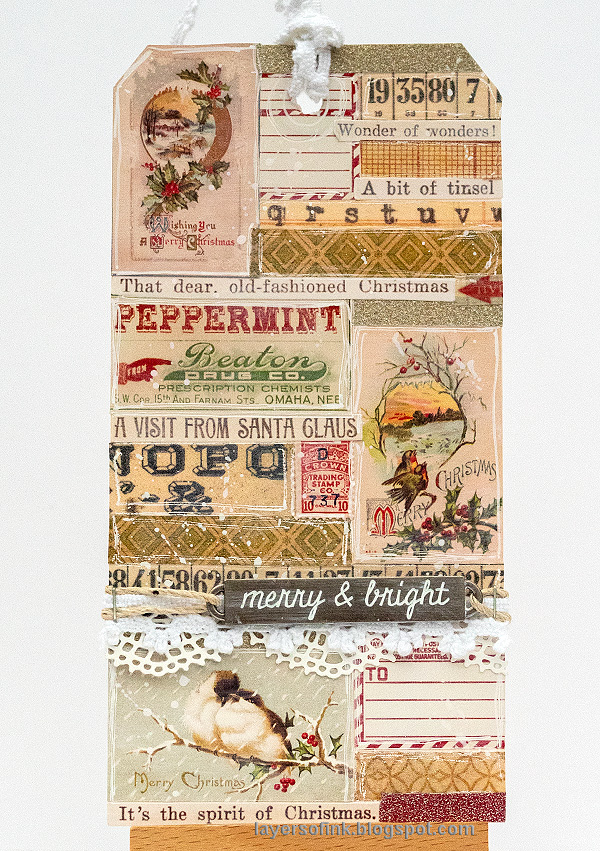
I had fun covering a tag completely with Design Tape and stickers. I wanted to use some of the pretty vintage Christmas cards stickers in Tim Holtz's Christmas Sticker Book, and filled the rest of the space with design tape and clippings sentiments. If you have small pieces of left-over tape, this is a great project to make them shine.

Start by simply adhering tape, stickers and sentiments to a tag. It's like doing a puzzle and lots of fun. Trim the edges.

Paint with Picket Fence to whitewash the colors a little. Wipe most of the paint off before it dries.

Draw borders with a white gel pen. If you use darker stickers, the white pen will be more visible, or you might use black instead. I wanted a light look to this tag.

Splatter some Picket Fence paint on the tag using a splatter brush.

Some stickers or paper ephemera are just too pretty to cover up with anything and this is a great project for those pieces.

The splatters add a winter feeling to the tag, and gives it some more texture.

I rubbed white paint into the Word Band. The paper border was die cut with Tim's Crochet die and I also use a piece of lace.
I hope you will join us this week in our Tape It Up challenge. As always, you have a chance to win a $50 gift voucher to do some fun shopping at Simon Says Stamp. You have until next Monday 8am Ohio time. 1pm UK time, 2 pm CET to join in.


Gorgeous tag Anna-Karin :-) I love how you layered the tag with various tapes and stickers, it looks abolutely fabulous! :-)
ReplyDeleteIt sounds like you had a succesful shopping weekend too! great finds! :-)
Hope you have a great week!
luv
Lols x x x
Hello! This is such a cute idea. And fun to figure out how to put all the little pieces together like a little puzzle. Great way to get out all those little bits of orphaned stickers and trims and put them to good use.
ReplyDeleteThank you for the lovely idea!
(If I start some now, I might have them ready for next Christmas!)