Tuesday, March 12, 2019

DIY Watercolor Birds Pen Holder

Hi friends! I am back from an chilly, but lovely walk. I always enjoy breathing fresh air. During March, the Eileen Hull Inspiration Team is sharing projects spring projects. I made a pen holder, featuring birds.

Layers of ink - DIY Watercolor Birds Pen Holder by Anna-Karin Evaldsson. With Eileen Hull Sizzix dies.

As you might already know, I like to make my own storage containers, and I have quite a few of them on my desk. I have a pretty deep desk, so there is plenty of space. When I used Eileen's new Treasure Box and Stacking Drawer dies to make a Chest of Drawers last month, I thought they would also work great as a pen and tool holder, with three handy compartments. I used very few supplies to make this project, just the dies, mat board, Darkroom Door stamps and watercolor paint. Did you know that mat board is a great surface for watercolor? It holds up very well to the water and is similar to hot-press (smooth) watercolor paper. Just as with hot-press paper, the paint dries fast.

Layers of ink - DIY Watercolor Birds Pen Holder by Anna-Karin Evaldsson.

Die cut the pieces seen here, from white mat board: two side pieces and one base from the Treasure Box, and three dividers from the Stacking Drawer. You need the Extended Cutting Pads, since this is an XL die, but it fits perfectly through the ordinary Big Shot or Vagabond.

Layers of ink - DIY Watercolor Birds Pen Holder by Anna-Karin Evaldsson. Stamp the garden birds.

I used the wonderful Garden Birds Darkroom Door set, designed by Godelieve Tijskens. I love these birds. Stamp them with waterproof ink.

Layers of ink - DIY Watercolor Birds Pen Holder by Anna-Karin Evaldsson. Watercolor the blue tit.

I used a bird book as reference, since I wanted to paint specific birds, but you can of course also paint your own fantasy birds. Mix watercolor paint before starting. Paint loosely, not worrying about perfection or fiddling around too much with the paint. The watercolor paint is vibrant on mat board.

Layers of ink - DIY Watercolor Birds Pen Holder by Anna-Karin Evaldsson. Watercolor birds.

I painted an European Robin, a Eurasian Blue Tit, and a Great Tit, repeating the first two in the smaller versions. These are all some of my favorite birds.

Layers of ink - DIY Watercolor Birds Pen Holder by Anna-Karin Evaldsson. Watercolor the background.

Add quick background colors with golden green and brown, adding a shadow under the birds.

Layers of ink - DIY Watercolor Birds Pen Holder by Anna-Karin Evaldsson. Add grass.

I used the grass stamp from Darkroom Door's Nature Walk set, inked it with Peeled Paint, misted with water and stamped.

Layers of ink - DIY Watercolor Birds Pen Holder by Anna-Karin Evaldsson. Splatter watercolor paint.

For a little more texture, I splattered some dark grey watercolor paint on the background, focusing especially on the ground.

Layers of ink - DIY Watercolor Birds Pen Holder by Anna-Karin Evaldsson. Add grass.

Add sentiments from Nature Walk, and birds from African Trees. I also stamped the names of the birds with alphabet stamps.

Layers of ink - DIY Watercolor Birds Pen Holder by Anna-Karin Evaldsson. Add grass.

Apply a strong adhesive along the flaps.

Layers of ink - DIY Watercolor Birds Pen Holder by Anna-Karin Evaldsson.Assemble the box.

Adhere the sides together.

Layers of ink - DIY Watercolor Birds Pen Holder by Anna-Karin Evaldsson. Assemble the box.

Adhere the base to the storage holder.

Layers of ink - DIY Watercolor Birds Pen Holder by Anna-Karin Evaldsson.

Assemble the three compartments.

Layers of ink - DIY Watercolor Birds Pen Holder by Anna-Karin Evaldsson.

Place them in the storage holder.

Layers of ink - DIY Watercolor Birds Pen Holder by Anna-Karin Evaldsson. Fill the pen holder with pens and tools.

Fill with pens and tools. I just added random pens and tools from my desk, for the sake of the photo. I will organise it better later, and I always keep my pencils with the tip up. For some reason, I placed them the wrong way around here.

Layers of ink - DIY Watercolor Birds Pen Holder by Anna-Karin Evaldsson. Watercolor blue tit.

The Eurasian Blue Tit is one of my absolute favorite birds, and I see them often outside my window and on my walks. 

Layers of ink - DIY Watercolor Birds Pen Holder by Anna-Karin Evaldsson.

If you want to, you can paint branches for them to stand on, but for this project, I was happy with them standing on the ground, or it might even be a thick branch.

Layers of ink - DIY Watercolor Birds Pen Holder by Anna-Karin Evaldsson. Watercolor Robin.

The European Robin is another bird I see frequently, and it has such a gorgeous color combination. I painted it very loosely, leaving some of the white of the mat board showing, for highlights.

Layers of ink - DIY Watercolor Birds Pen Holder by Anna-Karin Evaldsson.

The two little birds are cute too, and it looks like the Blue Tit has something to say to the Robin.

Layers of ink - DIY Watercolor Birds Pen Holder by Anna-Karin Evaldsson. Watercolor great tit.

And finally, the Great Tit, which has similar, but also different shades of color compared with the Blue Tit. The shape of this bird stamp fit well with the Great Tit, which is another common bird around here.

Layers of ink - DIY Watercolor Birds Pen Holder by Anna-Karin Evaldsson.

And let's finish with a lovely sentiment stamp. 

Layers of ink - DIY Watercolor Birds Pen Holder by Anna-Karin Evaldsson. With Sizzix dies by Eileen Hull.

Thank you so much for taking the time to stop by here today! I hope you will try to use watercolors on mat board, since it is a lot of fun.

Anna-Karin

Supplies:

* Please note: the links are affiliate links, for which I receive a small percentage of sales generated by the link, at no extra cost to you.


Additional supplies:

Daler and Rowney watercolor paint
Darkroom Door African Trees Set
Hero Arts Printer's Lowercase alphabet stamps

Monday, March 11, 2019

Multi-Color Embossing Tutorial

Hi friends! It is a beautiful new day and the sun is shining. This weekend, we enjoyed the Swedish final for the Eurovision Song Contest, gorgeous sunny and chilly weather, soccer, and iceskating. I also took a really long walk on Saturday, in areas where I don't walk so often. 


We have a Feminine/Girly theme at the Simon Says Stamp Monday Challenge Blog this week, a theme that can be interpreted in many different ways. Don't miss the lovely project by our March guest designer Lisa Rabellino.

Layers of ink - Multi-Color Embossing Tutorial by Anna-Karin Evaldsson.

I made a tag this week, with soft tones of yellow and pink, in anticipation of spring days when our bikes can come out. In real life, my bike is yellow and black (which is a good and visible color combo to have in traffic), but this bike is pink, with white and metallic details. I had such fun using multiple colors of embossing powders, which is a very easy technique that gives great result, and works perfectly even on tiny die cut details. 

Always take great care when melting embossing powders, so that you don't burn yourself. Never touch the powder until it has cooled down completely.

Layers of ink - Multi-Color Embossing Tutorial by Anna-Karin Evaldsson. Stencil the background with Tim Holtz Floral stencil.

The tag was covered with flowers, using Tim Holtz's Floral stencil and embossing paste.

Layers of ink - Multi-Color Embossing Tutorial by Anna-Karin Evaldsson. Paint with gesso.

Paint with gesso. I also added a layer of white paint, to make the background completely white.

Layers of ink - Multi-Color Embossing Tutorial by Anna-Karin Evaldsson. Paint with Scattered Straw.

When the background was dry, I dry-brushed it with Scattered Straw Distress Paint, not worrying too much about getting some paint in between the flowers, since I was aiming for a distressed shabby chic look.

Layers of ink - Multi-Color Embossing Tutorial by Anna-Karin Evaldsson. Stamp the background.

Stamp the flowers with the You Matter stamp and Vintage Photo archival ink.

Layers of ink - Multi-Color Embossing Tutorial by Anna-Karin Evaldsson. Die cut the bicycle.

Die cut the Classic Bicycle from mixed media paper.

Layers of ink - Multi-Color Embossing Tutorial by Anna-Karin Evaldsson. Heat emboss the bicycle.

Use Ranger Letter It embossing pens and work with one color at the time, applying the embossing ink where you want the particular color of embossing powder. I used silver for the spokes in the tires, and Gunmetal for the tires, also adding a second layer of gunmetal, so that the tires are slightly dimensional. For most parts of the bike itself, I used Tea Rose.

Layers of ink - Multi-Color Embossing Tutorial by Anna-Karin Evaldsson.

Next, I added white details to the handlebar, saddle and mud guards.

Layers of ink - Multi-Color Embossing Tutorial by Anna-Karin Evaldsson. Use an embossing pen.

I used yellow for the two lamps. The basket was embossed with two layers of tan powder, and the pedal with Gunmetal.

Layers of ink - Multi-Color Embossing Tutorial by Anna-Karin Evaldsson.

The celebrate word was die cut twice from white paper and and one of them was embossed with two layers of Tea Rose powder.

Layers of ink - Multi-Color Embossing Tutorial by Anna-Karin Evaldsson. Scalloped borders.

I die cut two pieces of vellum and one of watercolor paper using the Eyelet Arch Borders, to create a little path for my bicycle.

Layers of ink - Multi-Color Embossing Tutorial by Anna-Karin Evaldsson.

Instead of tying a ribbon to top the tag, I used a Tabbed Sentiment stamped on a die cut a Simple Tab to use as a tag topper.

Layers of ink - Multi-Color Embossing Tutorial by Anna-Karin Evaldsson.

I also added some pearls to the background. The background texture is easy to achieve and gives a great textured look.

Layers of ink - Multi-Color Embossing Tutorial by Anna-Karin Evaldsson. Simon Says Stamp Classic Bicycle.

The bike looks very sweet with all the different embossing powders, and it is easy to do when you use embossing pens. If strays from one color get stuck in another, you can brush them off, or leave them as is, for extra texture. I left the white strays in the pink areas.

Layers of ink - Multi-Color Embossing Tutorial by Anna-Karin Evaldsson. Die cut funky floral flowers.

Die cut the smallest flowers from Tim's Funky Floral 2 set, and give them some shape with the Sizzix Paper Sculpting tool kit. Adhere the basket with foam tape and add flowers.

Layers of ink - Multi-Color Embossing Tutorial by Anna-Karin Evaldsson.

I also glued some flowers here and there on the background.

Layers of ink - Multi-Color Embossing Tutorial by Anna-Karin Evaldsson. Metallic embossing powders.

Gunmetal and silver are similar in shades, but here you can see that the gunmetal is darker. Since I used two layers, it is also slightly raised from the background.

I hope you will join us this week in our Feminine/Girly challenge. As always, you have a chance to win a $50 gift voucher to do some fun shopping at Simon Says Stamp. You have until next Monday 8am Ohio time. 1pm UK time, 2 pm CET to join in.


Don't forget to follow Simon Says Stamp on Instagram, they post great stuff daily. 


Do you use Instagram? If so please add #sssmchallenge so we can see your entries there too.


Thank you so much for stopping by here today!  

Happy crafting!

Anna-Karin

Supplies:

* Please note: the links are affiliate links, for which I receive a small percentage of sales generated by the link, at no extra cost to you.


Monday, March 4, 2019

Dance in the rain tutorial

Hello friends! I hope your weekend was good! Spring is gone, and the snow is falling heavily outside my window, but it is what can be expected at the beginning of March. This weekend, we went to an indoor play area, did some ice-skating, and made pretend pancakes and oven-baked fish from snow. 


It is a new month and as always, the Simon Says Stamp Monday Challenge team showcases a specific designer/company on the first Monday of a new month. This week, the turn has come to the fantastic Tim Holtz, who has brought us so many wonderful products. There are an impressive 3415 Tim Holtz products in the SSS shop, you can find them all here. You don't have to use Tim's products to join in the challenge, but it is always fun if you do.

Our theme is Whatever The Weather, and don't miss the first project by our March guest designer Lisa Rabellino. She posts gorgeous projects on her blog and we are happy to have her as a guest this month. 

Layers of ink - Dance in the rain tutorial by Anna-Karin Evaldsson. With stamps and dies by Tim Holtz.

I was inspired by one of Tim's older sentiment stamps, to create an art journal page about dancing in the rain - or, in my case today, the snow. The page started out as a page in my large Dylusions journal where I have used up left-over paint and paste. I added quite a bit of stamping, some die cuts, and bits of pieces from my desk.

Layers of ink - Dance in the rain tutorial by Anna-Karin Evaldsson. Paint the background.

This was the background I started out with. I don't like to throw away left-over paste and paint, so I often use them on pages in my art journals. This also gives a ready-to-go background for new projects. The paints are Distress Paints, and I also used the large and the small version of  Tim's Bubble stencil.

Layers of ink - Dance in the rain tutorial by Anna-Karin Evaldsson. With stamps and dies by Tim Holtz. Stamp the background.

Stamp the background with various stamps.

Layers of ink - Dance in the rain tutorial by Anna-Karin Evaldsson. Winged Things 1.

Stamp the girl from Winged Things 1 on watercolor paper and on acetate or modeling film. She was stamped with Archival Jet Black ink on the paper, and Stazon Jet Black on the acetate.

Layers of ink - Dance in the rain tutorial by Anna-Karin Evaldsson. Color the images with Distress Ink.

Watercolor the girl with Distress Inks and cut off her wings. Color the acetate wings on the back with a little Teakwood alcohol ink.

Layers of ink - Dance in the rain tutorial by Anna-Karin Evaldsson. With stamps and dies by Tim Holtz.

I stamped the sentiment from Good Thoughts on a piece of acetate too, and colored it on the back in the same way. To make them stand out better from the background, I gave them a layer of white paint on the back, but not covering the entire piece, since I wanted the background to still show through here and there.

Layers of ink - Dance in the rain tutorial by Anna-Karin Evaldsson. Die cut branches.

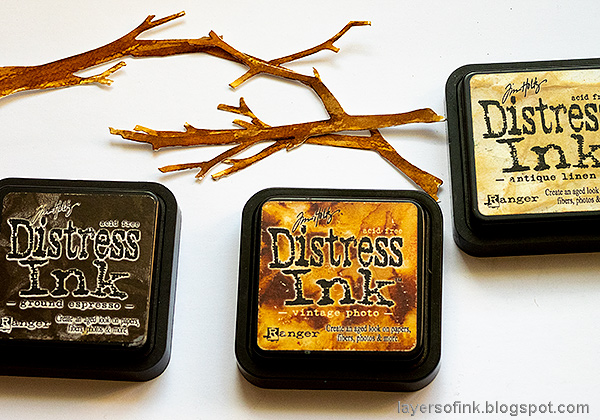
Die cut branches from watercolor paper with the Branches die.

Layers of ink - Dance in the rain tutorial by Anna-Karin Evaldsson. Color the branches.

Watercolor them with Distress Inks.
 Layers of ink - Dance in the rain tutorial by Anna-Karin Evaldsson. Stamp with alphabet stamp.

Stamp the branches with the alphabet background stamp from Going Somewhere.

Layers of ink - Dance in the rain tutorial by Anna-Karin Evaldsson.

I added the raindrops with a marker.

Layers of ink - Dance in the rain art journal tutorial by Anna-Karin Evaldsson.

The page needed a bit more pink, and I die cut the brick pattern from Tim's Mixed Media 4 set, and glued it in three places.

Layers of ink - Dance in the rain mixed media tutorial by Anna-Karin Evaldsson. With stamps and dies by Tim Holtz.
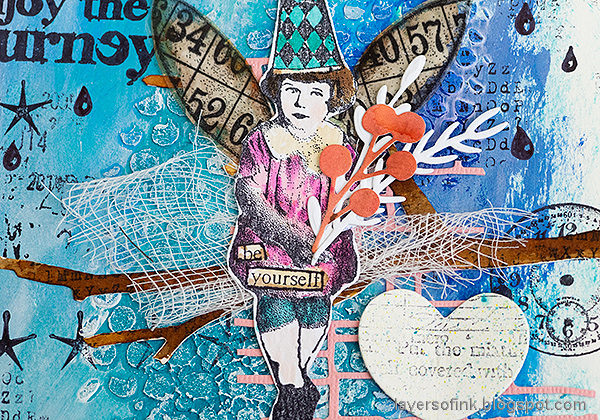
Glue the girl to one of the branches, adding a bit of cheese cloth behind her. I found some Funky Floral die cuts in a scrap box and gave her them to hold. They are from Funky Festive, Funky Floral 1 and Funky Floral 2. The heart was in the same box, and was die cut with the SSS Windows To My Heart die.

Layers of ink - Dance in the rain tutorial by Anna-Karin Evaldsson.

Here's a closer look at the sentiment, with the alcohol ink distressing, and the layer of white paint.

Layers of ink - Dance in the rain tutorial by Anna-Karin Evaldsson. With stamps and dies by Tim Holtz.
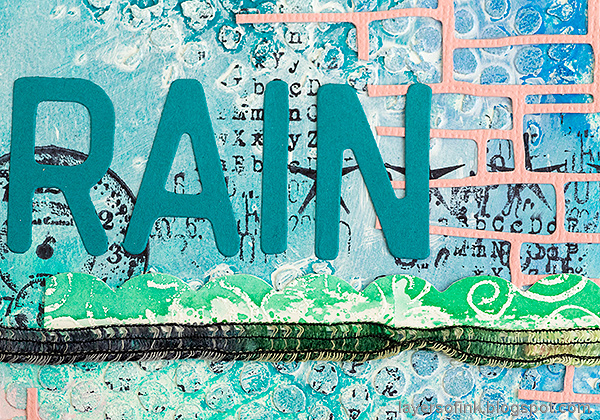
The title was die cut with the Letterboard die, and I added a scrap scalloped piece and a ribbon underneath it.

I hope you will join us this week in our Whatever The Weather challenge. As always, you have a chance to win a $50 gift voucher to do some fun shopping at Simon Says Stamp. You have until next Monday 8am Ohio time. 1pm UK time, 2 pm CET to join in.


Don't forget to follow Simon Says Stamp on Instagram, they post great stuff daily. 


Do you use Instagram? If so please add #sssmchallenge so we can see your entries there too.


Thank you so much for taking the time to visit my blog today!  

Happy crafting!

Anna-Karin

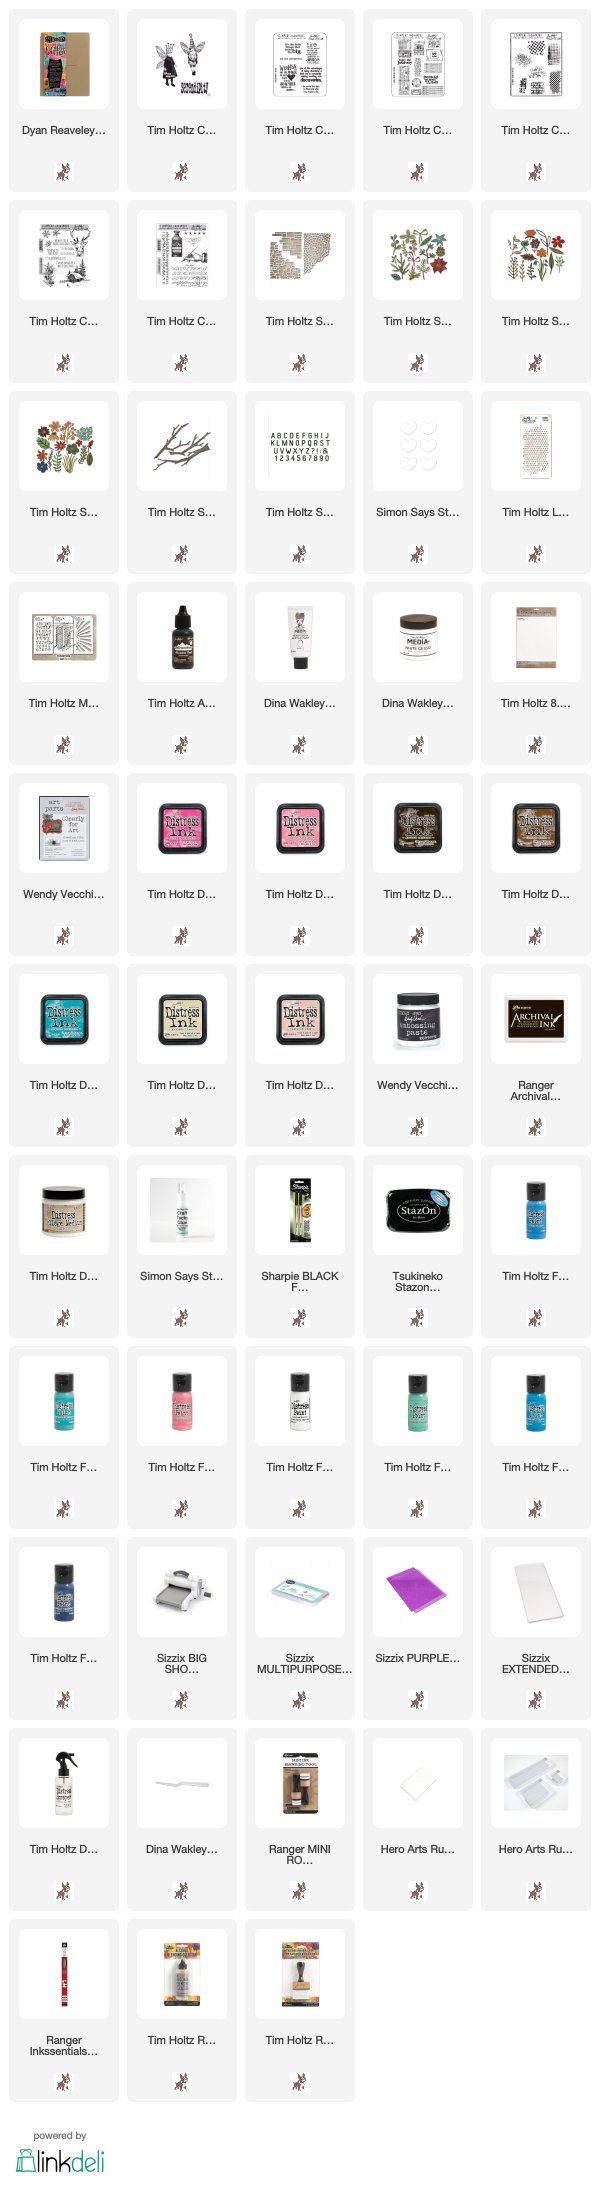
Supplies:

* Please note: the links are affiliate links, for which I receive a small percentage of sales generated by the link, at no extra cost to you.