Monday, December 19, 2016

Wander 365 Art Journal Page

Hello friends! December is going too fast! I wish this month was double the length. The photo calendars I ordered as Christmas gifts for family just arrived at the door. I am happy that they made it here in time. 


It is Monday and time for a new Simon Says Stamp Monday Challenge. Our theme is Party Time. This is our last challenge of 2016 and it will run for two weeks. I hope you'll have time to join us. Don't miss our special guest designer this month Cate Dixson, who is 14 years old, and is sharing some really wonderful projects with you. 

Layers of ink - Wander 365 Art Journal Page by Anna-Karin
I interpreted the theme a little differently and decided to do an art journal page celebrating the coming of a new year, full of new adventures and opportunities. I had fun using some brand new Simon Says Stamp DieCember release dies. The background of the page was already half-made, since I had used this page to smear some left-over paint on. I thought the stenciled blocked part looked almost like a continent, which made it fit well for my theme. 

Layers of ink - Wander 365 Art Journal Page by Anna-Karin
The Corbel Heart was die cut from white Paper Leather, which works really great with detailed dies and doesn't easily tear (in fact, it is really hard to try to tear it because this stuff is strong). There is vellum behind the heart. I used sentiments from Wendy Vecchi's Messages for Art set, stamped with Watering Can ink. 

Layers of ink - Wander 365 Art Journal Page by Anna-Karin
The stenciled words were done with Tim Holtz Traveler stencil, and embossing paste coloured black.

Layers of ink - Wander 365 Art Journal Page by Anna-Karin
One of my favourite dies from the DieCember release is the Spinner Trail, since I love almost anything circle themed. It was die cut from blue shimmer cardstock, and from white Paper Leather.

Layers of ink - Wander 365 Art Journal Page by Anna-Karin
Here you can see the shimmer a little better. I also stamped the background with the Tiny Alphabet Background stamp, and Red Geranium ink.

Layers of ink - Wander 365 Art Journal Page by Anna-Karin
The word was die cut from black Paper Leather. The Handlettered Greetings are probably mainly meant for card making, but as you can see, work great for art journaling too, and for scrapbooking. I splattered the page with Black Soot.

Layers of ink - Wander 365 Art Journal Page by Anna-Karin
The butterflies come from the Messages for Art set by Wendy Vecchi. The blue paint in the background was applied with a palette knife over a gessoed surface.

Layers of ink - Wander 365 Art Journal Page by Anna-Karin
I really like the 'Wander 365' sentiment. The page was also embellished with washi tape stickers by Prima.

I really hope you will join us in our last challenge of the year, which will last for two weeks. As every week, you have a chance to win a $50 gift voucher from Simon Says Stamp. You have until Monday 8am Ohio time. 1pm UK time, 2 pm CET to join in.

If you want to, follow Simon Says Stamp on Instagram, they post great stuff daily. 


new-instagram-icon22

Do you use Instagram? If so please add #sssmchallenge so we can see your entries there too.


Thank you so much for stopping by today!

Happy Christmas crafting!

Anna-Karin

Supplies:


Tuesday, December 13, 2016

Frosty Deer Clipboard Tutorial

Hi and welcome! Today, the traditional Lucia celebrations take place in Sweden - you can read about it here, if you are interested. Leo was a very cute little gingerbread man this year (wearing the outfit from yesterday's layout). On this shabby chic tag there's a photo of me from Lucia, when I was even younger than Leo is now.

I have a Sizzix tutorial to share with you today, for an acrylic clipboard, which I really enjoyed making.

Layers of ink - Frosty Deer Clipboard Tutorial by Anna-Karin, with Sizzix dies by Tim Holtz.
As you might know, I love to use clear or translucent elements, and I wanted to make a Christmas decoration for myself using Tim Holtz's Oh Deer Clipboard as my base. The clipboard is 6 x 9 in and very sturdy. Because it is transparent and reflective, photographing it was a little tricky. Here you see it against a grey background, so that the white parts are visible. I went with a white, brown, gold and silver look and used Tim's Dashing Deer as my focal point.

Layers of ink - Frosty Deer Clipboard Tutorial by Anna-Karin, with Sizzix dies by Tim Holtz.
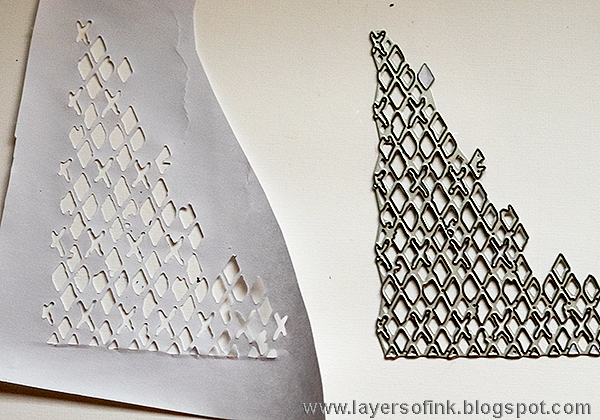
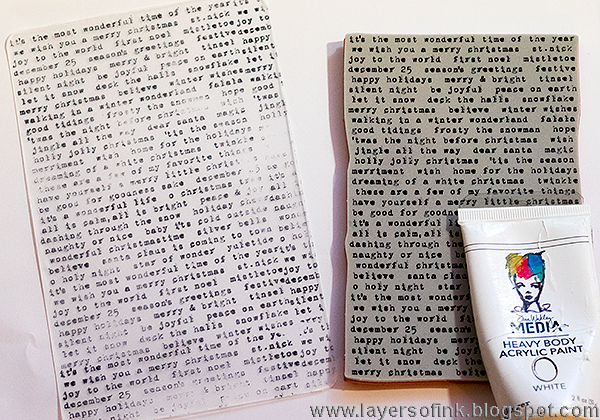
I used one of the dies from the Christmas Mixed Media set to make my own stencil. It was die cut from Eclipse Masking Tape.

Layers of ink - Frosty Deer Clipboard Tutorial by Anna-Karin, with Sizzix dies by Tim Holtz.
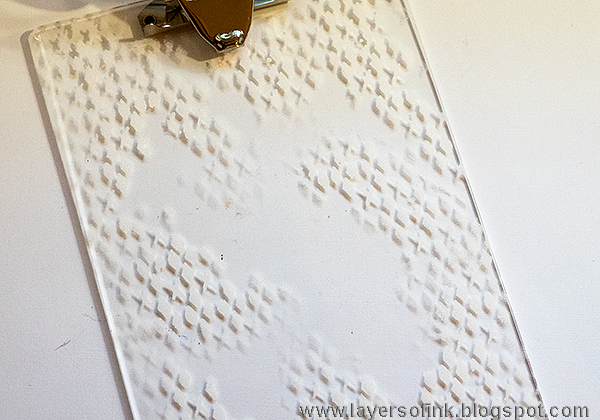
I am sorry about the poor quality of this photo, it gets dark so much earlier in the afternoons now and I didn't realize quite how dark it was when I took it. Place the homemade stencil on the clipboard and sponge white paint through it with a mini blending tool.

Layers of ink - Frosty Deer Clipboard Tutorial by Anna-Karin, with Sizzix dies by Tim Holtz.
Repeat until you have covered as much of the clipboard as you want. The Eclipse tape sticks to the background, which makes it easy to apply the paint, but is also easy to remove and leaves no residue. You can also use printer paper and hold it in place.

Layers of ink - Frosty Deer Clipboard Tutorial by Anna-Karin, with Sizzix dies by Tim Holtz.
Dry-brush white paint on the deer.

Layers of ink - Frosty Deer Clipboard Tutorial by Anna-Karin, with Sizzix dies by Tim Holtz.
Die cut the Dashing Deer from grungeboard, using this sandwich: Cutting Pad, die facing up, grungeboard, second Cutting Pad. Paint it white. You might need to give it two coats.

Layers of ink - Frosty Deer Clipboard Tutorial by Anna-Karin, with Sizzix dies by Tim Holtz.
Paint the deer with Antique Linen.

Layers of ink - Frosty Deer Clipboard Tutorial by Anna-Karin, with Sizzix dies by Tim Holtz.
Use two shades of brown on the body, and add a little dry-brushed brown paint to the antlers.

Layers of ink - Frosty Deer Clipboard Tutorial by Anna-Karin, with Sizzix dies by Tim Holtz.
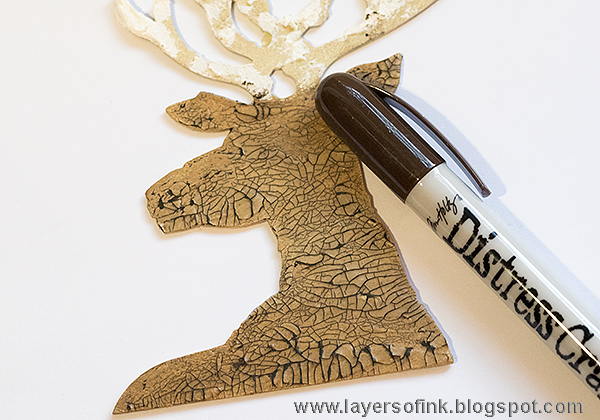
Coat the body with Distress Crazing Medium and let dry. Add some Grit-Paste to the antlers as snow.

Layers of ink - Frosty Deer Clipboard Tutorial by Anna-Karin, with Sizzix dies by Tim Holtz.
Rub Ground Espresso Distress Crayon (or another brown Distress Crayon) into the cracks. Remove excess with a slightly moist cloth.

Layers of ink - Frosty Deer Clipboard Tutorial by Anna-Karin, with Sizzix dies by Tim Holtz.
Die cut branches and leaves with the Mini Holiday Greens set. I die cut mine from white Paper Leather, which is very durable and works great with these detailed dies, and from silver Deco Sheet. Adhere the Deco Sheet to cardstock first.

Layers of ink - Frosty Deer Clipboard Tutorial by Anna-Karin, with Sizzix dies by Tim Holtz.
Glue a piece of fabric to mat board and when dry, die cut using the Ornamental die. Paint white paint around the edges.

Layers of ink - Frosty Deer Clipboard Tutorial by Anna-Karin, with Sizzix dies by Tim Holtz.
Stamp a piece of Frosted Film with a background stamp. I really like this stamp. Paint the edges white.

Layers of ink - Frosty Deer Clipboard Tutorial by Anna-Karin, with Sizzix dies by Tim Holtz.
 I also added some Grit-Paste to the antlers of the clipboard deer.

Layers of ink - Frosty Deer Clipboard Tutorial by Anna-Karin, with Sizzix dies by Tim Holtz.
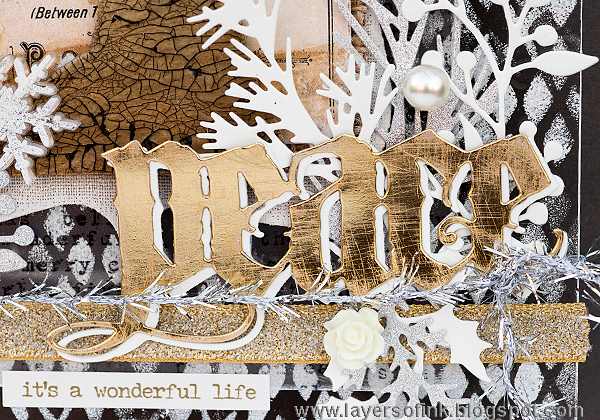
Die cut a word with the Vintage Tidings set, from gold Metallic Kraft-Core paper and from white Paper Leather. Sand the metallic word slightly and layer together. I used Distress Matte Medium to glue most of the elements to the clipboard. Branches were tucked behind the word.

Layers of ink - Frosty Deer Clipboard Tutorial by Anna-Karin, with Sizzix dies by Tim Holtz.
You could also use only white branches, or die cut some from gold Deco Sheet, or from gold metallic paper.

Layers of ink - Frosty Deer Clipboard Tutorial by Anna-Karin, with Sizzix dies by Tim Holtz.
Layer the Frosted Film, Ornamental die cut, a piece of burlap (with the corners rounded) and an ephemera piece (edges sanded). Glue the deer on top. I like the mix of different surfaces and textures. If you don't have Frosted Film, you could also use vellum.

Layers of ink - Frosty Deer Clipboard Tutorial by Anna-Karin, with Sizzix dies by Tim Holtz.
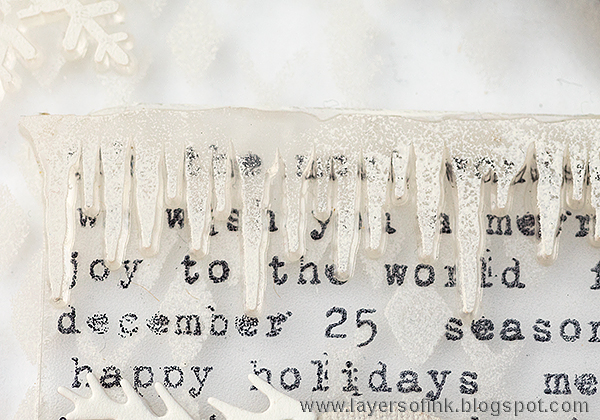
Paint a Frozen Alpha Part icicle with white paint, as well as three snowflakes. Glue the icicles at the top of the Frosted Piece.

Layers of ink - Frosty Deer Clipboard Tutorial by Anna-Karin, with Sizzix dies by Tim Holtz.
Grit-Paste makes wonderful snow. I also used it to create snow in my Winter Village Journal video.

Layers of ink - Frosty Deer Clipboard Tutorial by Anna-Karin, with Sizzix dies by Tim Holtz.
The Crazing Medium and Distress Crayon add great texture to the deer.

Layers of ink - Frosty Deer Clipboard Tutorial by Anna-Karin, with Sizzix dies by Tim Holtz.
 Glue some Heirloom Roses and baubles among the branches. I also used a soft gold glittery ribbon.

Layers of ink - Frosty Deer Clipboard Tutorial by Anna-Karin, with Sizzix dies by Tim Holtz.
I love the branches in the Mini Holiday Greens set. They are so delicate and detailed. Sentiments were added with metallic stickers.

Layers of ink - Frosty Deer Clipboard Tutorial by Anna-Karin, with Sizzix dies by Tim Holtz.
 Another sentiment, underneath the die cut word.

Layers of ink - Frosty Deer Clipboard Tutorial by Anna-Karin, with Sizzix dies by Tim Holtz.
Against the dark background, you can see the sponging better, and that the edges of both the Frosted Film and the clipboard were painted white.

Layers of ink - Frosty Deer Clipboard Tutorial by Anna-Karin, with Sizzix dies by Tim Holtz.
You could also colour the Heirloom Roses with alcohol ink, but I decided to keep them white for this project.

Layers of ink - Frosty Deer Clipboard Tutorial by Anna-Karin, with Sizzix dies by Tim Holtz.
The title against a dark background.  


Layers of ink - Frosty Deer Clipboard Tutorial by Anna-Karin, with Sizzix dies by Tim Holtz.
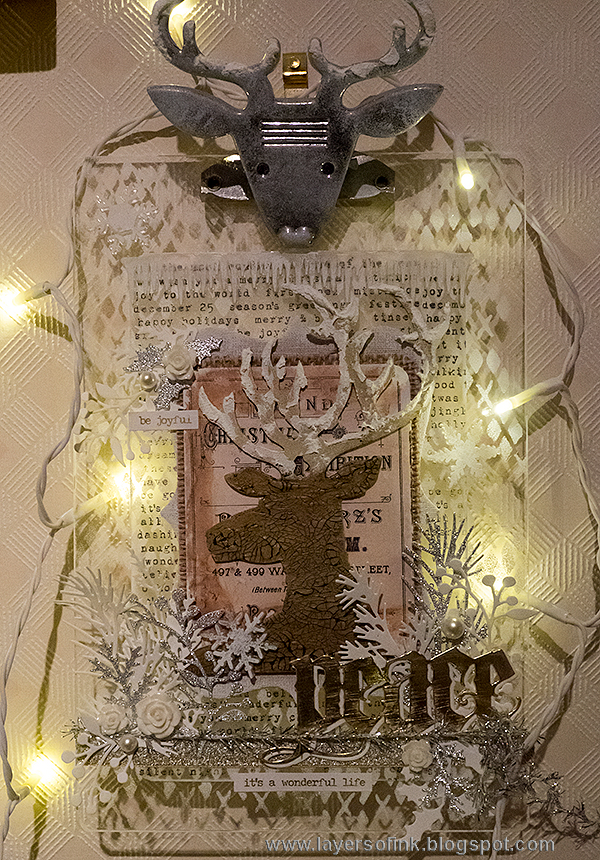
Here you can see the clipboard against a white background, when the background pattern looks subtle. My wall is cream and the clipboard looks nice on it. Although this clipboard is Christmas themed, I think I will keep it up a bit longer, since it works well during the whole of winter.

Layers of ink - Frosty Deer Clipboard Tutorial by Anna-Karin, with Sizzix dies by Tim Holtz.
I had a left-over battery-driven string of led lights and tried placing it around the clipboard. It would probably look nicer with smaller lights, placed closer together.

I hope you enjoyed this tutorial and thank you so much for stopping by today!

Happy crafting!

Anna-Karin

Supplies (affiliate links):