Sunday, May 29, 2016

For the Birds Watercolour Tutorial

Hi friends! It's Mother's Day here today and Anton had picked a Frozen Olaf coffee cup for me, very sweet. We also went out for lunch.

Today, I am sharing a tutorial on the Sizzix blog for a watercolour birdcage, which I really enjoyed making.

Layers of ink - For the Birds Watercolour Tutorial by Anna-Karin with Sizzix dies by Lori Whitlock and Prima Flowers watercolors.
This was made with two new die sets by Lori Whitlock, For the Birds and Mix & Match Flowers. I always get a happy surprise when I open one of Lori's sets of dies, because they always contain so many wonderful shapes, most of which are very versatile. The birds here, for example, and the 'friend' word, would be great for both cardmaking and scrapbooking. The Mix and Match Flowers, which you don't really see on this photo since the flowers are inside the cage and on the other sides, contain really great flower shapes.

Everything was painted with Prima's Decadent Pies watercolour set and I tried to make the birds look like Eurasian Blue Tits, one of my favourite birds.

You will find the full For the Birds Watercolour tutorial on the Sizzix blog.

Thank you for visiting today! I will be back tomorrow with another tutorial.

Happy crafting!

Anna-Karin

Supplies:


Friday, May 27, 2016

Leather Paper Poppy and Gift Bag Tutorial

Hi friends! I have a Sizzix tutorial to share today, made with new Favorite Things dies by Brenda Walton. I made a big poppy and a gift bag. My mom got the poppy when she visited us a couple of weeks ago.

Layers of ink - Leather Paper Poppy and Gift Bag Tutorial by Anna-Karin
This is probably the largest flower I ever made, and it will be a great piece of home decor or gift to someone who loves flowers. I used Sizzix Paper Leather for the flower, which makes it very durable, and it will last a long time. You can also make the flower with other papers, such as tissue papers (check out the tissue flowers from my Alphabet Sewing Box tutorial for an idea). If it is made from tissue paper, it will be quite a bit smaller. I forgot to measure if before giving it away, but I think it is about 5 in in diameter, maybe 5.5. 

Layers of ink - Leather Paper Poppy and Gift Bag Tutorial by Anna-Karin
These are the three sets of Thinlits dies that I used: Frames & EmbellishmentsMini Favor Bag, and the Large Poppy.

Layers of ink - Leather Paper Poppy and Gift Bag Tutorial by Anna-Karin
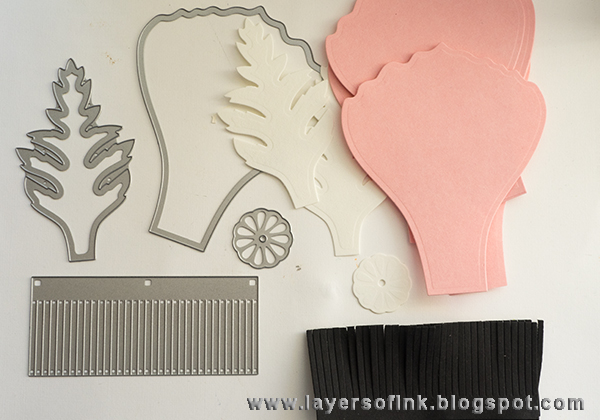
Start by die cutting the poppy from pink Paper Leather. I used 8 petals for my flower. The stamen was die cut twice from black Paper Leather and the leaves from white Paper Leather. Even though Paper Leather is so thick and durable - it is almost impossible to tear - it die cuts easily with wafer thin dies. For more Paper Leather ideas, check out these posts, for example: Paper Leather Canvas and Paper Leather Fox.

Layers of ink - Leather Paper Poppy and Gift Bag Tutorial by Anna-Karin
 Mist the petals with Abandoned Coral and Candied Apple.

Layers of ink - Leather Paper Poppy and Gift Bag Tutorial by Anna-Karin
When dry, crumble them up a bit.

Layers of ink - Leather Paper Poppy and Gift Bag Tutorial by Anna-Karin
 Mist the leaves with Twisted Citron and Peeled Paint.

Layers of ink - Leather Paper Poppy and Gift Bag Tutorial by Anna-Karin
I used a thick floral wire and rolled and glued the stamen pieces around it. I cut off the bottom part of the three innermost petals, to make them slightly smaller.

Layers of ink - Handmade Poppy Tutorial by Anna-Karin
 Continue with the following petal, overlapping them.

Layers of ink - Leather Paper Poppy and Gift Bag Tutorial by Anna-Karin
 When you have added all the petals, adhere the green circle.

Layers of ink - Leather Paper Poppy and Gift Bag Tutorial by Anna-Karin
Fold the petals out and apply yellow paint with a palette knife to the stamens. 

Layers of ink - Sizzix Leather Paper Poppy Tutorial by Anna-Karin
When the paint is dry, shape the petals until you are happy with your flower. You could also make some more leaves than what I did.

 Layers of ink - Leather Paper Poppy and Gift Bag Tutorial by Anna-Karin
Die cut the Mini Favor Bag from brown Paper Leather.

Layers of ink - Leather Paper Poppy and Gift Bag Tutorial by Anna-Karin
Stamp the bag with a Tim Holtz wood stamp and Potting Soil ink.

Layers of ink - Leather Paper Poppy and Gift Bag Tutorial by Anna-Karin
Die cut embellishments for the bag, using the Frames & Embellishments set, and the new Sizzix patterned paper pads, I used the Watercolors pad and the Geometrics pad. The bird was die cut from a Tim Holtz music paper and the darker green leaves from Core'dinations paper.

Layers of ink - Leather Paper Poppy and Gift Bag Tutorial by Anna-Karin
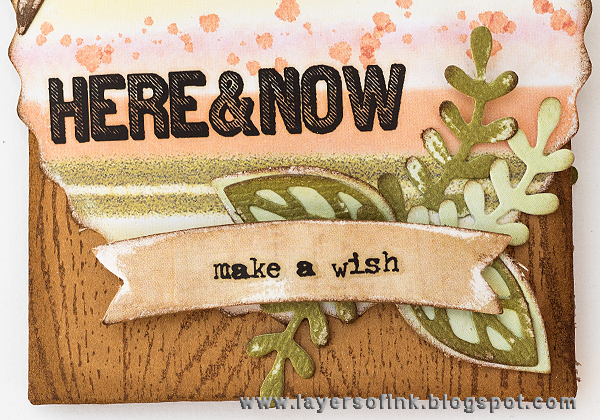
Adhere the label, bird and leaves to the bag.

Layers of ink - Leather Paper Poppy and Gift Bag Tutorial by Anna-Karin
The pieces were sanded and inked before gluing them down. I love this bird.

Layers of ink - Leather Paper Poppy and Gift Bag Tutorial by Anna-Karin
I added a rub-on sentiment to the banner, you could also stamp a sentiment instead.

Layers of ink - Leather Paper Poppy and Gift Bag Tutorial by Anna-Karin
The back of the bag is also decorated.

Layers of ink - Leather Paper Poppy and Gift Bag Tutorial by Anna-Karin
Here's a close-up of the poppy flower. It could also look great made from patterned paper, and it doesn't have to be a poppy. 

Layers of ink - Leather Paper Poppy and Gift Bag Tutorial by Anna-Karin
I wish you could see how large the Large Poppy is. Here I am holding it in my hand. The floral wire can be used to attach it to something.

Thank you so much for visiting today!!

Happy crafting!!

Anna-Karin

Supplies: