Saturday, August 8, 2020

SSS Let's Connect Blog Hop

Hello friends! I am so happy to take part in the Simon Says Stamp blog hop for the new Let's Connect collection. You should have come here from the very creative Daniel West.

Let's Connect is full of beautiful stamps, dies, stencils, sequins and printed products. They are very versatile and can be used for many occasions. You can see the full release here.  If you use the code GLUE you will get a Gina K Designs Dot Runner with your order. This promotion will expire on 8/9 at 11:59 pm EDT.


I made an art journal page and a tag for the hop, with techniques combining inks and colored pencils. The techniques work on any kind of project.

Layers of ink - Stamped Blue Flowers with ink and colored pencils tutorial by Anna-Karin Evaldsson.

My first project is an art journal page, but you can easily turn it into a card. I used the Spring Flowers background together with the Large Outline Happy. Lately, I have had fun combining Distress Inks with colored pencils, which is lots of fun and you can do it in many ways. I worked on a burlap page in Dina Wakley's Blue Edition Media Journal.


These are the products from Let's Connect that I will be using today: Spring Flowers Background, Large Outline Happy, Poppy Stem and Sunny Smiles. I am very happy to have three of my own designs in the Let's Connect release. I designed one of the stamp sets - Anna's Flowers - and two of the background stamps - Crackle Background and Reverse Crackle Background. It is so exciting to see other stampers creations with my stamps. The stamps are on their way here and I am looking forward to stamping with them. I happen to love crackle backgrounds. They can be used for entire backgrounds or just to add a little texture to something. Or how about crackled letters or die cuts?
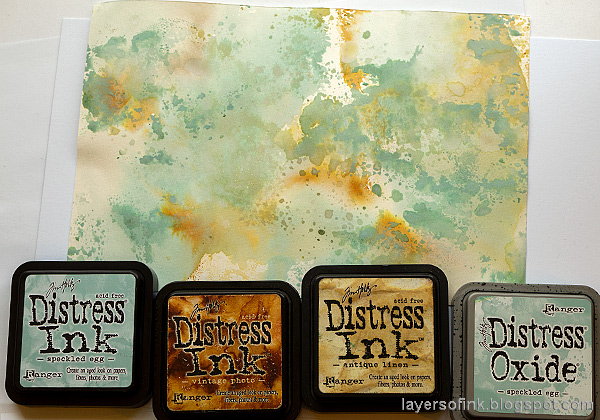
Layers of ink - Stamped Blue Flowers with ink and colored pencils tutorial by Anna-Karin Evaldsson. Ink with distress ink.

I smeared Speckled Egg, Antique Linen and a little Vintage Photo on a non-stick craft sheet, misted with water and pressed watercolor paper into the ink. Let dry and repeat. After that I did the same thing, but with just a little Speckled Egg Distress Oxide ink, giving spots of chalky blue. 
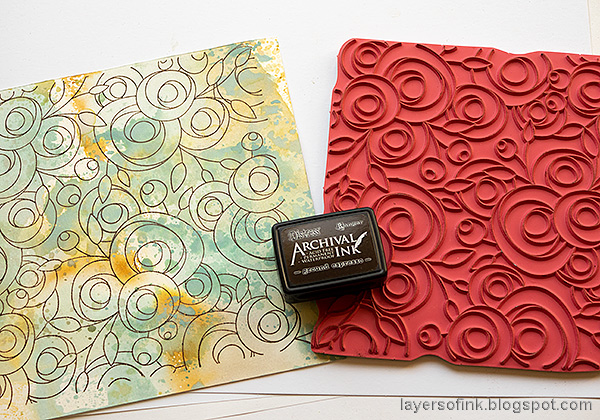
Layers of ink - Stamped Blue Flowers with ink and colored pencils tutorial by Anna-Karin Evaldsson. Stamp with Spring Flowers Background.

Stamp the Spring Flowers background with dark brown ink on the dry background.

Layers of ink - Stamped Blue Flowers with ink and colored pencils tutorial by Anna-Karin Evaldsson. Color flowers with Prismacolor pencils.

I used Prismacolor pencils to color the flowers. Pick out shades of blue and turquoise. Start with something looking a bit like this, applying darker shades towards the inside of the petals. 

Layers of ink - Stamped Blue Flowers with ink and colored pencils tutorial by Anna-Karin Evaldsson. Blend with white pencil.

Add a darker blue and then blend them together with a white pencil. Let some of the background show through. I worked quite fast and didn't worry too much about the details. Some of the stamped lines with disappear, but that just adds to the look. 

Layers of ink - Stamped Blue Flowers with ink and colored pencils tutorial by Anna-Karin Evaldsson.

Continue until you have colored the whole background. If you want to you can stamp with a light ink, such as Pumice Stone or Antique Linen and do no-line coloring instead.

Layers of ink - Stamped Blue Flowers with ink and colored pencils tutorial by Anna-Karin Evaldsson. Splatter with white gloss spray.

Splatter with a little White Gloss Acrylic Spray. Unscrew the cap and tap the end of the spritzer to create splatters.

Layers of ink - Stamped Blue Flowers with ink and colored pencils tutorial by Anna-Karin Evaldsson.

Die cut the Large Outline Happy from White Diamond and Blue Ocean glimmery cardstock. I really like word dies since they are so versatile and useful.
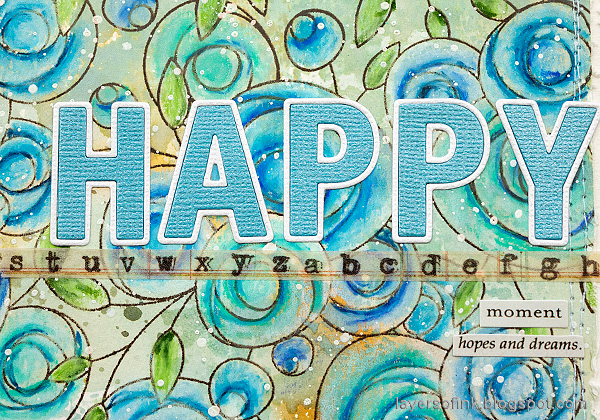
Layers of ink - Stamped Blue Flowers with ink and colored pencils tutorial by Anna-Karin Evaldsson. Large Outline Happy.

Assemble the title and glue to the background. I completed it with two Clippings Stickers. There is also a piece of Tim Holtz Design Tape. The glimmery cardstock is very pretty. It is hard to see the glimmer on this photo.

Layers of ink - Stamped Blue Flowers with ink and colored pencils tutorial by Anna-Karin Evaldsson.

Distress the edges and mat on another piece of watercolor paper. Stitch around it with a sewing machine. As you can see, I worked quickly when coloring, aiming for a lose look.

Layers of ink - Stamped Blue Flowers with ink and colored pencils tutorial by Anna-Karin Evaldsson. Butterfly from Thoughtful Flowers.

Stamp one of the butterflies from the Thoughtful Flowers set, from the Send Happiness release, on a scrap piece of inky paper. Add just a little color with a blue pencil. I also added more design tape and sentiments to the burlap.

Layers of ink - Stamped Blue Flowers with ink and colored pencils tutorial by Anna-Karin Evaldsson.

And the summer sun sure shines today!
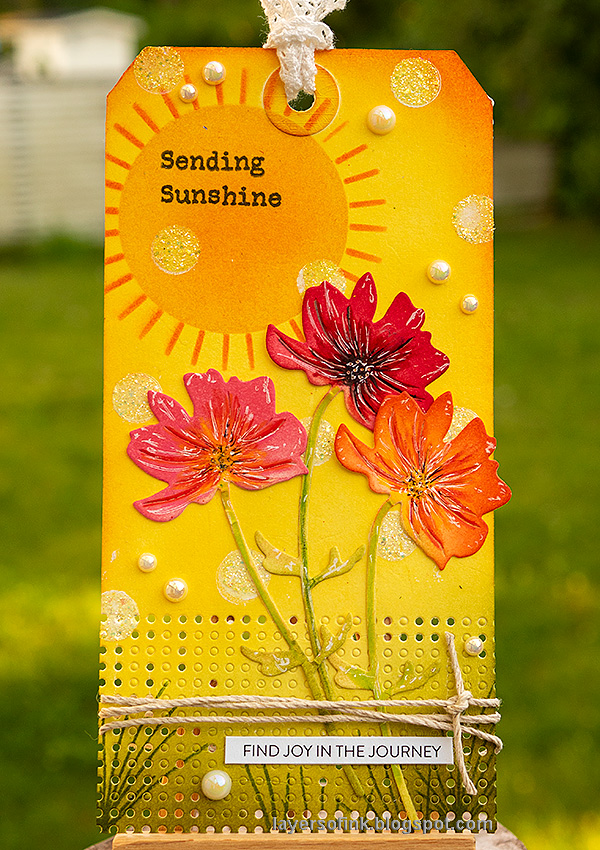
Layers of ink - Inky Sunshine Poppy card by Anna-Karin Evaldsson.

My second project is a bright tag, using the Poppy Stem die and the Sunny Smiles stencil set. I used lots of ink and color on this one. We had a very warm day yesterday when I created this, so the weather influenced my projects, a cooler blue for the morning, and this warm tag for the afternoon when it was starting to get way too warm in my studio.

Layers of ink - Inky Sunshine Poppy card by Anna-Karin Evaldsson.  Die cut poppy stem.

Start by die cutting three Poppy Stems from heavystock paper.

Layers of ink - Inky Sunshine Poppy card by Anna-Karin Evaldsson. Ink the flowers.

Ink them with Distress Ink using an ink-blending tool.

Layers of ink - Inky Sunshine Poppy card by Anna-Karin Evaldsson. Add details with colored pencils.

Add color and details with colored pencils. The Distress Ink gives you a base color and with the pencils, you can add shading and details.

Layers of ink - Inky Sunshine Poppy card by Anna-Karin Evaldsson.

Finally, I added some details with a black pen and highlights with a white gel pen.

Layers of ink - Inky Sunshine Poppy card by Anna-Karin Evaldsson. Ink tag with Distress Ink.

Ink a tag with yellow and a little green.
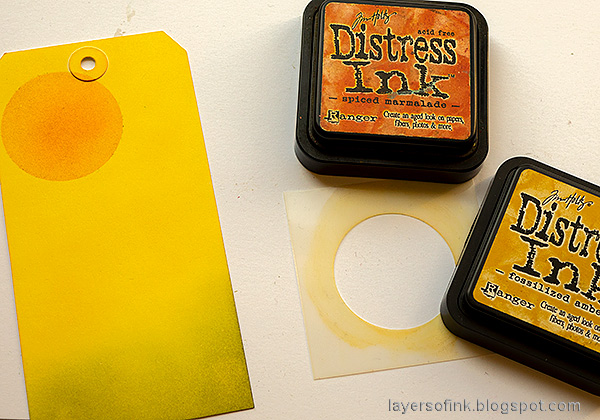
Layers of ink - Inky Sunshine Poppy card by Anna-Karin Evaldsson.

Use the large circle stencil from Sunny Smiles and ink with Fossilized Amber and Spiced Marmalade.

Layers of ink - Inky Sunshine Poppy card by Anna-Karin Evaldsson.

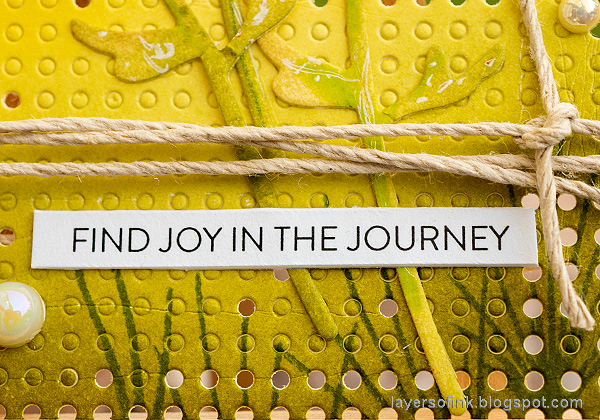
Use the line circle stencil and Spiced Marmalade to add the rays. Die cut the green area with the SSS Stitching Panel and remove some, but not all of the dots.

Layers of ink - Inky Sunshine Poppy card by Anna-Karin Evaldsson. Sentiments from Thoughtful Flowers.

Stamp grass and sentiment from Thoughtful Flowers.

Layers of ink - Inky Sunshine Poppy card by Anna-Karin Evaldsson.

Use the stencil with the two dots from Sunny Smiles together with white acrylic paint to add dots to the background. 

Layers of ink - Inky Sunshine Poppy card by Anna-Karin Evaldsson.

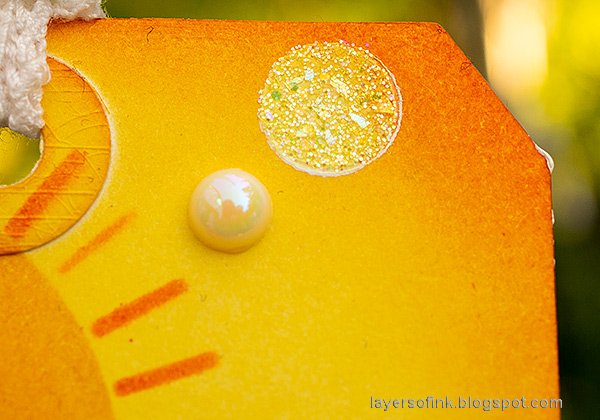
When the paint is dry, repeat with Moon Dust Stickles, creating glittery dots. Use a palette knife to apply the glitter glue.

Layers of ink - Inky Sunshine Poppy card by Anna-Karin Evaldsson.

The sun is a great place for a sentiment, or you could add the smiley face which is a part of the Sunny Smiles stencil set.
Layers of ink - Inky Sunshine Poppy card by Anna-Karin Evaldsson.

The white paint makes the glitter dots a little brighter and also gives an outline.

Layers of ink - Inky Sunshine Poppy card by Anna-Karin Evaldsson.

If you want a less scribbly look to your flowers, just skip the part with the white and black pens. 

Layers of ink - Inky Sunshine Poppy card by Anna-Karin Evaldsson.

Bend the stem a little to make the flower face another way.
Layers of ink - Inky Sunshine Poppy card by Anna-Karin Evaldsson.

I like the texture from the Stitching Panel. The sentiment comes from one of SSS Sentiment Strips 4.

There are of course prizes to be won, and at each stop on the hop SSS is giving away a $25 coupon, randomly drawn from those who leave a comment. The winners will be posted post on the Simon Says Stamp store blog on Wednesday, the 12th of August.

Your next stop on the hop is my friend Karin Ã…kesdotter and she will show you wonderful card inspiration.

Here are all the stops along the hop:

Anna-Karin Evaldsson (you are here)


For more Let's Connect inspiration, remember to check out the Let's Connect gallery at SSS, and if you make something with products from the range, it is fun if you post it in the gallery too. There are galleries for all releases, and for the card kits, full of inspiration. Part one of the Let's Connect blog hop was yesterday, so don't miss all the inspiration there.


Thank you so much for taking the time to visit my blog today!  

Happy crafting!

Anna-Karin

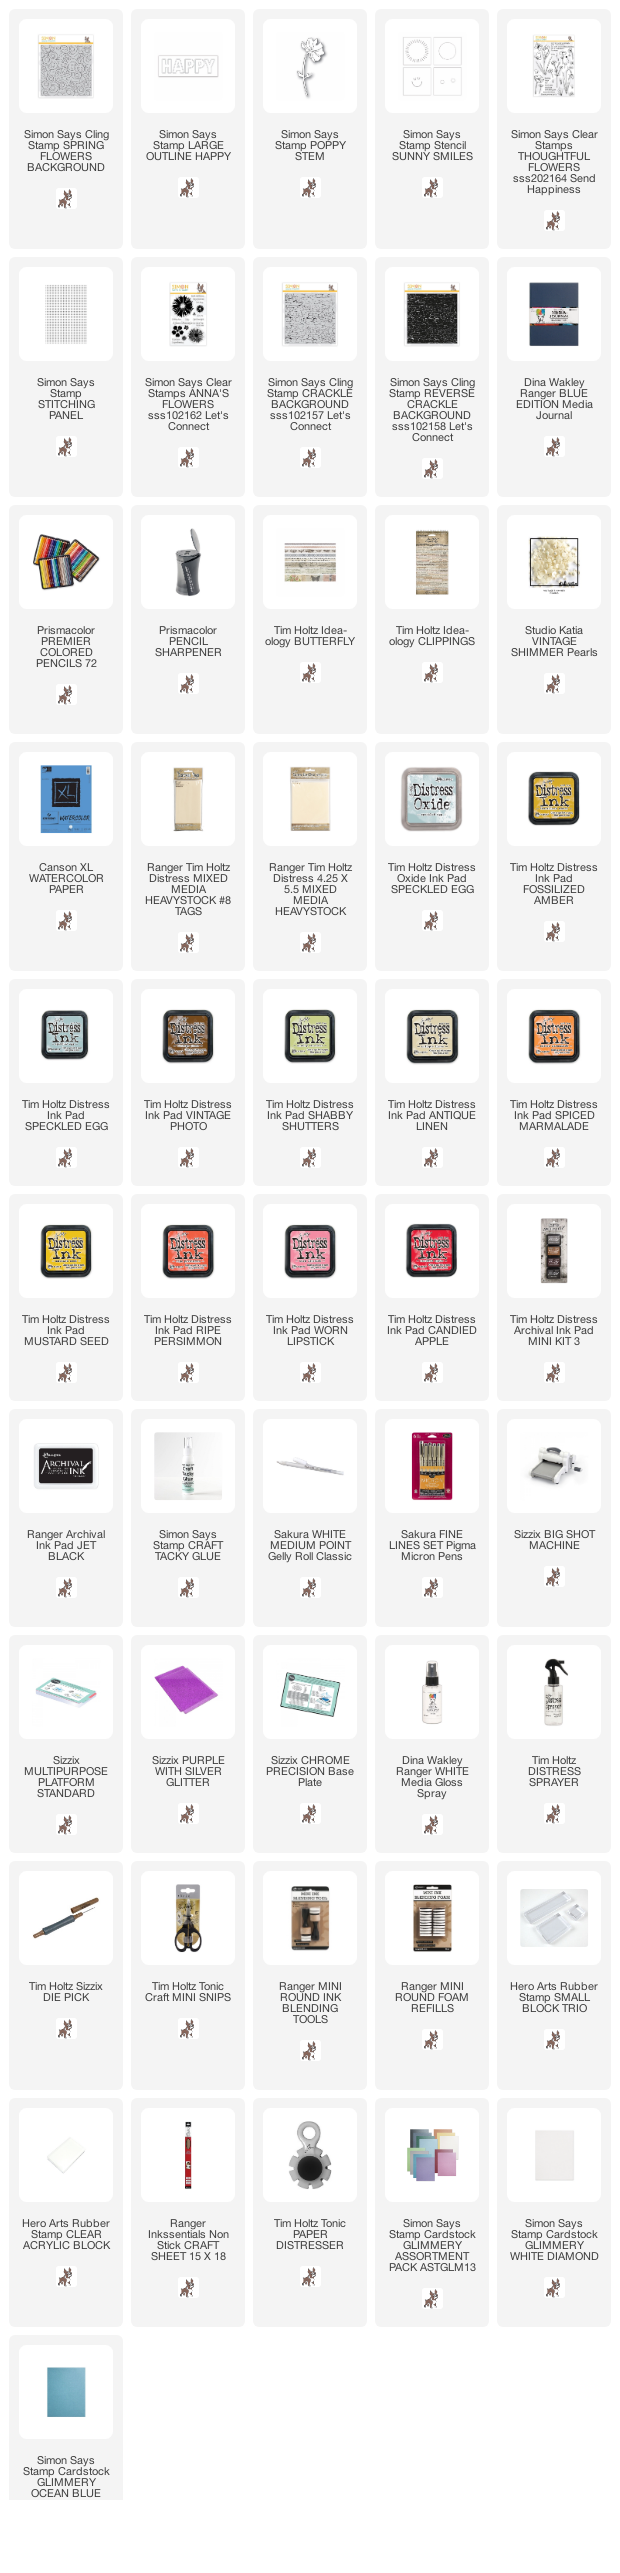
Supplies:

* Please note: the links are affiliate links, for which I receive a small percentage of sales generated by the link, at no extra cost to you.

* I added the three products I designed to the list too. 
Monday, August 3, 2020

Inky Ombre Card Tutorial

Hello crafters! We have a very special birthday at the Simon Says Stamp Monday Challenge Blog this week. We are turning 10 years old! It is amazing to think of all the creativity and wonderful projects that have been created for the challenge during these 10 years. I am very happy that so many people join us in the challenge and share their projects. 


We have a special Happy Birthday theme this week, to celebrate our birthday. Since it is also the first Monday of a new month, the team is showcasing products by a specific company/designer. This week it is Stamper's Anonymous, who creates fantastic rubber stamps, stencils and other products. You can see their range of products here. You don't have to use their products to join in the challenge, but it is always fun if you do.

We also have a new guest designer. During August the wonderful Anne Redfern is our guest. She creates so many different creative projects and don't miss her blog Redanne. 


Don't miss our month long Kids Summer Vacation Challenge over on the Wednesday Challenge Blog. The theme is Anything Goes With Sparkle And/Or Shine. Please CLICK HERE for more details.

Layers of ink - Inky Ombre Card Tutorial by Anna-Karin Evaldsson.

I made a birthday card using the Tiny Text stamp set by Stamper's Anonymous, designed by Tim Holtz. I also used Stamper's Anonymous fantastic Clearly For Art Modeling Film by Wendy Vecchi. It's been one of my favorite surfaces for a long time and you can do many different techniques with it.

Layers of ink - Inky Ombre Card Tutorial by Anna-Karin Evaldsson. Stamp with Tim Holtz Tiny Text.

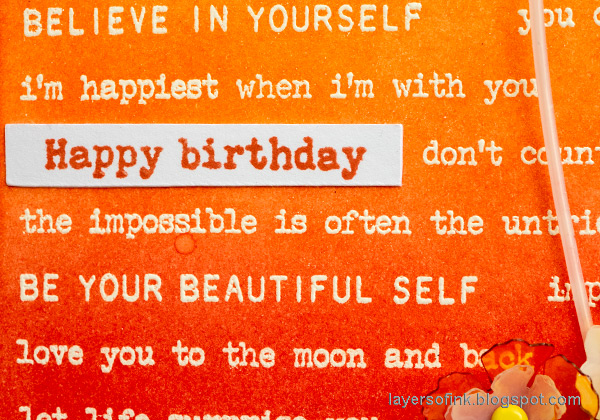
When I looked at the Tiny Text stamp, planning to remove some of the sentiments and stamp them, I thought it would be fun to use the entire set as a big stamp first. I stamped a couple of sheets of papers like this, so that I can use them in the future. White emboss the Tiny Text on Heavystock paper, positioning it so that you get complete sentiments at the left-hand edge of the paper.

Layers of ink - Inky Ombre Card Tutorial by Anna-Karin Evaldsson. Ink with Distress Ink.

I inked the paper with Mustard Seed, Ripe Persimmon and Abandoned Coral. Isn't it a gorgeous color combo? The white embossing will resist the ink.

Layers of ink - Inky Ombre Card Tutorial by Anna-Karin Evaldsson. Die cut flowers from Clearly For Art Modeling Film.

Clearly For Art Modeling Film is a thick plastic film, which can be die cut, stamped on, cut out, and colored in various ways. Heat it to soften and then shape the designs. The film keeps it shape perfectly. If you aren't happy with it, just reheat and reshape. Be careful not to burn yourself. I die cut some of Tim's Small Tattered Florals. You might need to take the die back and forth a couple of times in your Big Shot or Vagabond

Layers of ink - Inky Ombre Card Tutorial by Anna-Karin Evaldsson.

I also die cut the Simon Says Stamp Etched Flower Buds.

Layers of ink - Inky Ombre Card Tutorial by Anna-Karin Evaldsson.

Carefully heat with a heat tool and then shape the buds.

Layers of ink - Inky Ombre Card Tutorial by Anna-Karin Evaldsson.

Color the stems with Snow Cap Alcohol Ink Mixative and apply a thin layer of Moon Dust Stickles to the back of the buds. The Stickles takes a while to dry on the plastic, but gives a great glittery look.

Layers of ink - Inky Ombre Card Tutorial by Anna-Karin Evaldsson. Color with alcohol inks.

Color the Tattered Florals with Snow Cape, Valencia and Butterscotch alcohol ink, using a felt applicator.

Layers of ink - Inky Ombre Card Tutorial by Anna-Karin Evaldsson.

When dry, shape them in the same way as the Etched Buds.

Layers of ink - Inky Ombre Card Tutorial by Anna-Karin Evaldsson.

I love the Tiny Text stamp set. The sentiments are wonderful and I also really like small-sized sentiments.

Layers of ink - Inky Ombre Card Tutorial by Anna-Karin Evaldsson. Clearly For Art Modeling Film dimensional DIY flowers.

Pierce a hole through the plastic flowers and layer them together with a brad or staples.

Layers of ink - Inky Ombre Card Tutorial by Anna-Karin Evaldsson.

The glitter buds were a little hard to photograph, but they look really nice with the glitter. The new Stickles jars also contains some larger pieces of glitter, which you can see here.

Layers of ink - Inky Ombre Card Tutorial by Anna-Karin Evaldsson.

Modeling Film is great for dimensional embellishments like these, but also perfect for entire backgrounds, clear cards, or for shaker cards. Here are some more examples: Recycled Tag, Wildflower Mason Jar, Embossed Acetate Autumn Tag, Apothecary Wall-Hanger, Sherlock Holmes Tags, and Halloween Window.

Layers of ink - Inky Ombre Card Tutorial by Anna-Karin Evaldsson.

Happy Birthday was stamped with the SSS Thoughtful Flowers set.

I hope you will join us this week in our Happy Birthday challenge.  Since we are celebrating, you have a chance to win a $50 gift voucher to get some new creative products from Simon Says Stamp. You have until next Monday 8am Ohio time. 1pm UK time, 2 pm CET to join in.


Don't forget to follow Simon Says Stamp on Instagram, they post great stuff daily. 


Do you use Instagram? If so please add #sssmchallenge so we can see your entries there too.


Thank you so much for taking the time to visit my blog today!  

Happy crafting!

Anna-Karin

Supplies:

* Please note: the links are affiliate links, for which I receive a small percentage of sales generated by the link, at no extra cost to you.