Monday, March 16, 2020

Lavender Mixed Media Tutorial

Hello friends! I hope you are all well and healthy. These times are tough in the whole world and it is important to try to stay positive and not to panic. Crafting and getting out in nature are good ways to calm the mind, at least for me.

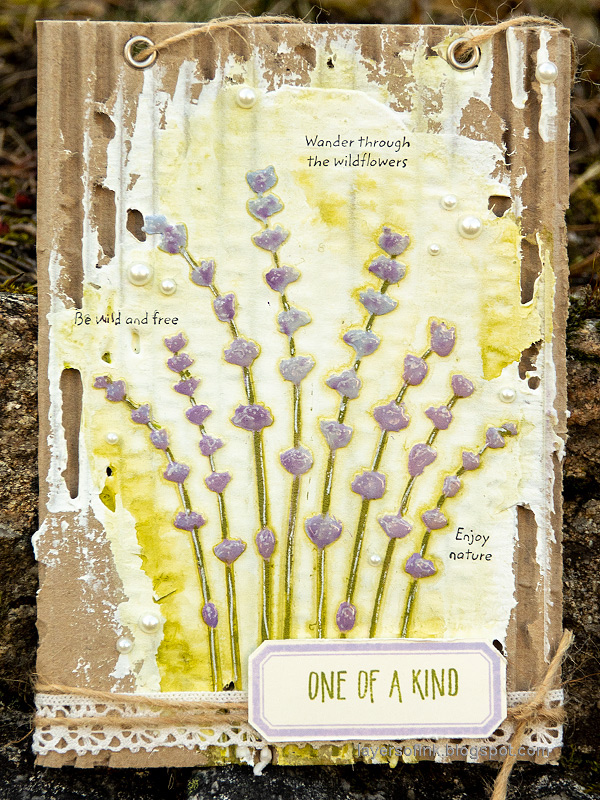
Today, I am sharing a mixed media lavender tutorial, with a piece of recycled cardboard as a base. You can turn it into a card instead, by just adhering the cardboard to folded cardstock. Or make a cardboard tag.



At the Simon Says Stamp Monday Challenge Blog we have a Stencil It theme and I hope you can join us. Don't miss the beautiful project by our March guest designer Ann Chuang

Layers of ink - Lavender Mixed Media Tutorial by Anna-Karin Evaldsson.

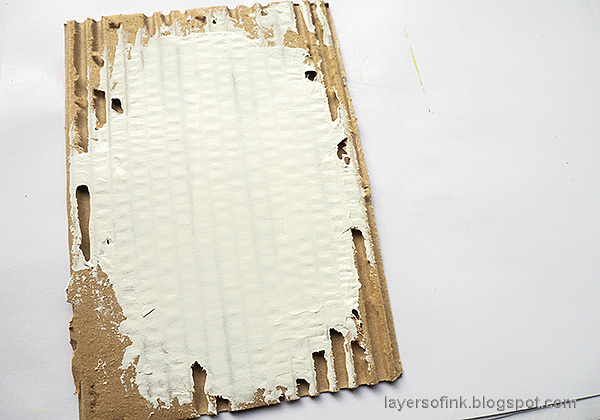
I was tidying up my desk when my eye fell upon this piece of cardboard and I decided to make something out of it right away. I wanted quite a bit of the raw cardboard to show, but I also wanted a smooth surface in the center which would work for some mixed media magic. Gesso was the answer to this. The Lavender stencil that I used is by Darkroom Door.
Layers of ink - Lavender Mixed Media Tutorial by Anna-Karin Evaldsson.

Start by removing some of the upper layer of the cardboard around the edges. Then apply gesso with a palette knife. Let it dry and add one or two more layers, so that you get a fairly smooth surface.

Layers of ink - Lavender Mixed Media Tutorial by Anna-Karin Evaldsson. Apply texture paste through the stencil.

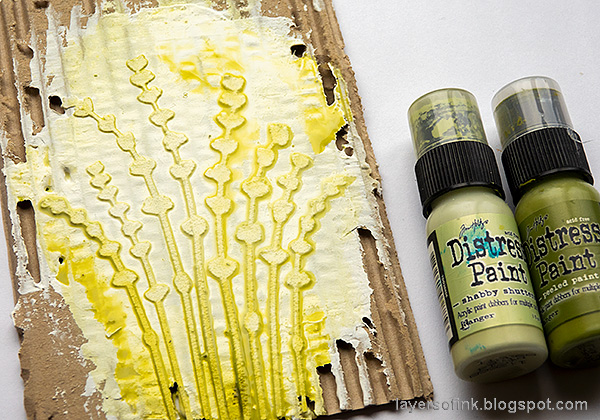
Apply texture paste through the Lavender Small stencil with a palette knife. Let dry.
Layers of ink - Lavender Mixed Media Tutorial by Anna-Karin Evaldsson.

Paint with watered down Shabby Shutters and a little Peeled Paint. I was aiming for a light look. Let dry.

Layers of ink - Lavender Mixed Media Tutorial by Anna-Karin Evaldsson.

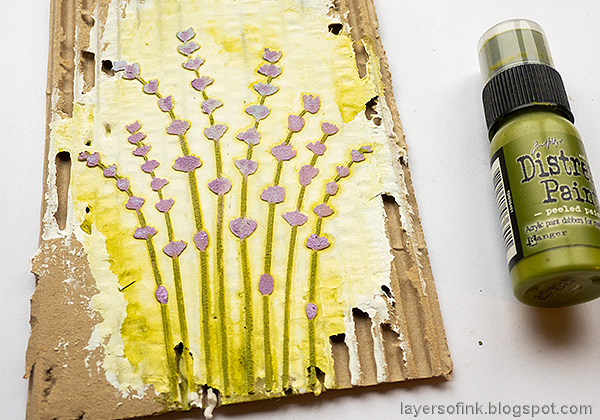
Place the stencil back on the design and sponge two shades of purple through it with a small ink-blending tool.
Layers of ink - Lavender Mixed Media Tutorial by Anna-Karin Evaldsson. Paint the lavender.

Paint the stems green with a fine paint brush.

Layers of ink - Lavender Mixed Media Tutorial by Anna-Karin Evaldsson. Add highlights with a white gel pen.

When the paint was dry, I added lines and highlights with a white gel pen.

Layers of ink - Lavender Mixed Media Tutorial by Anna-Karin Evaldsson.

Glossy Accents is one of my all-time favorites, but I hadn't used it for a while, so I decided to make the flowers glossy. Leave to dry.
Layers of ink - Lavender Mixed Media Tutorial by Anna-Karin Evaldsson.

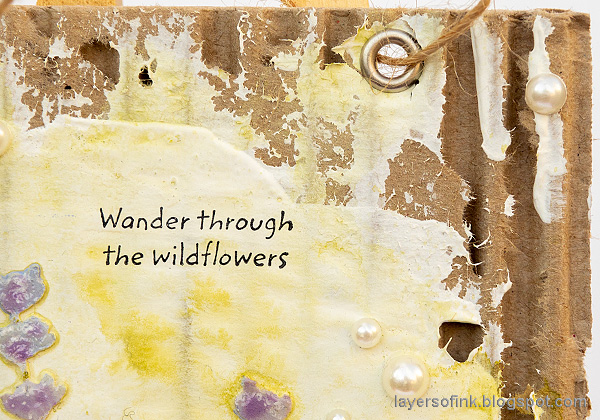
I stamped sentiments from the Darkroom Door Nature Walk set.
Layers of ink - Lavender Mixed Media Tutorial by Anna-Karin Evaldsson.

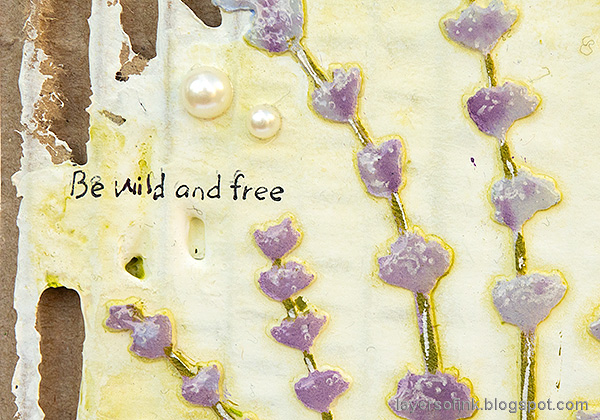
Here you can see the effect of the white gel pen on the flowers. I also added some pearls.
Layers of ink - Lavender Mixed Media Tutorial by Anna-Karin Evaldsson.

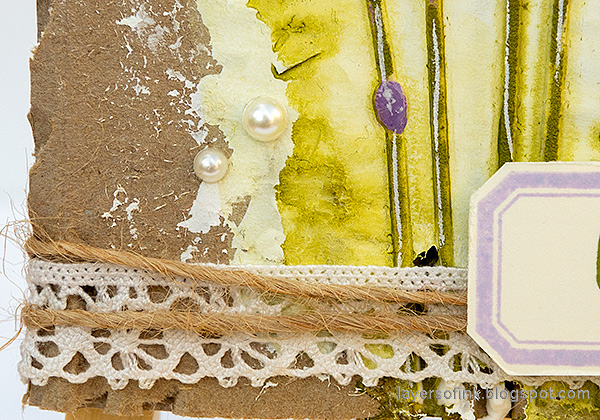
I like the texture created where the gesso meets the cardboard. It is in fact my favorite part of this project.

Layers of ink - Lavender Mixed Media Tutorial by Anna-Karin Evaldsson. Stamp the label and sentiment.

The label was stamped with Simon Says Stamp Lavender ink using the new Darkroom Door Lots of Labels set, and the sentiment comes from the Make Art sentiment stamp, also by Darkroom Door.
Layers of ink - Lavender Mixed Media Tutorial by Anna-Karin Evaldsson.

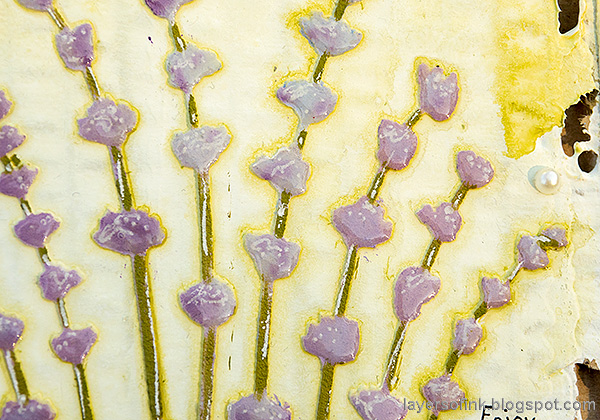
It is difficult to capture the dimensional glossy surface on a photo, but I think you can see it better here. It's a fun addition to any stenciled design.

Layers of ink - Lavender Mixed Media Tutorial by Anna-Karin Evaldsson.

I was in the mood for a light shabby chic project this week. If you want to make a grungier version of this project, it is easy to do by, for example, adding brown paint around the edges and giving the lavender a dark shadow.


I hope you will join us this week in our Stencil It challenge. As always, you have a chance to win a $50 gift voucher to do some fun shopping at Simon Says Stamp. You have until next Monday 8am Ohio time. 1pm UK time, 2 pm CET to join in.


Don't forget to follow Simon Says Stamp on Instagram, they post great stuff daily. 


Do you use Instagram? If so please add #sssmchallenge so we can see your entries there too.


Thank you so much for taking the time to visit my blog today!  

Happy crafting!

Anna-Karin

Supplies:

* Please note: the links are affiliate links, for which I receive a small percentage of sales generated by the link, at no extra cost to you.


Friday, March 13, 2020

Poppy Watercolor Tutorial

Hello friends! Today I have a watercolor poppy tutorial to share with you, made using one of the beautiful Simon Says Stamp Suzy's Watercolor Prints. The prints are done on watercolor paper, so they are perfect for watercoloring. We will do an easy masking technique and also add some pen work.

Layers of ink - Poppy Watercolor Tutorial by Anna-Karin Evaldsson.

This poppy print comes from the Suzy's Spring Flowers Watercolor Prints set and is such a pretty print and I also really like poppies. I turned my project into a wall-panel, but you can of course make a card instead or use it in your art journal. I used watercolor paint, but as an alternative you can use watercolor pencils, or smear Distress Ink on a craft sheet, mist with water and paint with a paint brush.

Layers of ink - Poppy Watercolor Tutorial by Anna-Karin Evaldsson. Add masking fluid.

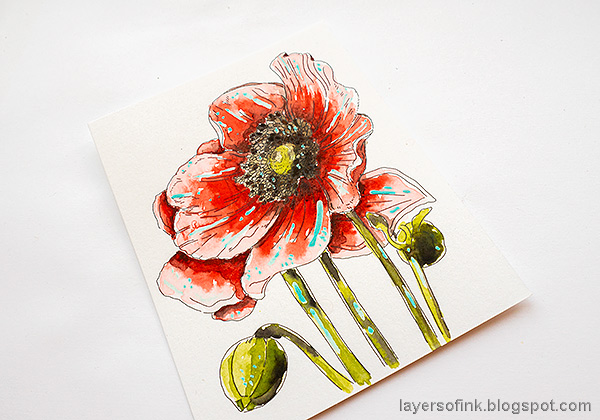
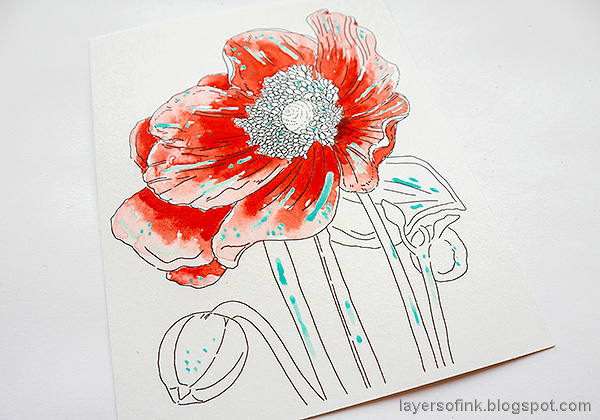
When you watercolor it is often a good idea to leave some of the paper white, as highlights and to create life. An easy way to do that is to use a masking pen. Add dots and lines with a Molotow Masking Pen and let dry. It dries quickly.

Layers of ink - Poppy Watercolor Tutorial by Anna-Karin Evaldsson. Paint with watercolors.

Mix up watercolor paint and start painting the flower. Make the petals darker towards the center.

Layers of ink - Poppy Watercolor Tutorial by Anna-Karin Evaldsson.

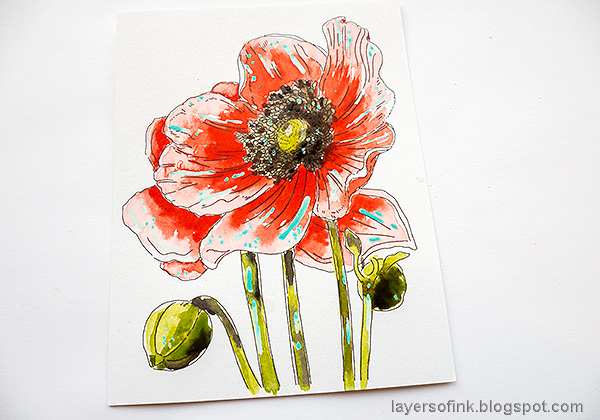
Continue with the rest of the poppy and then paint the stems and bulbs. Use a dark grayish brown mix for the petals, with a lighter green area in the center.

Layers of ink - Poppy Watercolor Tutorial by Anna-Karin Evaldsson.

Increase the shading if needed.

Layers of ink - Poppy Watercolor Tutorial by Anna-Karin Evaldsson. Paint the background.

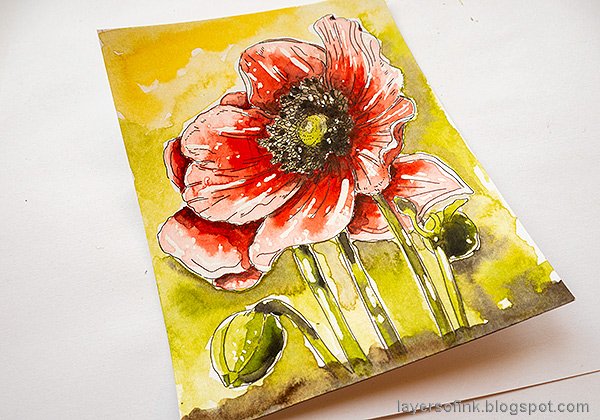
Paint the background in springtime shades of green and add darker brown to the ground.

Layers of ink - Poppy Watercolor Tutorial by Anna-Karin Evaldsson. Remove the masking fluid.

When everything is dry, rub off the masking liquid with your finger to reveal the white areas underneath.

Layers of ink - Poppy Watercolor Tutorial by Anna-Karin Evaldsson. Splatter paint.

Splatter the page lightly with dark brown paint.

Layers of ink - Poppy Watercolor Tutorial by Anna-Karin Evaldsson.

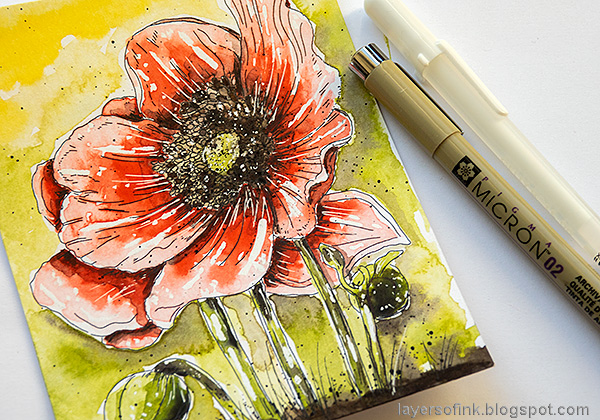
Add details and highlights with a black pen and a white gel pen. I also drew grass at the bottom of the page. If some details have disappeared when you painted, you can add them back with the black pen.

Layers of ink - Poppy Watercolor Tutorial by Anna-Karin Evaldsson. Distress the edges.

Distress the edges and mount on a second piece of watercolor paper and then on sanded blackout kraft stock paper. Finally everything was adhered to a piece of mat board, for stability.

Layers of ink - Poppy Watercolor Tutorial by Anna-Karin Evaldsson.

You can se the pen work clearly in the center of the flower, where some of the lines weren't so visible any more.

Layers of ink - Poppy Watercolor Tutorial by Anna-Karin Evaldsson.

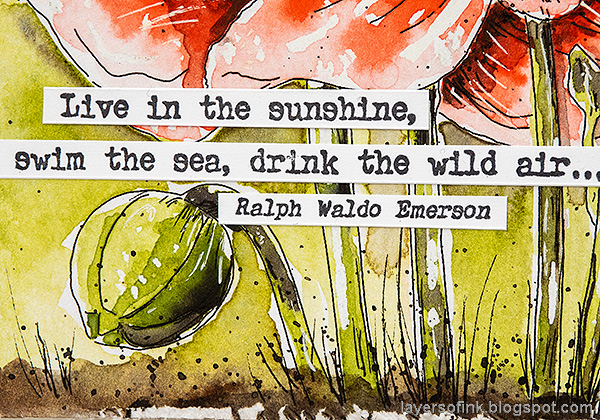
The sentiment comes from the Paper Artsy Sunshine and Rain set by Alison Bomber. It also happens to be one of my favorite quotes.

Layers of ink - Poppy Watercolor Tutorial by Anna-Karin Evaldsson.

Concentrate the splatters at the bottom of the page, where the shadows are deeper.

Layers of ink - Poppy Watercolor Tutorial by Anna-Karin Evaldsson.

The panel is a great spring gift for someone and can spread some happiness.


Thank you so much for taking the time to visit my blog today!  

Happy crafting!

Anna-Karin

Supplies:

* Please note: the links are affiliate links, for which I receive a small percentage of sales generated by the link, at no extra cost to you.


Monday, March 9, 2020

Wildflowers Art Journal Page

Hello friends! What better way to start the week than with some stamping, watercoloring and art journaling.
 
I hope you had a good weekend! I had to take it a little easy since I have a cold and I missed my long walks. We played some Monopoly instead. I don't know how my eldest always manages to win at Monopoly. We have a South African version and it is fun to talk about the various places while playing. 


This week at the Simon Says Stamp Monday Challenge Blog our theme is 'A Bit O' Green'. I love green and one of my favorite things with spring is how almost each day brings new shades of green. Don't miss the project by our March guest designer Ann Chuang

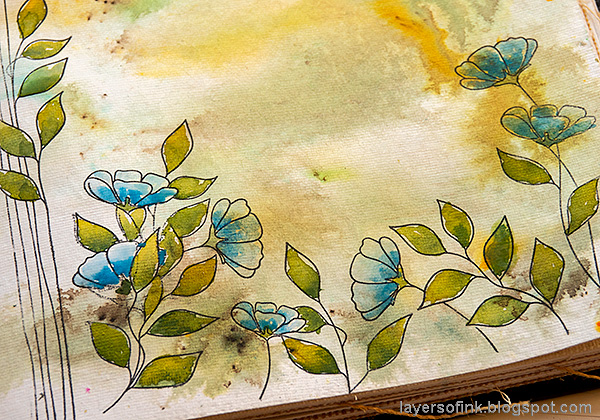
Layers of ink - Wildflower Art Journal Page with watercoloring and stamping, by Anna-Karin Evaldsson.

I was in the mood for art journaling and wanted to use the new beautiful Simon Says Stamp Stronger Together set. The stamp set was in the March card kits, but you can also get it on its own. I decided to stick to just watercolors, stamping and some Paper Artsy Infusions colored stains.

The technique works perfectly for cards too, just use a smaller paper and fewer of the stamps. It is best to work on watercolor paper.

Layers of ink - Wildflower Art Journal Page with watercoloring and stamping, by Anna-Karin Evaldsson. Color with PaperArtsy Infusions.

Working on a cotton-rag watercolor page in my Dina Wakley Media Journal, I misted it heavily with water and then sprinkled in a tiny bit of Infusions powders. I have pierced a hole in the lid since you need so little powder. I used: Golden Sands, Emerald Isle and Olive Tree. Mist with more water to help the Infusions to blend. I dabbed off some of the brown pigment with a paper towel, to get a lighter look. This is a great background to start out from, it is interesting without being busy.

Layers of ink - Wildflower Art Journal Page with watercoloring and stamping, by Anna-Karin Evaldsson.

When dry, stamp flowers and leaves from Stronger Together on the page. I place a Sizzix cutting pad underneath the page to give me an even surface to stamp on. I still messed up some of the stamping, and added extra leaves to cover it up.

Layers of ink - Wildflower Art Journal Page with watercoloring and stamping, by Anna-Karin Evaldsson.

Mix two or three shades of green, a yellow green, a middle green and a darker cooler green. Paint the leaves, dropping in lighter and darker colors.

Layers of ink - Wildflower Art Journal Page with watercoloring and stamping, by Anna-Karin Evaldsson. Watercolor the flowers.

The flowers were painted with Cerulean blue, using more water for the lighter areas.

Layers of ink - Wildflower Art Journal Page with watercoloring and stamping, by Anna-Karin Evaldsson.

Paint a darker soil area at the bottom of the page and then splatter the background with the dark brown paint.

Layers of ink - Wildflower Art Journal Page with watercoloring and stamping, by Anna-Karin Evaldsson.

When everything was completely dry, I added details with a black pen and a white gel pen. You can also fill in some lines that have disappeared. The white pen works great when it comes to adding highlights.

Layers of ink - Wildflower Art Journal Page with watercoloring and stamping, by Anna-Karin Evaldsson.

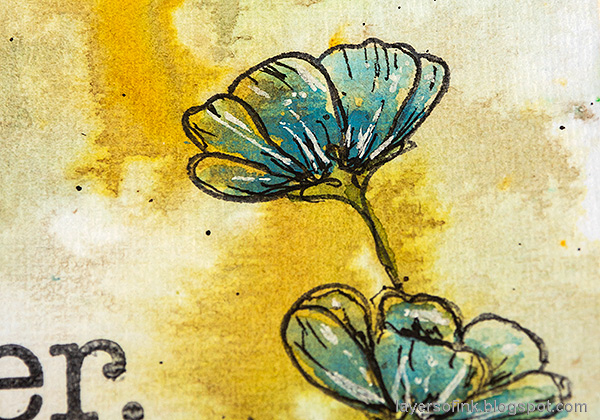
Here's a close up where you can see my added black scribbles and the white lines and dots.

Layers of ink - Wildflower Art Journal Page with watercoloring and stamping, by Anna-Karin Evaldsson.

Painting on a tinted background gives a nice muted look to the watercolor paint, since the background shows through.

Layers of ink - Wildflower Art Journal Page with watercoloring and stamping, by Anna-Karin Evaldsson.

I just love the look of this type of fluid and transparent background.

Layers of ink - Wildflower Art Journal Page with watercoloring and stamping, by Anna-Karin Evaldsson.

The stamping on the flower to the left got messed up, so I stamped another leaf in front of the flower, covering up the area that did get stamped.

Layers of ink - Wildflower Art Journal Page with watercoloring and stamping, by Anna-Karin Evaldsson. Stronger Together.

Adding strands of grass gives extra life to the page and helps to ground the flowers to the page.

I hope you will join us this week in our Bit O' Green challenge. As always, you have a chance to win a $50 gift voucher to do some fun shopping at Simon Says Stamp. You have until next Monday 8am Ohio time. 1pm UK time, 2 pm CET to join in.


Don't forget to follow Simon Says Stamp on Instagram, they post great stuff daily. 


Do you use Instagram? If so please add #sssmchallenge so we can see your entries there too.


Thank you so much for taking the time to visit my blog today!  

Happy crafting!

Anna-Karin

Supplies:

* Please note: the links are affiliate links, for which I receive a small percentage of sales generated by the link, at no extra cost to you.


Sunday, March 8, 2020

Kindness Tag

Hi friends! Today I have a tutorial on the Simon Says Stamp Store blog, for a mixed media tag, with an important message. Here is a sneak peek:

Layers of ink - Kindness Tag Mixed Media Tutorial by Anna-Karin Evaldsson.

I love to make die cuts a part of the background, by almost baking them into the background. If you touch the tag it doesn’t seem as if the die cuts have been glued onto the background, but more like they were there from the start. This works with almost any type of die and is very effective with detailed dies, such as the Rose Scribble Trio by Memory Box that I used here. I made a tag, but the techniques work just as well for cardmaking or art journaling.

You can find all the steps and details on the Simon Says Stamp blog.


Thank you so much for visiting today!

See you again tomorrow!

Anna-Karin

Supplies:

* Please note: the links are affiliate links, for which I receive a small percentage of sales generated by the link, at no extra cost to you.