Monday, October 8, 2018

Embossed Cityscape Tutorial

Hi crafters! We have had a beautiful autumn weekend here, with perfect photo weather. I like to observe how my favorite trees change colors from week to week. Many of the Birch trees seem to be a little less spectacular this year, probably because they suffered the most during the warm and very dry summer.


This week at the Simon Says Stamp Monday Challenge Blog we have a Cityscape theme. Don't miss the project by our wonderful October guest designer Tenia Nelson, aka Jazzy Paper Designs.

Layers of ink - Embossed Cityscape Tutorial by Anna-Karin Evaldsson, with Tim Holtz Sizzix Metropolis.

My tag started out as a Christmas tag, but wanted to become something else. I both like and dislike big cities at the same time. They are vibrant, energetic, busy and fun to visit, with an emphasis on visit, because living in the city center is not for me. I value having nature around me too much. Cityscapes at night are a pretty cool sight though, and that's the theme of my tag. 

I had fun heat embossing the Tim Holtz Metropolis buildings.

Layers of ink - Embossed Cityscape Tutorial by Anna-Karin Evaldsson, die cut buildings with the Tim Holtz Sizzix Metropolis set.

Die cut Metropolis buildings from Heavystock paper. I didn't die cut any of the small details that you can use to dress up the buildings, since I was planning to heat emboss the entire buildings.

Layers of ink - Embossed Cityscape Tutorial by Anna-Karin Evaldsson, paint the buildings.

Paint the buildings black and brown, to give them a darker base.

Layers of ink - Embossed Cityscape Tutorial by Anna-Karin Evaldsson, emboss the buildings with Ranger embossing powders.

I used three embossing powders by Ranger: Gunmetal, Aqua Tinsel and Mixed Media Sea. All three are awesome and give a different effect. Gunmetal gives a cool metallic shine. Aqua Tinsel is a distressed glittery powder. And the new Mixed Media powers are so cool, with larger pieces mixed in with the powder. I used the Emboss-It Dabber to apply embossing ink to the houses and left a few small areas without ink. Heat emboss with a heat tool, being careful not to burn yourself.
 Layers of ink - Embossed Cityscape Tutorial by Anna-Karin Evaldsson, Speckles stencil and paste on tag.

For the background, I applied embossing paste through the Speckles stencil. When dry, I covered it with gesso.

Layers of ink - Embossed Cityscape Tutorial by Anna-Karin Evaldsson, paint the tag with Distress Paint.

I forgot to take a photo of the painting step - the tag was painted with Black Soot, Blueprint Sketch, and Hickory Smoke. When the paint was dry, I dry-brushed white and silver paint on the tag, to increase the texture and make the sky look like a snowy/starry sky.

Layers of ink - Embossed Cityscape Tutorial by Anna-Karin Evaldsson

The tag was tied with a piece of travel-themed Chatter Design Tape folded up on itself.

Layers of ink - Embossed Cityscape Tutorial by Anna-Karin Evaldsson, night time cityscape background.

The textured background is pretty cool and I like the effect of the speckles. I also added some Brutus Monroe Acrylic Bubbles.

Layers of ink - Embossed Cityscape Tutorial by Anna-Karin Evaldsson, heat embossed cityscape.

I used Quotations Metallic Stickers as my sentiments and glued the buildings down to create a cityscape. The combinations of different embossing powders makes for a cool effect. It is a little hard to see the difference between the tinsel and the mixed media powder here. In real life, the difference is much more visible.

Layers of ink - Embossed Cityscape Tutorial by Anna-Karin Evaldsson

As a border, I used a piece of vellum which was embossed in the Dot Matrix folder (which is my all time favourite embossing folder), a Mini Provincial Impresslits die cut, and a piece of Industrious border sticker. I also used Industrious Deco Type Stickers for the title.

I hope you will join us this week in our Cityscape challenge. As always, you have a chance to win a $50 gift voucher to do some fun shopping at Simon Says Stamp. You have until next Monday 8am Ohio time. 1pm UK time, 2 pm CET to join in.


Don't forget to follow Simon Says Stamp on Instagram, they post great stuff daily. 


Do you use Instagram? If so please add #sssmchallenge so we can see your entries there too.


Thank you so much for taking the time to visit my blog today!  

Happy crafting!

Anna-Karin

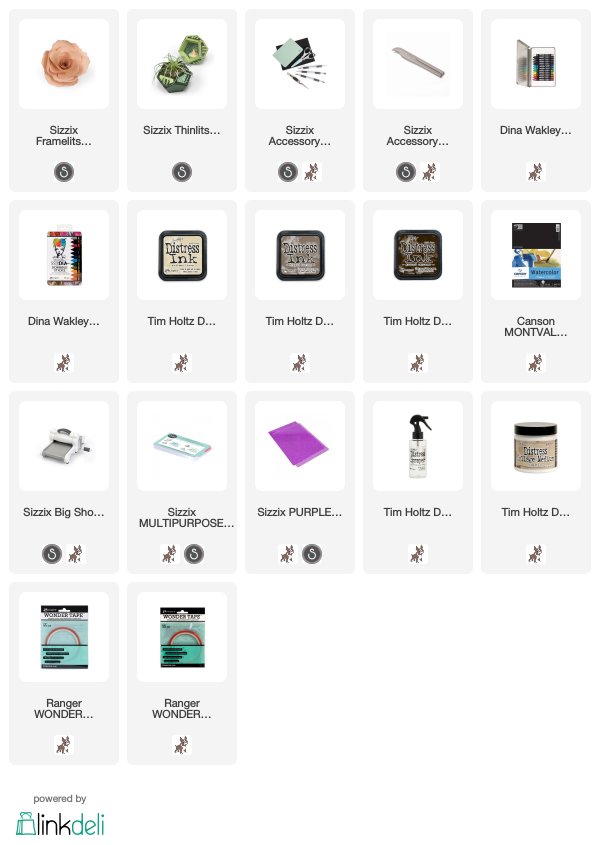
Supplies:

* Please note: the links are affiliate links, for which I receive a small percentage of sales generated by the link, at no extra cost to you.


Wednesday, October 3, 2018

Autumn Gift Bags Tutorial

Hi everyone! I have a tutorial on the Sizzix blog, for two cute autumn-themed gift bags. As always, the techniques can also be used for other types of projects too.

Layers of ink - Autumn Gift Bags Tutorial by Anna-Karin Evaldsson with Sizzix dies by Tim Holtz.

I picked some rowanberries from a tree close by. They are so pretty and I actually later watercolored these same berries, but first they acted as photo props. For the gift bags, I used dies by Tim Holtz to make the gift bags and had such fun with the Funky Foliage, Skeleton Leaves, Autumn Side-order and Treat Bag sets. For another example using the Funky Foliage dies, check out my Embossed Acetate Autumn Tag. The gift bags are quick and easy to make and you could make lots of variations in one go.

For the full tutorial, you'll have to head over to the Sizzix blog.

Thank you so much for visiting my blog today!

Happy crafting!

Anna-Karin

* Please note: the links are affiliate links, for which I receive a small percentage of sales generated by the link, at no extra cost to you.

Tuesday, October 2, 2018

Paper Rose in Geometric Pot Tutorial

Hi crafters! Flowers are such fun to make and they work for so many themes and seasons. Today I have a Sizzix tutorial to share with you, for a pretty and easy dimensional rose, which I made as a gift to my Mom.

Layers of ink - Paper Rose in Geometric Vase Tutorial by Anna-Karin Evaldsson, with Sizzix dies by David Tutera and Lynda Kanase.

The rose was made with David Tutera's Rose Framelits set, and is much easier to make than what it might look like. I also made the pot/vase from paper, using Lynda Kanase's 3-D Geometric Holder set. I didn't glue the rose to the vase, so I can give my Mom more flowers so that she can change the flower in the vase now and then. Let's start. 
 Layers of ink - Paper Rose in Geometric Vase Tutorial by Anna-Karin Evaldsson, with Sizzix Rose Framelits by David Tutera.

The only surface I used for this entire project, was watercolor paper. I used the Canson Montval 200 g/m2 (100lbs) paper. You can also use other papers, as long as they can handle a bit of water. There are two sizes petals in the Rose set. Fold a piece of watercolor paper and place the dies along the folded edge as shown. Die cut using this sandwich: Multi Purpose Platform Tab 2, Cutting Pad, folded paper, die facing down, second Cutting Pad.

Layers of ink - Paper Rose in Geometric Vase Tutorial by Anna-Karin Evaldsson, pairs of rose petals.

You need five of each, or more if you want a fuller flower.

Layers of ink - Paper Rose in Geometric Vase Tutorial by Anna-Karin Evaldsson, coloring with Dina Wakley Scribble Sticks.

I used Dina Wakley's Scribble Sticks to color my petals, since they are so easy and quick to use. You can also use watercolors or, for example, Distress Ink. The petals look horrible here, but it will all change with a bit of water. Color both sides, Lemon in the center, then Tangerine and last Sedona. The come from the Scribble Stick set 1 and set 2.

Layers of ink - Paper Rose in Geometric Vase Tutorial by Anna-Karin Evaldsson, with Sizzix dies by David Tutera and Lynda Kanase.

Die cut the center piece to and color on both sides as shown.

Layers of ink - Paper Rose in Geometric Vase Tutorial by Anna-Karin Evaldsson

I totally forgot to take a photo of the step where you add water, but it is a simple process of loading a paint brush with water and working from the center out dissolving the pigment. I like to dab off excess color from the paint brush on a piece of paper towel. 

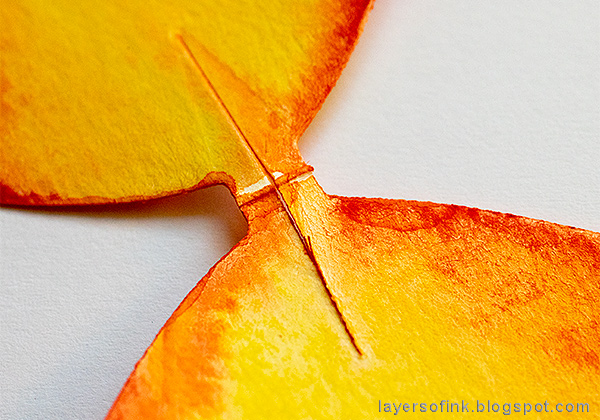
As you can see, the large petals have a slit in the center, this will help to give them dimension.

Layers of ink - Paper Rose in Geometric Vase Tutorial by Anna-Karin Evaldsson, with Sizzix Rose Framelits die by David Tutera

Fold one side of the slit over the other and glue and repeat on the other side of each petal pair. If you use hot glue, you have to take great care not to burn yourself. A small piece of Wonder Tape works well, or ordinary clear-drying white glue, or Ranger's Matte Medium. This step gives the petals more of a cup shape.

Layers of ink - Paper Rose in Geometric Vase Tutorial by Anna-Karin Evaldsson, give shape to the rose.

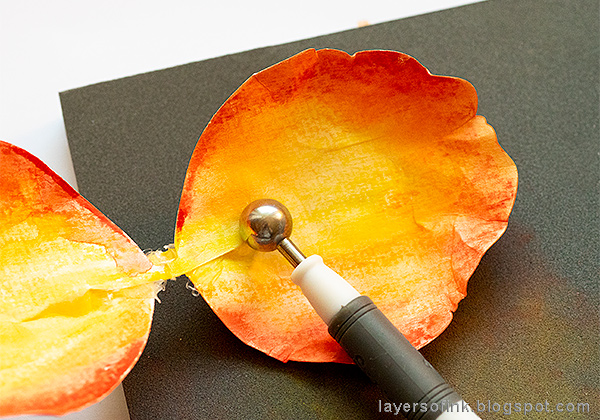
To shape them even more, I used the Paper Sculpting kit. Press with one of the ball tools, from the center towards the edges, working on the foam pad included in the kit. This gives great dimension and also breaks the fibers in the paper, making it easier to shape.

Layers of ink - Paper Rose in Geometric Vase Tutorial by Anna-Karin Evaldsson, with Sizzix Crease and Curl tool

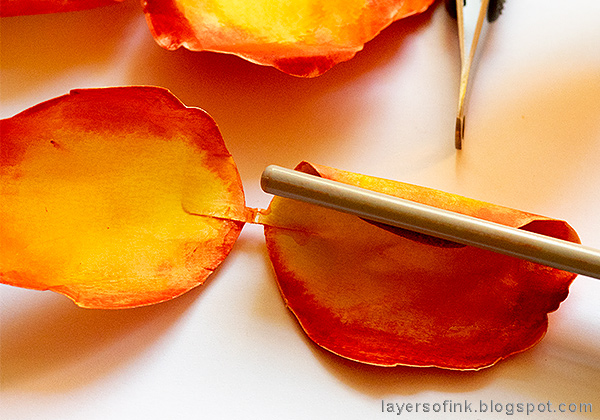
Use the Crease & Curl tool to shape the edges.  It is very easy to use.

Layers of ink - Paper Rose in Geometric Vase Tutorial by Anna-Karin Evaldsson, with Sizzix Paper Sculpting Kit

To shape some of the edges even more, I used the pair of tweezers included in the kit. You can also pinch the edges with the tweezers creating folds and slightly torn areas.

Layers of ink - Paper Rose in Geometric Vase Tutorial by Anna-Karin Evaldsson

For the center of the rose, I curled up two of the smaller pairs of petals as shown in the lower part of this photo. I also rolled and glued the stamen piece.

Layers of ink - Paper Rose in Geometric Vase Tutorial by Anna-Karin Evaldsson.

Here is a better look at the center piece, fold one of the two curled petal pairs around the first one. 

Layers of ink - Paper Rose in Geometric Vase Tutorial by Anna-Karin Evaldsson, DIY paper rose

Assemble the rose, starting by gluing the larger pairs of petals together, altering their direction as you go. Continue with the three smaller pairs of petals. I cut off the lower part of the center petals that you see to the right, so that it wouldn't stick out. Again, be very careful if you use hot glue.

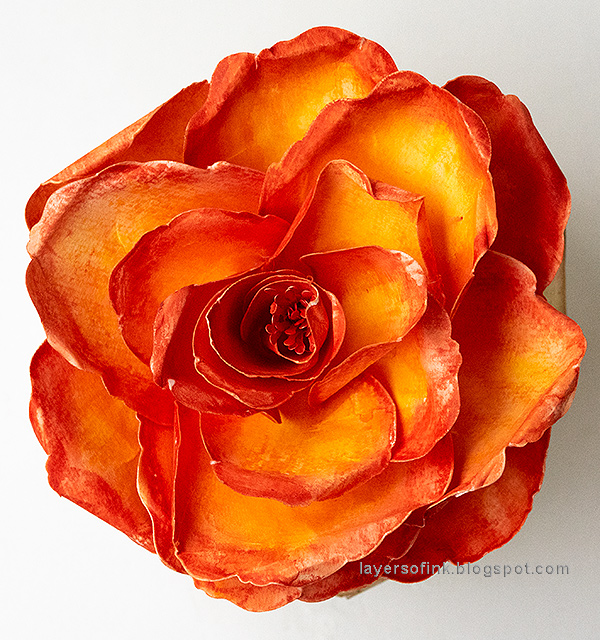
Layers of ink - Paper Rose in Geometric Vase Tutorial by Anna-Karin Evaldsson, red and orange rose

Glue the center petals into the rose and then add the stamen piece (or leave it out).
 Layers of ink - Paper Rose in Geometric Vase Tutorial by Anna-Karin Evaldsson, with Sizzix Lynda Kanase Geometric Holder.

The pot is easy to make, using the same watercolor paper. Using the Geometric Holder set, die cut one base piece and five of the side pieces.

Layers of ink - Paper Rose in Geometric Vase Tutorial by Anna-Karin Evaldsson.

The pieces were colored on both sides, by applying Distress Ink to a non-stick craft sheet, misting with water and pressing the paper into the ink. I used Antique Linen and a tiny bit of Frayed Burlap. Fold along the score lines and adhere to the base piece as shown.

Layers of ink - Paper Rose in Geometric Vase Tutorial by Anna-Karin Evaldsson, DIY paper pot.

Assemble the pot by simply gluing all the flaps in place, one side at a time.

Layers of ink - Paper Rose in Geometric Vase Tutorial by Anna-Karin Evaldsson, with Sizzix dies byLynda Kanase.

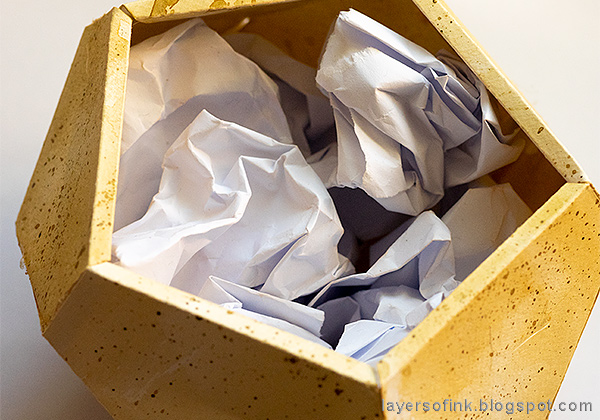
A very easy way of filling up the pot, is simply to scrunch up some paper and place in the vase.
  Layers of ink - Paper Rose in Geometric Vase Tutorial by Anna-Karin Evaldsson, DIY paper pot/vase.

Then I cut a piece of green felt and tucked it down over the pieces of paper. I splattered the pot with Ground Espresso ink for that textured look. Smear ink on a non-stick craft sheet, mist with water and pick up with a small paint brush. Tap the brush to create splatters.

Layers of ink - Paper Rose in Geometric Vase Tutorial by Anna-Karin Evaldsson, with Sizzix dies by David Tutera and Lynda Kanase.

Place the rose into the pot and you are done. If you want to, you can also add leaves, but I decided that I wanted just the rose and the pot for this project.

Layers of ink - Paper Rose in Geometric Vase Tutorial by Anna-Karin Evaldsson, with Sizzix dies by David Tutera and Lynda Kanase.

Here's a look at the project from the side. The project might be larger than you think, it is about 6 in tall and 4 in wide.

Layers of ink - Paper Rose in Geometric Vase Tutorial by Anna-Karin Evaldsson, with Sizzix dies by David Tutera and Lynda Kanase.

You can make the rose in any color you could think of, and this doesn't even need to be a rose, it can also be turned into other flowers. The finished size of the rose is 4 x 4 in.

Layers of ink - Paper Rose in Geometric Vase Tutorial by Anna-Karin Evaldsson, with Sizzix dies by David Tutera and Lynda Kanase.

Using Scribble Sticks is a very quick coloring method and it is fun too.

Layers of ink - Paper Rose in Geometric Vase Tutorial by Anna-Karin Evaldsson, with Sizzix dies by David Tutera and Lynda Kanase.

I hope you enjoyed this project and that it inspired you to make some paper flowers. For more paper flower inspiration, check out my recent Dahlia tutorial.

Happy Crafting!

Anna-Karin

Supplies:

* Please note: the links are affiliate links, for which I receive a small percentage of sales generated by the link, at no extra cost to you.


Monday, October 1, 2018

Twigs and Owl Tag Tutorial

Hello friends! I hope you had a nice weekend! We went on an outing to a castle yesterday, where there is also a second hand shop, playground and great places to have lunch. And lots of autumn trees. I found a fun little wooden box to alter in the second hand shop, and didn't even have to pay for it.


It is a new month, and on the first Monday of a new month, the Simon Says Stamp Monday Challenge  team showcases a specific company/designer. This week it is the very creative and innovative Tim Holtz. You don't have to use Tim's products to join in the challenge, but it is always fun if you do. His fantastic range of products can be found here. Our theme for this week is Tag It. Don't miss the first project from our October guest designer Tenia Nelson with her blog Jazzy Paper Designs. I hope you will stop by her blog and enjoy all the inspiration.

Layers of ink - Twigs and Owl Halloween Tag Tutorial by Anna-Karin Evaldsson made with dies and stamp by Tim Holtz

Tags are such a great surface to work on and they are perfect for trying out new techniques. I also really like the size and shape of a tag, and I keep many of my tags on display for quick technique or color inspiration. For this week, I made a Halloween tag, with a fun double tag background. 

Layers of ink - Twigs and Owl Halloween Tag Tutorial by Anna-Karin Evaldsson, die cut Sizzix Tim Holtz Tangled Twigs from a tag.

Start by die cutting the Tangled Twigs die from a Heavystock tag. I used the Sizzix Chrome Precision Base Plate, to make sure all the details were die cut perfectly. Doesn't it look cool?

Layers of ink - Twigs and Owl Halloween Tag Tutorial by Anna-Karin Evaldsson, color tag with Ranger Distress Crayons

Color the twigs by smearing various brown Distress Crayons, blending with your finger. I also wiped over the surface with a slightly moist cloth.

Layers of ink - Twigs and Owl Halloween Tag Tutorial by Anna-Karin Evaldsson, color tag with Distress Paint.

Take another tag and paint it with Distress Paint. I used Mermaid Lagoon on the top two-thirds, and Broken China on the bottom.

Layers of ink - Twigs and Owl Halloween Tag Tutorial by Anna-Karin Evaldsson, with Ranger Distress Rock Candy Crackle Paint

When dry, smear Rock Candy Distress Crackle Paint on the tag with a palette knife, varying the thickness.

Layers of ink - Twigs and Owl Halloween Tag Tutorial by Anna-Karin Evaldsson, with crackle paint.

When the tag is dry, accentuate the cracks by smearing a brown Distress Crayon into them.

Layers of ink - Twigs and Owl Halloween Tag Tutorial by Anna-Karin Evaldsson, with Tim Holtz Mr Bones stamps

I love this stamp from Tim's new Mr Bones set and stamped it on Specialty Stamping Paper with Jet Black Archival Ink. I die cut it with one of the Stitched Circles dies and tore off the outer circle to get a jagged edge.

Layers of ink - Twigs and Owl Halloween Tag Tutorial by Anna-Karin Evaldsson, color with Distress Ink

I forgot to take a step photo for the coloring of the tag. I used Pergamano Blending Pen Craft Nib Holder and Blending Pen Nibs, for all the details, picking up Distress Ink with it's fine tip. It was the first time I used this tool and I thought it worked really great. The edges were inked with Mermaid Lagoon and a Mini Ink Blending tool and the textured look of the Black Soot ink was done with a Tim Holtz Blending Brush.

Layers of ink - Twigs and Owl Halloween Tag Tutorial by Anna-Karin Evaldsson

I stapled the twigs tag to the blue tag. The ribbon was done by folding over a piece of design ribbon.

Layers of ink - Twigs and Owl Halloween Tag Tutorial by Anna-Karin Evaldsson, tag with layers

The Distress Crayon will be thicker in some areas on the twigs, which adds to the look.

Layers of ink - Twigs and Owl Halloween Tag Tutorial by Anna-Karin Evaldsson

The title was die cut from black cardstock and from a paper inked with Spiced Marmalade. I also used some Clippings Stickers.

Layers of ink - Twigs and Owl Halloween Tag Tutorial by Anna-Karin Evaldsson, twigs and crackle background.

Here's another look at the textured effect of the crackled background and the detailed twigs.

Layers of ink - Twigs and Owl Halloween Tag Tutorial by Anna-Karin Evaldsson, with Halloween idea-ology adornments

There is a cheese cloth spiderweb under the owl circle and I added two spiders and an owl Adornment, distressing them with black paint.

I hope you will join us this week in our Tag It challenge. As always, you have a chance to win a $50 gift voucher to do some fun shopping at Simon Says Stamp. You have until next Monday 8am Ohio time. 1pm UK time, 2 pm CET to join in.


Don't forget to follow Simon Says Stamp on Instagram, they post great stuff daily. 


Do you use Instagram? If so please add #sssmchallenge so we can see your entries there too.


Thank you so much for taking the time to visit my blog today!  

Happy crafting!

Anna-Karin

Supplies:

* Please note: the links are affiliate links, for which I receive a small percentage of sales generated by the link, at no extra cost to you.