Monday, September 8, 2014

Remember This Art Journal Tutorial

Hello everyone!! It is STAMPtember® at Simon Says Stamp, which means a month full of fun and stamping inspiration. This week we are having a  STAMPtember® blog hop at Simon Says Stamp Monday Challenge. Don't miss any of the fabulous posts. The challenge is to use any Simon Says Stamp Exclusive product.
 
http://www.simonsaysstamp.com/
 
Everybody on the team will share stamping tips and inspiration.
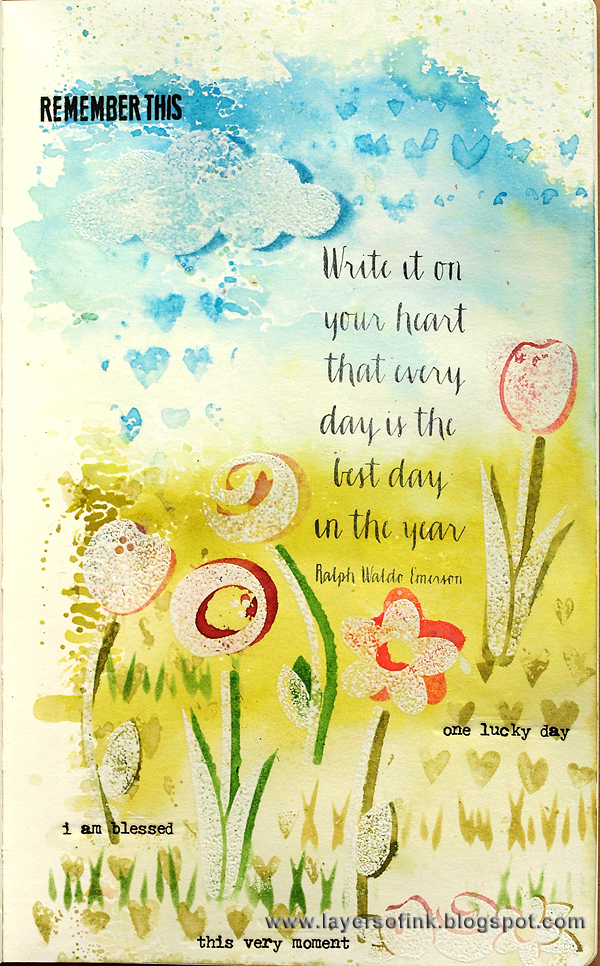
 
I did a tutorial for an art journal page, using a shadow stamping technique. The technique can just as well be used on any type of project. For a different version check out this tutorial of mine, using stencils, paint and embossing powder instead.
 
I worked in my Small Creative Journal, but you can do this technique on many different projects. Smear bands of Distress Ink on your craft sheet, in this order: Shabby Shutters, Crushed Olive, Tumbled Glass, and Salty Ocean. Mist with water and press the page into the ink. Leave to dry. 

White emboss flowers from the new gorgeous Floral Bookmarking set on the page, and stamp a sentiment with Jet Black ink. I really like this quote stamp.
 
Use the same stamps again and different colours Distress Ink. After inking up the stamp, mist a few times with water, for a watercolour effect. Because the stems and flowers are separate stamps, it is very easy to make the stems green and the flowers various colours. Stamp a little bit to the side of the embossed image, for a shadow effect. The white embossing will resist the ink, but will now be more visible than before, even more so if you use darker inks.

I love this heart background stamp. Ink it up with Salty Ocean, mist with water and stamp randomly on the sky area, then do the same with Shabby Shutters in the grass.

I decided I wanted to use a stencil too, and reached for the Make a Scene one. Apply embossing ink through the cloud and white emboss. Place the stencil back on the cloud, a little to the side, and sponge Salty Ocean through it. Lightly mist the ink with water. Sponge Shabby Shutters and Mowed Lawn through the grass part of the stencil.

I liked the shadow effect on the cloud and that it by coincidence looks like it is raining hearts.

Isn't it a great quote, perfect for a journal page.

The effect on the flowers is subtle, which is exactly what I was aiming for. You can see that the flower stamped with Aged Mahogany stands out a little more than the others. I really like the shapes of the flowers in this set.

Finally, I added some Tim Holtz rub-ons to support the message of the page.

Here is some info from Simon Says Stamp regarding  STAMPtember®.

Simon Says Stamp was founded in 2002 with an interest in exclusively selling rubber stamps. It didn’t take long until we realized we couldn’t stop there. For more than 10 years we have celebrated rubber stamping and its glory. We work to bring companies from around the world together in a one stop shopping environment. Rubber stamps still remain the heart of our business and we are celebrating by hosting a “STAMPtember®" event intended to inspire, educate, and celebrate the delight of rubber stamping. Part of the enticement of rubber stamping is that stamps can be used in creating or complementing ANYTHING! From stamping dates on bank documents and postage parcels in the early 18th century, rubber stamping has dramatically expanded to include card making, scrapbooking, mixed media and many forms of altering and expressing art.

I hope you'll join us this week! As always, one random participant wins a $50 gift voucher from Simon Says Stamp.

http://www.simonsaysstamp.com
 
Your next stop on the blog is the wonderful Ashli Oliver. If you get lost, these are all the stops:

Anna-Karin (you are here)


Have fun and thank you for stopping by here at my blog!
 
Happy STAMPtember!
 
Anna-Karin
 
Supplies:
Stamps: Simon Says Stamp: Drawn Heart Background, Floral Bookmarking
Stencils: Simon Says Stamp: Make a Scene
Embossing Powder: Ranger White
Embellishments: Tim Holtz idea-ology: Life Quotes Remnant Rubs, Words Remnant Rubs

Sunday, September 7, 2014

Autumn Brook Scenic Stamping

Hello stampers! It is a new month and of course a new theme at Craft a Scene - Fall Splendour. I hope you can join us in the challenge.
 
I stamped an autumn scene, using Distress Markers to ink up the stamps, a technique that works real well for the varied and vibrant colours of autumn. I started by stamping the Autumn Brook and Autumn Bank stamps and then continued to add more colour. The scene was stamped on glossy cardstock and coloured with dye inks. I kept the sky and the water pretty light and added some highlights with a white gel pen.
 
Thank you for visiting today!
 
Happy stamping!
 
Anna-Karin
 
Supplies:
Stamps: Stampscapes: Migrating Birds 152D, Autumn Brook 212G, Autumn Bank Left 213G, Scenic Sentiment Sheet 6
Ink: Ranger Archival Ink: Fern Green; Adirondack: Aqua, Stonewashed, Willow, Oregano, Lemonade; Distress Ink: Faded Jeans, Peeled Paint, Mustard Seed, Forest Moss
Markers: Distress Markers: Barn Door, Spiced Marmalade, Mustard Seed, Peeled Paint, Forest Moss
Surfaces: Kromecote glossy cardstock
 

Friday, September 5, 2014

Hydrangea Shadow Box Tutorial

Hello everyone! I am sharing a tutorial on the Sizzix blog today, for a Hydrangea shadow box.
 
Earlier this year I made a Lilac Tree Shadow Box and I thought it needed a partner. The Hydrangea was made with Susan Tierney-Cockburn's Hydrangea Flower die and coloured with Pan Pastels.
 
To see the full tutorial, you'll have to head over to the Sizzix blog.
 
Thank you for stopping by today and enjoy your weekend!
 
Anna-Karin

Thursday, September 4, 2014

Autumn Burlap Panel Tutorial

Hi all! Today I have a tutorial to share for the Tim Holtz Media team, with a mix of fun techniques. It is September and time for some autumn projects. 
 
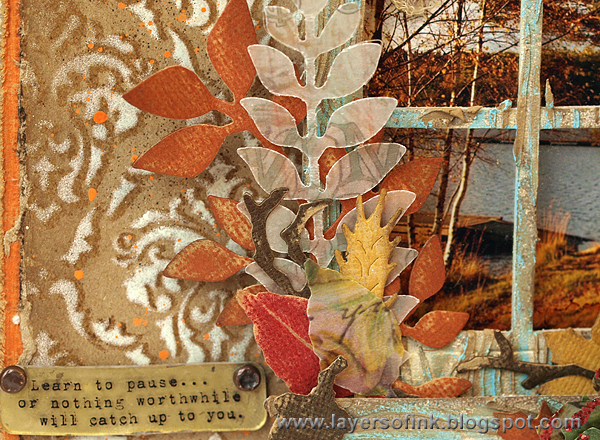
The vibrant colours of autumn are wonderful and I made a burlap panel to celebrate them. Through the window you can look out at a beautiful lake in warm autumn light and colours. The burlap panels fit very well on autumn projects because of the rustic texture. The main focus of this tutorial is on stencils, and I'll be sharing some fun stencil techniques, particularly a shadow stencil technique.
 
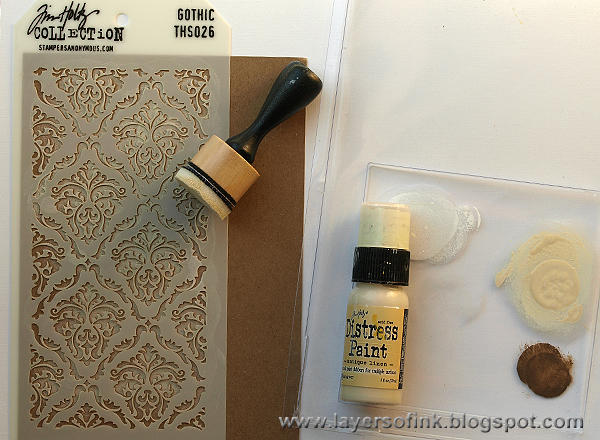
I did a fun technique which creates both dimension and texture, but without any bulk. In the past, I did a similar technique with stamps, but for this project I wanted to see if I could think of way of doing the same thing but with stencils. Working on craft cardstock, pounce Antique Linen paint through the Gothic stencil. Don't use too much paint to prevent it from seeping under the stencil. I love the pattern of the Gothic stencil.

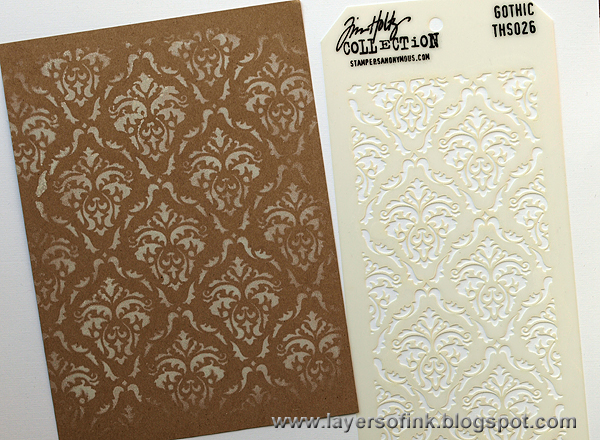
Continue until you have covered the whole paper, it is easy to line up the stencil to get a continuous pattern. Leave to dry completely.

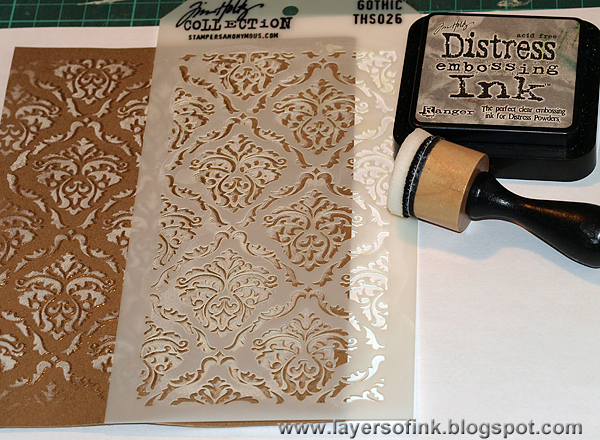
Put the stencil back on the paper, but move it a little bit to the side of the original pattern. It is easy to do if you first line it up perfectly and then just shift the stencil. Make sure to shift it to the same side over the whole paper. Pounce embossing ink through the stencil with a round ink-blending tool.

Sprinkle with clear embossing powder and melt with a heat gun. Work on one section at a time. This is the final result. The technique gives a really cool shadow effect that makes the stencil pattern almost look three dimensional.

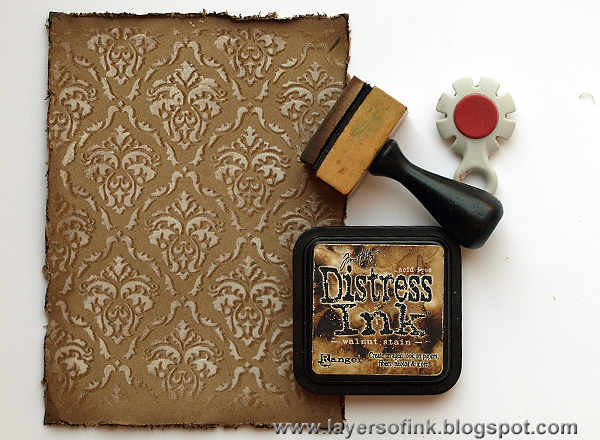
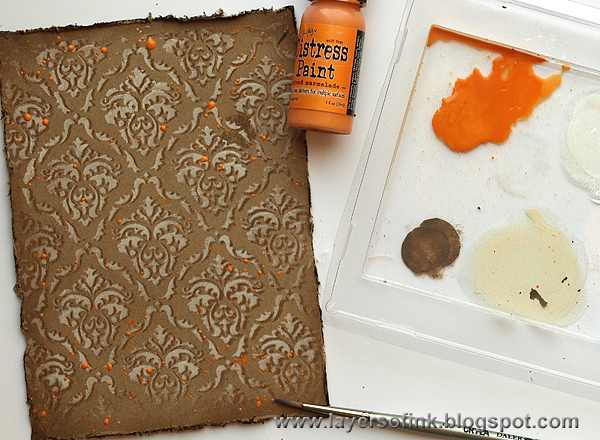
Distress the edges and ink with Walnut Stain.
 
Add a tiny bit of water to Spiced Marmalade paint and splatter on the background.
 
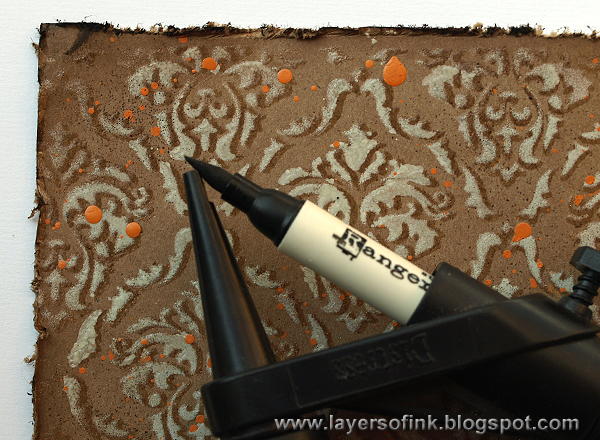
Finally, for a little more texture, I used the Spritzer tool and a Walnut Stain Distress Marker here and there on the background.
 
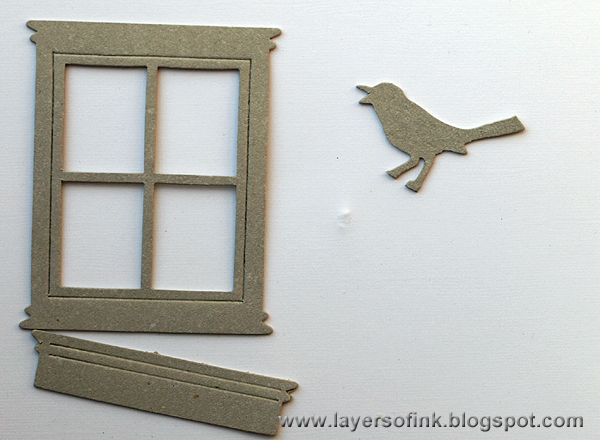
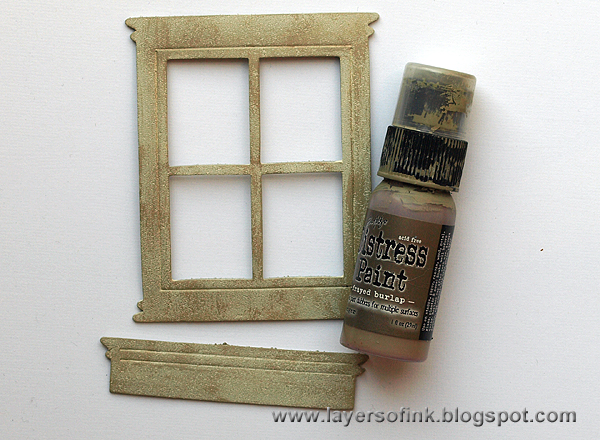
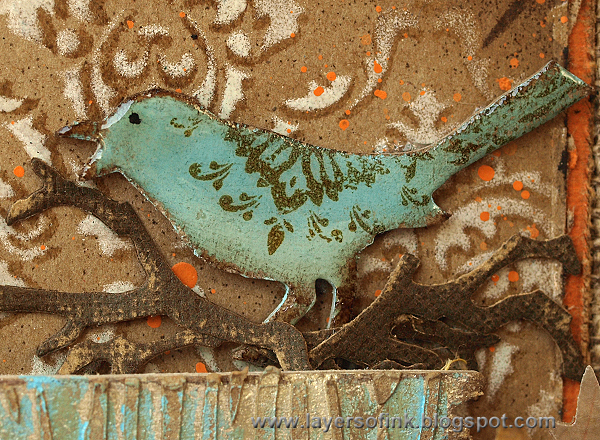
Die cut the window and the bird from the Bird Branch die from grungeboard. I love this window die, and once used it to make large houses to decorate the stage for my son's school concert.

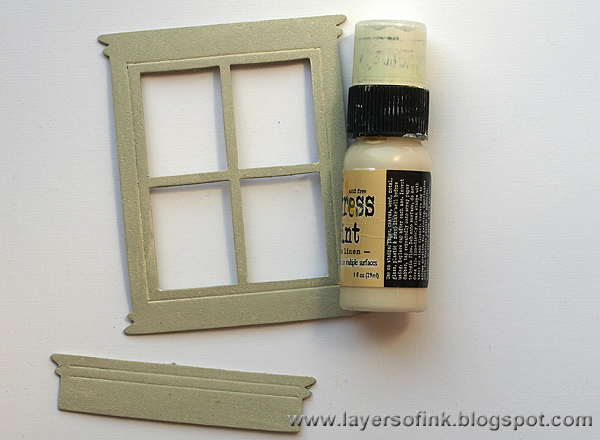
Paint with Antique Linen.

Paint with some Frayed Burlap.

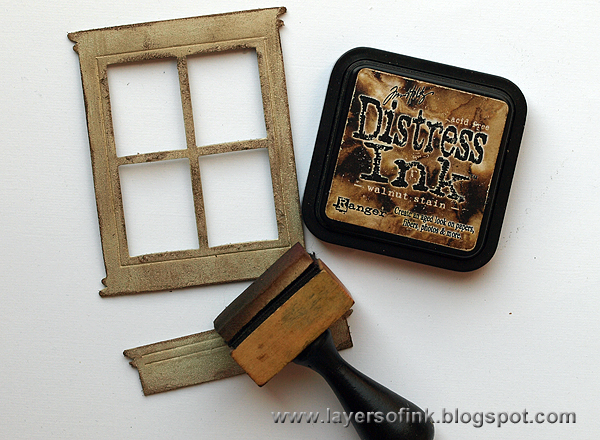
Sand the edges with a sanding grip and ink with Walnut Stain. If you want to you can stop here, because the window already looks nice.

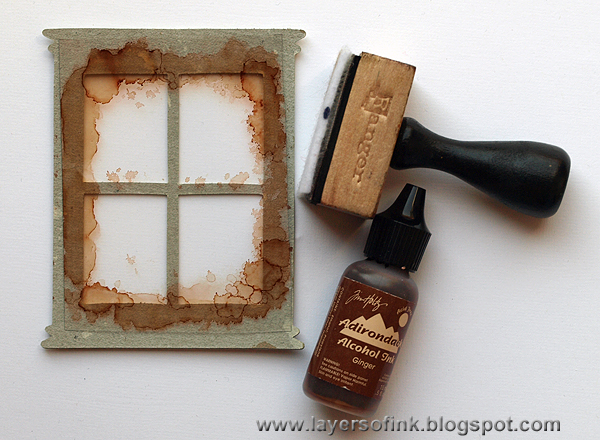
I wanted window glass too and cut a piece of acetate. Place it temporarily on the back of the window die cut and add some Ginger Alcohol ink around the edges. Placing it on the die cut makes it easier to see where to ink.

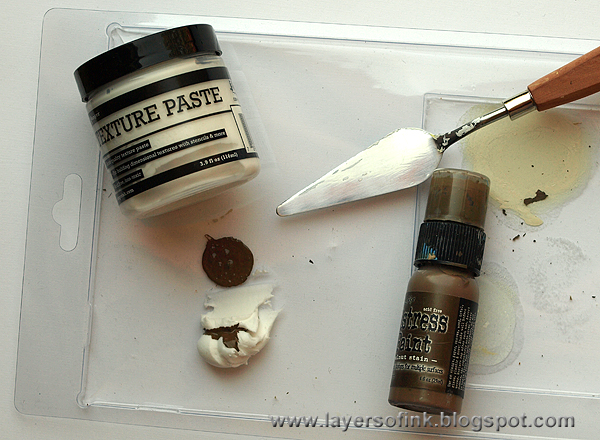
Mix a little bit of Walnut Stain paint into Ranger's new Texture Paste.

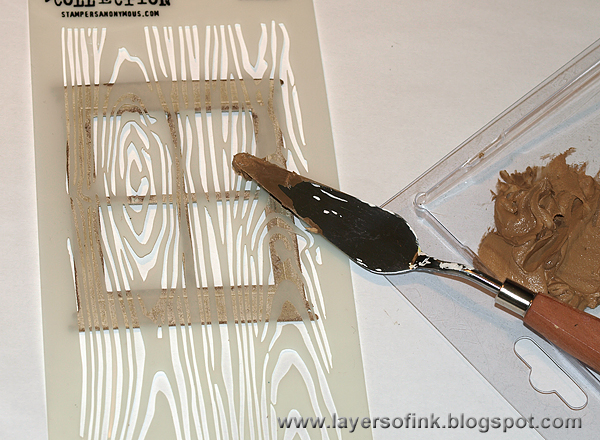
Place the Woodgrain stencil over the window and apply paste with a palette knife. Carefully lift the stencil up and immediately clean it.

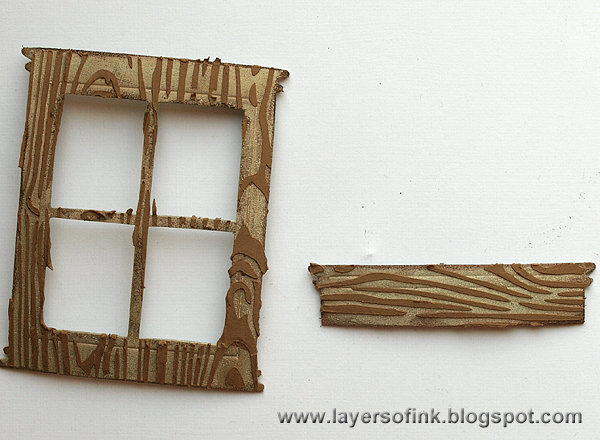
When the paste is dry, it looks like this. But at this stage I changed my mind and decided that the window needed some blue.
 
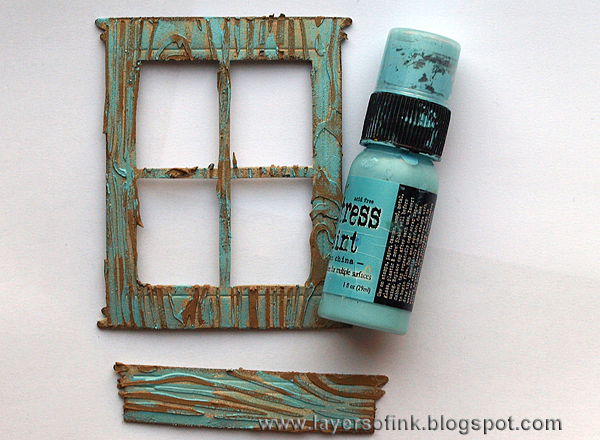
Paint Broken China here and there on the window with a paint brush. If you want to, you can do this step before the paste.
 
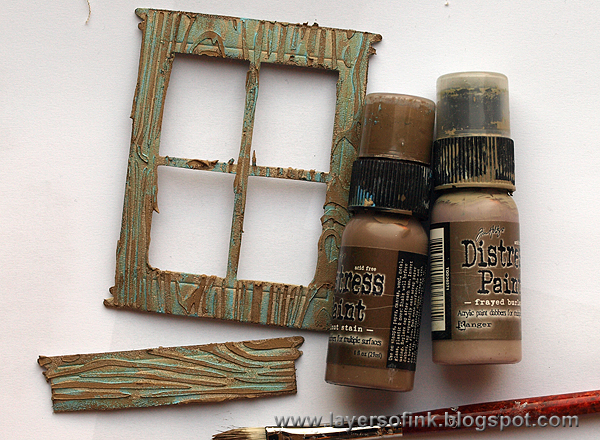
Dry brush brown paint on the window to tone down the blue and blend the colours.

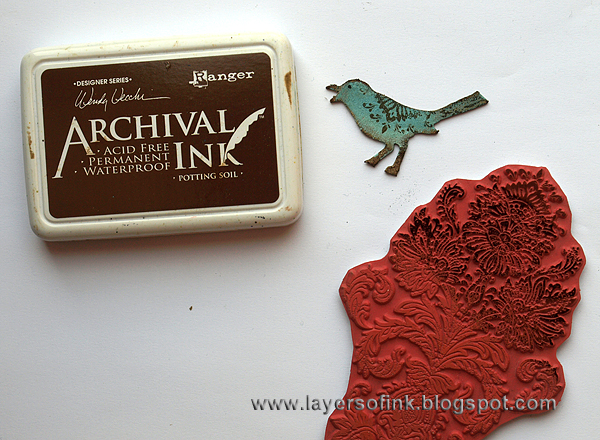
The bird was painted with Broken China, sanded and inked with Walnut Stain. I stamped one of the Distress Damasks on the body of the bird as a wing, using Potting Soil ink.
 
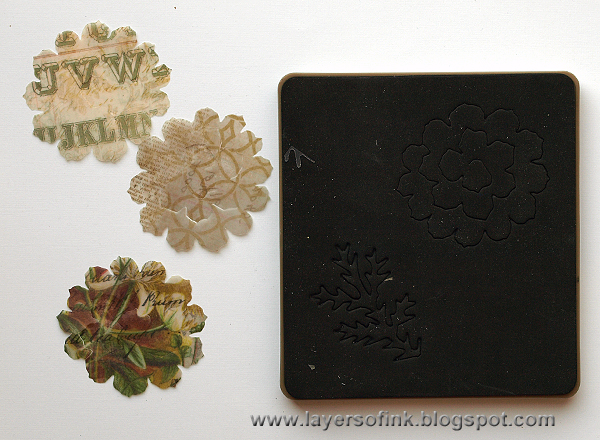
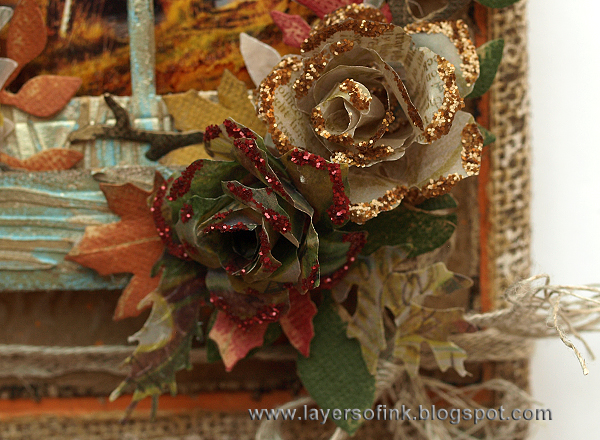
Die cut three Tattered Pinecones from vellum.

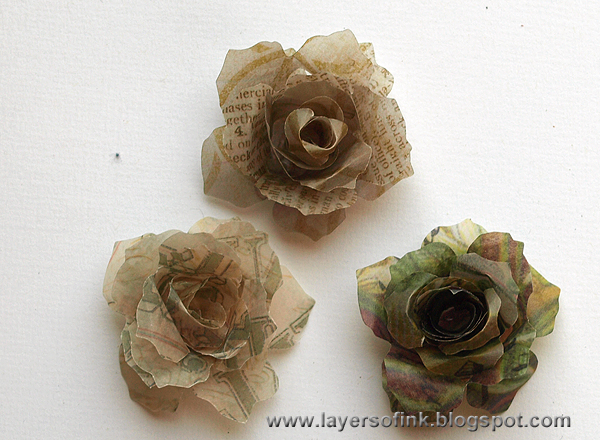
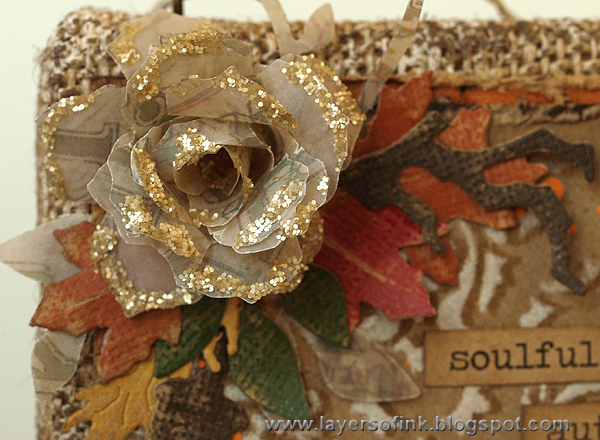
Roll them up into vintage roses. They look real nice with the vellum.

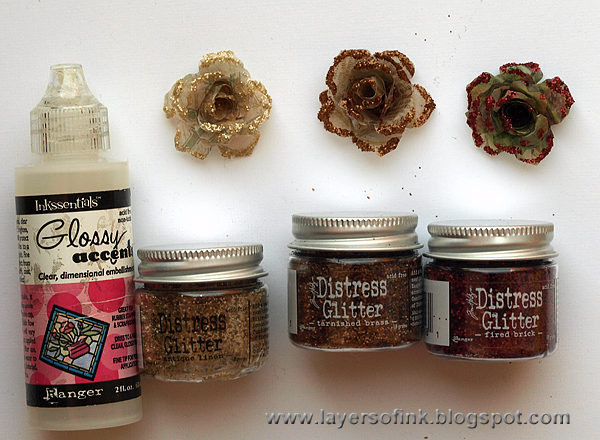
Add a little Glossy Accents to the flowers and sprinkle Distress Glitter on top. I used Antique Linen, Tarnished Brass and Fired Brick. 

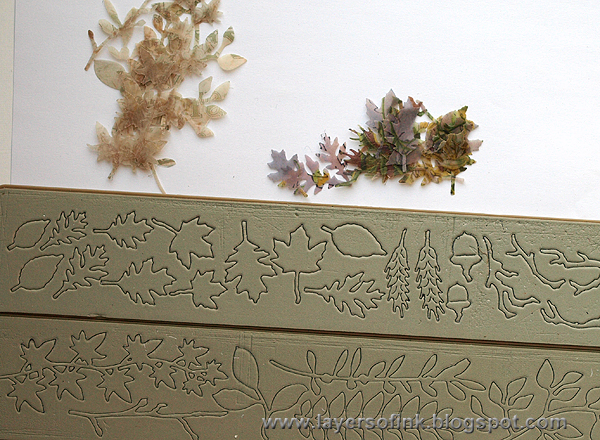
Die cut leaves and branches from vellum with the Spring Greenery and Autumn Gatherings dies.

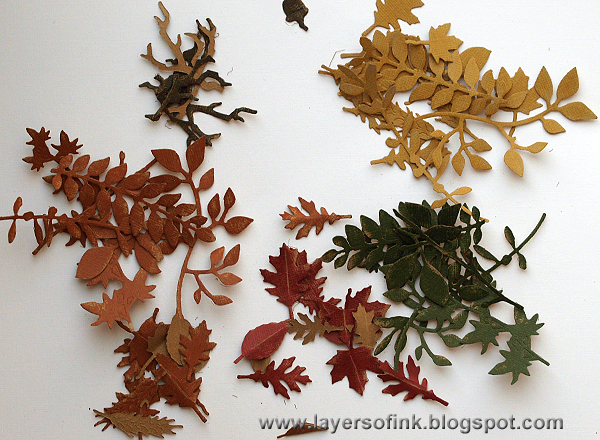
Use the same two dies to die cut more leaves and branches from kraft-core cardstock. Sand to reveal some of the kraft-core. Fold the leaves in the middle and sand to create a vein.
 
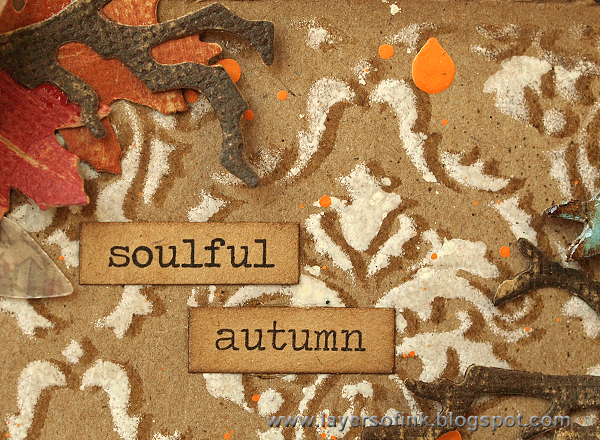
Time to assemble everything. Glue the background to a slightly larger piece of orange kraft-core cardstock, sanded around the edges. Add some chit chat stickers for a sentiment. Here you can better see the shadow effect of the stencil technique.
 
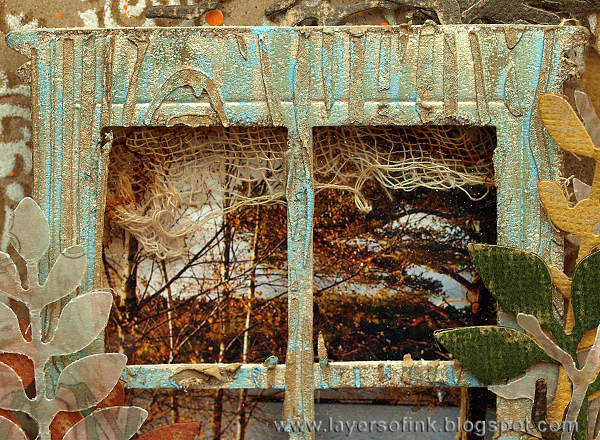
To add more shine, I misted the window with Biscotti Perfect Pearls. I always want to add a curtain, but I didn't want to cover too much of the photo up, so I dyed a piece of cheese cloth with Gathered Twigs ink and used that.
 
Adhere the window and window box with foam tape, or place pieces of foam or cork behind them to add dimension. Layer branches and leaves into the window box.
 
Finish with two of the tattered pinecone roses.

I added another rose and more leaves and branches to the upper lefthand corner of the panel.
 
Coat the bird with Glossy Accents for shine and when dry, place it and some branches above the window.

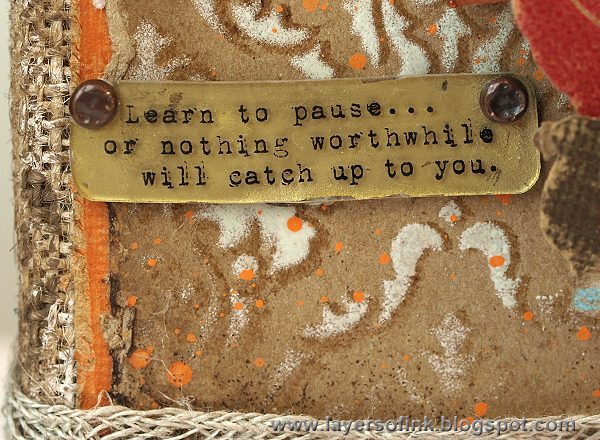
I wanted to use this stamped sentiment from the Just Thoughts set, but it was too large for the canvas. Instead, I stamped it on shrink plastic and cut it out. Punch two holes and shrink the plastic according to the instructions on the packaging. Colour at the back with gold alcohol ink. 

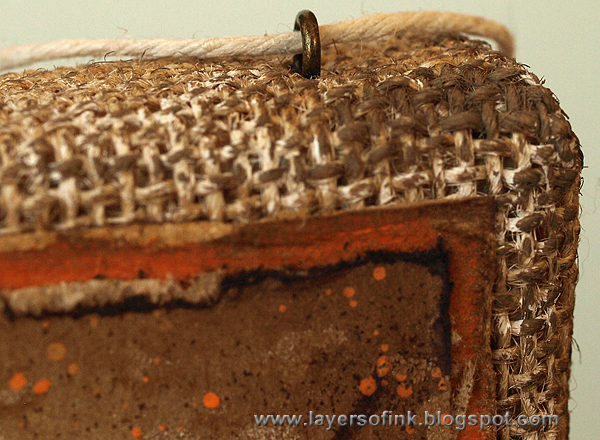
The edges of the canvas were painted with Antique Linen and Walnut Stain. I like to use Screw Eyes on burlap panels to be able to easily hang them up. Screw one on each side and tie a piece of twine in between.
 
Thank you so much for looking! I hope you enjoyed the tutorial!
 
Happy crafting!!
 
Anna-Karin
 
Supplies:
Surfaces: Tim Holts idea-ology: Burlap Panel 6 x 8, Wallflower Vellum Paper Stash, Grungeboard; Core'dinations Tim Holtz: Kraft-Core cardstock; Ranger: Kraft Cardstock, Shrink Plastic
Stamps: Stamper's Anonymous Tim Holtz: Just Thoughts, Distress Damask
Ink: Ranger Archival Ink: Potting Soil, Jet Black; Distress Ink: Walnut Stain
Paint: Distress Paint: Broken China, Antique Linen, Frayed Burlap, Walnut Stain, Spiced Marmalade
Marker: Distress Marker: Walnut Stain
Alcohol ink: Ranger Adironack: Ginger, Gold Mixative
Glitter: Distress Glitter: Antique Linen, Tarnished Brass, Fired Brick
Embossing powder: Ranger: Clear
Mist: Ranger: Biscotti Perfect Pearls
Medium: Ranger Texture Paste
Stencils: Stamper's Anonymous Tim Holtz: Gothic, Woodgrain
Embellishments: Tim Holtz idea-ology: Seasonal Chit Chat Stickers, Chit Chat Stickers, Screw Eyes, Long Fasteners, Linen Ribbon
Tools: Sizzix: Big Shot; Ranger: Mini Round Ink Blending Tool, Distress Marker Spritzer Tool, Sanding Grip

Monday, September 1, 2014

Bold Stamping

Hello friends! It is Stamptember at Simon Says Stamp and this whole month will be full of celebrations and stamp inspiration.
 
http://www.simonsaysstampblog.com/blog/hip-hip-hooray-stamptember-starts-today/
 
At Simon Says Stamp Monday Challenge we are kicking it off with a bold stamping challenge.
 
I made another layout this week because I wanted to use a whole lot of stamps and needed space. Tim Holtz Numeric stamps are some of the boldest stamps I have, big and bold numbers. The whole background was stamped with them, using bright Archival Inks. I also used a large and bold sentiment stamp. This photo has been in a pile on my desk for a long time and I thought it was time that it made it onto a layout.
 
The numbers were stamped on Ranger's Specialty Stamping paper, and I white embossed my favourite alphabet background stamp here and there over them. The hearts were die cut from cork and painted around the edges with a little bit of Picket Fence paint. This ticket stamp set is also a favourite of mine. The background is Motif cardstock inked with Distress Ink. The cardstock has an embossed pattern which resists the ink.
 
A second cork heart, Label Letter and crinkle ribbon die dyed with Distress Ink. The edges of Specialty Stamping paper looks nice distressed.
 
Under the photo there is a Picture Wheel die cut from natural sticky-back canvas, with another leftover gelli print underneath. I added a tiny photo and some remnant rubs. The arrows were die cut, painted and coated with Glossy Accents.

The tag was die cut from leftover gelli printed paper. It is a ghost print (second print without adding more paint).

The sentiment was die cut from cork with the Lowercase Block Talk die. I also added a piece of Filmstrip Ribbon, and some sprocket gears. A stitched border finished the layout.
 
I hope you will join us this week in our bold stamping challenge, as always one random participant wins a $50 gift voucher from Simon Says Stamp. And don't miss all the fun Stamptember events.  

http://www.simonsaysstamp.com/
 
Happy stamping!
 
Anna-Karin

Supplies:
Surfaces: Ranger: Specialty Stamping Paper, Natural Sticky-Back Canvas; Tim Holtz idea-ology: Motif Cardstock; DCWV: The Adhesive Cork Stack
Dies: Sizzix: Tag & Bookplates, Picture Wheel, Lowercase Block Talk, Artful Arrows, Mini Hearts
Stamps: Stamper's Anonymous Tim Holtz: Numeric, School Desk, Odds & Ends, Way With Words
Ink: Ranger Archival Ink: Jet Black, Leaf Green, Sap Green, Monarch Orange, French Ultramarine, Venetian Orange, Chrome Yellow, Forget-Me-Not; Distress Ink: Salty Ocean, Mustard Seed, Evergreen Bough
Paint: Distress Paint: Broken China, Picket Fence
Embossing powder: Ranger: White
Embellishments: Tim Holtz idea-ology: Sprocket Gears, Long Fasteners, Label Letters, Crinkle Ribbon, Philosophy Tags, Words Remnant Rubs, Life Quotes Remnant Rubs, Botanical Remnant Rubs, Film Strip Ribbon