Hello crafters! It is Monday and I hope you had a good weekend with some crafty time!
Please note: this post has affiliate links, for which I receive a small percentage of sales generated by the link, at no extra cost to you.
This week our challenge theme at the Simon Says Stamp Monday Challenge Blog is Add a Sentiment. I hope you will join us and don't miss the project by our July guest designer Laura Cassina.
I made a matchbox and couldn't use just one sentiment, but instead filled the box with sentiments. Almost as if it is a little box holding a lot of secrets. The box was made with Tim Holtz Vault Matchbox set and I used a bunch of different butterfly stamps to embellish it and the cards.
There are seven sentiment cards in the box.
Start by die cutting the box with the Vault Matchbox die from heavystock paper. Fold along the scorelines.
Ink the box with Distress Ink. I also die cut a card for the top of the box.
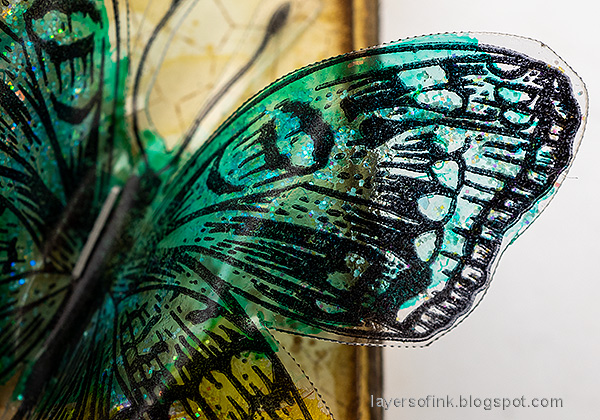
Stamp one of the butterflies from Tim Holtz Flutter on acetate.
Cut out and color on the back with alcohol ink.
Gently heat with a heat tool and shape the acetate. Be careful as this might not work with all types of acetate. I used Wendy Vecchi Clearly for Art Modeling Film.
Die cut seven cards from inky paper. Stamp sentiments and small images on the cards. Mist the images with water after inking. Also stamp a sentiment inside the box.
Stamp here and there with Simon Says Stamp Stained Glass, for texture.
Ink the edges and assemble the box.
I added Moon Dust Stickles Glitter Gel to the back of the butterfly, but forgot to take a photo of that step.
A part of a Tim Holtz Tiny Text sentiment was stamped on the front.
I stamped words from Simon Says Stamp Forest Scenery on both sides of the box. I messed up the stamping of 'peaceful' and restamped and cut into a strip.
When you open the box you will find a little treasure of words.
I used a mix of stamps by Simon Says Stamp and Tim Holtz for the sentiments and images.
Mist the stamp with water after inking for a watercolor effect.
The remaining four cards. The long sentiment comes from Tim's Urban Chic, the sentiment to the bottom left is from Simon Says Stamp Extra Proud and the remaining two sentiments are from Tim's Tiny Text.
The birds come from Tim Holtz Mini Ornates.
The stamp at the top is one of my youngest son's favorite sayings.
All the little cards and the box itself.
Die cut the side pieces from kraft cardstock and sand to reveal the texture.
Join us this week in our Add a Sentiment! You have a chance to win a $25 gift voucher to do some fun shopping at Simon Says Stamp. You have until Monday 8am Ohio time. 1pm UK time, 2 pm CET to join in.


I've seen a LOT of lovely creations over the years but this one I actually covet. It is so beautiful. What an excellent job you did on it. [Bunny]
ReplyDeleteI forgot to say I've never hears of modeling film but I sure do wish I had a piece of it to play with.
Delete