
Hi stampers! Today I have a tag to share with various fun techniques. It is one of those projects that proceeded without much of a plan.
Please note: this post has affiliate links, for which I receive a small percentage of sales generated by the link, at no extra cost to you.

The tag has an earth theme with lightbulbs turned into hot air balloons exploring the world. The background is made with a combination of stenciling and stamping. The globe is heat embossed and shiny and the lightbulbs are glittery and dimensional. Arrows are a great way to create movement.

Start by die cutting the globe from Tim Holtz Vault World Travel set from heavystock paper and from Simon Says Stamp Acetate.

Ink the base globe with Simon Says Stamp Embossing ink and sprinkle Wow embossing powders on top. I used Tarnished Teal, Sea of Tranquility and Crusty Copper. Repeat until you are happy with the look. Ink the land masses with Distress Ink and emboss with several layers of clear powder. Sprinkle some of the colored powders into the last layer. Always be very careful with heat embossing and do not touch the melted powder until it has cooled down completely.

Ink the acetate with Patina Alcohol ink, to make it look like the ocean.

Die cut another circle from old dictionary paper and place under the acetate. Then glue all the pieces and place under a book until the glue is dry.

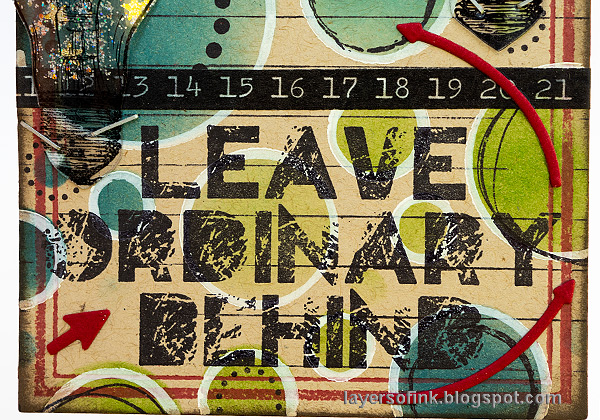
The tag was die cut with Tim's Framed Tags. Ink the die with Archival Ink Red Geranium before die cutting. It was stamped with Simon Says Stamp Ledger Paper Background stamp.

Ink with Distress Ink through Simon Says Stamp Mix and Match Circles stencil.

Clean the stencil and place it back on the tag. Trace around the circles with a white paint pen.

Stamp the sentiment with black ink and stamp circles from Simon Says Stamp Mix and Match Circles stamp set on some of the circles.

Stamp the lightbulbs from Tim's Curiosity Shop on Wendy Vecchi Clearly for Art Modeling Film. Cut out, heat with a heat tool and shape the bulbs. Add Nebula Stickles Glitter Gel to the back.

Glue the globe to the background and draw a circle around it with a black marker. Staple the lightbulbs to the background.

The stamp in the circle in the upper right-hand corner is meant to be the sun.

The globe is very shiny, as you can see here, with the acetate in the background and the layers of embossing powders.

I placed some of the arrows so the pointed to specific places. The arrows are die cut with Vault World Travel.
The main sentiment comes from Tim Holtz Random Quotes. I also added some design tape Trims to the tag.

The tag is quite dimensional because of the lightbulbs / hot-air balloons.

The techniques can be used for other dies and stamps too and for other types of projects and themes.

Thank you so much for stopping by here today!
Anna-Karin
Supplies:
* Please note: the links are affiliate links, for which I receive a small percentage of sales generated by the link, at no extra cost to you.
* Please note: the links are affiliate links, for which I receive a small percentage of sales generated by the link, at no extra cost to you.
No comments:
Post a Comment
Thank you so much for leaving a comment! Happy Crafting!