Hi crafters! Today I have a fun resist background technique to share with you.
Please note: this post has affiliate links, for which I receive a small percentage of sales generated by the link, at no extra cost to you.
Inspired by music is our theme this week at the Simon Says Stamp Monday Challenge Blog. I hope you will join us! Don't miss the lovely project by our May guest designer Cassie Lynch aka mk_knits into the Designer Spotlight.
I used Tim Holtz Concerto stencil for the background and wanted a textured resist. After having applied texture paste, I got the idea of trying to do a resist technique with Sizzix Luster Wax and really liked the result.
Apply Ranger Texture Paste through the Concerto stencil with a palette knife.
When the paste was dry, I placed the stencil back and sponged white paint on the design. You can also mix a little white into the paste to begin with.
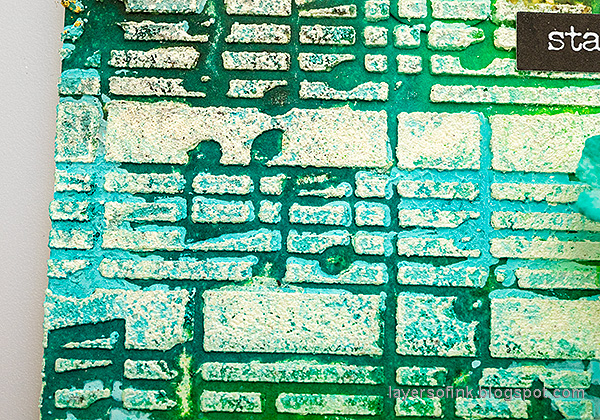
When dry, apply Sizzix Ivory Luster Wax over the design with your finger. Don't worry about getting a perfect result, but try not to get too much wax in between the texture paste.
Mist with Distress Spray Stains and blend by misting with water. The wax will resist the spray, creating this cool, colorful, textured and shimmery background.
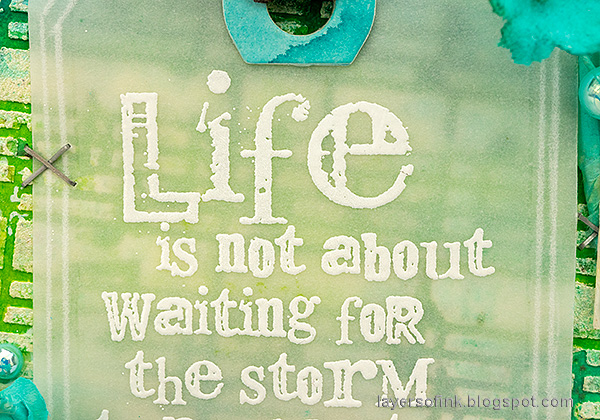
The tag was die cut from Tonic Vellum using Tim's Framed Tags. I flipped the tag over and placed it on foam. Draw two borders using a ruler and Simon Says Stamp Place and Score Embellishment Wand.
The sentiment comes from Tim Holtz Good Thoughts and was white embossed on the vellum tag. Here you can also see the white borders better.
I also applied a tiny bit of Sizzix Gold Luster Wax.
Before painting the dry paste with white paint, I started doing the same thing with gesso, but too much of it soaked under the stencil. However, these ended up being my favorite areas of the background, since the gesso which ended up under the stencil created a second resist effect. The ligth blue areas here are where the gesso had ended up.
I also added two Small Talk sentiments.
There are also three strips of Design Tape Trims in the background.
I hope you will join us this week in our Inspired by Music challenge. You have a chance to win a $25 gift voucher to do some fun shopping at Simon Says Stamp. You have until Monday 8am Ohio time. 1pm UK time, 2 pm CET to join in.


What an amazing and well made tag. I love everything, the idea, the textures and the colors. Thank you for a beautiful inspiration
ReplyDeleteThis looks amazing! Cathy x
ReplyDelete