
Hello friends! I am so happy to take part in the Simon Says Stamp blog hop for the new Let's Connect collection. You should have come here from the very creative Daniel West.

Let's Connect is full of beautiful stamps, dies, stencils, sequins and printed products. They are very versatile and can be used for many occasions. You can see the full release here. If you use the code GLUE you will get a Gina K Designs Dot Runner with your order. This promotion will expire on 8/9 at 11:59 pm EDT.

I made an art journal page and a tag for the hop, with techniques combining inks and colored pencils. The techniques work on any kind of project.

My first project is an art journal page, but you can easily turn it into a card. I used the Spring Flowers background together with the Large Outline Happy. Lately, I have had fun combining Distress Inks with colored pencils, which is lots of fun and you can do it in many ways. I worked on a burlap page in Dina Wakley's Blue Edition Media Journal.

These are the products from Let's Connect that I will be using today: Spring Flowers Background, Large Outline Happy, Poppy Stem and Sunny Smiles. I am very happy to have three of my own designs in the Let's Connect release. I designed one of the stamp sets - Anna's Flowers - and two of the background stamps - Crackle Background and Reverse Crackle Background. It is so exciting to see other stampers creations with my stamps. The stamps are on their way here and I am looking forward to stamping with them. I happen to love crackle backgrounds. They can be used for entire backgrounds or just to add a little texture to something. Or how about crackled letters or die cuts?
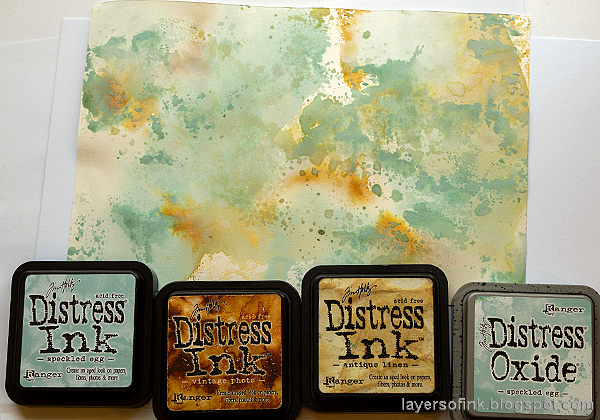
I smeared Speckled Egg, Antique Linen and a little Vintage Photo on a non-stick craft sheet, misted with water and pressed watercolor paper into the ink. Let dry and repeat. After that I did the same thing, but with just a little Speckled Egg Distress Oxide ink, giving spots of chalky blue.
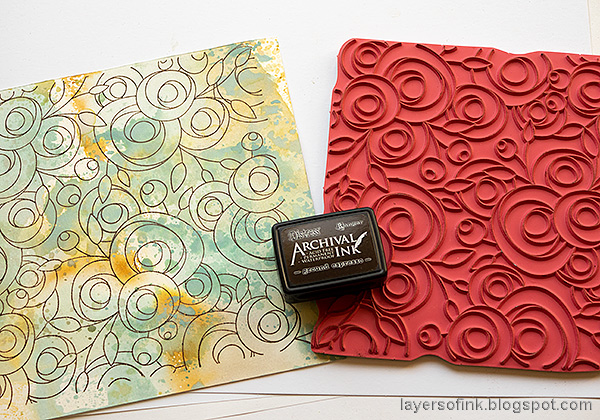
Stamp the Spring Flowers background with dark brown ink on the dry background.

I used Prismacolor pencils to color the flowers. Pick out shades of blue and turquoise. Start with something looking a bit like this, applying darker shades towards the inside of the petals.

Add a darker blue and then blend them together with a white pencil. Let some of the background show through. I worked quite fast and didn't worry too much about the details. Some of the stamped lines with disappear, but that just adds to the look.

Continue until you have colored the whole background. If you want to you can stamp with a light ink, such as Pumice Stone or Antique Linen and do no-line coloring instead.

Splatter with a little White Gloss Acrylic Spray. Unscrew the cap and tap the end of the spritzer to create splatters.

Die cut the Large Outline Happy from White Diamond and Blue Ocean glimmery cardstock. I really like word dies since they are so versatile and useful.
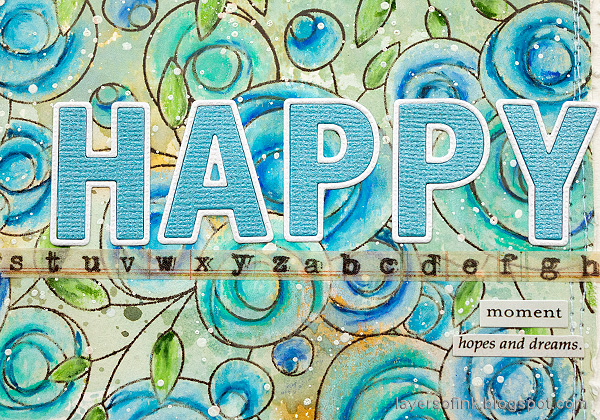
Assemble the title and glue to the background. I completed it with two Clippings Stickers. There is also a piece of Tim Holtz Design Tape. The glimmery cardstock is very pretty. It is hard to see the glimmer on this photo.

Distress the edges and mat on another piece of watercolor paper. Stitch around it with a sewing machine. As you can see, I worked quickly when coloring, aiming for a lose look.


And the summer sun sure shines today!

My second project is a bright tag, using the Poppy Stem die and the Sunny Smiles stencil set. I used lots of ink and color on this one. We had a very warm day yesterday when I created this, so the weather influenced my projects, a cooler blue for the morning, and this warm tag for the afternoon when it was starting to get way too warm in my studio.

Start by die cutting three Poppy Stems from heavystock paper.

Ink them with Distress Ink using an ink-blending tool.

Add color and details with colored pencils. The Distress Ink gives you a base color and with the pencils, you can add shading and details.

Finally, I added some details with a black pen and highlights with a white gel pen.

Ink a tag with yellow and a little green.
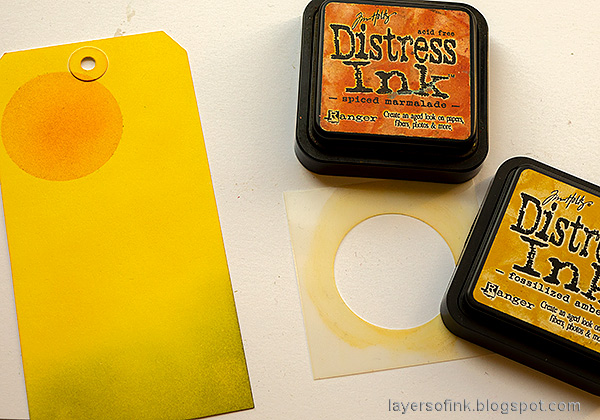
Use the large circle stencil from Sunny Smiles and ink with Fossilized Amber and Spiced Marmalade.

Use the line circle stencil and Spiced Marmalade to add the rays. Die cut the green area with the SSS Stitching Panel and remove some, but not all of the dots.

Stamp grass and sentiment from Thoughtful Flowers.

Use the stencil with the two dots from Sunny Smiles together with white acrylic paint to add dots to the background.

When the paint is dry, repeat with Moon Dust Stickles, creating glittery dots. Use a palette knife to apply the glitter glue.

The sun is a great place for a sentiment, or you could add the smiley face which is a part of the Sunny Smiles stencil set.

The white paint makes the glitter dots a little brighter and also gives an outline.

If you want a less scribbly look to your flowers, just skip the part with the white and black pens.

Bend the stem a little to make the flower face another way.
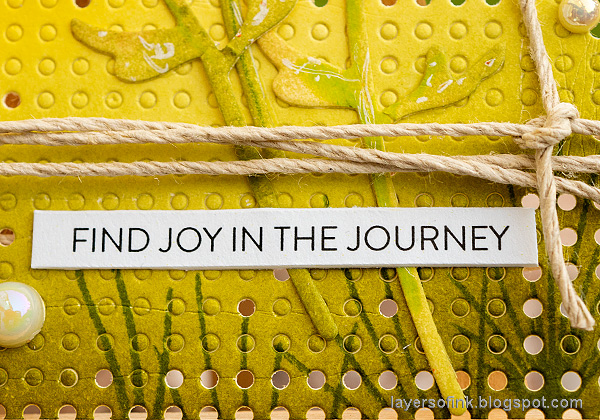
I like the texture from the Stitching Panel. The sentiment comes from one of SSS Sentiment Strips 4.
There are of course prizes to be won, and at each stop on the hop SSS is giving away a $25 coupon, randomly drawn from those who leave a comment. The winners will be posted post on the Simon Says Stamp store blog on Wednesday, the 12th of August.
Your next stop on the hop is my friend Karin Åkesdotter and she will show you wonderful card inspiration.
Here are all the stops along the hop:
Anna-Karin Evaldsson (you are here)

Thank you so much for taking the time to visit my blog today!
Happy crafting!
Anna-Karin
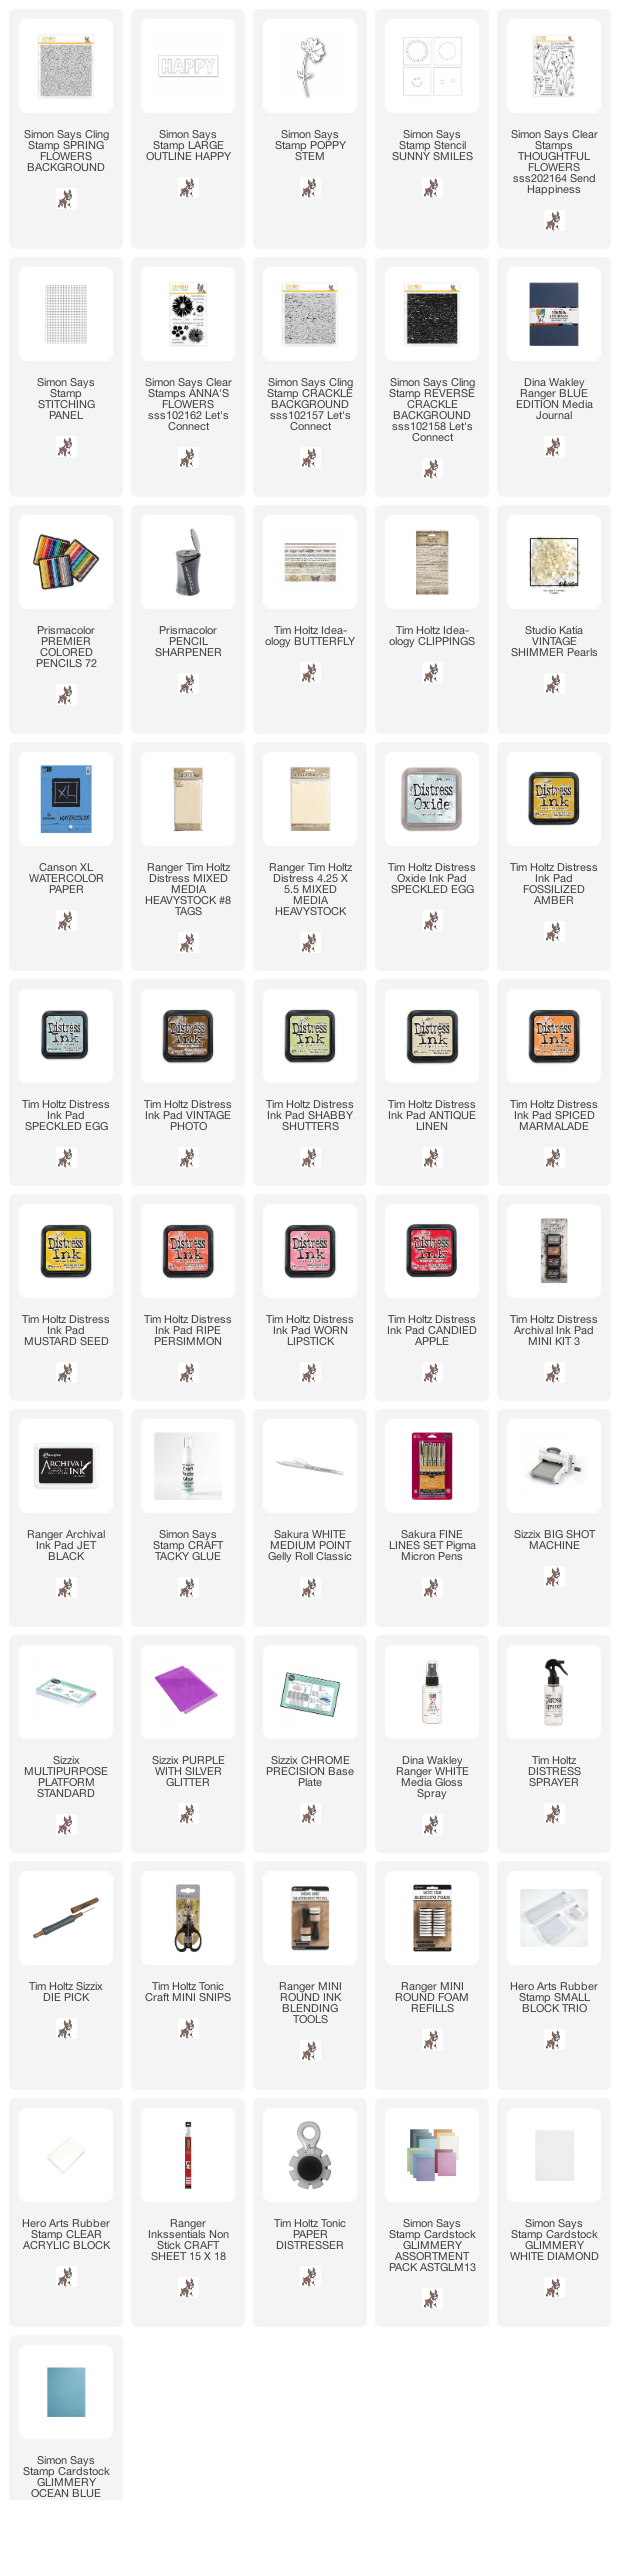
Supplies:
* Please note: the links are affiliate links, for which I receive a small percentage of sales generated by the link, at no extra cost to you.
* Please note: the links are affiliate links, for which I receive a small percentage of sales generated by the link, at no extra cost to you.
* I added the three products I designed to the list too.
Your step by step pics are amazing. Love the flower background
ReplyDeleteYour tag is so bright & happy! Love your crackle stamp too by the way, congratulations!
ReplyDeleteThank you so much! I am so glad to hear you like the crackle stamp!!
DeleteI LOVE that flower background stamp! Both your journal page and tag are beautiful. I am new to a lot of these techniques so I really appreciate you showing how exactly you coloured the flowers. I thought you had used Gamsol to blend so to see it was a white pencil is so cool!
ReplyDeleteThank you so much! It works great with the white pencil! My bottle of Gamsol got missing in a move and since then I used a white pencil instead.
DeleteAnna-Karin, your pages are always so beautiful! I get so much inspiration from your blog, I keep every post in my inbox! This floral bg and the crackle bg stamps are my favorite items in this release -- can't wait for them to arrive -- so versatile!
ReplyDeleteThank you so much for your sweet comment! And I am SO happy to hear that you like the stamps.
DeleteYour projects are always so beautiful, Anna-Karin! Love your techniques.
ReplyDeleteHi, Anna-Karin -
ReplyDeleteYour work is spectacular! I love the way you explained the process, too... from the watercolor to the stamping to the coloring, the spattering, wow! Please keep the videos coming!
Wonderful!! Thank you for the step by step instructions. I always love seeing what you do with each release. You really did turn that background stamp into a must have!
ReplyDeleteI love what you did with that background stamp it was amazing!
ReplyDeleteWow! On the tag the flowers look so real.
ReplyDeleteLove your art journal page and your tag. These are artistic and beautiful looks created from these products with the help of your talent!
ReplyDeleteBright and fun Anna-Karin!! TFS
ReplyDeleteOh my you are inspiring and creative. I love your work.
ReplyDeleteThe first card makes you think of
ReplyDeletefun and party. Lots of movement.
the flowers are beautiful.
thanks for sharing
txmlhl(at)yahoo(dot)com
Beautiful projects! Love seeing how they were created! Thanks for sharing them!
ReplyDeleteSome flipping amazing tips and ideas in this post!
ReplyDeleteSuch an awesome art journal page and tag. Love the colors.
ReplyDeleteThanks for sharing.
Lovely set of projects. TFS tips and ideas.
ReplyDeleteI love Prismacolor pencils. Glad to see the beautiful results!!! Thanks for sharing the wonderful techniques on the background stamp!!!!
ReplyDeleteSo beautiful and whimsy looking! I am in love with that yellow summery tag!
ReplyDeleteAll your creations are wonderful. Thanks for sharing in detail how you achieved your looks!
ReplyDeleteWonderful use of Distress Inks. Fan of Tim Holtz.
ReplyDeleteMelissa
"Sunshine HoneyBee"
Wonderful tutorial and I especially love that spring flowers background.
ReplyDeleteYou have a wonderful talent for color! Love the swirly background florals and the deep shades of the die cut florals!
ReplyDeleteLove your bright, bold and colorful style. The floral background is wonderful. Thanks for sharing.
ReplyDeletegreat cards love the bright colors
ReplyDeleteGreat creations - wonderful colors! And I love those Crackle backgrounds you designed!
ReplyDeleteWow!!! Amazing projects!!! I love how you used the cheek stencil just to make dots!! Very clever!!!
ReplyDeleteWow! Such fun projects! I love the new release. It is just fabulous!
ReplyDeleteI love your mixed media project. Everything you have designed is gorgeous.
ReplyDeleteWell done!
ReplyDeleteNeed to pull out my colored pencils!
ReplyDeleteAll the details in your Happy card. i'm going to have to try that out! And i was just looking at some shipping tags on my shelf that i got probably 20 yrs ago when they were all the rage then. I love the idea of using they die on the bottom.
ReplyDeleteStunning work, love the colors you used in all of them. Thanks for sharing.
ReplyDeleteWow - I absolutely love your mixed media style. Beautiful cards.
ReplyDeleteLove the HAPPY die cut!
ReplyDeleteWonderful projects, Whoa!!
ReplyDeleteThank you for sharing the detailed technique instructions. Both projects are amazing.As soon as I finish picking tomatoes, I am trying out some if your techniques! Happy art-ing!
ReplyDeleteI love your happy tag and the colors! It is inspiring. Thank you.
ReplyDeleteAll your cards are gorgeous. There are so many wonderful products in this fantastic release, but the Spring Flowers background is definitely one of my favorites.
ReplyDeleteI love how you went big and bold with color and texture! Shaking things up and coloring outside the lines is so freeing. Thanks for sharing these fabulous cards. Have a great weekend.
ReplyDeleteImpressive! You are very talented.
ReplyDeleteLove your projects! Your first card reminds me of a scrapbook layout. Love the colours and textures
ReplyDeleteI wouldn't have guessed that you used blue colored pencils. It looked like paint. COOL techniques you showed!
ReplyDeleteVery pretty card and tag!!
ReplyDeletelove that bright yellow tag!
ReplyDeleteYour tag is amazing. All the detail and colors...awesome!
ReplyDeleteAbsolutely beautiful I only wish it was a video!
ReplyDeleteYour cards are so incredible! Amazing and a feast for the eyes. I feel like I've just been to a fantastic art class. Well, I have been!
ReplyDeleteI like ever little detail with these fantastic products.
Your journal page shows how versatile the stamp is, and the card is stunning with it's bright and contrasting colors! Gorgeous!
ReplyDeleteStunning and beautiful!! I can't even pick a favorite.
ReplyDeleteBeautiful card and projects!!
ReplyDeleteVery pretty cards and journal sheet-love the doodles on the flowers-it adds so much dimension.
ReplyDeleteYour coloring and backgrounds are soooo unique! I LOVE the blue one!
ReplyDelete2 great projects. Thanks for a great add to this wonderful blog hop!
ReplyDeleteLovely projects. Love multi media project.
ReplyDeleteSimply beautiful. Thanks for sharing
ReplyDeleteLove the slimline cards
ReplyDeleteAwesome projects. You are so talented. Thank you so much for all your great ideas.
ReplyDeleteLove your cards! Your crackle backgrounds are fantastic!
ReplyDeleteI am so impressed by your blue floral page and your tag. Incredibly projects. They look like a lot of fun. Really fabulous!
ReplyDeleteWow!!! I love your journal page. The coloring of the background is stunning.
ReplyDeleteGorgeous journal page and tag! Just lovely! Thanks for sharing.
ReplyDeleteLovely..just lovely.
ReplyDeleteYour Art Journal page is really stunning...I so love how you colored that gorgeous background stamp! And your tag is equally gorgeous! Anna-Karin, you are very creative and very talented! Thank you for sharing!
ReplyDeleteYour designs are so eye-catching and are stunning
ReplyDeletebeautiful work
ReplyDeleteYour card is gorgeous! Then, I saw the tag! It is eye-popping with those beautiful bright colors!!!! Fantastic!
ReplyDeleteLove your tag, the colour and stamping combo are simply stunning!!!
ReplyDeleteFabulous projects. Thanks for sharing the step by step tutorial too!
ReplyDeleteThank you for the tutorials! The tag is so bright and beautiful.
ReplyDeleteAll great cards, with great instructions. Would love seeing the crackle and reverse crackle in a side-by-side comparison & ideas for designs.
ReplyDeleteSure can tell you are a talented mixed media gal and I LOVE this. My mixed media experience is still wishing I could do what I'm watching and in awe of the beautiful textures and composition! What made those poppies "thicker"? Don't think it's glossy accents. I really enjoyed this and hope to find your videos. Thanks!
ReplyDeleteYour sunshine tag blew me away!! You always create amazing projects and I learn so much from your step-by-step tutorials.
ReplyDeleteSo very colorful.
ReplyDeleteBeautiful cards!!
ReplyDeleteBeautiful art journal page and tag! Love the pretty floral designs and the colors!
ReplyDeleteWonderful art journal and tag, love the bright colours on the tag.
ReplyDeleteFun and cheery art work! Love your detailed instructions. Thanks for sharing your awesome art talents!
ReplyDeleteI love those soft blues and greens against the burlap background, and how the word stickers extend out onto that background too. The tag is full of fiery summer colour - fabulous!
ReplyDeleteAlison x
Lovely projects. Your journal page is amazing. Thanks for providing the great details for both your projects.
ReplyDeleteGreat projects!!!! Loving the bright yellow on the tag! Thanks for sharing.
ReplyDeleteFun to see your process! The colored pencil details add a lot!
ReplyDeleteWhat a wonderful journal page and tag-- it took me extra long to view your post as I kept finding something new each time I looked at them, w/ all the textures, subtle stamping and colors-- just brilliant how each element works together but the resultd don't
ReplyDeletelook crowded! I'm in awe. Thanks so much- Be Well
I love your use of multiple mediums. I love the way you colored the background stamp.
ReplyDeleteI am so in love with this outline happy die, and the design of your poppy tag is wonderful.
ReplyDeleteI love the poppy tag. It is striking!
ReplyDeleteOMG!! I love your journal page and tag!!
ReplyDeleteTYSM for sharing! I learned something new... using colored pencils over ink! Brilliant!
ReplyDeleteYour projects are absolutely amazing!! Thanks for sharing!! New subscriber!!
ReplyDeleteI am always in awe of your creations and the tag and journal page is no exception! Thanks so much for the step-by-step directions and photos. I can’t wait to try some of your techniques!
ReplyDeleteLove the tags and the distress ink colors.
ReplyDeleteThanks for sharing the details with your pictures!
ReplyDeleteAnna-Karin, in my mind, your two stunning creations take the cake! Best I've seen on this hop. Love love your journal page with those yummy colours & the tag gives a feeling of warmth & sunshine, for sure. Would love to see a video of you creating the journal page.
ReplyDeleteI love using my Prismacolor colored pencils but have never tried them with Distress Inks! Thanks so much for sharing your gorgeous work and steps in the projects!
ReplyDeleteThe colours on your page and tag are spectacular, so rich and vibrant. Congrats on your stamp set and the fab crackle backgrounds, they are my fave of this release.
ReplyDeleteYou've presented such a wonderful variety of colors and styles! That floral background stamp is great!
ReplyDeleteWonderful journal page and tag. Nice to see how it’s done. Thanks for sharing this
ReplyDeleteI love your color choices! Beautiful!
ReplyDeleteNice projects. Thanks for the inspiration and sharing.
ReplyDeleteBeautiful projects, so much time and detail taken with them. Thank you so much for sharing with us.
ReplyDeleteNice mix of elements. I like the textures and layers.
ReplyDeleteThese are beautiful! I love the colors you chose.
ReplyDeleteBeautiful projects! I love how you colored the flowers on the tag
ReplyDeleteThank you for the inspiration! I needed it.
ReplyDeleteI love both your projects. I also love your choice of ink colors. Thank you for sharing them.
ReplyDeleteFantastic projects Anna-Karin! Love that floral background! The coloring is awesome! The layers are amazing on the tag. Great textures too! That sun image is so sweet. Thank you for the inspiration. Be safe and God bless!
ReplyDeleteYour journal page and tag are so pretty!
ReplyDeleteTHANK YOU for showing and telling us all the details of your projects. They are beautiful!!! Too bad you didn't have the crackle stamps to create with. They are sure to be a favorite! Thank you!!!
ReplyDeleteSWOON!! Such a BEAUTIFUL Projects!! THANKS SO MUCH for sharing and have a FABULOUS WEEK!!
ReplyDeletegorgeous creations - I love the textures of your wonderful journal page!!
ReplyDeleteI ABSOLUTELY LOVE THE CRACKLE STAMPS!!! Both of these projects are filled with fabulous, new, and brilliant techniques!!! I really adore how you combined the use of colored pencils, black and white ink to add detail to your stamps!! I can’t wait to try it. And the sewing around the edges is shabby chic! Wonderful textures, colors and embellishments on each piece are unique, effective and make your projects absolutely perfect!! Thanks so much for the great ideas and inspiration!!
ReplyDeleteSo many fun cards.. loved them..thank you for sharing all of them!!
ReplyDeleteMy comment above
ReplyDeletewow, absolutely stunning!
ReplyDeleteGreat journal page and tag. I love the colors you chose for the flowers on the tag.
ReplyDeleteLove the blues & greens of the first card!!! thanks for sharing.
ReplyDeleteYour projects are so creative and gorgeous!!
ReplyDeleteBright and cheery colors on the tag and flowers.
ReplyDeleteVery creative, thanks for sharing!
Awesome projects! Thanks for sharing!
ReplyDeleteVery nice cards. Love the "lose" effect and smile from ear to ear at your "sunshine". hope your part of the world is Sunny.
ReplyDeleteThank you for sharing all your techniques! Your artwork is beautiful! So many wonderful ideas here to enjoy! So cool to add coloring pencil. Thoroughly enjoyed my visit here!
ReplyDeleteWOW Anna-Karin :) I L.O.V.E. your mixed media projects!!! Way to show off what this new release can do! Amazing!!! Thanks for inspiring me :)
ReplyDeleteWow!!!!!! These are Amazing!!!!!’ So beautiful!!!!!! I love the Crackle backgrounds you designed!!!!! So amazing!!!!!!
ReplyDeleteBeautiful projects
ReplyDeleteLove both the card and the tag!! And thank you for sharing your talent!!
ReplyDelete