
Hello friends! I hope your weekend was good! I did the last of our decorations for Christmas and got a little tree. Leo loves to help decorate the tree and this year he managed to place the decorations over a larger area of the tree. Last year, our tree was very heavily decorated in one small area.

It is Monday again and this week we have a Cityscape challenge at the Simon Says Stamp Monday Challenge Blog. Don't miss the wonderful project by our December guest designer Autumn Clark, with her blog SewPaperPaint.

I didn't make an entire cityscape, but was inspired to focus on just one part of a city, namely people's homes, and what an important part that is. So here's a cosy home inside a mini snowglobe. Now and then it is fun to do a miniature or really small project and this one is just 1.7 in tall.

I die cut houses, trees and a fence from kraft stock paper with Tim Holtz Snowglobe 2 die set, and glued a piece of acetate for windows.
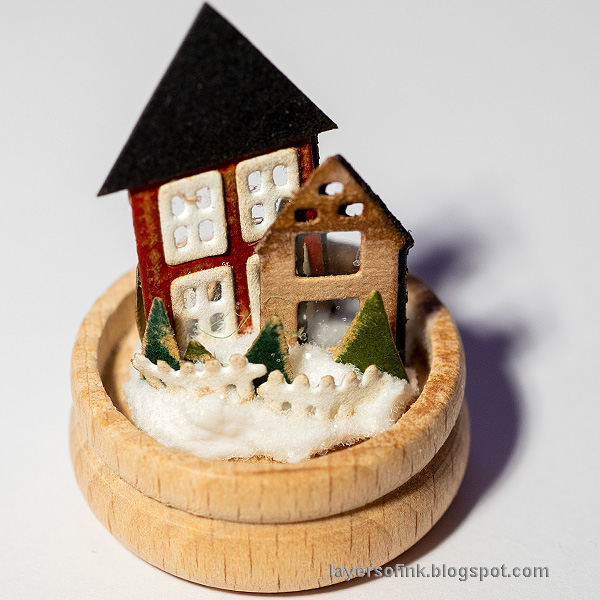
Add texture paste to the wooden base of a snowglobe and press the houses and trees into the paste. There are some trees at the back too. Sprinkle with Rock Candy Distress Glitter.

Pour some mica flakes into the glass dome and add a little bit of matte medium around the bottom edge. Adhere to the wooden base. If the texture paste isn't dry yet, you need to leave the snowglobe upside down until it is dry, to prevent the mica flakes from sticking to the paste. I added a bit too much mica flakes, and I think less will be better.
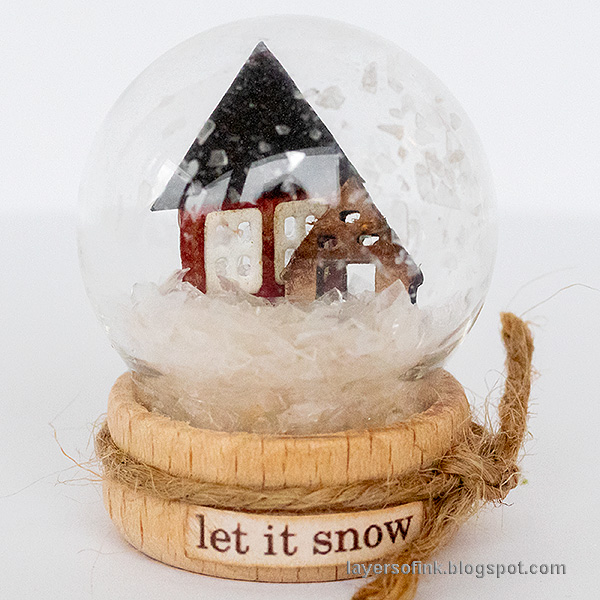
Here you can see that I added too much mica, if you shake the snowglobe and the mica ends up in the front, it looks like one very snowy garden.

Here's a close up of the icy and shiny look of the mica flakes.

If you leave the mica behind the houses after shaking it, the snow effect is better and it doesn't cover the trees and fence.
I hope you will join us this week in our Cityscape challenge. As always, you have a chance to win a $50 gift voucher to do some fun shopping at Simon Says Stamp. You have until next Monday 8am Ohio time. 1pm UK time, 2 pm CET to join in.


Do you use Instagram? If so please add #sssmchallenge so we can see your entries there too.


Thank you so much for taking the time to visit my blog today!
Happy Christmas crafting!
Anna-Karin
Supplies:
* Please note: the links are affiliate links, for which I receive a small percentage of sales generated by the link, at no extra cost to you.
* Please note: the links are affiliate links, for which I receive a small percentage of sales generated by the link, at no extra cost to you.
THAT is stunning Anna-Karin and a great tutorial. What a gorgeous snow globe. TFS!
ReplyDeleteMerry Christmas
Love this. Thanks for the inspiration. I wasn't quite sure what to put in these adorable snow globes.
ReplyDeleteThis is very cute. For such a tiny thing you sure got a lot of detail added to it. It's wonderful.
ReplyDelete