
Hello and welcome to my blog! I am so happy to take part in the blog hop to celebrate the Simon Says Stamp Diecember release. You should have arrived here from the very creative Karin Åkesdotter.

The Diecember release is huge and full of fantastic and versatile dies. There is also a free gift with every order (until supplies last), if you use the code THKU894, you get the Bold Thanks die. This promotion will expire on 12/8 at 11:59 pm EST.
I made two projects, an art journal page and a card, both are tutorials. As usual, the techniques work great for a whole range of different projects.

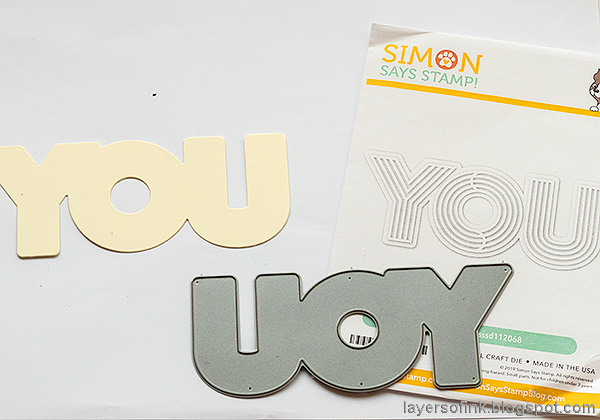
I love the big Lined You die and knew I wanted to make it the focal point of an art journal page. The word would also make a lot of impact on a card, especially since it is such a large die. I paired it up with a sentiment die and the beautiful Detailed Leaf Cluster die. The page was done on a cotton-rag page in my Dina Wakley journal. I used different types of papers to get an interesting effect: the rough watercolor paper in the background, gloss cardstock, and metallic paper.

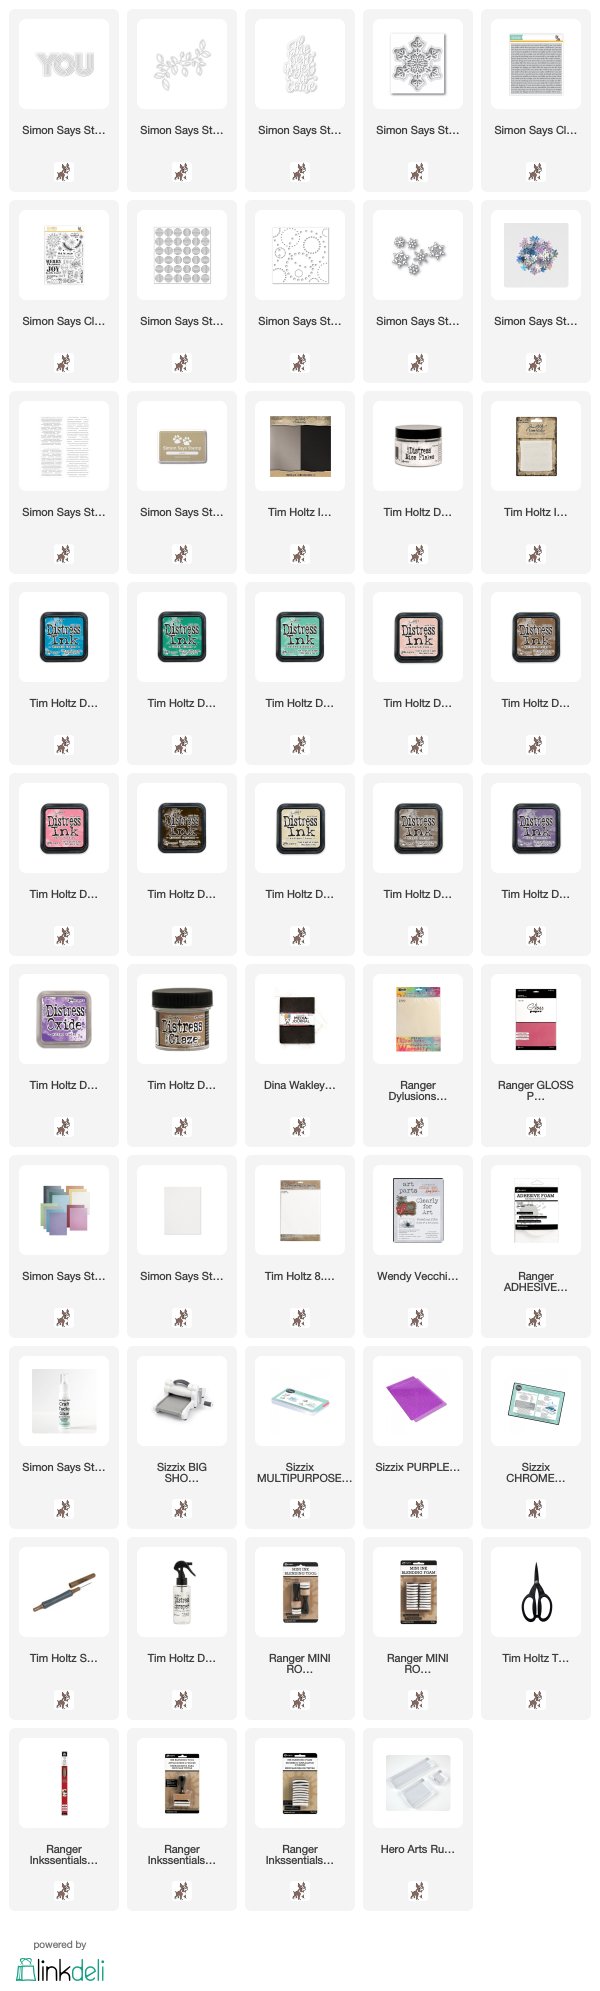
These are the Diecember products that I used for my projects: Lined You, Detailed Leaf Cluster, The Best Is Yet To Come, and the Shimmer Snowflake.

Start by inking a piece of gloss cardstock with Distress Inks, aiming for an ombre effect.

Die cut the fabulous Lined You from the inked paper.
Die cut the base piece from cream cardstock.

Ink with Distress Inks and an ink-blending tool.
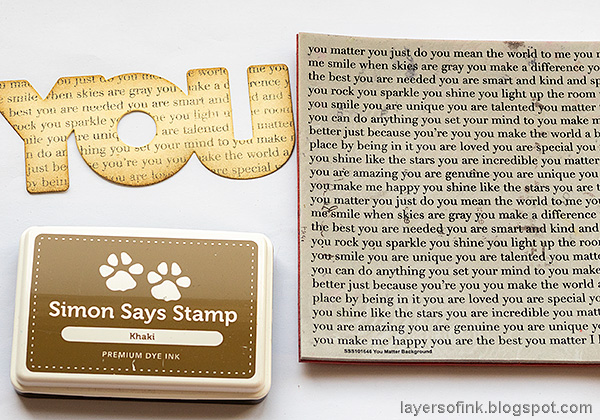
Stamp with the You Matter background stamp and Khaki ink.

Ink another piece of glossy cardstock.
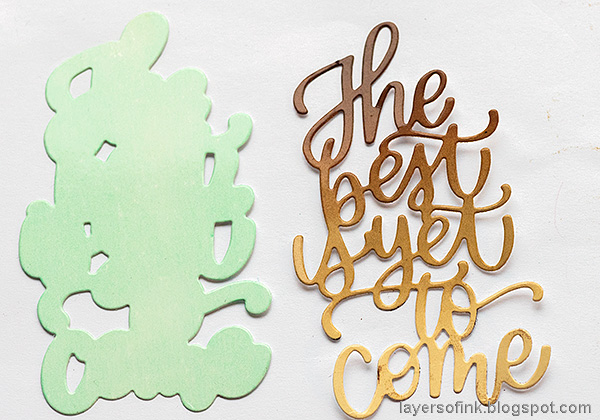
Die cut the Best Is Yet To Come sentiment from the brown ombre piece and die cut the matte from gloss paper. Ink the latter with Cracked Pistachio.
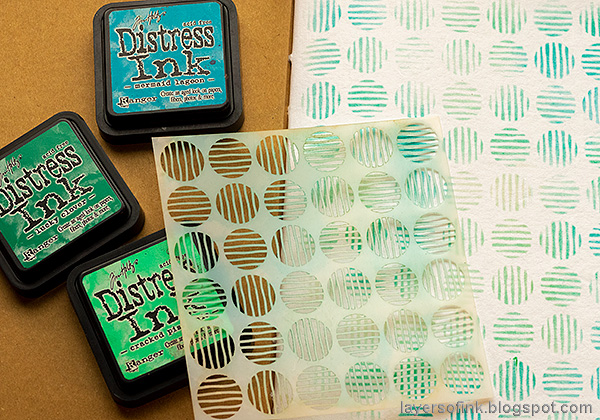
For the background, I used the SSS Lined Circles stencil and inked through it with Distress Ink.

Mist with water to give the inks a watercolor appearance.

When dry, ink with Ground Espresso through the Circle Dots stencil.
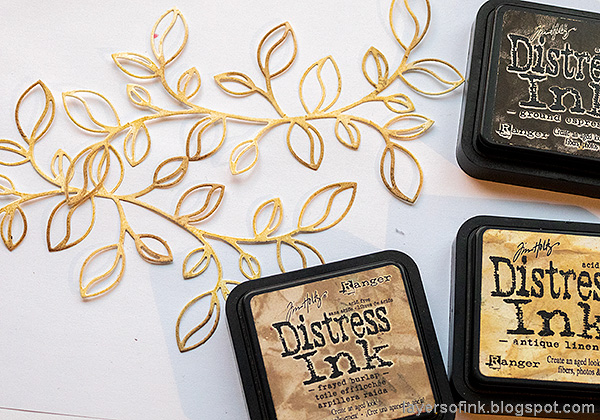
Die cut the Detailed Leaf Cluster from cream paper and ink with Distress Ink.

Die cut the branch from Champagne Metallic Kraft Stock, and glue the inked leaves on top, offsetting a little. The soft gold of the Champagne cardstock is really pretty.

I cut two sentiment from the SSS Sentiment Strips 4.
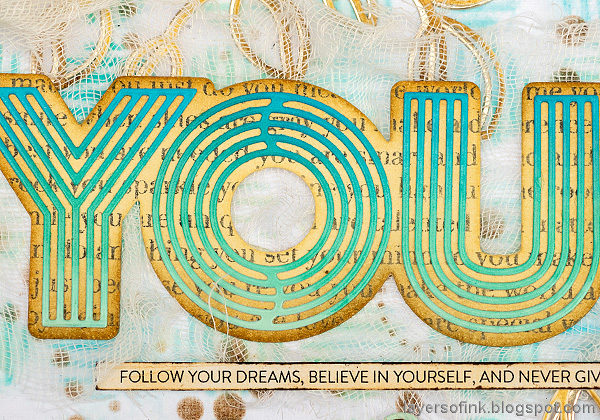
Glue a piece of cheese cloth to the background and then the Lined You. Isn't it such a cool die? I love it.

I don't know if you can see the effect of the gloss cardstock here. I like to add gloss paper to projects now and then, and dye inks, such as Distress Inks, look so vibrant on top of gloss paper. If you haven't tried it, I hope you will.

This sentiment is all gloss cardstock.

My second project is a winter or Christmas card. As you can see on this photo, the snow that we got last week has melted away. It is a pity since the world is so much brighter during the winter when there is snow. I used the beautiful and detailed Shimmer Snowflake die for this card. I made a shaker card with mica flakes, but you can also use small beads, glitter or sequins. Or a mix of several of these.
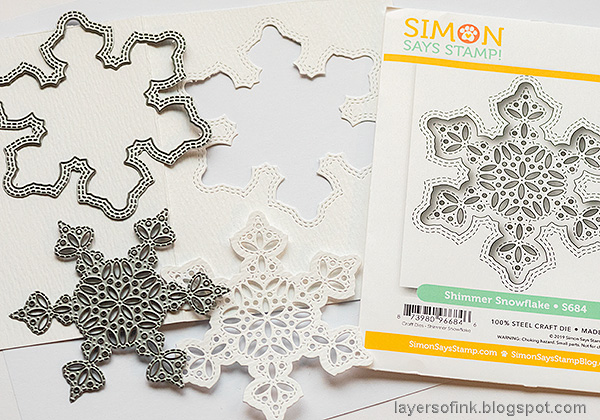
Start by die cutting the frame from the front of a piece of folded watercolor paper. The die cut the detailed part from the shape that you get.

With your finger, smear a little Distress Micro Glaze around the edges of the snowflake and around the edges of the card.

Smooch Distress Inks on a non-stick craft sheet, mist with water and press the papers into the ink. The Micro Glaze will resist the ink.

Later, I changed my mind about the colored snowflake and die cut it from SSS Glimmery Cardstock instead.

Glue a piece of acetate behind the snowflake window. Adhere foam tape on the inside of the card and sprinkle a generous amount of Distress Mica Flakes. Then adhere a second piece of acetate on top to seal the shaker.

Here you can see the cool look of the mica.

Die cut Stitched Flakes from a piece of watercolor paper, inked with the same inks as the cardbase.

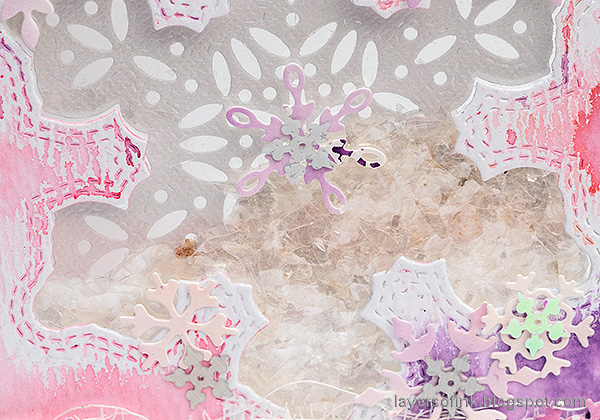
Glue the snowflakes and some Winter Flurries sequins here and there.
Glue the shimmery snowflake to the back of the shaker.

Here you can see the effect of the Micro Glaze, I love the random resist look that it creates.

The sentiment comes from the SSS Comfort & Joy set, and was stamped with Wilted Violet Distress Oxide Ink.

These snowflake sequins are cool, since some of the have an irredescent look, and the color shifts from white to pink.
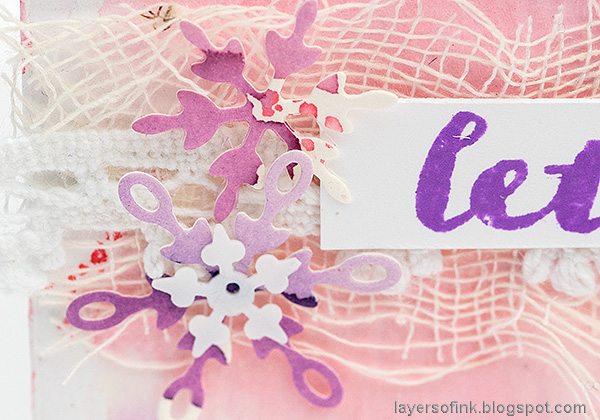
I used a piece of Mummy Cloth by Tim Holtz and some lace trim.

The stitched details on the die also become more visible because of the Micro Glaze, since the glace doesn't go into the debossed areas (i.e. the stitches).

Anna-Karin Evaldsson (you are here)
This is day 2 of the blog hop, and for more inspiration, don't miss the first blog hop that was on Monday. For even more Diecember inspiration, check out the SSS Diecember Gallery. You can also link your own projects made with the release and there are galleries for all SSS releases, and for the card kits too.

Thank you so much for taking the time to visit my blog today!
Happy Christmas Crafting!
Anna-Karin
Supplies:
* Please note: the links are affiliate links, for which I receive a small percentage of sales generated by the link, at no extra cost to you.
* Please note: the links are affiliate links, for which I receive a small percentage of sales generated by the link, at no extra cost to you.
Wow! You have amazing talent!! Love that shaker card!! Thank you for sharing!!
ReplyDeleteLOVE everything you created! Thanks for sharing your techniques and talent!
ReplyDeleteYAY Anna-Karin, I have finally managed to access your blog! I am working with a tablet at the mkment and it doesn'tlike me;)
ReplyDeleteAnyway, you are right, the techniques you have shared here on the Art journal page and card will work well on any project. The detailed leaf cluster looks amazing in gold on that page. I definitely need to remember your colour combos.
Beautifully done on both counts.
Beautiful projects!
ReplyDeleteYour cards are stunning!
ReplyDeleteAll your cards are amazing but I really, really love the snowflake! Just gorgeous!
ReplyDeleteWOW, the aqua and gold look amazing together. I never would have even tried that, but it's wonderful!
ReplyDeleteBoth projects are great. I love the beautiful colors and the lovely layering.
ReplyDeleteOoh that's a lot of effort into the journal page and card!! Beautiful! :)
ReplyDeleteYou really show the versatility of these dies with your amazing artistic ability. Great ending to this blog hop!
ReplyDeletestunning projects - LOVE how you made the amazing art journal page and card - awesome technique
ReplyDeleteYour backgrounds are fantastic! Thanks for the detailed description of the techniques used. So helpful.
ReplyDeleteWow! Beautiful Cards!
ReplyDeleteI am just loving the mixed media approach you used with these wonderful new products!
ReplyDeleteBoth creations are WONDERFUL!
ReplyDeleteLove the colours and creations. Appreciate very much you put up a fil tutorial with pictures:)
ReplyDeleteWonderful projects. Your art journal page is beautiful and I love the unique card.
ReplyDeleteThe card is fabulous. It's so
ReplyDeletedelicate and airy. The layout
is gorgeous. Love all of the gold.
thanks for sharing
txmlhl(at)yahoo(dot)com
I think its wonderful that you created an art journal page...the tutorial was wonderful and very inspiring...I never would have thought to distress the metallic card stock. So Pretty! Thank you for sharing.
ReplyDeleteShaker cards are my fave!
ReplyDeleteThe color combination and composition on your "YOU" card are just breath-taking.
ReplyDeleteSo much texture! These are great
ReplyDeleteWow!! Your cards are amazing!! I love how you used the snowflake die! Just gorgeous!
ReplyDeleteI love all the elements you used in making this ever so glitzy card! It is stunning. I forgot about my lonely little mica flakes sitting in the drawer. Thanks for the inspiration all the way around with this card creation!
ReplyDeleteGreat tutorials and gorgeous projects, thanks so much for sharing!
ReplyDeleteThe colors on your Let it Snow card took my breath away!!! Gorgeous!! I also really liked the way you cut the leaf die cut in half so all of it could be used on the card.
ReplyDeleteAMAZING INSPIRATION!! I LOVE all of the ideas!! THANKS for sharing and have a FABULOUS WEEKEND!!
ReplyDeleteLove the colours of your journal page and that snowy card is just stunning - love it!
ReplyDeleteBeautiful, colorful cards! Thanks for sharing.
ReplyDeleteJust lovely all of the cards you have created with this newest Simon release! simply amazing!
ReplyDeleteLove the backgrounds and the gorgeous snowflake shaker!!
ReplyDeleteLove your color choices--especially the aqua and gold--Lovely!
ReplyDeleteSo creative! I love the gold!
ReplyDeleteLovely projects.
ReplyDeleteLove the gold, your cards are all very beautiful. Awesome products and Die-cember release.
ReplyDeleteYou rocked this release!
ReplyDeleteSo many layers of AWESOME! I love how you did the "newspaper" YOU... just amazing colors!
ReplyDeleteAmazing cards! I especially love the detail of the first one.
ReplyDeleteWOW!! Love all the pictures of your creativity process!! Love the aqua and gold with the words!! So much fun for the eyes!!
ReplyDeleteLove the shaker with the snowflakes!!
Your cards are amazing!
Fantastic Die-cember release with wonderful creations! Thanks for sharing and your creativity!
Awesome cards! Love the way you combined several designs on your first card, and the snowflake die is just gorgeous!
ReplyDeletegorgeous - I love the use of all the different papers!
ReplyDeleteYour cards are fantastic. In love with the snowflake shaker.
ReplyDeleteWhat fabulous projects! The champagne metallic cs on the first one really pops and adds so much to the overall look. I like the way that the stencilled bg turned out, too!
ReplyDeleteYour snowflake card is just lovely in the shades of pinks and purples. How fun that you turned it into a shaker! :)
The multimedia looks on your cards is great. There is something about your first card that just draws me in. Not sure what element it is, it just works. Thanks for the inspiration. Merry Christmas
ReplyDeleteYou have so much going on in your cards but you put it all together so beautifully. And thanks for showing how to use the Distress Micro Glaze.
ReplyDeleteYour journaling page is Gorgeous!!! And I love that shaker card!!!
ReplyDeleteVery pretty snowflake card. I keep forgetting about using the Distress Glaze that I have, thanks for reminding us how handy it is. Lovely shaker card.
ReplyDeleteI enjoy mixed media, your snowflake card is beautiful! Love the new SSS dies!
ReplyDeleteThese look fantastic - love the mixed media look.
ReplyDeleteWow! Your work is amazing, love the card you made!
ReplyDeleteEnjoyed the fresh minty green with the sepia tones and metallic. I'm stealing that color pallette.
ReplyDeleteAwesome journal page and card! Love how you used the dies on your journal page. So creative.
ReplyDeleteThanks for sharing...
Wow, how beautiful and inspiring!! Love love love it!!!
ReplyDeleteI love the way you can create a collage of so many different designs and elements and it all works together. What an eye. Love that leaf cluster especially.
ReplyDeleteFun creations! So lovely!
ReplyDeleteReally love the step by step pictorial, love the art journal page
ReplyDeleteTHank you for all your very creative cards. I love them. And I love that they are the "norm". They are totally awesome!!!!
ReplyDeleteGorgeous cards and thanks for the step by step pics of your process
ReplyDeleteAbsolutely love your journal page!
ReplyDeleteGreat creativity. Thanks for sharing
ReplyDeleteLove that journal page--the gold really pops ! Thank you for sharing your talent.
ReplyDeleteThese are gorgeous! I love all of the detail you added :)
ReplyDeleteWELL! I was so crazy about the big YOU card with all the stenciling and layers and then when I scrolled down and saw the snowflake shaker card I nearly fell out of my seat! GORGEOUS!!!!!
ReplyDeleteWow, stunning cards! Amazing layers, textures and depth - gorgeous!
ReplyDeleteWow what a way to end the hop! Your cards are so fantastic! The one with the big you is really nice with all the different things on it and that color scheme is a very pretty one. The snowflake card is super cool with that background and that die is very nice.
ReplyDeleteWow this card looks so cool with the different products you used!
ReplyDeleteHi Anna-Karin :) Love to see these dies used indifferent settings like your journal page and shaker card.......beautiful and soooooo versatile!!! Thanks for the inspiration :)
ReplyDelete