
Hi crafters! I hope you had a good weekend! We were busy with lots of sport related activities, but I also managed to squeeze in a visit to an antique fair.


I made two tags this week, since I wanted to show two background techniques using Resist Spray and a single stencil. This is the same Gradient Dot stencil by Tim Holtz that I used on last week's project, so for even more inspiration on this stencil you can check out that post. There are also two smaller tags on each tags. Let's start.

I used Tim's Distress Resist Spray and first misted through the Gradient Dot stencil, onto watercolor paper. Take the stencil up, flip it around, and press it down on another area of the watercolor paper. You can even repeat this step one more time.

Die cut tags from the background. Smear Distress Inks on a craft sheet, mist with water and press the tags into the ink. Watch the resist magic happen. The tag to the right is the first misting from the step above, when misting through the tag. The tag to the left comes from when the stencil was flipped around pressed down on the paper. Both methods give a really cool effect.
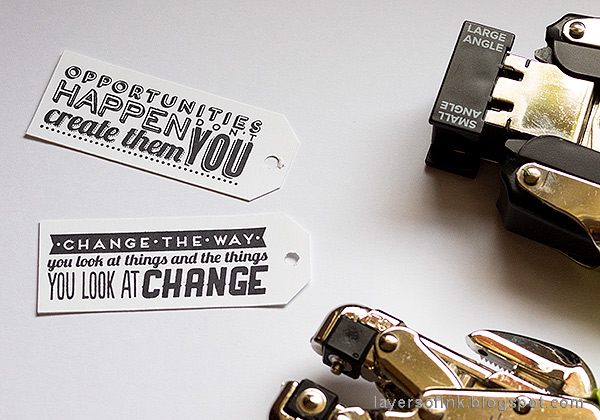
I wanted big, bold sentiments and stamped them with the Mini Motivation set on white cardstock. The We R Memory Keepers Angle Corner Chomper tool make it very easy to do your own tags. It cuts perfect angles in two sizes. For many years, I tried to cut these angles by hand using a ruler and a craft knife, and this method is so much easier. Punch holes with a Crop-a-dile.

I misted some Bouquet Flowers, so that they would coordinate with the tags.
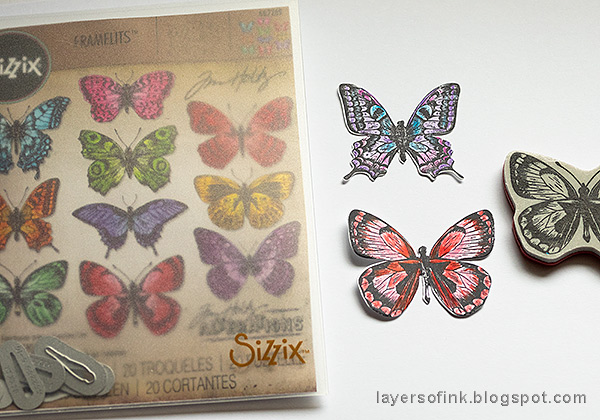
Stamp Flutter butterflies and color them with pencils. I used Prismacolor pencils. Die cut with the coordinating dies.

The first tag, with the white dots, and a mix of blue, teal and purple.
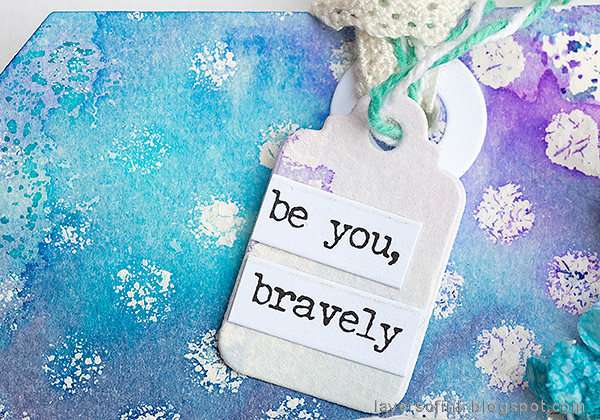
The small tags were die cut with Tim's Gift Tags set, from left-over inked papers.

I wanted pretty bold colors for the butterflies, so that they would stand out. Colored pencils work great for that, and are easy to use for the details.
Here you can see the cool textured effect from the Resist Spray. I will be back tomorrow with another project using the Resist Spray.

Here's the pink and red tag, with the flipped pattern on the background. This technique is also great for avoiding to waste left-over mist on a stencils. You can do it with colored mists too.

The butterfly was colored with the same shades of colors.

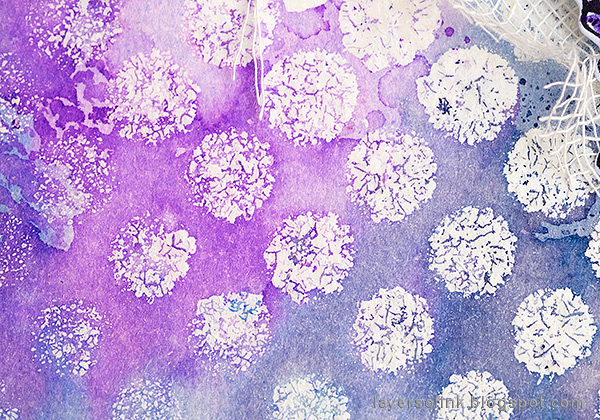
And a close-up of the resist background.

At the top of the tag, there was more mist on the stencil, which means that the dots aren't as visible. I love the unpredictable nature of this technique.

Some pretty flowers always give life and joy to a project.


Do you use Instagram? If so please add #sssmchallenge so we can see your entries there too.


Thank you so much for taking the time to visit my blog today!
Happy crafting!
Anna-Karin
Supplies:
* Please note: the links are affiliate links, for which I receive a small percentage of sales generated by the link, at no extra cost to you.
* Please note: the links are affiliate links, for which I receive a small percentage of sales generated by the link, at no extra cost to you.
Gorgeous tags Anna-Karin :-) I love how you used the distress resisit with the stencil, such cool backgrounds and the butterflies and details are so pretty, beautifully done :-)
ReplyDeletehope you have a fabulous time at the spring event tomorrow :-)
luv
Lols x x x
Absolutely BEAUTIFUL tags Anna-Karin, I love both methods you used. I am in the middle of cleaning my room but can't wait to get back in there to play. I'll have to try these.
ReplyDeleteBeautiful tags! Thanks for sharing...
ReplyDeleteBeautiful tags, Anna-Karin! Love the way you used the resist, it creates such wonderful texture with the color. I also really like how you add a little tag too. hugs, Maura
ReplyDeletebeautiful tags Anna-Karin, love your "don't waste the resist" technique, hugs kath xxx
ReplyDeleteThese tags are fabulous and I loved seeing the different background techniques. I especially liked what you did with the flowers. You are always full of innovative ideas!
ReplyDeleteFabulous double version! love both of your tags!!!! Colors are wonderful and I adore butterflies! Barbara
ReplyDeleteSuch gorgeous tags, Anna-Karin! Love that they are the opposites, what a fabulous effect. Hugs, Sandra
ReplyDelete