
Hello friends! I hope you had a good weekend and that you got some crafty time. We had spring in the air here, but the colder weather is probably coming back again. We are also looking forward to celebrating Leo's birthday this week. February is a big birthday month here. He wants to eat tacos and have a fire truck cake.

The theme for this week at the Simon Says Stamp Monday Challenge Blog is Vintage/Past Times, which is of course a favorite team for us all. Don't miss the project by our February guest designer Lucyna Marynowska, with her blog u Luli.

I wanted to do a photo project this week, and particularly something about my paternal grandmother, since I recently met an older relative who shared memories about her. My dad took this photo of my grandmother and one of her brothers-in-law. You can use any type of photo on this vintage style wall-hanger, or use a stamped image as the focal point instead. The wall-hanger is 7 x 7 in and has a lot of layers.

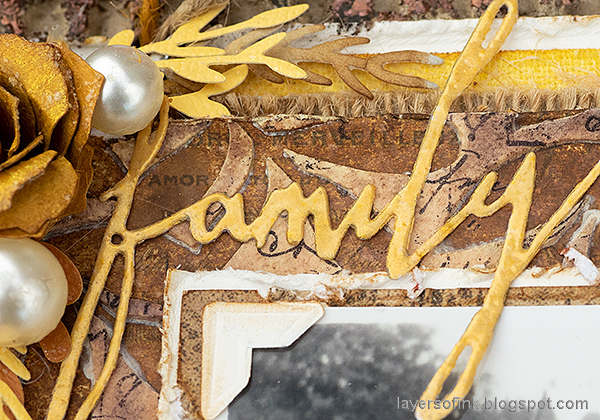
I started out with a patterned paper and the Leafy Frame stencil by SSS.
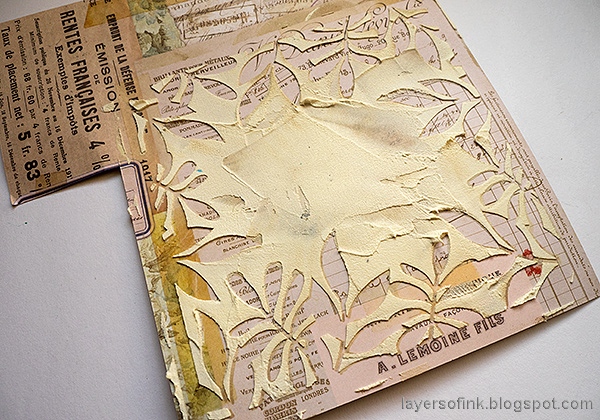
Mix a little paint into paste and apply with a palette knife. I started out using only paint and then changed my mind, which is why you can see a small paint shadow on many of the leaves.

When dry, mist with Distress Spray Stain. Use a paper towel to dab off stain from the paste areas.
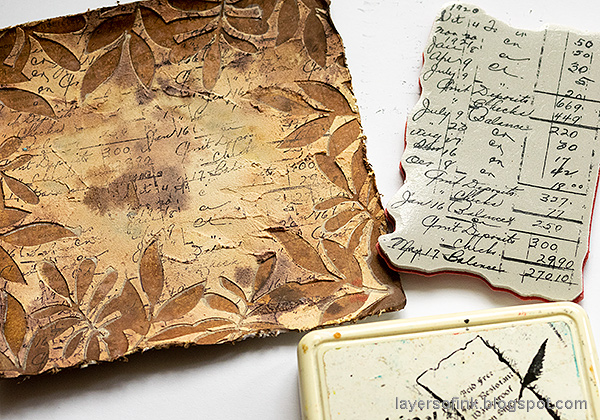
When dry, stamp with a script stamp. The stamp I used is from a receipt (as was the patterned paper), which works well, since my grandmother ran a shop.

Paint natural sticky-back canvas with watered down Mustard Seed Distress Paint. Or you could use yellow cardstock, but I wanted lots of different textures.
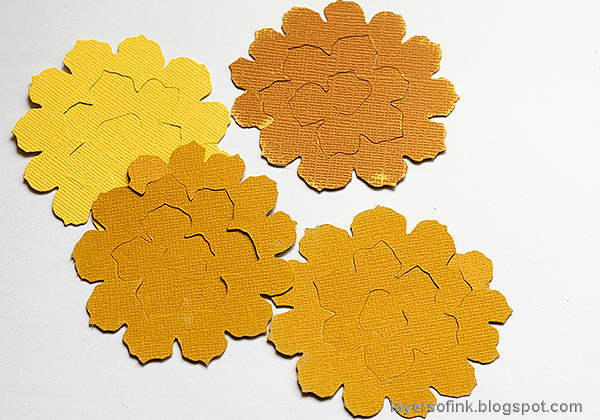
The roses were made with Tim Holtz's Tattered Pinecone die. Die cut from various shades of yellow. Sand slightly.

Use a pair of tweezers to roll the spirals into a rose shape. I used hot glue - if you use hot glue, be very careful not to burn yourself.

For extra shine, mist with Buttercup Mica Spray. I love the warm yellow shine you get from this mist.

The Mini Detailed Butterfly was die cut from patterned paper and white cardstock. I also die cut a word from white cardstock. Apply embossing ink and emboss with Marigold powder, which has a lovely yellow pearlescent shine.
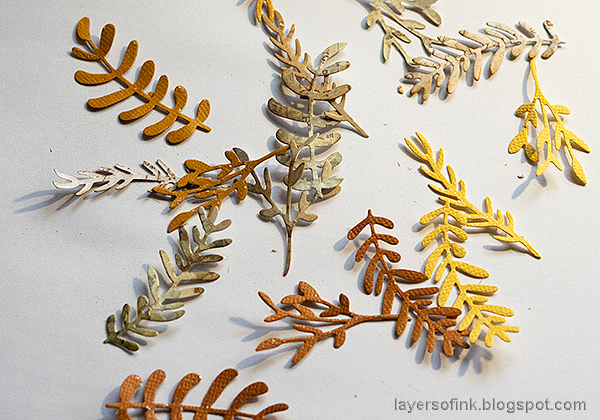
Die cut foliage using the Funky Floral 1 and Funky Floral 2 sets, from patterned paper and cardstock. It is a great way to use up scrap patterned paper.

Distress all the edges and layer together. Add two layers of watercolor paper, for even more dimension. Remove the top layer of a piece of cardboard to use as a base. Glue everything together with Matte Medium. Apply embossing ink along the edges and emboss with the cool Mixed Media Hammered powder.
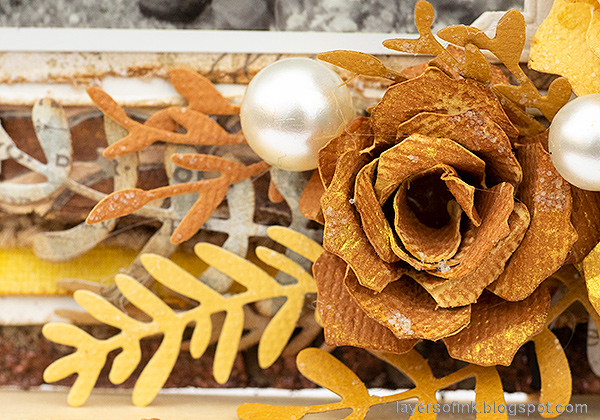
I also added a tiny bit of Stickles to the roses, and some baubles.
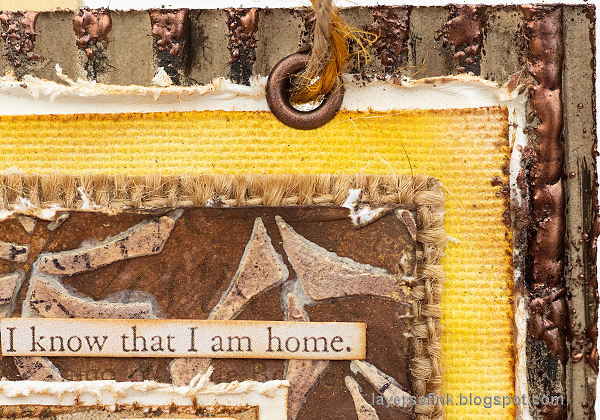
Here you can see all the layers better. The photo was layered on patterned paper and watercolor paper, then comes the leafy panel, a piece of burlap, the yellow canvas, another piece of watercolor paper and finally the cardboard.

I added photo corners to the photo, to give it even more of a vintage look. I also used a camera embellishment.

The Hammered powder gives a really cool effect. I used it on my Typography Tag too.

I never get tired of using dimensional flowers on projects.

Here you can see the shine from the mica powder a little better. It is such a quick way of adding shine and texture to a project.
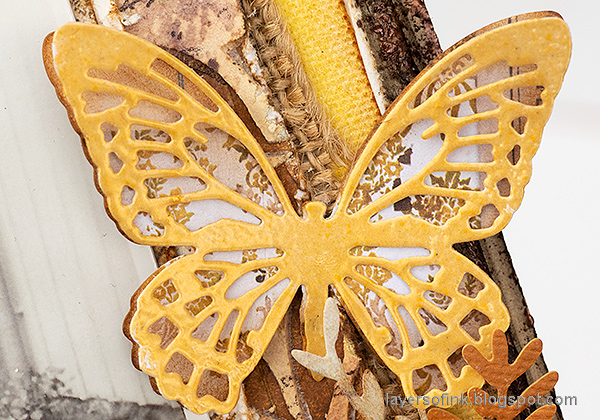
The detailed butterflies look lovely with the top layer being embossed. I used the same technique on my recent Typography Tag project too.
I added some journaling to the back of the wall-hanger, about memories of my grandmother.


Do you use Instagram? If so please add #sssmchallenge so we can see your entries there too.


Thank you so much for taking the time to visit my blog today!
Happy crafting!
Anna-Karin
Supplies:
* Please note: the links are affiliate links, for which I receive a small percentage of sales generated by the link, at no extra cost to you.
* Please note: the links are affiliate links, for which I receive a small percentage of sales generated by the link, at no extra cost to you.

What a fabulous photo and you have framed it beautifully! The colours and details are gorgeous!! LOVE it :-)
ReplyDeleteHope you have a great week
luv
Lols x x x
Gorgeous project Anna- Karin! The colours and style are fabulous and I love the photo!
ReplyDeleteLucyna xxx
This negative stencil looks so cool as a frame. I love how you gave it such a deep brown shades and that you mixed it with a warm and sunny yellows. Lovely and romantic panel. Hugs, Marzena
ReplyDeleteWow!!!! Another amazing piece of Art!!! LOVE!! How many wonderful details!!! Thanks so much for the inspirations!!
ReplyDeleteOh so stunning! LOVE the use of so many materials especially the canvas on the roses! LOVE the yellow too! So eye catchingly wonderful!
ReplyDeleteI love that you used an old family photo, Anna-Karin. Then, the yellow frame! oh my! Suddenly, yellow is becoming a favorite when I see how you've used it here with the canvas and flowers and all, in so many shades! Beautiful! and a very HAPPY BIRTHDAY to LEO!! Tacos are yummy and a fire truck cake sounds awesome! hugs, Maura
ReplyDeleteThis is stunning! And yes- what an excellent tribute to the past here. I'm always interested to see your colors and how you combine so many different products so skillfully.
ReplyDeleteWhat a beautiful wall handing! I love the colour palette, it looks so warm and inviting 😁. Happy weekend! J 😊 x
ReplyDeletebeautiful wall hanging Anna-Karin, I love how you made it look vintage but warm and spring like at the same time, hugs kath xxx
ReplyDeleteGorgeous wall hanging, Anna-Karin! Love the yellow with the browns, and so much details! It's really pretty! Hugs, Sandra
ReplyDelete