
Hi everyone! As you might know, I like to make my own storage boxes and today I have a photo storage tutorial to share with you. It can be used for other things too, such as stickers, clear stamps, tags and various smaller sized papers.
This month the Eileen Hull Inspiration Team is sharing projects made with some of their favourite Sizzix dies by Eileen. I have way too many favorites, and decided to use one of the new Book Club dies, the Stamp & Photo Storage die, which is very versatile. Versatile dies are often my favourites, since they can be used in so many different ways.

I always have a pile of photos on my desk, some of them are newly printed and others are photos I feel inspired to use or work with soon. This storage box with five compartments will keep them organized and protect them at the same time. You can easily add even more compartments and the box can be stored on its side too. The box is a perfect fit for 4 x 6 in photos, and is 3 in tall.
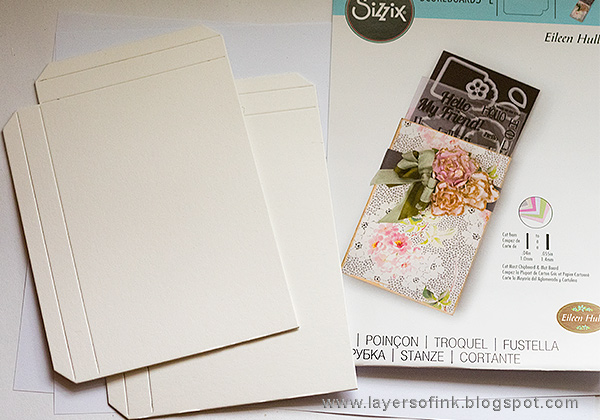
Start by die cutting the Stamp & Photo Storage from mat board. You need two to make one box/compartment.

Cut off the closure flap on one of the die cuts, since you only need to close the box on one side.

Assemble using a strong adhesive. I used Ranger's Wonder Tape.
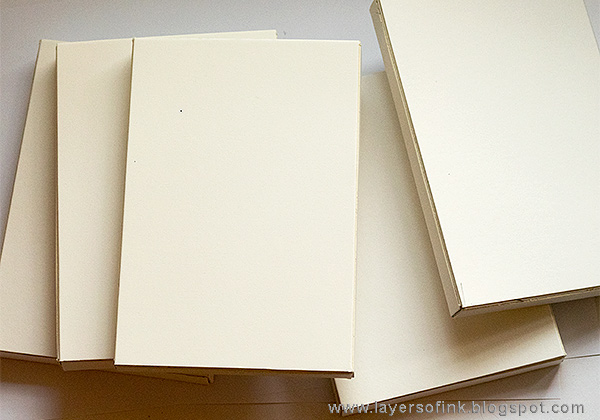
Make as many boxes as you need.

Glue the boxes together and place them under a book until the glue is dry.

Coat with gesso.

I used Dina Wakley's acrylic paints to paint my box and decided to make color-coded stripes for the sides. The top and bottom were painted orange, pink and grey.
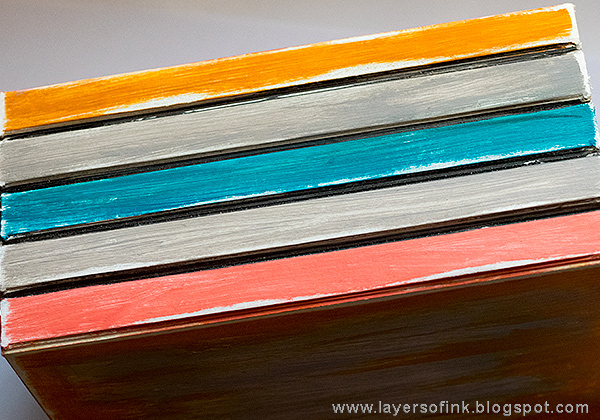
When dry, sand the edges and use a black marker to add definition to the joints.

I stamped the edges with Darkroom Door stamps, from the Photography set. You can of course use any stamps that fit the purpose of your box.

To embellish the box, I die cut words, flowers, labels and a pocket using Eileen's Bookmark, Tag & Pocket, Bookplate, Hinges & Labels, and Floral Arch and Words sets.

I also stamped a camera from Darkroom Door on inky paper and cut it out. The patterned papers come from Kaisercraft Documented Paper Pad. All the edges were distressed and inked.

One the one side of the box, I used alphabet stamps to write some labels for the compartments. One each for the kids, and compartments for nature, South Africa and mixed photos. I needed a vintage one too, so I should actually add a compartment later.

I love the look of this vintage camera stamp. There are also some Clippings stickers.
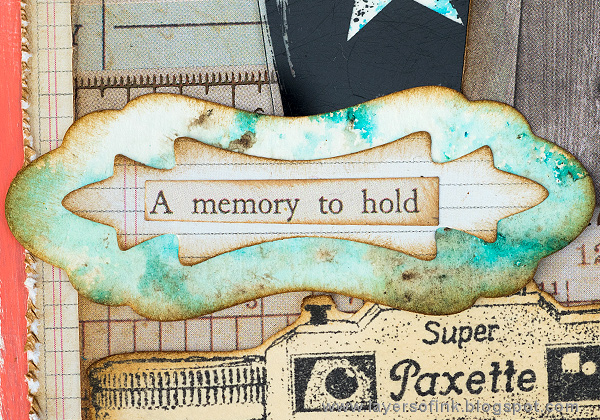
The label and flowers were die cut from a paper colored with Paper Artsy's Infusions.

I placed a piece of the Infusions paper behind the star too.

You can add a center to the flowers if you want too.

The little tag in the pocket holds this great sentiment from the Darkroom Door Photography set.

On the other side of the box, I added some Clippings stickers.
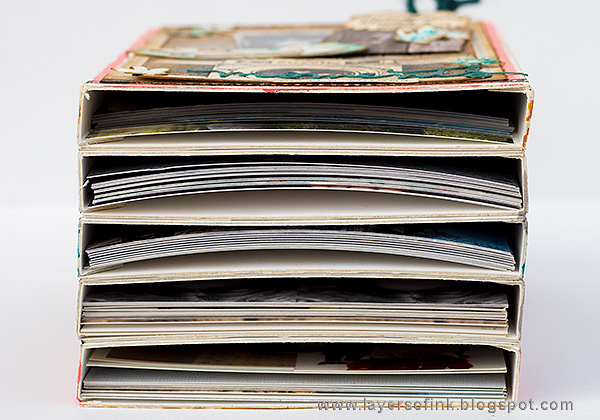
Here's a look from the front, there is plenty of space for more photos.

If you want to, you can also store the box like this, or on one of the longer sides.
Thank you so much for stopping by here today!
Happy crafting!
Anna-Karin
Supplies:
* Please note: the links are affiliate links, for which I receive a small percentage of sales generated by the link, at no extra cost to you.
|
Other supplies:
Stamps: Darkroom Door: Photography
Sassy and fun . . . look at you always coming up with a new way to get creative with paper and ink. Bravo!!!
ReplyDeleteKeep Smiling!
Connie :)
Such a great way to use this die Anna-Karin. Love when projects are pretty and useful too!
ReplyDeleteWhat an amazing project! Love how you have made this look so beautiful! Chrisx
ReplyDeleteThis is just so clever Anna-Karin and not only is it beautiful the way you have decorated it, it is so useful too! I love that camera stamp too! Anne xx
ReplyDeleteGreat tutorial - this is just cool!
ReplyDeleteVery inventive and really cool
ReplyDelete