Hello again! I have a winter tag tutorial to share with you today, which could also easily be turned into a Christmas card, or maybe a decoration.

This tag is my second project made with the Tim Holtz exclusive STAMPtember stamp and stencil set at Simon Says Stamp. You can find my first project, a Deer Winter mixed media canvas here. For this tag, I wanted a warm background with the woodgrain circles being the main feature, and the fun snowman as focal point. The tag is very shimmery in real life.

The Tim Holtz exclusive stamp and stencil set is one of the exclusive sets released for Simon Says Stamp STAMPtember celebrations. You can see all the STAMPtember exclusive products here.

Both the stamp set and stencil are very versatile and can be used for many different types of projects, and not only for Christmas. The trees and the cool woodgrain circle, for instance, work any time of the year.

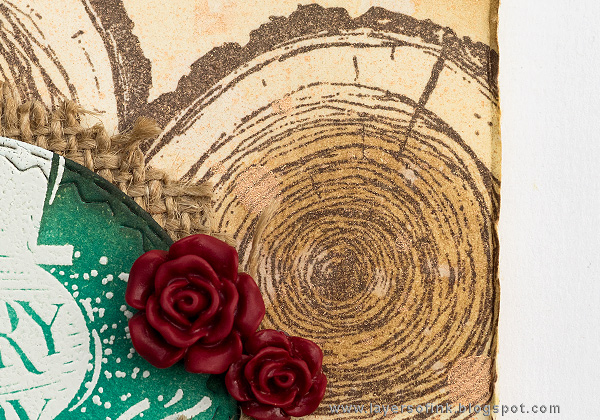
I started out by repeatedly stamping the woodgrain circle with brown Archival Ink. The image was stamped twice on masking paper first and cut out. I used the masks when stamping all circles apart from the one at the bottom right. I forgot to take a photo of that step unfortunately. Ink the tag with Distress Ink and splatter with water to create droplets.

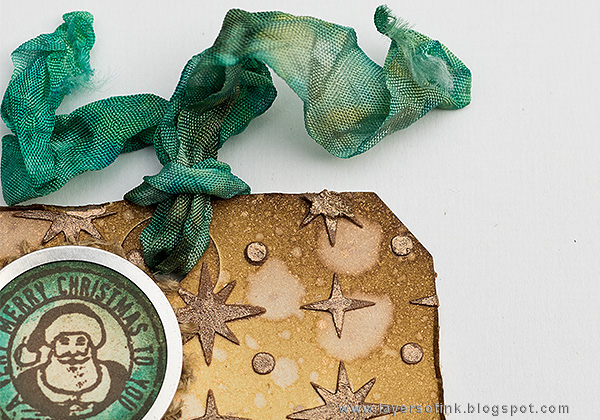
Place the masks on the two top woodgrain circles and mix a little bit of Ancient Dina Wakley paint into Texture Paste. Smear through the star part of the stencil.

When the paste was dry, I painted the stars with more Ancient paint to increase the metallic effect and then misted the tag with mica spray.

White emboss the fun snowman on heavystock cardstock and die cut with one of the circles from the Stitched Circles set.

Ink the circle with Peacock Feathers and Ground Espresso. The embossing resists the ink. I also die cut circles from burlap and tore off the edge. It is easy to tear along the stitched impression that the die makes. The two circle stamps were stamped on cardstock and inked. They are just the right size for the largest tags for Tim Holtz's Tag Press Tool. It was fun making my own metal-rimmed tags.

I added burlap circles under the metal-rimmed tags too. The tag needed a bit of red and a Mirrored Heart was coloured with alcohol ink.

The crinkle ribbon was dyed with Peacock Feathers and Ground Espresso and misted with the mica spray.

I also used red Heirloom Roses, from the Halloween idea-ology release. They work great for Christmas projects too.

You might see the shine of the mica spray better here. It works really well on festive projects.
I hope you enjoyed this project and thank you so much for taking the time to visit here today!
Happy crafting!
Anna-Karin
Supplies:
|
* Please note: the links are affiliate links, for which I receive a small percentage of sales generated by the link, at no extra cost to you.


Beautiful mixed media tag, love the color and texture! The new Stamptember stamp and stencil set is awesome!
ReplyDeleteBeautiful tutorial!!!!! I love the wood stamp in this set!!!
ReplyDeleteWonderful.... I love this tag!! And the stamps too!
ReplyDeleteWhat a great stampset this is. I love the wood stamp! what a great colour is the darkest colour u used!
ReplyDeleteHow beautiful Anna-Karin. This set from TH is so awesome and versatile, I love it!
ReplyDeleteWonderful start for Christmas preparations. I like the colors and the composition of stamp motifs you have chosen.
ReplyDeleteDear greetings
Sabine
This is SO eye catching Anna-Karin! LOVE IT!!!!
ReplyDelete