I made a mixed media project on a 11 x 14 in
Photo Mat Art Board. These consist of heavy mat board with a pre-cut opening for a 4 x 6 photo. You might already know that I love working on mat board, and this was no exception. The mat board holds up to a lot of techniques, as you will see below in my tutorial. I used another photo of Anton from our photo session with Alet Groenewald from
Blessed Reflection Photography. It's a pretty typical photo of him, he is up in a tree, with a branch of some sort in his, pretty dirty, hand. He also found a lot of really big pine cones during this outing. I extended the scene in the photo with paint, stamps, stencils and dies.
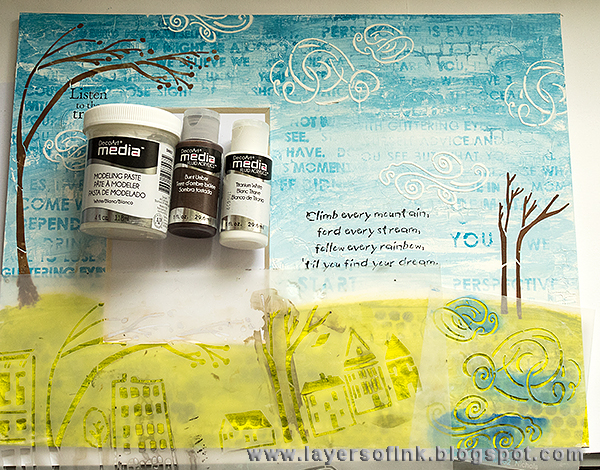
Start by coating the mat board with Gesso. Press the lid of a Distress Paint bottle into the wet gesso to create circles and press Eileen's
Basket Weave embossing folder into the gesso here and there. Clean the folder immediately.
When the gesso is dry, paint the background with
DecoArt Media paint, Green Gold and Cerulean Blue, mixing the paint into
Tinting Base, to create different shades. Wipe some of the blue paint off with a cloth right before it dries completely.
Stamp sentiments to the sky, these two are some of my favourite sentiments from Darkroom Door, from the
Gum Trees and
Wilderness Vol. 1 sets. The sentiments were stamped first, so that I wouldn't cover those areas up with anything else. I used stencils by
StencilGirl, starting with the Wall of Words and more Cerulean paint.
Add texture to the grass with the Journal Texture stencil and Sap Green paint.
Mix Raw Umber paint into Modeling Paste and smear through the
City Stories stencil. The clouds were made with the
Clouds stencil, same as on
this winter canvas of mine. Mix a little white paint into the paste to make it more opaque.
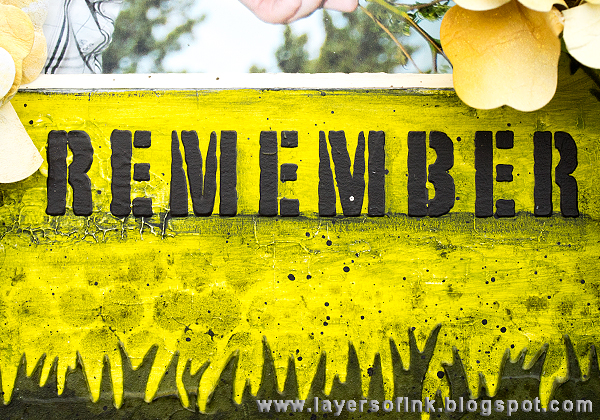
Add a word with black Modeling Paste and the
Uplifting Words stencil. Greenery was added with the lovely
Herbs stencil, mixing Green Gold and Sap Green into Modeling Paste. Later, I added some more herbs.
I wanted a grassy border at the front, since the photo was taken on a grass field. Die cut Eileen's
Grass Thinlits from
Eclipse Art Masking Tape, three times, and use as a homemade stencil. Sap Green paint was mixed into Modeling Paste for the grass.
Add shadows and shading to the piece using Sap Green and Paynes Grey paint. This step really brings the scene to life and makes a big difference. I also stamped the grass with the Darkroom Door
Splatter Texture stamp and Fern Green ink.
Splatter a little black and white paint on the background, for added texture.
To make the flowers,
I used Crescent's RENDR paper and Eileen's beautiful
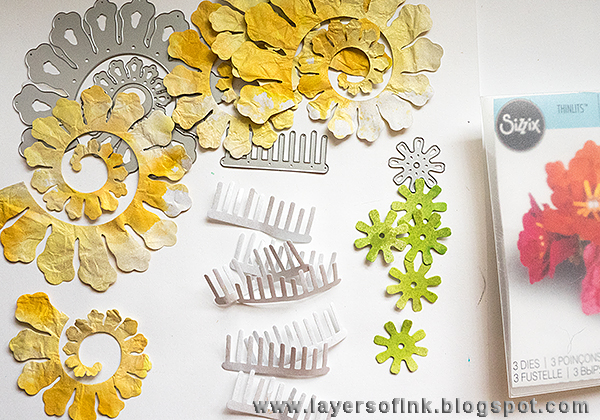
Rolled Flower die. Smear yellow Distress Inks on your craft sheet, mist with water and press the paper into the ink. Repeat on the other side and crumble the paper up before it dries completely. The RendR paper is very strong and durable and can take a lot of action.
The RENDR paper doesn't show through on the other side, which is very cool, although in my case, I wanted both sides of the paper in the same colour. For a shiny effect, mist with Wendy Vecchi's
Buttercup Mica Spray and Tim Holtz
Tarnished Brass Mica Spray.
I misted more RENDR paper with green shades of Distress Spray Stain, adding some Tarnished Brass spray. The sheet to the left was misted with
Pearl Mica Spray, on both sides.
When the paper is dry, die cut the
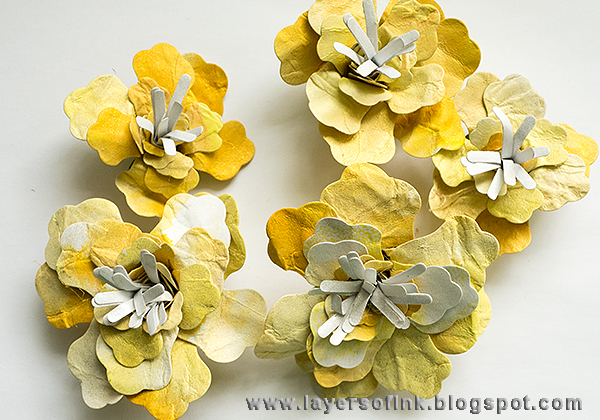
Rolled Flower five times. I made two full-sized flowers and three smaller ones. To make smaller flowers, simply cut off some of the petals. Die cut the stamen from the pearly white paper.
Glue two stamen pieces to each other, for the large flowers, and glue the end to the smallest flower petal. Use the slotted quilling tool included in
Tim Holtz Tiny Tattered Florals set, or another slotted quilling tool, to roll the flower.
Use hot glue (be careful not to burn yourself!) or another strong adhesive to gluy the flowers together.
Roll the petals out and give them some shape, until you are happy with the flowers.
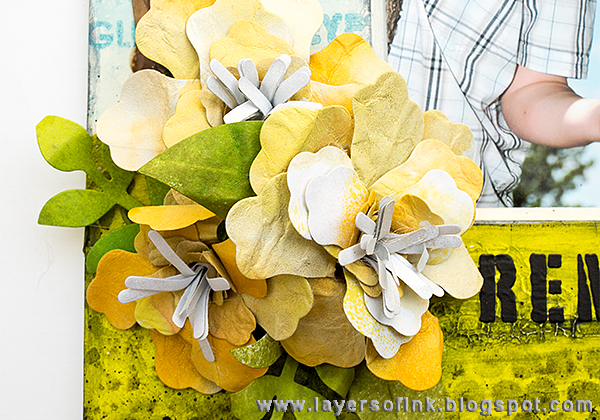
Die cut leaves using the
Spring Leaves die. Shape them a little.
Glue the flowers to the background and add the leaves.
I coated the background in three layers of DecoArt
Soft-Touch Varnish, which gives a lovely matte look to the background, and feels wonderful to the touch.
Add just the touch of a shadow under the clouds.
I just love this sentiment stamp and it is perfect for Anton. I've used it on quite a lot of projects before.
The shadows make the shapes look more dimensional and gives them life. I messed up the stamping a little here, but left it as it was.
Here you can see the textures created with the paint, embossing folder, paint lids, stencilling and splattering.
I also added a metallic bird by P
rima.
The
rusted heart is by Prima and
Finnabair.
The flowers would look great on a card too, or on any type of 3-D project.
It is easy to use your dies to make stencils, such as with this grass, making dies even more versatile.
Thank you so much for looking! I hope you enjoyed this tutorial.
Happy crafting!
Anna-Karin
Supplies:
Additional supplies;
Paint: DecoArt Media: Cerulean Blue, Green Gold, Sap Green, Paynes Grey, Raw Umber, Burnt Umber, Carbon Black, Titanium White
Medium: DecoArt Media: Tinting Medium, White Gesso, Soft-Touch Varnish, White Molding Paste, Black Molding Paste
Stencil: StencilGirl: Wall of Words









I love what you did with the Photo Mat Art Board Anna-Karin, your layout is beautiful! Great tutorial too. xx
ReplyDeletemerci pour ce magnifique pas à pas!
ReplyDeleteStunning!
ReplyDeleteWhat a beautiful scene you created Anna-Karin to frame the lovely photo of Anton in the tree! Wonderful techniques, colors and stencils using the Crescent products and Eileen's lovely flower die! Julia xx
ReplyDeleteYour photo mat is gorgeous Anna Karin! What a sweet way to display a darling photo of your cutie pie. So many interesting details to look at.
ReplyDeleteThank you for sharing your beautiful work! :)
Simply gorgeous!
ReplyDeleteThis is a lovely project, You've used so many different ways to add texture and dimension to add to the photo frame.
ReplyDeleteA very lovely creation in fresh colors, perfect for the sweet little boy.
ReplyDeleteDear Greetings
Sabine
Amazing, wonderful, beautiful, pure, solar!!! I love your mixed media projects!
ReplyDeleteA beautiful page. I like how you made things move in the direction Anton is leaning. And thank you for the how to on the flowers, they are gorgeous!
ReplyDelete