Monday, January 22, 2024

Woven Paper Cards

Hi friends! It is Monday again and I hope you had a good weekend! We got even more snow. I don't know if I have ever seen a winter with this much snow.

Please note: this post has affiliate links, for which I receive a small percentage of sales generated by the link, at no extra cost to you.


This week with have a Recycle theme at the Simon Says Stamp Monday Challenge blog. Use strings, ribbons, fibers or something similar. Fun! I hope you will join us and don't miss the wonderful project by our guest designer. Don't miss the project by our guest designer Rox.

Layers of ink - Woven Paper Card Tutorials by Anna-Karin Evaldsson.

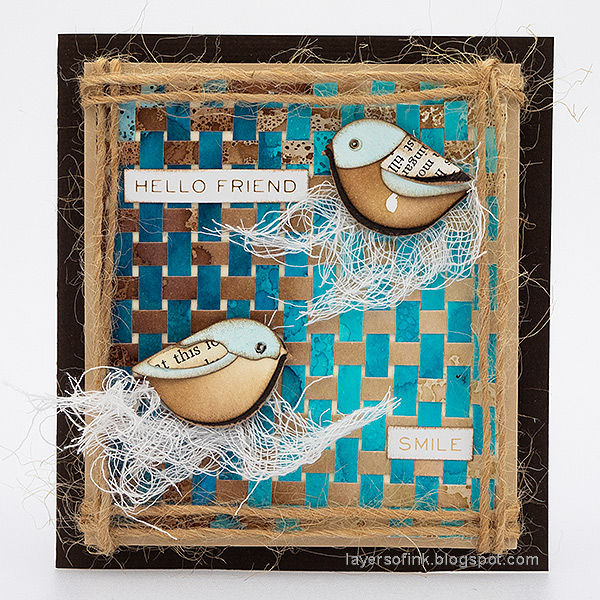
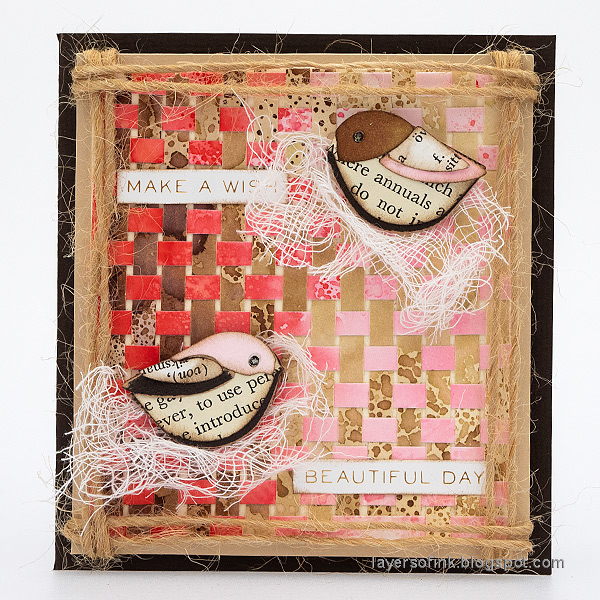
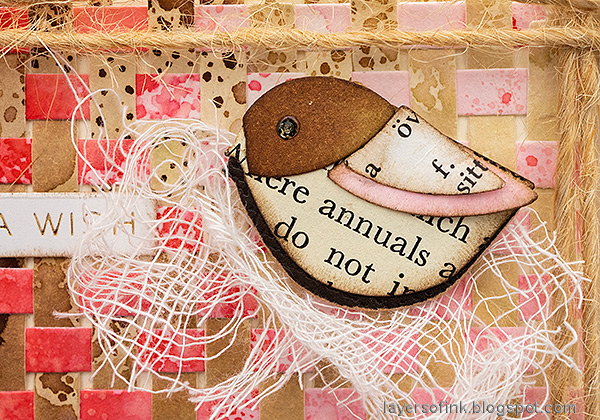
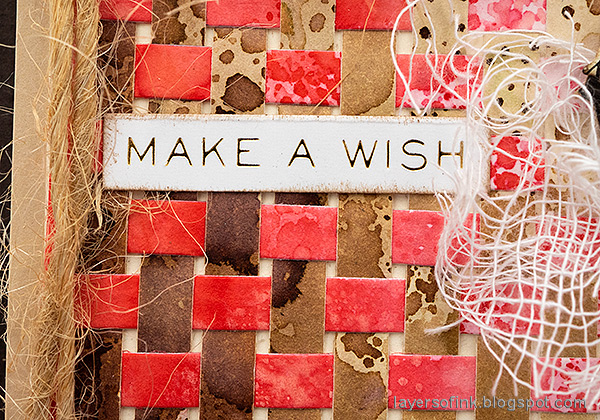
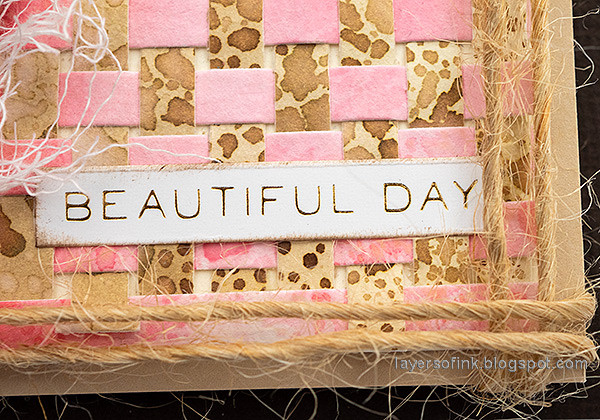
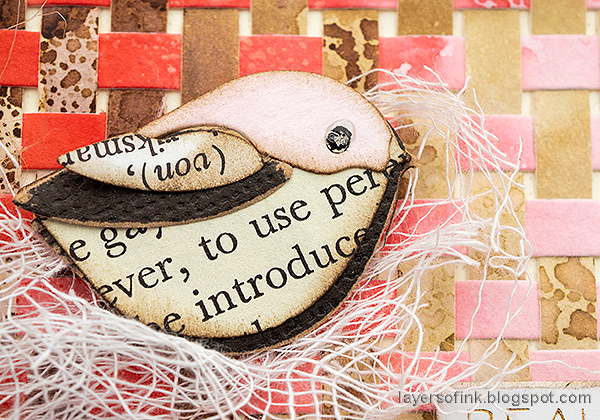
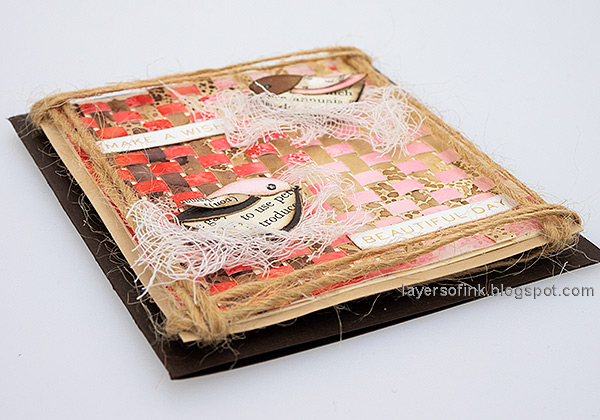
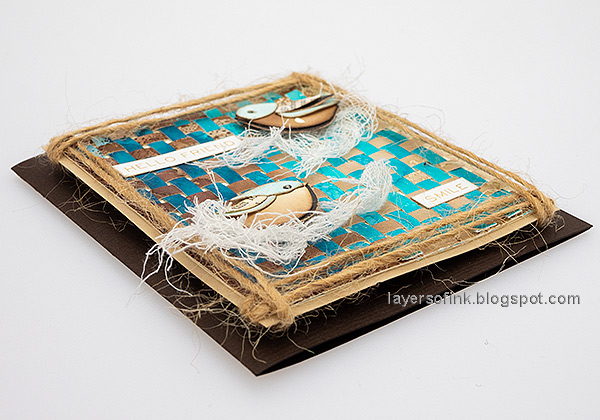
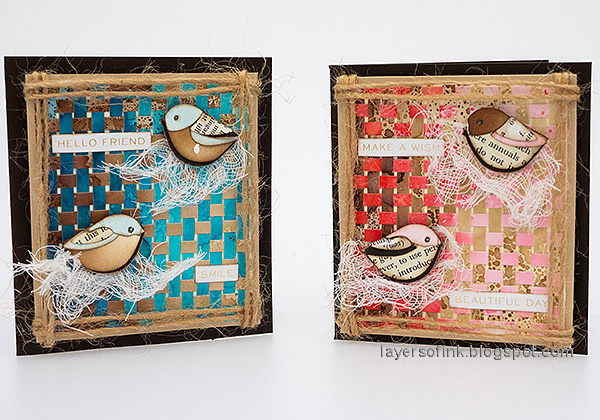
I made two cards this week, weaving paper for the background. I haven't done paper weaving for many years and it was a lot of fun. I tied twine around all the edges of the cards, as a frame. The twine was recycled from a parcel that I received and has a nice rugged texture. Other recycled parts of these cards are the old book and dictionary papers, as well as various small scrap papers. The little birds have nests of cheese cloth. I used an unusual die to for the background, namely Simon Says Stamp So Many Candles. I love to use dies in ways they might not have been intended for. 

Layers of ink - Woven Paper Card Tutorials by Anna-Karin Evaldsson. Ink with Distress Ink.

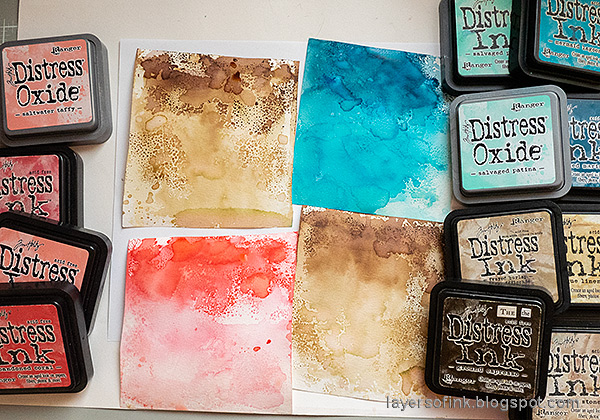
Start by preparing the paper for the weave. Smear Distress Ink on a non-stick craft sheet in an ombré manner (dark to light), mist with water and press watercolor paper into the ink. Let dry and repeat. Finish with a tiny bit of Oxide Ink.

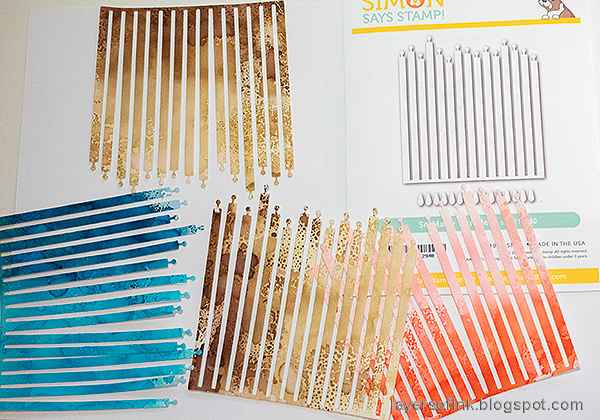
Layers of ink - Woven Paper Card Tutorials by Anna-Karin Evaldsson. Die cut with Simon Says Stamp Birthday Candles.

When the paper is dry, die cut with the Simon Says Stamp So Many Candles die. 

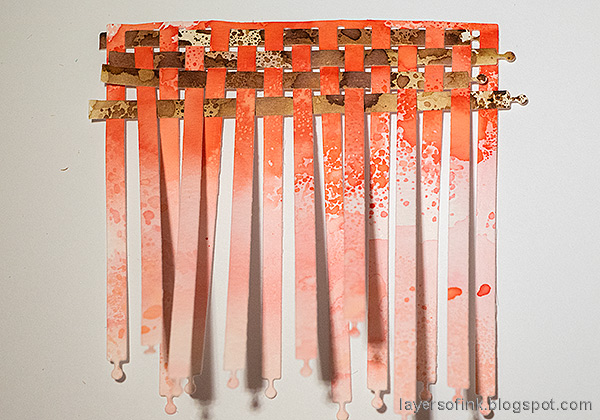
Layers of ink - Woven Paper Card Tutorials by Anna-Karin Evaldsson. Start weaving the paper.

Use one of the die cuts as the loom and cut strips from another. Place the strips so that you keep the ombré pattern.

Layers of ink - Woven Paper Card Tutorials by Anna-Karin Evaldsson. Weave the paper.

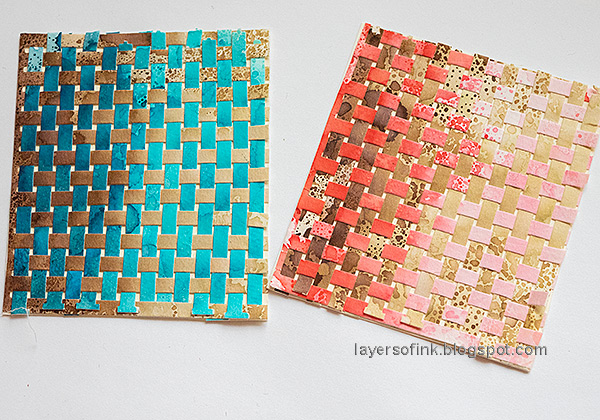
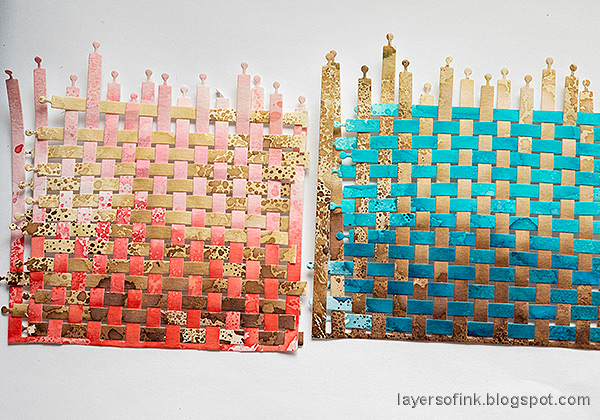
Continue until you have completed both weaves.

Layers of ink - Woven Paper Card Tutorials by Anna-Karin Evaldsson. Paper weaving completed.

Tidy up the edges and add some glue if needed. Glue to cream paper. The edges might look a little messy, but that will be covered with the strings.

Layers of ink - Woven Paper Card Tutorials by Anna-Karin Evaldsson.

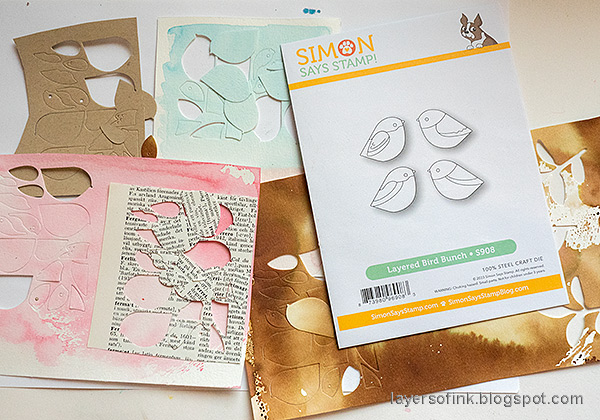
The Simon Says Stamp Layered Bird Bunch was die cut from left-over inky papers, old dictionary paper and kraft paper.

Layers of ink - Woven Paper Card Tutorials by Anna-Karin Evaldsson. Simon Says Stamp Layered Bird Bunch.

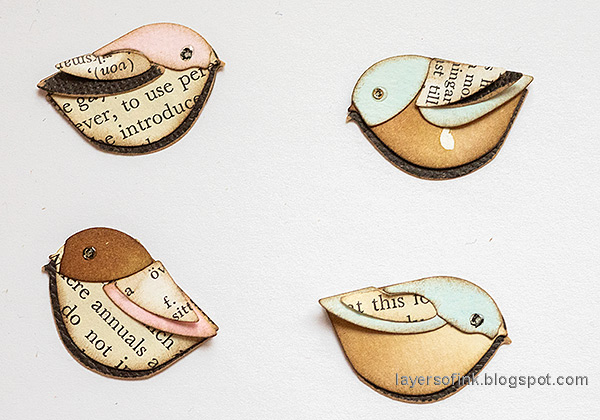
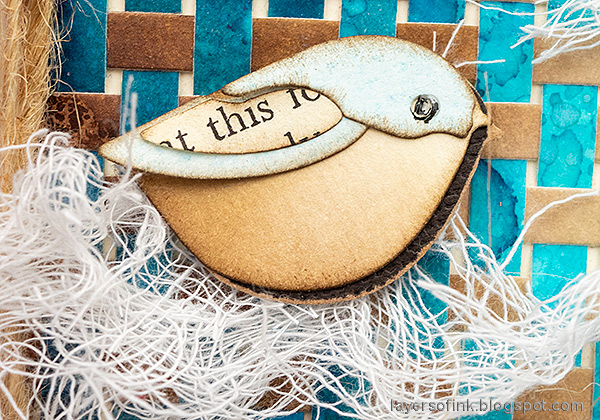
Ink the edges and assemble the birds. I also die cut the bodies from brown kraft stock paper. Add a dot of Glossy Accents to the eyes.

Layers of ink - Woven Paper Card with birds tutorial by Anna-Karin Evaldsson.

The blue and brown card. Mount the woven panel on kraft cardstock and then wrap string around the edges of the card. 

Layers of ink - Woven Paper Card with birds tutorial by Anna-Karin Evaldsson. Layered paper bird.

Make nests for the birds with a little cheese cloth or mummy cloth. 

Layers of ink - Woven Paper Card with birds tutorial by Anna-Karin Evaldsson. Sentiment sticker

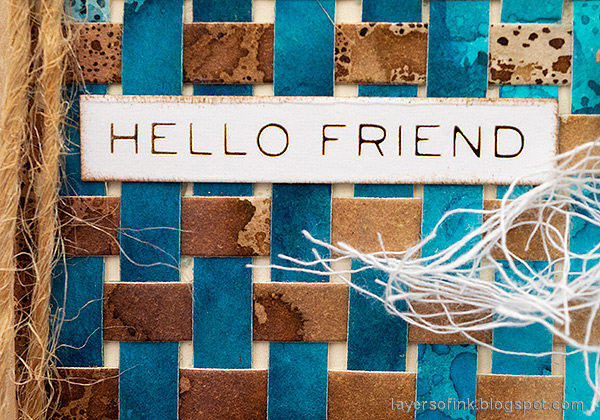
The sentiments come from Tim Holtz Metallic Sticker Book.

Layers of ink - Woven Paper Card with birds tutorial by Anna-Karin Evaldsson.

The second little blue bird. The birds were adhered with Simon Says Stamp Pawsitively Perfect Foam Tape.

Layers of ink - Woven Paper Card with birds tutorial by Anna-Karin Evaldsson. Paper weave.

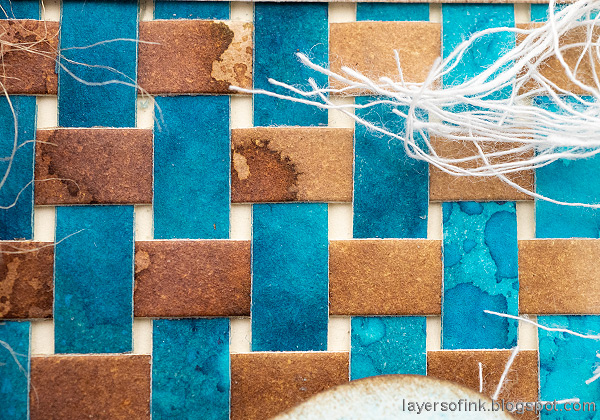
The weave might not be completely perfect, but it also doesn't have to be.

Layers of ink - Woven Paper Card with birds pink tutorial by Anna-Karin Evaldsson.

The ombré effect shows best when you see the whole card. You can also turn the panel around and have the darker area on top or at the bottom. 

Layers of ink - Woven Paper Card with birds pink tutorial by Anna-Karin Evaldsson.

These Layered Bird Bunch birds are so cute. I love bird dies.

Layers of ink - Woven Paper Card with birds pink tutorial by Anna-Karin Evaldsson.

The twine forms a quick, but also dimensional border.

Layers of ink - Woven Paper Card with birds pink tutorial by Anna-Karin Evaldsson.

The lighter side of the background.

Layers of ink - Woven Paper Card with birds pink tutorial by Anna-Karin Evaldsson. Paper bird.

Adding Glossy Accents to the eye makes the bird look more alive.

Layers of ink - Woven Paper Card with birds pink tutorial by Anna-Karin Evaldsson.

I adhered the top panel with foam tape, partly to accommodate for the twine, but also to add dimension.

Layers of ink - Woven Paper Card with birds tutorial by Anna-Karin Evaldsson.

I hope you enjoyed this tutorial and that you will join us in the challenge. 

I hope you will join us this week in our Recycle challenge. You have a chance to win a $25 gift voucher to do some fun shopping at Simon Says Stamp. You have until Monday 8am Ohio time. 1pm UK time, 2 pm CET to join in.


Do you use Instagram? If so please add #sssmchallenge so we can see your entries there too.


Thank you so much for stopping by here today! 

Happy crafting!

Anna-Karin

Supplies:

* Please note: the links are affiliate links, for which I receive a small percentage of sales generated by the link, at no extra cost to you.


Tuesday, January 16, 2024

Clementine Art Journal

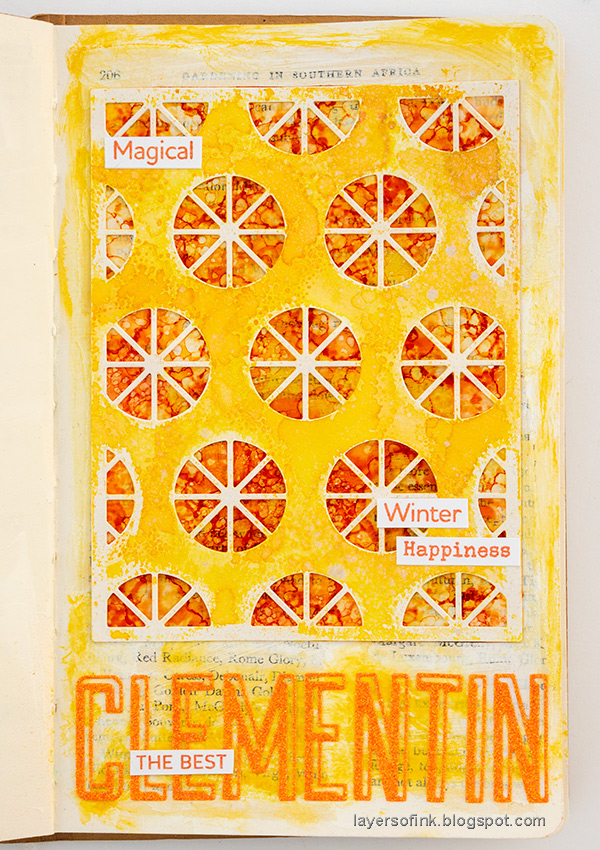
Hi friends! We have another cold day here of -18 Celsius (-0,4 Fahrenheit). It is beautiful, but quite chilly. I have an art journal page to share, using sunny colors. 

Please note: this post has affiliate links, for which I receive a small percentage of sales generated by the link, at no extra cost to you.


Layers of ink - Clementine Art Journal Tutorial by Anna-Karin Evaldsson.

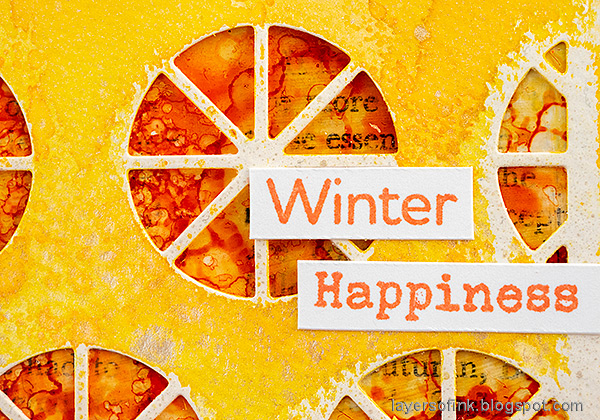
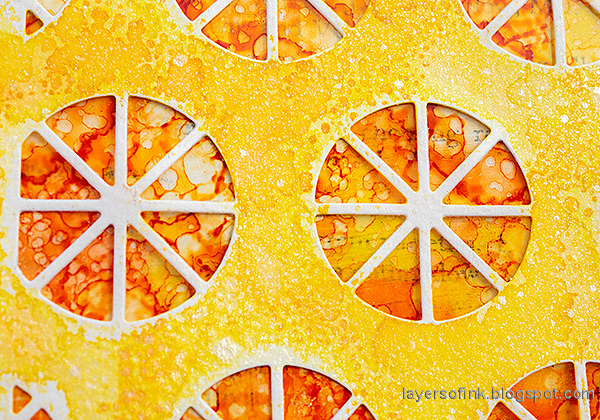
When I was little, clementines or mandarins were only available in the shops during the cold months. Nowadays, you can get them most of the time, but they still taste best at winter-time. The Simon Says Stamp Citrus Slice Background die inspired me to do a citrus-themed art journal page. I spelled the word 'clementine' in Swedish, partly since the 'e' at the end didn't fit on the page. 

Layers of ink - Clementine Art Journal Tutorial by Anna-Karin Evaldsson. Add Distress Glaze.

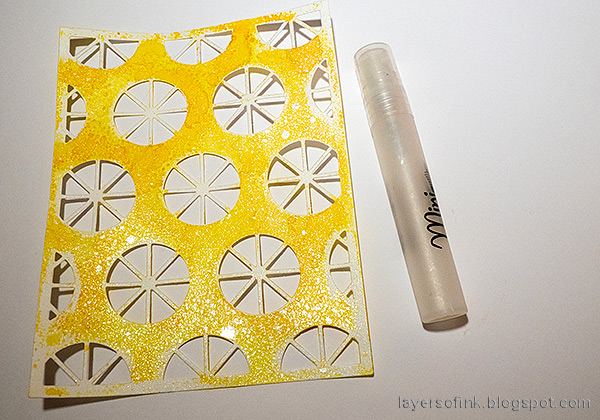
Die cut the Citrus Slice Background from watercolor paper. Add Distress Micro Glaze with your finger on the slices.

Layers of ink - Clementine Art Journal Tutorial by Anna-Karin Evaldsson. Ink with Distress Ink and mist with glimmer mist.

Ink with yellow shades of Distress Ink. The Micro Glaze will resist the ink. Mist with homemade glimmer mist. Add a scoop of Perfect Pearls to water in a Mini Mister and shake.

Layers of ink - Clementine Art Journal Tutorial by Anna-Karin Evaldsson. Color acetate with alcohol ink.

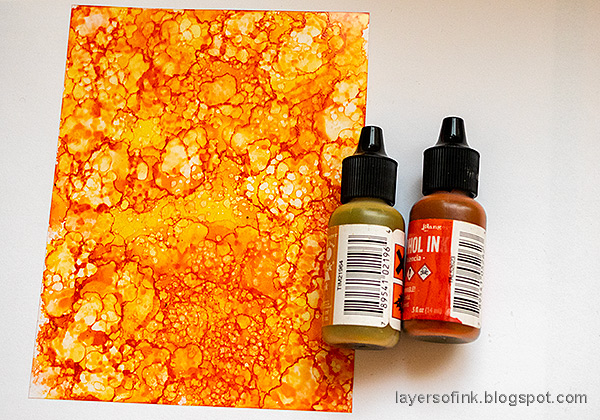
I asked my youngest, who also loves clementines, what color the slices are. His reply was: 'orange and yellow with a little bit of white, and shiny'. I used Simon Says Stamp Acetate to get the shiny part and colored it with alcohol ink. I used mainly Valencia, but also Butterscotch. Apply Blending Fluid to felt and pounce on the background to create the splotchy pattern.

Layers of ink - Clementine Art Journal Tutorial by Anna-Karin Evaldsson. Cover the page with old text paper.

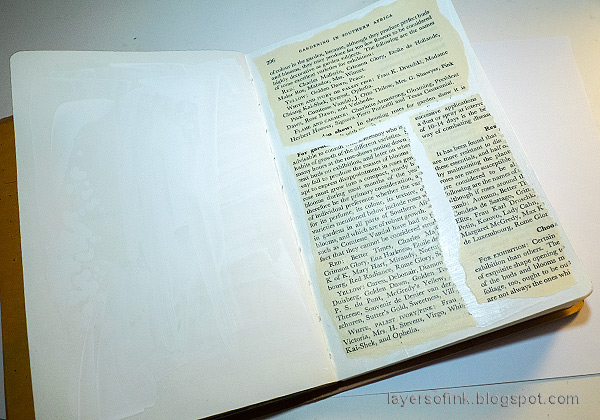
I wanted a neutral background with just a little texture, since I didn't want to change the colors of the acetate by placing it on something dark or colorful. Add gesso. I worked in my Dylusions Small Creative Journal. When dry, glue torn book paper to the background with matte medium. Add a layer of matte medium on top.

Layers of ink - Clementine Art Journal Tutorial by Anna-Karin Evaldsson. Coat with gesso.

When dry, apply gesso on top, but don't cover all the text.

Layers of ink - Clementine Art Journal Tutorial by Anna-Karin Evaldsson. Paint with Distress Paint.

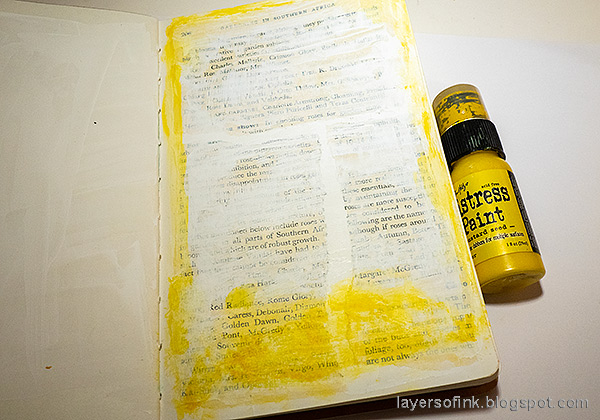
Paint with Distress Paint, but only around the edges and at the bottom, not where you plan to place the citrus panel.

Layers of ink - Clementine Art Journal Tutorial by Anna-Karin Evaldsson.

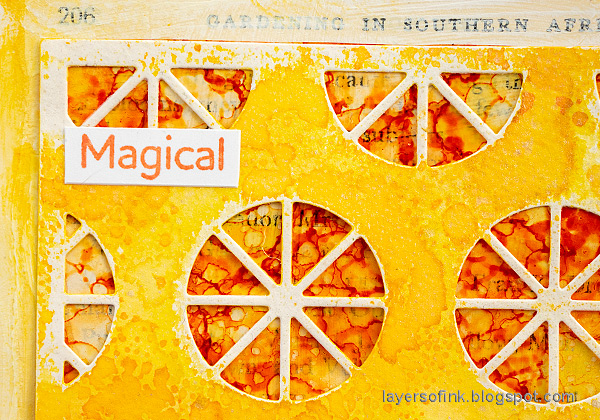
Glue the acetate to the citrus panel and then glue it to the background. 

Layers of ink - Clementine Art Journal Tutorial by Anna-Karin Evaldsson.

Stamp sentiment with Simon Says Stamp Pawsitively Sherbet Ink and cut into strips.

Layers of ink - Clementine Art Journal Tutorial by Anna-Karin Evaldsson. Die cut letters with Tim Holtz Glitter Paper.


Layers of ink - Clementine Art Journal Tutorial by Anna-Karin Evaldsson.

The Micro Glaze resists the ink, but still leaves some texture where there was no glaze. Here you can also see the shine caused by the glimmer mist.


Thank you so much for stopping by here today! 


Anna-Karin

Supplies:

* Please note: the links are affiliate links, for which I receive a small percentage of sales generated by the link, at no extra cost to you.


Monday, January 15, 2024

Snow-covered Branches

Hello crafters! It is Monday again and I hope you had a good weekend. I enjoyed some crafty time, some walking and we baked cookies.

Please note: this post has affiliate links, for which I receive a small percentage of sales generated by the link, at no extra cost to you.


This week we have a Sparkle and Shine challenge at the Simon Says Stamp Monday Challenge blog. Fun! Glitter, sparkly paints or mists, shiny papers and ribbons and anything else you might think of. Don't miss the project by our guest designer Rox.

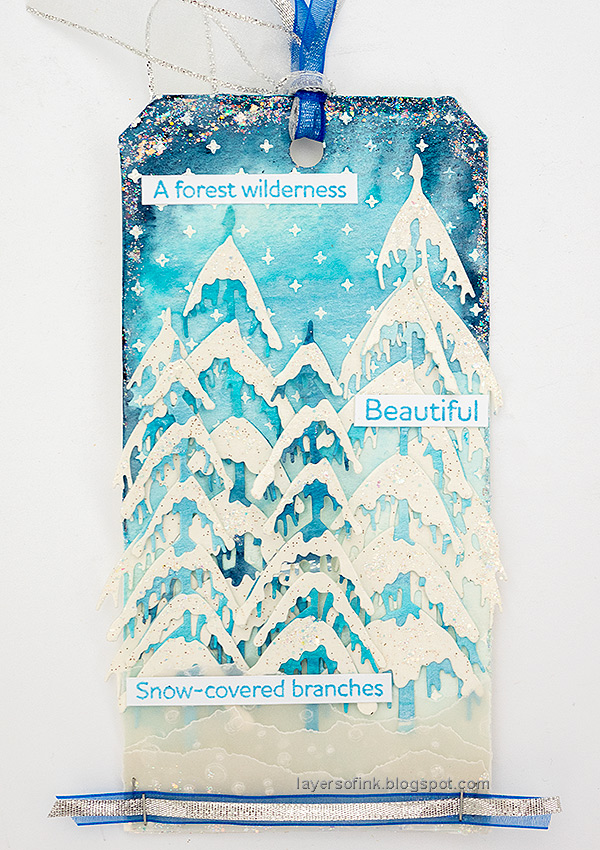
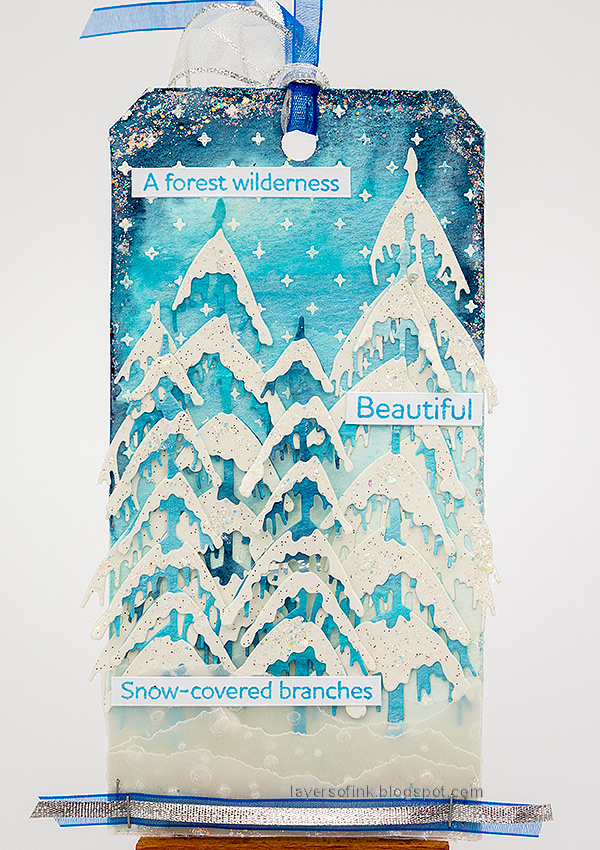
Layers of ink - Snow-covered Branches Tag Tutorial by Anna-Karin Evaldsson.

I made a sparkly and shimmering winter tag. We have had snow almost the entire time since the middle of November, which is unusual and makes winter much prettier. And what is more pretty than pine trees with a thick layer of sparkly snow on their branches? I also made some vellum snow and a resist background with shimmer paints.

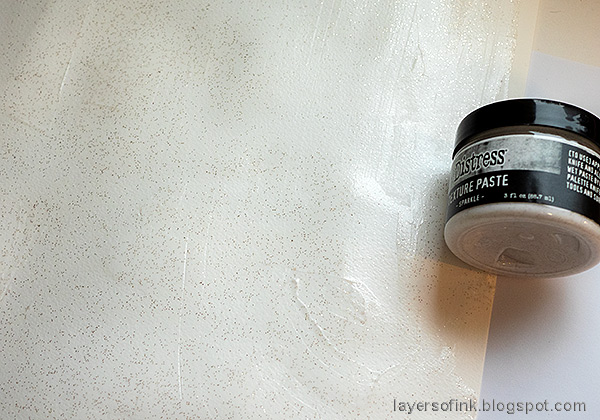
Layers of ink - Snow-covered Branches Tag Tutorial by Anna-Karin Evaldsson. Cover paper with Sparkle Texture Paste.

Start with preparing your own glitter paper by applying Sparkle Texture Paste to watercolor paper with a palette knife. Let dry. 

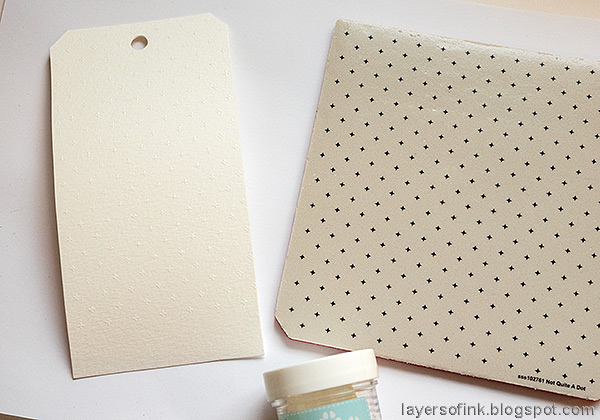
Layers of ink - Snow-covered Branches Tag Tutorial by Anna-Karin Evaldsson. White emboss Simon Says Stamp Not Quite a Dot.

White emboss Simon Says Stamp Not Quite a Dot on a tag die cut from watercolor paper.

Layers of ink - Snow-covered Branches Tag Tutorial by Anna-Karin Evaldsson. Paint with Zig Kuretake Gansai Tambi paints.

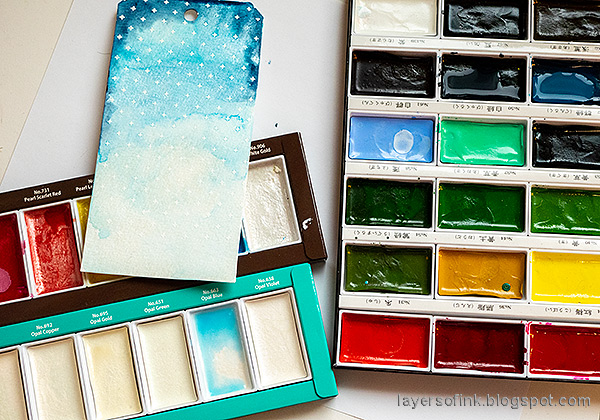
Paint the tag with Zig Kuretake Gansai Tambi watercolors. I used mainly the Pearl Colors and Opal Colors sets, but also mixed in some darker blues. The embossed dots will resist the paint.

Layers of ink - Snow-covered Branches Tag Tutorial by Anna-Karin Evaldsson. Paint with Gansai Tambi Pearl paint.

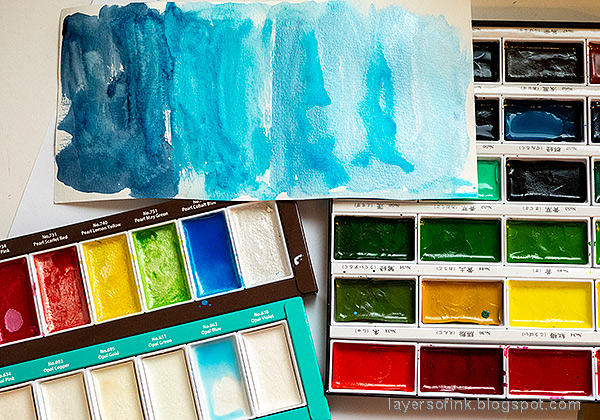
I also painted a scrap piece of watercolor paper with the same shades. Let dry.

Layers of ink - Snow-covered Branches Tag Tutorial by Anna-Karin Evaldsson. Die cut Simon Says Stamp Snow Laden Trees.

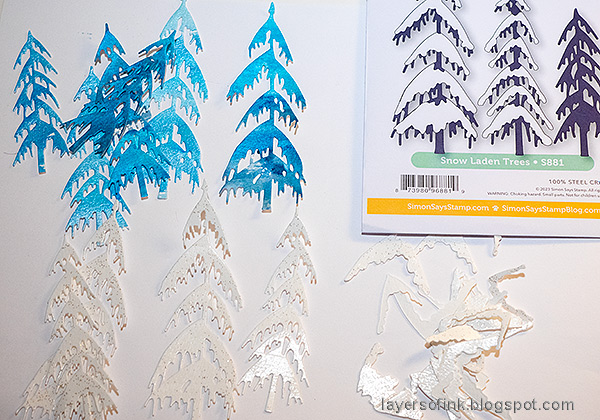
Die cut Simon Says Stamp Snow Laden Trees twice from the painted blue paper and twice from the homemade glitter paper.

Layers of ink - Snow-covered Branches Tag Tutorial by Anna-Karin Evaldsson. Assembly the snowy trees.

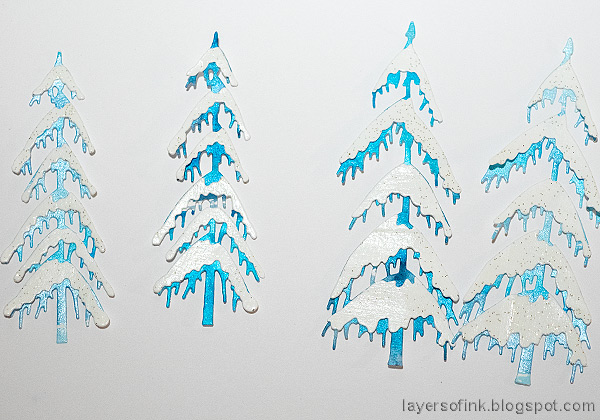
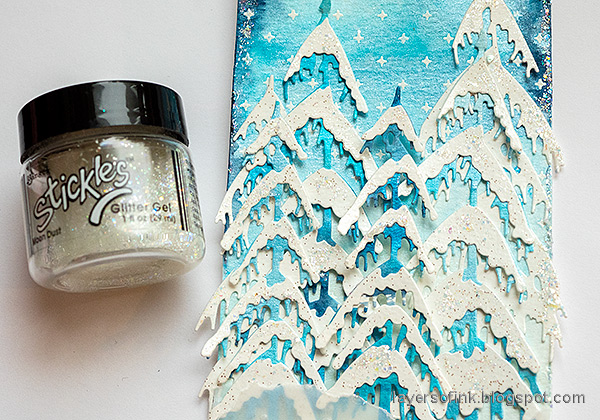
Glue the white glitter snow to the blue trees. If you have the packaging in front of you it is easier to place out the snow pieces. 

Layers of ink - Snow-covered Branches Tag Tutorial by Anna-Karin Evaldsson. Add Ranger Stickles Glitter Gel.

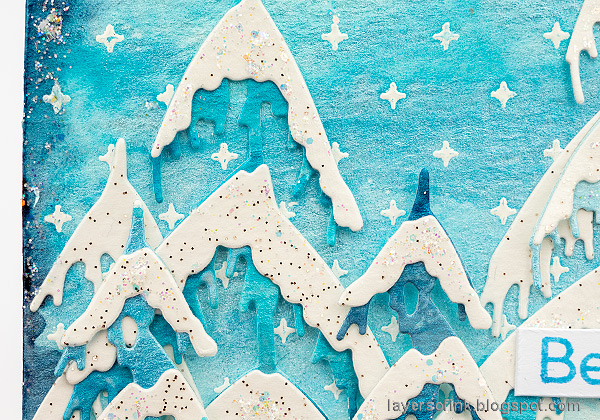
Glue the trees to the tag. I used to white trees in the background, and the four blue trees. Add Moon Dust Stickles Glitter Gel here and there on the snow and around the edges of the tag.

Layers of ink - Snow-covered Branches Tag Tutorial by Anna-Karin Evaldsson. Dry emboss vellum to create snow.

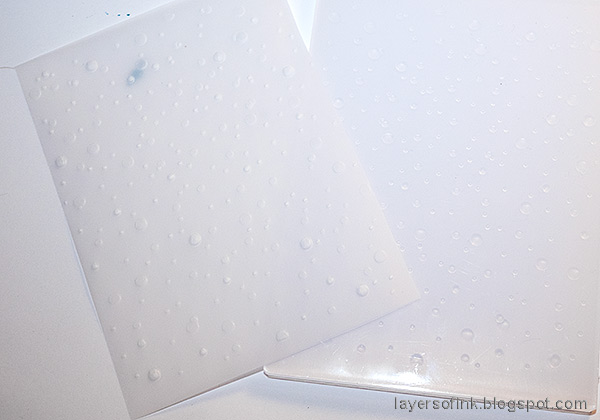
To make the snow in the foreground, emboss vellum in Simon Says Stamp Soft Snowfall folder.

Layers of ink - Snow-covered Branches Tag Tutorial by Anna-Karin Evaldsson. Vellum snow.

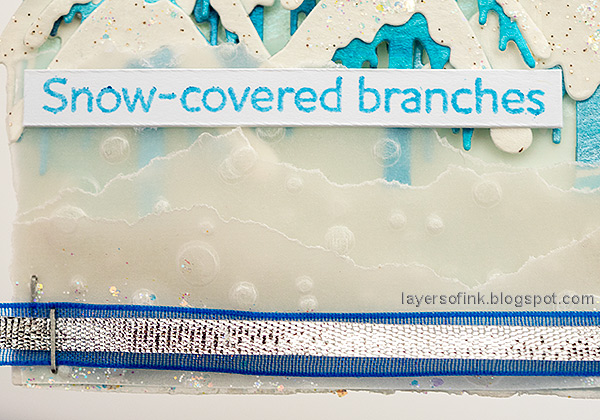
Tear the vellum to create snow shapes and layer in the foreground. I finished with two sheer ribbons. The sentiment comes from Simon Says Stamp Forest Scenery.

Layers of ink - Snow-covered Branches Tag Tutorial by Anna-Karin Evaldsson.

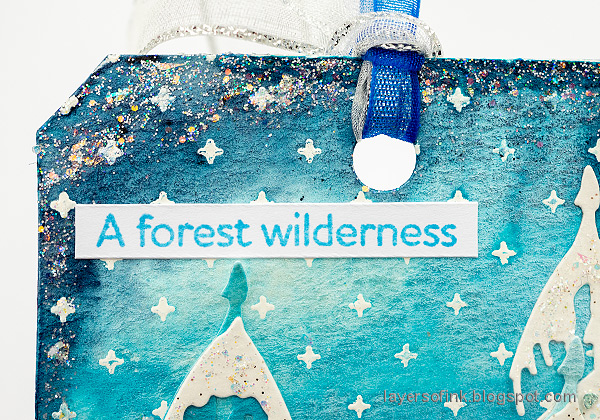
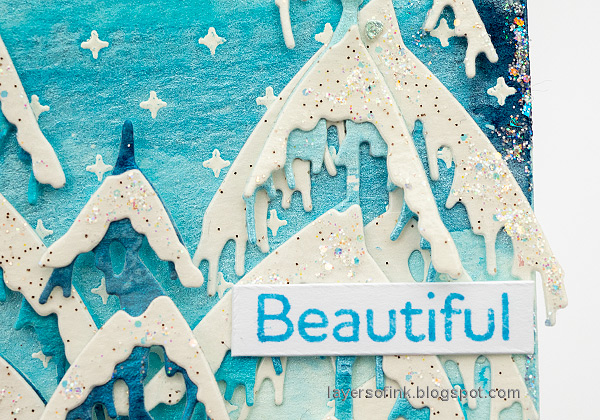
The Stickles adds a nice glittery edge to the tag.

Layers of ink - Snow-covered Branches Tag Tutorial by Anna-Karin Evaldsson.

The sentiments were stamped with Cobalt Archival ink on white paper and cut into strips. They all come from Simon Says Stamp Forest Scenery.

Layers of ink - Snow-covered Branches Tag Tutorial by Anna-Karin Evaldsson.

The glimmer of the paint is hard to capture in the photo, but you get a hint of it here.

Layers of ink - Snow-covered Branches Tag Tutorial by Anna-Karin Evaldsson. Glitter snow.

I used the same homemade glitter paper for my Snowman Meeting tag and particularly like how thick the edges look when you use it for die cuts. The snow pieces look thicker than the trees, even though in reality, they are not.

Layers of ink - Snow-covered Branches Tag Tutorial by Anna-Karin Evaldsson.

I hope this project inspired you to play around with glitter, glimmer and shine!

I hope you will join us this week in our Sparkle and Shine challenge. You have a chance to win a $25 gift voucher to do some fun shopping at Simon Says Stamp. You have until Monday 8am Ohio time. 1pm UK time, 2 pm CET to join in.


Do you use Instagram? If so please add #sssmchallenge so we can see your entries there too.


Thank you so much for stopping by here today! 

Happy crafting!

Anna-Karin

Supplies:

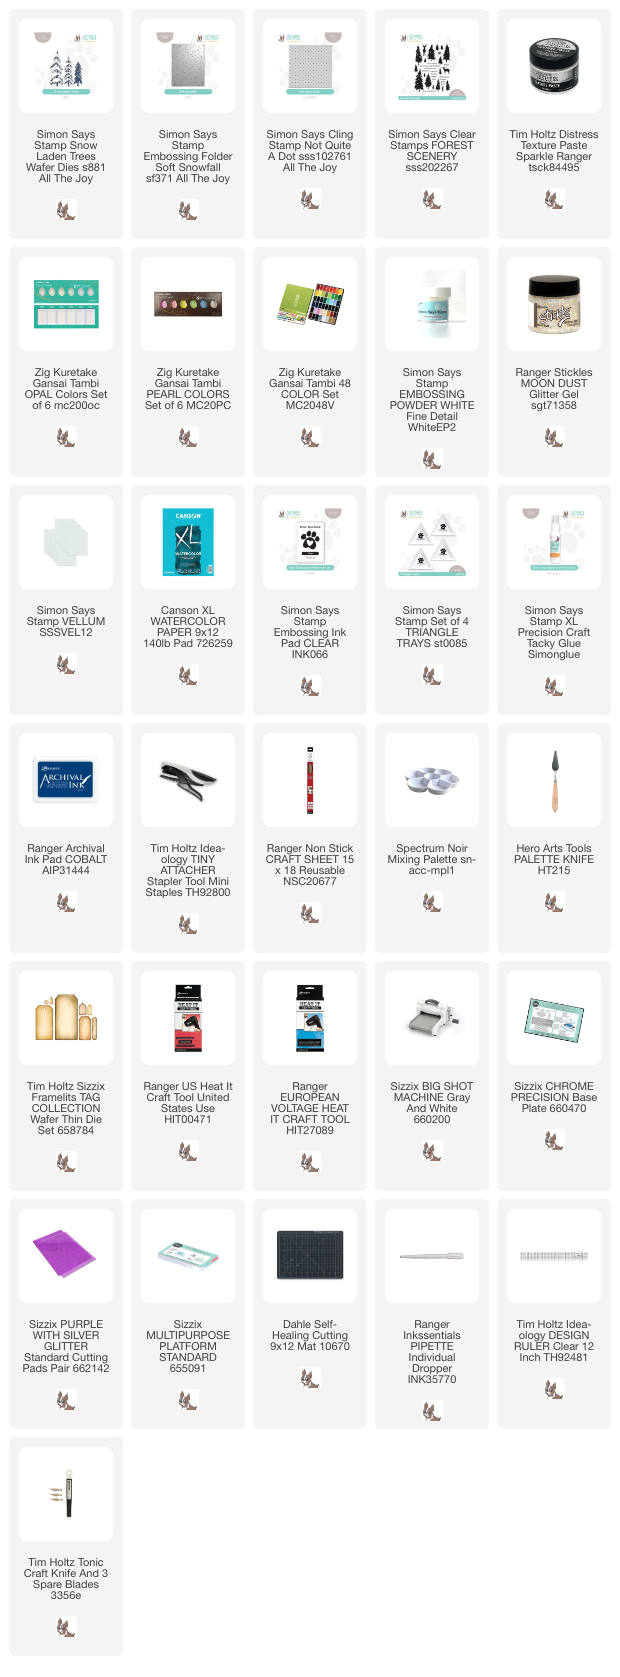
* Please note: the links are affiliate links, for which I receive a small percentage of sales generated by the link, at no extra cost to you.