Monday, September 23, 2019

Inky Bird Art Journal Page

Hello stampers! I hope you had a good weekend! We had our first morning with frost today, and luckily I had packed out all the mittens and hats yesterday. Our weekend was full of fun stuff, two soccer games, one bicycle competition, and a trip to a second-hand store. I found some beautiful old school books, Anton found a vintage, but still working, stop-watch and some old coins, and Leo got lego. 



It is a new week and our theme at the Simon Says Stamp Monday Challenge Blog is Stitch It. Don't miss the beautiful project by our September guest designer Anne Redfern.
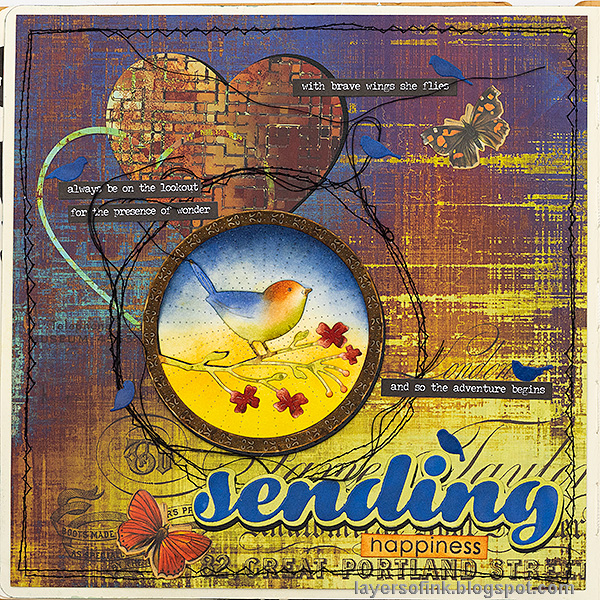
Layers of ink - Inky Bird Art Journal Page by Anna-Karin Evaldsson.

I made an art journal page this week, and used one of the gorgeous papers in Tim Holtz's Abandoned paper stash as a background. I enjoyed working with the dark blue, yellow and orange/brown color combo. The page is done in my square (8 x 8 in) Dylusions journal, and I used the Perched Bird die by Memory Box as my focal point. The die looks like it has faux stitched elements, and I also did quite a bit of messy stitching on the page itself. 

Layers of ink - Inky Bird Art Journal Page by Anna-Karin Evaldsson. Die cut Memory Box Perched Bird.

Start by die cutting the bird from heavystock paper. This die has wonderful details.
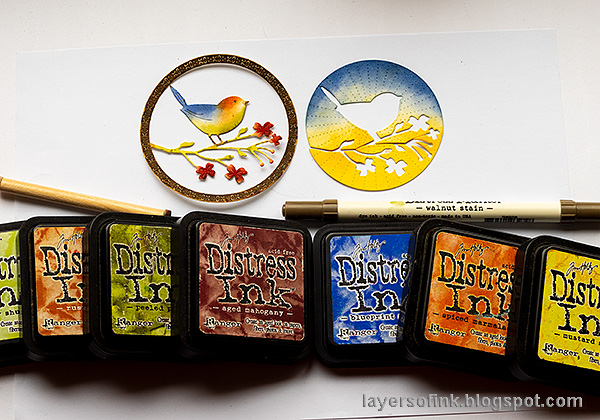
Layers of ink - Inky Bird Art Journal Page by Anna-Karin Evaldsson. Ink with Distress Inks.

Separate into two parts and color with Distress Inks. I used a combination of the mini-round ink blending tool, Detailed Blending Tools, and one Distress Marker. I wanted the frame pretty dark, and used the marker to avoid tearing it.

Layers of ink - Inky Bird Art Journal Page by Anna-Karin Evaldsson.

The big title word was die cut with Poppy Stamps Luscious Script Sending. I die cut it from glossy cardstock, since I love the vibrant shades of dye inks you get when inking glossy cardstock. The top word was inked with Blueprint Sketch and Chipped Sapphire and the mat was inked with Shabby Shutters and a little Peeled Paint. Later, I also die cut the mat in black, to give it a shadow.

Layers of ink - Inky Bird Art Journal Page by Anna-Karin Evaldsson. Add messy stitching around the bird.

I die cut the bird from black cardstock too, and used as a base, off-setting it a little bit. Lots of messy stitching around the bird, which got even messier since Anton was timing me with his new vintage stop-watch, wanting to go for a walk.

Layers of ink - Inky Bird Art Journal Page by Anna-Karin Evaldsson. Simon Says Stamp Thinking of You Heart.

The hearts were die cut with the new SSS Thinking of You Heart, from the new STAMPtember release. They were actually left over from a project that I will post in a couple of days, and were die cut from papers in the Abandoned paper stash.

Layers of ink - Inky Bird Art Journal Page by Anna-Karin Evaldsson.

The pretty butterflies come from Tim's Curiosities sticker book and were inked around the edges with brown ink. I used Small Talk stickers as sentiments.

Layers of ink - Inky Bird Art Journal Page by Anna-Karin Evaldsson.

The little blue birds were die cut with Poppy Stamps Greenhoouse Potted Plants set, from glossy paper inked with the same blue inks as the word. I just love to add little birds to projects.
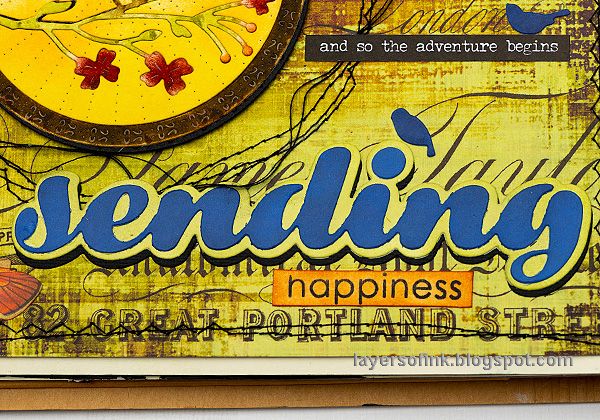
Layers of ink - Inky Bird Art Journal Page by Anna-Karin Evaldsson.

'Happiness' was stamped with the Wishing Mandala set and inked with orange Distress Inks.

Layers of ink - Inky Bird Art Journal Page by Anna-Karin Evaldsson.

I stitched the page before adhering it to a page in my art journal.

I hope you will join us this week in our Stitch It challenge. As always, you have a chance to win a $50 gift voucher to do some fun shopping at Simon Says Stamp. You have until next Monday 8am Ohio time. 1pm UK time, 2 pm CET to join in.


Don't forget to follow Simon Says Stamp on Instagram, they post great stuff daily. 


Do you use Instagram? If so please add #sssmchallenge so we can see your entries there too.


Thank you so much for taking the time to visit my blog today!  

Happy crafting!

Anna-Karin

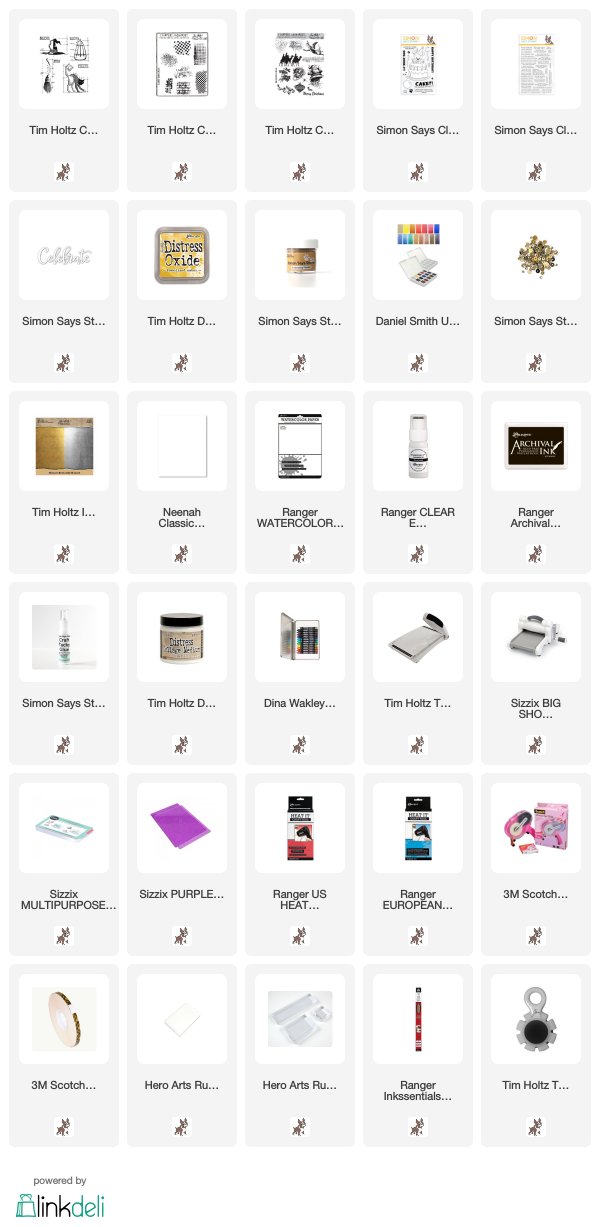
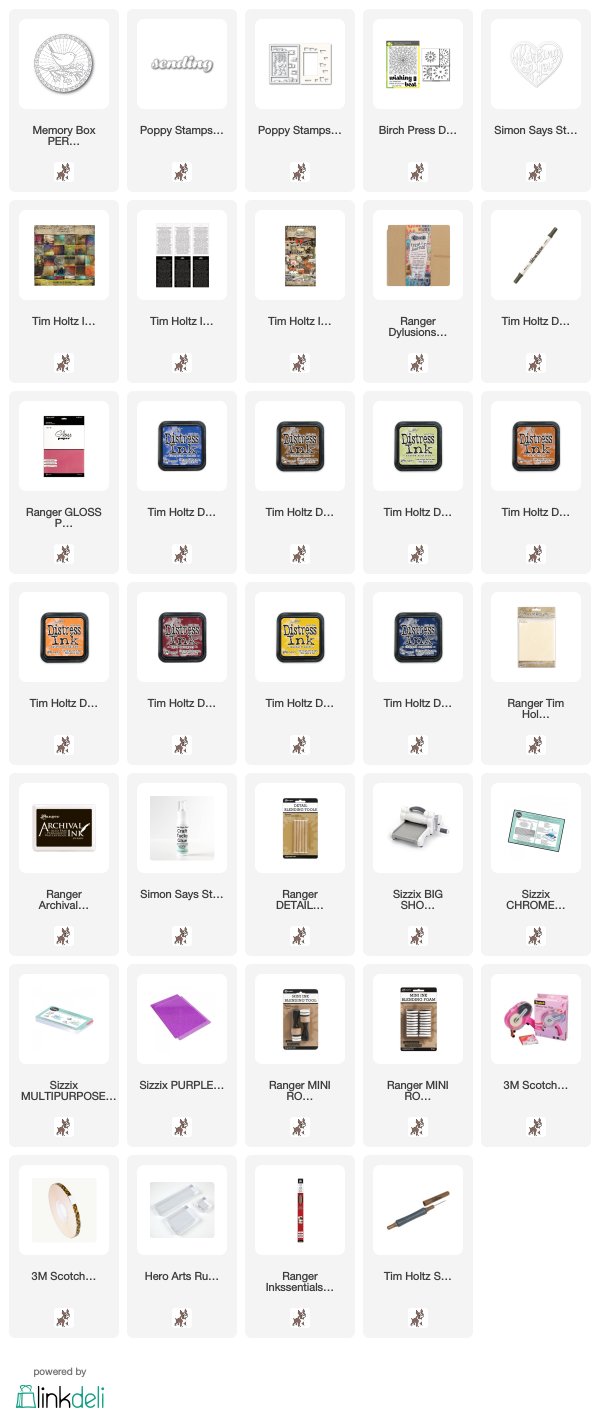
Supplies:

* Please note: the links are affiliate links, for which I receive a small percentage of sales generated by the link, at no extra cost to you.


Friday, September 20, 2019

Celebrate Birthday Card

Hello friends! Today I have a fun card tutorial to share with you, with some watercoloring, heat embossing and of course stamping. There is also a funny story behind the card. 

Layers of ink - Celebrate Birthday Card Tutorial by Anna-Karin Evaldsson.

The boys and I listen a lot to Queen, each of us having different favorite songs. Leo's favorite is We Will Rock You and he has been singing it since before he could talk. One of my friends who is a big fan of Queen and Freddie Mercury, suggested that I make a card to send for a celebration of his birthday, with donations being made for each card received to a charity. Freddie liked cats and the color yellow, and my card was inspired by that, with quite a bit of gold too. My card was a little late because it took too long in the mail, but if you have a look here at Funwitfreddie's Facebook page, you can see how the 'Little Freddie' action figurine opens the card. 

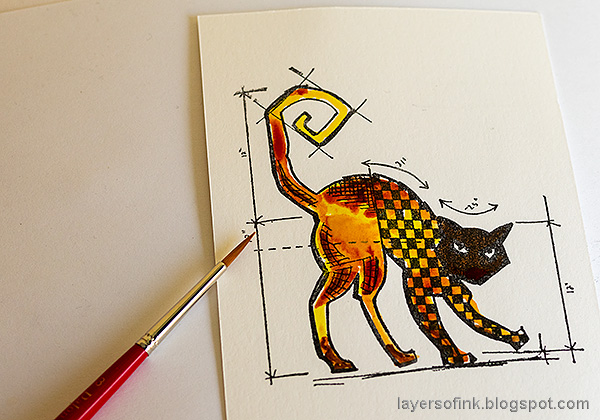
Layers of ink - Celebrate Birthday Card Tutorial by Anna-Karin Evaldsson. Stamp the cat.

All the cat stamps I had were Halloween themed, and so is this blueprint stamp by Tim Holtz. But it doesn't have to be for Halloween, especially if you avoid stamping the title. The checkered pattern is also pretty cool.

Layers of ink - Celebrate Birthday Card Tutorial by Anna-Karin Evaldsson. Watercolor the cat.

Mix some watercolor paint and paint the cat. Drop in darker shades before the lighter yellow and orange dries.

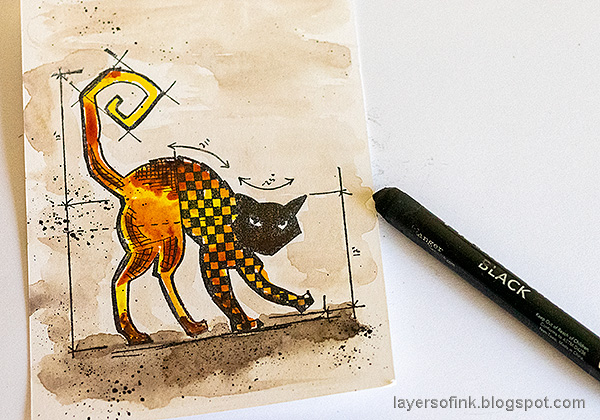
Layers of ink - Celebrate Birthday Card Tutorial by Anna-Karin Evaldsson.

 Mix a brownish grey and paint a light background. Use a darker shade as a shadow.

Layers of ink - Celebrate Birthday Card Tutorial by Anna-Karin Evaldsson.

Dip the tip of a black Scribble Stick in water and flick a paint brush against it to create splatters.

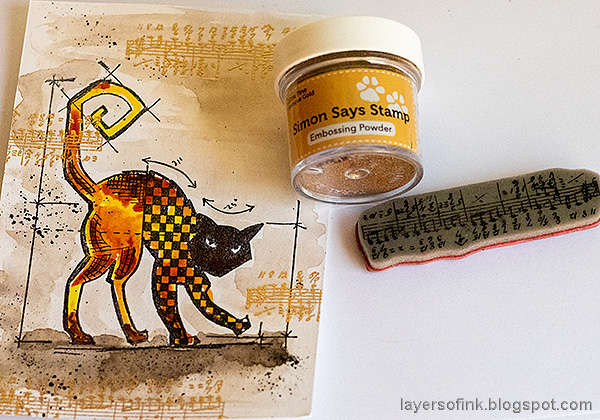
Layers of ink - Celebrate Birthday Card Tutorial by Anna-Karin Evaldsson. Gold emboss the musical notes.

Stamp a music stamp in some areas with embossing ink and gold emboss, with Antique Gold powder.

Layers of ink - Celebrate Birthday Card Tutorial by Anna-Karin Evaldsson.

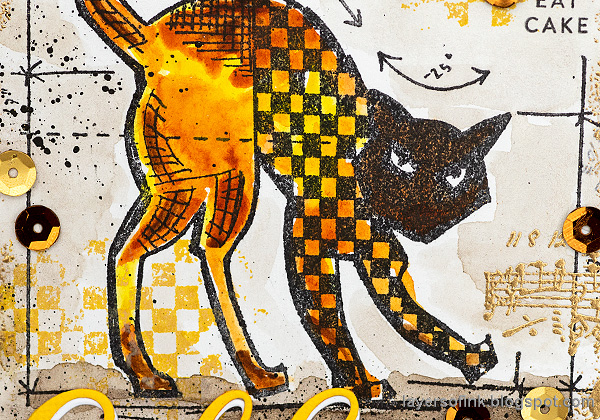
I wanted to repeat the checkered pattern and used a background stamp together with Fossilized Amber Distress Oxide.

Layers of ink - Celebrate Birthday Card Tutorial by Anna-Karin Evaldsson.

Apply embossing ink around the edges with an Emboss It Dabber, sprinkle gold powder on top and emboss.

Layers of ink - Celebrate Birthday Card Tutorial by Anna-Karin Evaldsson.

I layered the main panel on black cardstock, and then on gold kraft paper and finally on a cream folded cardstock.

Layers of ink - Celebrate Birthday Card Tutorial by Anna-Karin Evaldsson.

Sentiments, both larger and tiny, were stamped on top with Simon Says Stamp stamps. I also added gold sequins.

Layers of ink - Celebrate Birthday Card Tutorial by Anna-Karin Evaldsson.

You can see that I added some color to the face too, just to tone down the big area of black there and make the cat a little less Halloweenish.

Layers of ink - Celebrate Birthday Card Tutorial by Anna-Karin Evaldsson.

The card was finished with a SSS Celebrate word die cut from yellow and white paper.


Don't miss the continued STAMPtember® celebrations over at Simon Says Stamp.

Thank you so much for visit my blog today!  

Happy crafting!

Anna-Karin

Supplies:

* Please note: the links are affiliate links, for which I receive a small percentage of sales generated by the link, at no extra cost to you.


Monday, September 16, 2019

Beautiful shades of green

Hello friends! Did you have a good weekend? We did a mix of chores (tidying up, garden work) and fun stuff - soccer, picking blueberries, hanging out with friends, bicycle ride and going to a little market. We bought some homemade jam and marmalade.


It is Monday and this week at the Simon Says Stamp Monday Challenge Blog we have a Monochrome challenge. If you have never done a monochrome project before, this is the perfect time. It is a lot of fun to work with shades of only one color. 

Don't miss the stunning project by our September guest designer Anne Redfern.

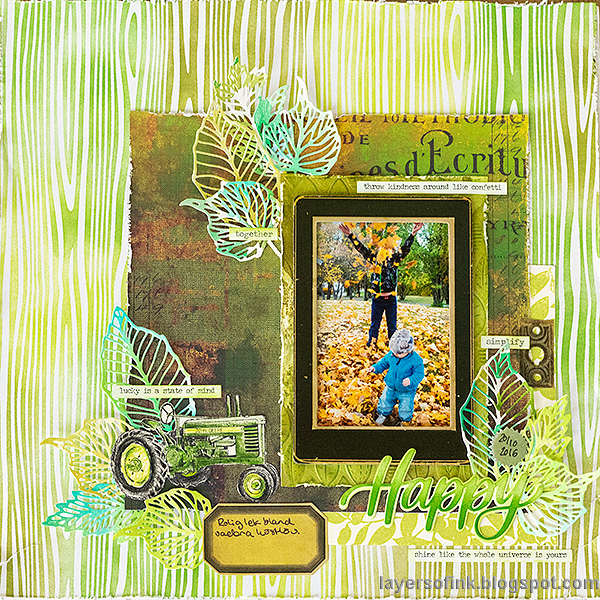
Layers of ink - Beautiful shades of green layout by Anna-Karin Evaldsson.

There is just something so amazing about green, and even more so when you see many shades of green together. I think it has to do with nature and walking in forests. My favorite forests are those with a mix of pine and leaf trees, partly because you get so many more shades of green then. I found a photo of the boys playing among fall leaves and decided to use that. It was taken three years ago, so they are quite a bit smaller than now. 

Layers of ink - Beautiful shades of green layout by Anna-Karin Evaldsson. Ink resist.

The background is Tim Holtz Motif cardstock, which has patterns that will resist inks and mists. Here you can see the middle white part which is the original look of the cardstock and the way the woodgrain pattern appears once I inked it with Distress Ink. There are different patterns in the pack, and also kraft papers with the same resist patterns.

Layers of ink - Beautiful shades of green layout by Anna-Karin Evaldsson. Dry embossing.

I also used the Sizzix 3D Leaves embossing folder and embossed a piece of green watercolor paper that I found in my scrap box. Then it was inked with Mowed Lawn and Peeled Paint to make the leaves more visible. Most of it was covered up in the end, but this would also make a great background for a card.

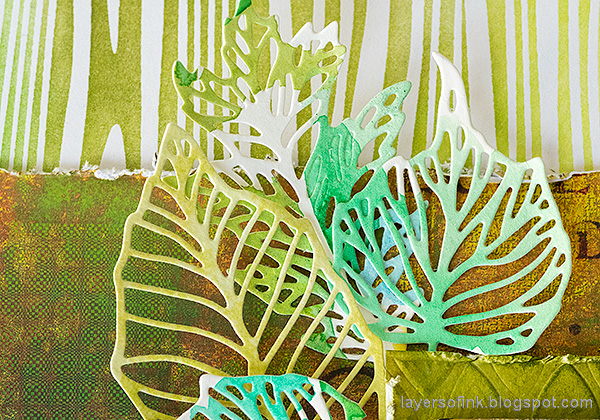
Layers of ink - Beautiful shades of green layout by Anna-Karin Evaldsson. Skeleton leaves.

The leaves were die cut with Tim Holtz Skeleton Leaves set, from various green scrap papers that I found. One of them was a left over paper from when I tested different shades of green watercolor mixes for another project. Those ended up being my favourite leaves - it's the leaves with areas of white. That paper could easily have been thrown away, since on its own it was hard to use, but for die cutting it was perfect.

Layers of ink - Beautiful shades of green layout by Anna-Karin Evaldsson.

I like to add bits of glossy pieces on projects, and for this layout, I die cut the title from glossy paper. The top word was inked with Moved Lawn, making it darker towards the bottom. The mat was inked with Twisted Citron.

Layers of ink - Beautiful shades of green layout by Anna-Karin Evaldsson.

Glue them together, for a great, glossy, green title. Here you can also spot a piece of paper stamped with the SSS Leaves Background stamp, which I also found in my scrap box.

Layers of ink - Beautiful shades of green layout by Anna-Karin Evaldsson.

The patterned paper comes from Tim's new Abandoned paper stash, which I love. The papers are meant for Halloween, but they work for any theme. Wonderful colors, textures and patterns.

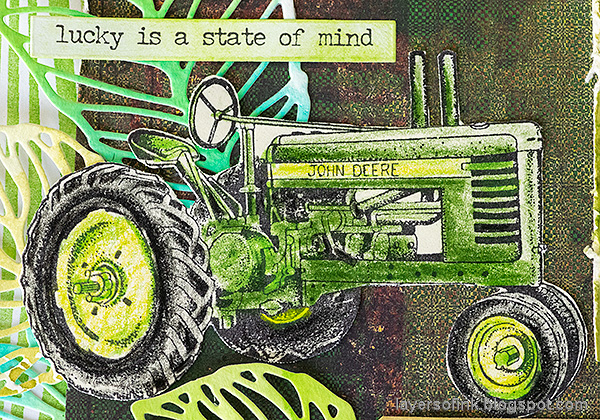
Layers of ink - Beautiful shades of green layout by Anna-Karin Evaldsson. Tractor stamp.

The Farm Tractor from Whimsy Stamps was colored with Prismacolor pencils, and then cut out. Leo loves tractors, so I added it mainly for him. He actually picked out this stamp when he joined me for my last SSS order.

Layers of ink - Beautiful shades of green layout by Anna-Karin Evaldsson.

Some of the leaves have a pretty teal shade, which fits well with the green.

Layers of ink - Beautiful shades of green layout by Anna-Karin Evaldsson.

The photo was framed with a frame from Tim's Halloween Layers and Baseboard set. That frame actually inspired the whole project, since I loved the vintage look of it and wanted to use it for something non-Halloween.

I hope you will join us this week in our Monochrome challenge. As always, you have a chance to win a $50 gift voucher to do some fun shopping at Simon Says Stamp. You have until next Monday 8am Ohio time. 1pm UK time, 2 pm CET to join in.


Don't forget to follow Simon Says Stamp on Instagram, they post great stuff daily. 


Do you use Instagram? If so please add #sssmchallenge so we can see your entries there too.


Thank you so much for taking the time to visit my blog today!  

Happy crafting!

Anna-Karin

Supplies:

* Please note: the links are affiliate links, for which I receive a small percentage of sales generated by the link, at no extra cost to you.

Thursday, September 12, 2019

Watercolor Florals Tutorial

Hello friends! Today I have a borderless watercolor tutorial to share with you. I used a floral stamp, but the technique works for other images too, and for any type of project. 

I hope you aren't missing all the inspiration at Simon Says Stamp during STAMPtember®. Today, the brand of the day is Memory Box, and I used one of their lovely stamps here.  

Layers of ink - Watercolor Florals Tutorial by Anna-Karin Evaldsson.

This started out as an art journal page, but then I changed my mind and framed it instead, so that I can give it as a gift to someone. I had a cheap frame that I got in a sale box at our local grocery store recently. This project might look hard, but it is much easier than what it looks like. I used a beautiful Rose Bouquet stamp set by Memory Box. 

Layers of ink - Watercolor Florals Tutorial by Anna-Karin Evaldsson.

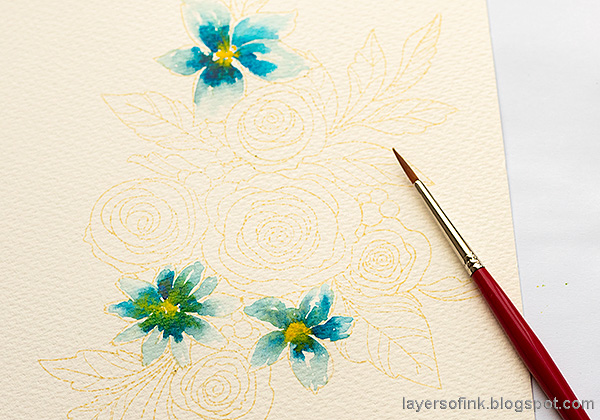
Working on watercolor paper, start by stamping the floral stamp with Antique Linen ink. We want to use a light ink, so that the edges will almost disappear. For a different effect, emboss with white embossing powder, or stamp with waterproof black ink.

Layers of ink - Watercolor Florals Tutorial by Anna-Karin Evaldsson. Watercolor the flowers.

Mix up some watercolor paint. I always test my paint on scrap paper first, to make sure I have the shades that I want. Start with the lighter blue and then drop in a darker blue towards the center. Before the blue paint dries, drop in yellow in the center. You can also do the same technique with Distress Ink, by smearing the inks on a craft sheet, mist with water and pick up with a paint brush.

Layers of ink - Watercolor Florals Tutorial by Anna-Karin Evaldsson.

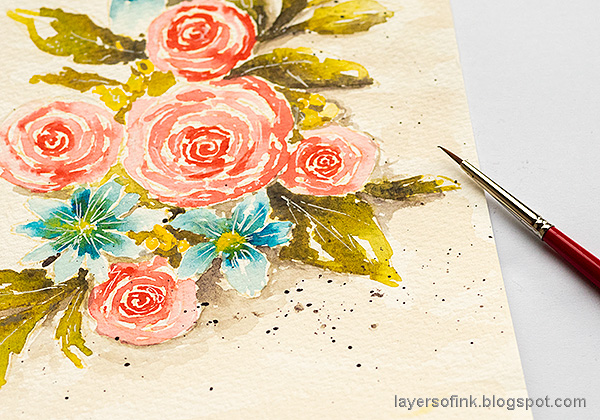
Continue with the roses and the leaves. Don't cover the whole design with paint, but instead leave some of the paper showing, which creates highlights, and gives the coloring a loose look. I decided that the light was coming from the top left, and made the roses and leaves lighter on that side.

Layers of ink - Watercolor Florals Tutorial by Anna-Karin Evaldsson.

Continue with the rest of the design.

Layers of ink - Watercolor Florals Tutorial by Anna-Karin Evaldsson. Add highlights.

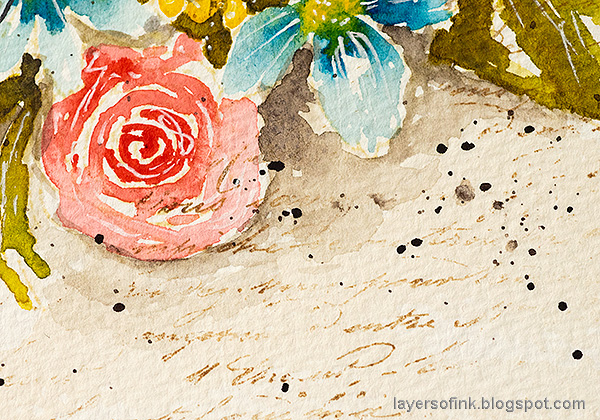
The background was painted with very watery light brown paint, since I wanted it to be a little darker. I forgot to take a photo of the shading step. Mix a relatively light shade of grey and paint a shadow on the darker side of the arrangement. This grounds the flowers to the paper and adds dimension. When everything was dry, I decided to add some lines and highlights with a white gel pen too.

Layers of ink - Watercolor Florals Tutorial by Anna-Karin Evaldsson.

Splatter a tiny bit of dark grey watercolor paint on the background, focusing on the shadow areas.

Layers of ink - Watercolor Florals Tutorial by Anna-Karin Evaldsson. Stamp script.

Stamp randomly with a script stamp with a light brown ink. I used Vintage Photo Archival Ink and stamped once on scrap paper first. The script stamp comes from Tim Holtz's French Marketplace set.

Layers of ink - Watercolor Florals Tutorial by Anna-Karin Evaldsson.

I stamped the sentiment on a different paper first and cut it out, but then decided it would look better stamped directly on the background. It comes from Simon Says Stamp Uplifting Thoughts.

Layers of ink - Watercolor Florals Tutorial by Anna-Karin Evaldsson.

Here's a closer look at the shadows and the white gel pen work.

Layers of ink - Watercolor Florals Tutorial by Anna-Karin Evaldsson. With Memory Box Rose Bouquet.

If you don't want to add the script, you can skip that step.

Layers of ink - Watercolor Florals Tutorial by Anna-Karin Evaldsson.

Some of the lines still show, and I liked that, since they almost look like a soft shadow. If you want them to be invisible, paint over them.

Layers of ink - Watercolor Florals Tutorial by Anna-Karin Evaldsson. With Memory Box Rose Bouquet.

I cut the paper down to 8 x 6 in, so that it would fit into my frame. You can leave the paper a little larger if you want to, with more space around the flowers.


Thank you so much for taking the time to visit my blog today!  

Happy crafting!

Anna-Karin

Supplies:

* Please note: the links are affiliate links, for which I receive a small percentage of sales generated by the link, at no extra cost to you.