Saturday, May 20, 2023

Glossy Birthday Cards

Hello friends! Today I have two glossy birthday cards to share, made with two versions of the same technique. 

Please note: this post has affiliate links, for which I receive a small percentage of sales generated by the link, at no extra cost to you.
Layers of ink - Glossy Birthday Cards Tutorial by Anna-Karin Evaldsson.

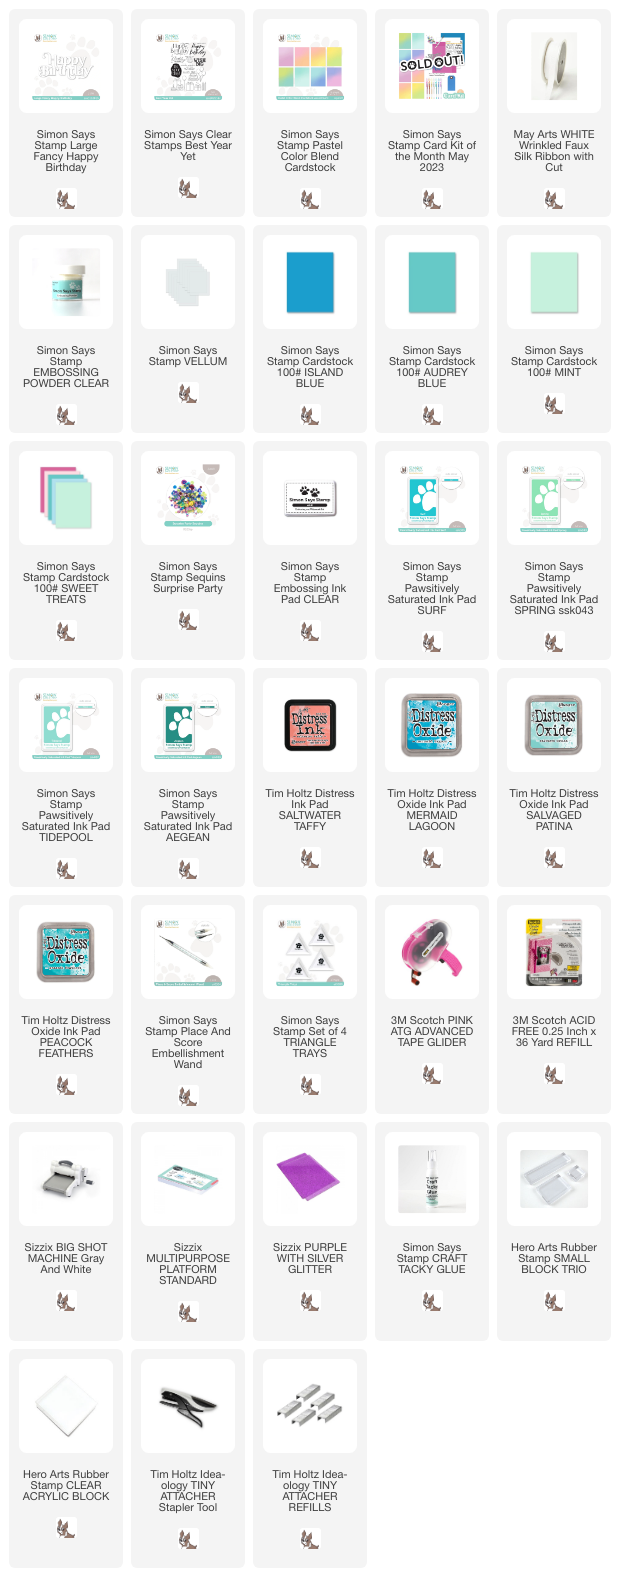
I made two birthday cards on glossy cardstock and with a lot of embossing. The sentiments from Simon Says Stamp Best Year Yet were so pretty that I decided to cover the entire backgrounds with them. The card to the left has more visible sentiments, while the background on the card to the right is more subtle. I used Simon Says Stamp Best Year Yet May card kit. You can also get the products individually. 

Layers of ink - Glossy Birthday Cards Tutorial by Anna-Karin Evaldsson.

For the first card, I clear embossed sentiments from Simon Says Stamp Beat Year Yet on a Simon Says Stamp Pastel Color Blend glossy card.

Layers of ink - Glossy Birthday Cards Tutorial by Anna-Karin Evaldsson. Emboss the images with clear powder.

For the second card, I stamped the sentiments with various Distress Oxide Inks in turquoise shades and embossed with the clear powder.

Layers of ink - Glossy Birthday Cards Tutorial by Anna-Karin Evaldsson. Simon Says Stamp Happy Birthday.

Color glossy cardstock with Tidepool and Spring Simon Says Stamp Pawsitively Saturated inks. Die cut the Simon Says Stamp Large Fancy Happy Birthday from the gloss card.

Layers of ink - Glossy Birthday Cards Tutorial by Anna-Karin Evaldsson.

The background is subtle with the glossy shine of the embossing. The letters are less visible on the lighter part of the ombre background.

Layers of ink - Glossy Birthday Cards Tutorial by Anna-Karin Evaldsson.

If you angle the card, you can easily read all the sentiments, even the small ones. I embossed stars here and there too, from the same stamp set. 

Layers of ink - Glossy Birthday Cards Tutorial by Anna-Karin Evaldsson.

The sequins come from Simon Says Stamp and I used the Place and Score Embellishment Wand to easily place them down. 

Layers of ink - Glossy Birthday Cards Tutorial by Anna-Karin Evaldsson.

The glossy title was matted on turquoise cardstock.

Layers of ink - Glossy Birthday Cards Tutorial by Anna-Karin Evaldsson.

The ribbon was dyed with the Tidepool and Aegean Pawsitively Saturated inks and the sentiment was stamped with Surf ink.

Layers of ink - Glossy Birthday Cards Tutorial by Anna-Karin Evaldsson.

The second card also as a glossy tone-on-tone background, but here the text is more visible since it was stamped with Distress Oxide inks.

Layers of ink - Glossy Birthday Cards Tutorial by Anna-Karin Evaldsson.

The Oxide inks take on a multi-colored look on the Pastel Color Blend cardstock.

Layers of ink - Glossy Birthday Cards Tutorial by Anna-Karin Evaldsson.

The sentiments and fonts used on the Best Year Yet stamp set are just great and I like the mix of larger and small sentiments.

Layers of ink - Glossy Birthday Cards Tutorial by Anna-Karin Evaldsson.

Here's another really pretty sentiment. I twisted the ribbon and adhered it with staples. The staples were covered up with sequins. I normally leave the staples visible, but on this card, I rather wanted a round shape 'holding' down the ribbon.

Layers of ink - Glossy Birthday Cards Tutorial by Anna-Karin Evaldsson.

I stamped stars here and there on this card too.


Thank you so much for stopping by here today! 

Happy crafting!

Anna-Karin

Supplies:

* Please note: the links are affiliate links, for which I receive a small percentage of sales generated by the link, at no extra cost to you.


Monday, May 15, 2023

Be an Individual Art Journal Page

Hello friends! I hope you are well and had a good weekend. We has beautiful weather and most of the trees are now becoming green. 

Please note: this post has affiliate links, for which I receive a small percentage of sales generated by the link, at no extra cost to you.


This week at the Simon Says Stamp Monday Challenge Blog we have an Art Journal theme. If you have never tried art journaling, I hope you will do so. It is a lot of fun. If you don't have an art journal, you can journal on lose pages and later bind them into a journal. 

Don't miss the gorgeous art journal page by our May guest designer Cassie Lynch aka mk_knits.

Individual Mixed Media Art Journal Tutorial by Anna-Karin Evaldsson.

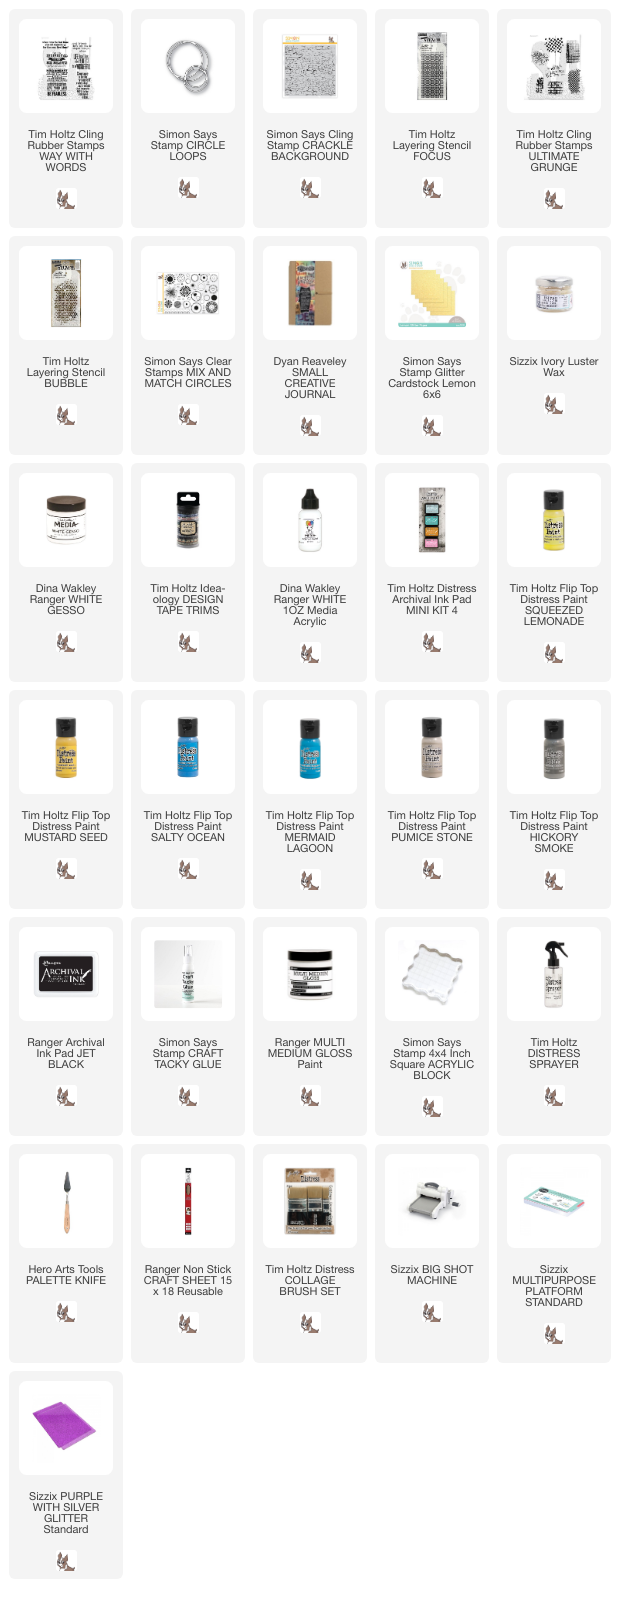
I was looking through some stamp sets and came up on this large stamp from Tim Holtz Way With Words. I decided to use it as the focal point on an art journal page in my Small Creative Journal.

Individual Mixed Media Art Journal Tutorial by Anna-Karin Evaldsson.

When I have left-over paint, I often use it on a page in an art journal. This page had first been coated with gesso and later I had added left-over Distress Paint and misted with water.

Individual Mixed Media Art Journal Tutorial by Anna-Karin Evaldsson. Stamp Tim Holtz Way With Words.

This is a large stamp with fine details in the form of small typography and dots and I didn't want to risk a bad stamped impression on the already painted background. Instead, I stamped the sentiment on tissue paper and tore around the edges.

Individual Mixed Media Art Journal Tutorial by Anna-Karin Evaldsson.

Apply gloss medium to the background and place the tissue paper into the medium. Add another layer of medium on top and the tissue paper will become basically invisible. 

Individual Mixed Media Art Journal Tutorial by Anna-Karin Evaldsson. Tim Holtz Focus stencil.

Sponge Hickory Smoke paint through Tim Holtz Focus Stencil to frame the sentiment.

Individual Mixed Media Art Journal Tutorial by Anna-Karin Evaldsson.

Stamp with a brick stamp from Tim Holtz Ultimate Grunge and with Simon Says Stamp Crackle Background.

Individual Mixed Media Art Journal Tutorial by Anna-Karin Evaldsson.

Mix a little white paint into texture paste and then apply with a palette knife through Tim's Bubble Stencil.

Individual Mixed Media Art Journal Tutorial by Anna-Karin Evaldsson. Sizzix Ivory Luster Wax.

When dry, apply a little Sizzix Ivory Luster Wax on the dots and here and there on the page.

Individual Mixed Media Art Journal Tutorial by Anna-Karin Evaldsson.

The blue dots were stamped with a border stamp from Simon Says Stamp Mix and Match Circles. I also added strips of Tim Holtz Trims Design Tape.

Individual Mixed Media Art Journal Tutorial by Anna-Karin Evaldsson.

Stamping can be a challenge on textured art journal pages, especially if the other side of the page is already decorated. Using tissue tape works great, especially on a painted surface.

Individual Mixed Media Art Journal Tutorial by Anna-Karin Evaldsson.

Simon Says Stamp Circle Loops were die cut from Lemon Glitter Paper. This is one of my all time favorite die.

Individual Mixed Media Art Journal Tutorial by Anna-Karin Evaldsson.

I hope you enjoyed this tutorial, focusing on one large sentiment stamp. 

I hope you will join us this week in our Art Journaling challenge. You have a chance to win a $25 gift voucher to do some fun shopping at Simon Says Stamp. You have until Monday 8am Ohio time. 1pm UK time, 2 pm CET to join in.


Do you use Instagram? If so please add #sssmchallenge so we can see your entries there too.


Thank you so much for stopping by here today! 

Happy crafting!

Anna-Karin

Supplies:

* Please note: the links are affiliate links, for which I receive a small percentage of sales generated by the link, at no extra cost to you.


Monday, May 8, 2023

Luster Wax Resist Tutorial

Hi crafters! Today I have a fun resist background technique to share with you. 

Please note: this post has affiliate links, for which I receive a small percentage of sales generated by the link, at no extra cost to you.


Inspired by music is our theme this week at the Simon Says Stamp Monday Challenge Blog. I hope you will join us! Don't miss the lovely project by our May guest designer Cassie Lynch aka mk_knits into the Designer Spotlight.

Layers of ink - Luster Wax Resist Tutorial by Anna-Karin Evaldsson.

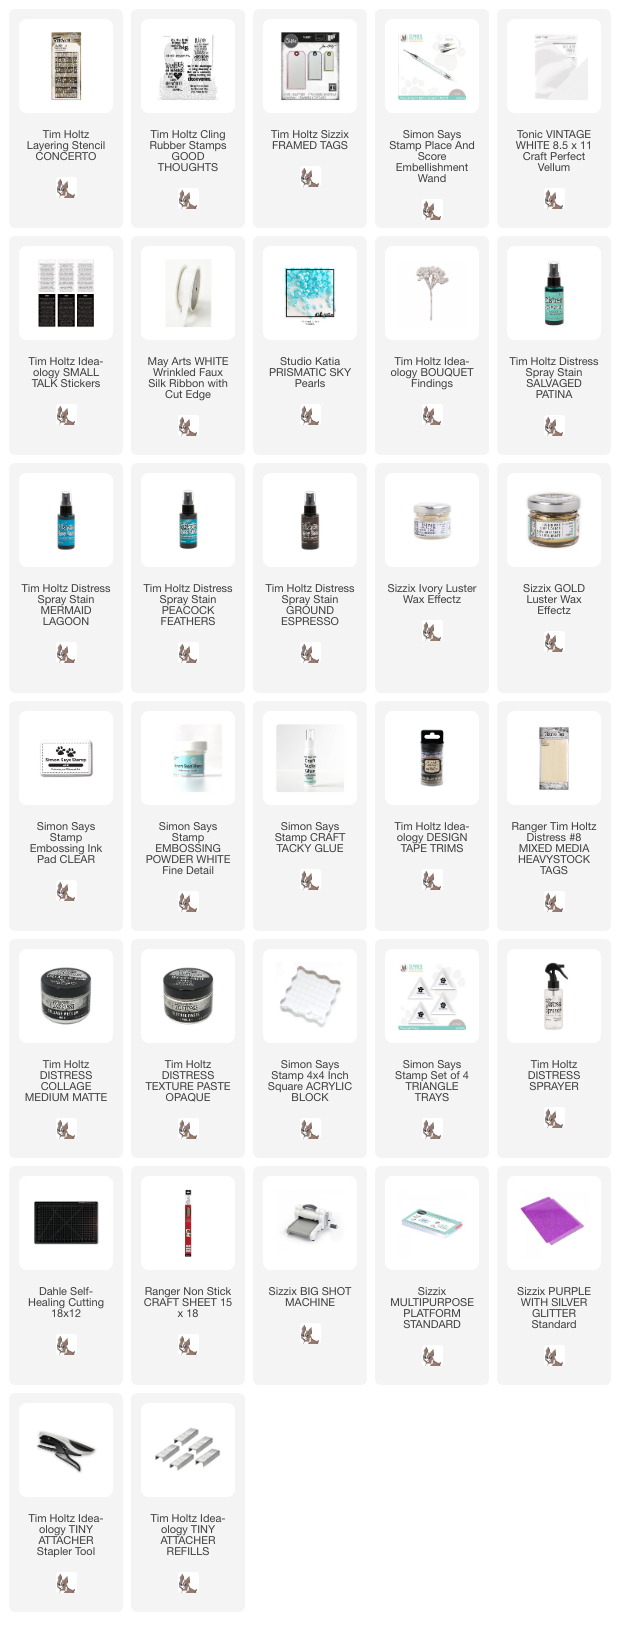
I used Tim Holtz Concerto stencil for the background and wanted a textured resist. After having applied texture paste, I got the idea of trying to do a resist technique with Sizzix Luster Wax and really liked the result. 

Layers of ink - Luster Wax Resist Tutorial by Anna-Karin Evaldsson. Apply texture paste through Tim Holtz Concerto stencil.

Apply Ranger Texture Paste through the Concerto stencil with a palette knife.

Layers of ink - Luster Wax Resist Tutorial by Anna-Karin Evaldsson.

When the paste was dry, I placed the stencil back and sponged white paint on the design. You can also mix a little white into the paste to begin with.

Layers of ink - Luster Wax Resist Tutorial by Anna-Karin Evaldsson. Apply Sizzix Ivory Luster Wax.

When dry, apply Sizzix Ivory Luster Wax over the design with your finger. Don't worry about getting a perfect result, but try not to get too much wax in between the texture paste.

Layers of ink - Luster Wax Resist Tutorial by Anna-Karin Evaldsson. Mist with Distress Spray Stain.

Mist with Distress Spray Stains and blend by misting with water. The wax will resist the spray, creating this cool, colorful, textured and shimmery background.

Layers of ink - Luster Wax Resist Tutorial by Anna-Karin Evaldsson.

The tag was die cut from Tonic Vellum using Tim's Framed Tags. I flipped the tag over and placed it on foam. Draw two borders using a ruler and Simon Says Stamp Place and Score Embellishment Wand

Layers of ink - Luster Wax Resist Tutorial by Anna-Karin Evaldsson. Stamp with Tim Holtz Good Thoughts.

The sentiment comes from Tim Holtz Good Thoughts and was white embossed on the vellum tag. Here you can also see the white borders better.

Layers of ink - Luster Wax Resist Tutorial by Anna-Karin Evaldsson.

I also applied a tiny bit of Sizzix Gold Luster Wax

Layers of ink - Luster Wax Resist Tutorial by Anna-Karin Evaldsson.

Before painting the dry paste with white paint, I started doing the same thing with gesso, but too much of it soaked under the stencil. However, these ended up being my favorite areas of the background, since the gesso which ended up under the stencil created a second resist effect. The ligth blue areas here are where the gesso had ended up.

Layers of ink - Luster Wax Resist Tutorial by Anna-Karin Evaldsson.

Mist Tim's Bouquet Findings with the same Distress Spray Stains and add to the tag. Add some Studio Katia Prismatic Sky pearls here and there using the Simon Says Stamp Place and Score Embellishment Wand.

Layers of ink - Luster Wax Resist Tutorial by Anna-Karin Evaldsson.

I also added two Small Talk sentiments.

Layers of ink - Luster Wax Resist Tutorial by Anna-Karin Evaldsson. Tim Holtz Bouquet flowers.

There are also three strips of Design Tape Trims in the background.

Layers of ink - Luster Wax Resist Tutorial by Anna-Karin Evaldsson.


I hope you will join us this week in our Inspired by Music challenge. You have a chance to win a $25 gift voucher to do some fun shopping at Simon Says Stamp. You have until Monday 8am Ohio time. 1pm UK time, 2 pm CET to join in.


Do you use Instagram? If so please add #sssmchallenge so we can see your entries there too.


Thank you so much for stopping by here today! 

Happy crafting!

Anna-Karin

Supplies:

* Please note: the links are affiliate links, for which I receive a small percentage of sales generated by the link, at no extra cost to you.


Sunday, May 7, 2023

Window Shaker Card Tutorial

 Hi crafters! Today I have a tutorial on the Simon Says Stamp store blog, for a fun shaker card.


I like to color or stamp acetate sheets used for shaker cards and here I did both. The sheet used for the windows is colored with alcohol ink and one of the two acetate sheets used for the shaker is stamped with a script stamp. 

You can find see the full project, the tutorial and details on the Simon Says Stamp store blog. 

Thank you for taking the time to visit my blog today!

Happy stamping!

Anna-Karin