Monday, April 8, 2019

Pastel Easter Tag Tutorial

Hello friends! It is a new week, and spring is taking a temporary break here it seems. On Friday and Saturday we had gorgeous weather though, and spent a lot of time outdoors. On Friday afternoon, Leo and I went to one of our favorite little lakes where there are lots of things to explore, such as pine-cones, spring flowers, and this year's very first bumblebee. 

At the Simon Says Stamp Monday Challenge Blog there is a Down On The Farm theme this week. I am looking forward to seeing all the creations, and don't miss the project by our April guest designer Sabrina Perna. It is a wonderful project.

Layers of ink - Pastel Easter Tag Tutorial by Anna-Karin Evaldsson.

Easter is coming soon, so I made an Easter tag, with two farm critters, and one additional friend. Lots of pastel colors make the tag look almost good enough to eat. The background and the grass were colored with Distress Oxides. I had planned to take out our Easter decorations this week, but time ran out, so I will try to do it one of the evenings this week instead. All the bright colors are so cheerful.

Layers of ink - Pastel Easter Tag Tutorial by Anna-Karin Evaldsson. Ink with Distress Oxides.

I started out by adding layers of Distress Oxides on a tag, by smearing the inks on a craft sheet, misting with water and pressing the tag into the ink. Dry with a heat tool in between layers, and mist with extra water if needed.

Layers of ink - Pastel Easter Tag Tutorial by Anna-Karin Evaldsson. Ink with Distress Oxides. Stamp with Distress Oxides.

Stamp with two background stamps using Worn Lipstick and Fossilized Amber. The stamps come from Tim Holtz's Tiny Textures set.

Layers of ink - Pastel Easter Tag Tutorial by Anna-Karin Evaldsson. Ink with Distress Oxides. White emboss.

When the background is dry, stamp with a texture stamp and white emboss.

Layers of ink - Pastel Easter Tag Tutorial by Anna-Karin Evaldsson. Ink with Distress Oxides.

I also added some script stamping with Wilted Violet.
 Layers of ink - Pastel Easter Tag Tutorial by Anna-Karin Evaldsson. Die cut Tim Holtz Critters die.

The animals come from Tim's Critters Sidekick set. Each die includes lots of little details.

Layers of ink - Pastel Easter Tag Tutorial by Anna-Karin Evaldsson. Ink with Distress Oxides.

Die cut from watercolor and black paper.

Layers of ink - Pastel Easter Tag Tutorial by Anna-Karin Evaldsson. Watercolor the animals.

Watercolor the animals with Distress Ink, by first smearing the ink on a craft sheet, misting with water and picking it up with a paint brush.

Layers of ink - Pastel Easter Tag Tutorial by Anna-Karin Evaldsson.

When dry, assembly the animals. I adhered some of the pieces with foam dots. Add a black outline shadow at the back, but slightly off-setting one a black die cut piece.

Layers of ink - Pastel Easter Tag Tutorial by Anna-Karin Evaldsson.

Add brown hearts with the Simon Says Stamp Heart Layers stencil.

Layers of ink - Pastel Easter Tag Tutorial by Anna-Karin Evaldsson. Ink with Distress Oxides.

The grass was die cut with the Simon Says Stamp Grassy Edges set from watercolor paper and colored with Cracked Pistachio and Twisted Citron, in the same method as above.

Layers of ink - Pastel Easter Tag Tutorial by Anna-Karin Evaldsson. Assemble the grass.

Layer the grass pieces on the tag, using foam tape for the front piece.

Layers of ink - Pastel Easter Tag Tutorial by Anna-Karin Evaldsson.

I also added some stickers as sentiments.

Layers of ink - Pastel Easter Tag Tutorial by Anna-Karin Evaldsson. Ink with Distress Oxides.

The layers of ink and stamping makes for a really nice effect and each little area of the background is different from the others.

Layers of ink - Pastel Easter Tag Tutorial by Anna-Karin Evaldsson.

Tuck the animals in among the grass.

Layers of ink - Pastel Easter Tag Tutorial by Anna-Karin Evaldsson.

The sheep is my favorite.

Layers of ink - Pastel Easter Tag Tutorial by Anna-Karin Evaldsson.

And the happy duck. I really like the speckled effect in the background, which you can see here.
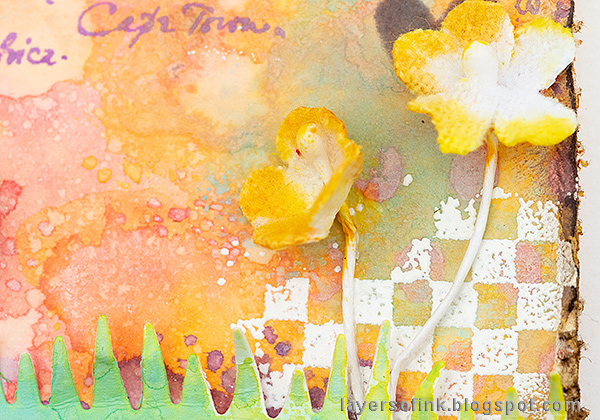
Layers of ink - Pastel Easter Tag Tutorial by Anna-Karin Evaldsson. Paper flowers.

I also added some Bouquet Findings flowers, colored with Distress Ink.

Layers of ink - Pastel Easter Tag Tutorial by Anna-Karin Evaldsson.

And a title die cut using Tim's Calendar Words set.

Layers of ink - Pastel Easter Tag Tutorial by Anna-Karin Evaldsson.

Here you can better see the dimension of the animals.

Layers of ink - Pastel Easter Tag Tutorial by Anna-Karin Evaldsson.

I tied the tag with a piece of ribbon and a twine, which I found on my desk.

I hope you will join us this week in our Down On The Farm challenge. As always, you have a chance to win a $50 gift voucher to do some fun shopping at Simon Says Stamp. You have until next Monday 8am Ohio time. 1pm UK time, 2 pm CET to join in.


Don't forget to follow Simon Says Stamp on Instagram, they post great stuff daily. 


Do you use Instagram? If so please add #sssmchallenge so we can see your entries there too.


Thank you so much for taking the time to visit my blog today!  

Happy crafting!

Anna-Karin

Supplies:

* Please note: the links are affiliate links, for which I receive a small percentage of sales generated by the link, at no extra cost to you.


Monday, April 1, 2019

Watercolor Stamping Tutorial

Hi everyone! I hope your weekend was good. We had a great weekend, with beautiful spring weather. The crocuses are now flowering and since we switched over to summer time, we have an extra hour of light in the evenings. 


It is the first of April, and you might already have heard a couple of April's Fools jokes. I am still thinking of a funny joke for the kids tonight. Our theme at the Simon Says Stamp Monday Challenge Blog is Don't Be Fooled, Be Foiled. Fun! Since it is the first Monday of a new month, the team is showcasing the products of a specific designer/company and this week the turn has come to Gina K Designs. Here you can find all the wonderful stamps, dies, stencils, ink, foil, paper products and more by Gina K. You don't have to use Gina K products to join us, but it is always fun if you do. 

Since it is a new month, we also have a new guest designer, and for April Sabrina Perna will be our guest. Stop by her blog It's Time To Create-my Mixed Media Corner and you will be treated with fantastic projects.

Layers of ink - Watercolor Stamping Tutorial by Anna-Karin Evaldsson. With Watercolor Flowers stamps by Gina K Designs.

I made a set of two cards and a bookmark this week. Since I have been very much in a mood for yellow lately, these cards also feature yellow as the main color. The flowers were watercolor stamped, which is one of my all time favorite techniques. It is easy to do, and gives a slightly different result every time. No flower will look exactly like the other.

Layers of ink - Watercolor Stamping Tutorial by Anna-Karin Evaldsson. With Watercolor Flowers stamps by Gina K Designs.

These are the Gina K products that I used: Crystalline Drops, Watercolor Flowers, and Artist's Choice cardstock.

Layers of ink - Watercolor Stamping Tutorial by Anna-Karin Evaldsson. Ink the flower stamps.

Start by inking a flower with Mustard Seed Distress Ink. Add a darker shade towards the center with a Wild Honey marker and brown to the center with Gathered Twigs.

Layers of ink - Watercolor Stamping Tutorial by Anna-Karin Evaldsson. Distress Ink, inking.

Here's a close up where you can better see the ink once it is applied to the stamp.


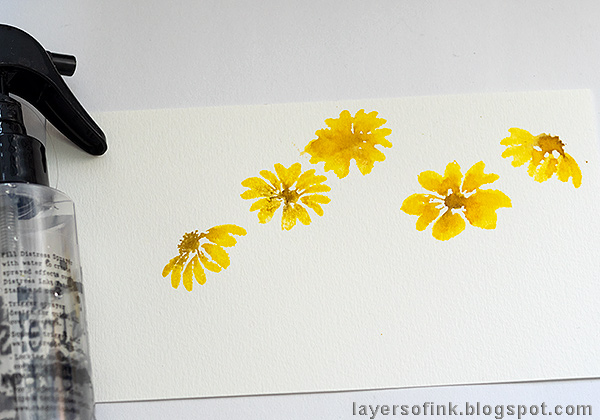
Mist with water about three times and stamp on watercolor paper.

Layers of ink - Watercolor Stamping Tutorial by Anna-Karin Evaldsson. With Watercolor Flowers stamps by Gina K Designs.

Depending on how much water you mist on the stamp, you will get a different look to the flowers. Here I used slightly too much water for the stamp in the middle, but I will fix that later.

Layers of ink - Watercolor Stamping Tutorial by Anna-Karin Evaldsson. Paint flower stems.

The Watercolor Flowers stamp set includes leafy stems, but I wanted my stems to be taller, so I painted them with watercolor paint instead. You can also use Distress Ink (smear on non-stick craft sheet, mist with water and pick up with the paint brush).

Layers of ink - Watercolor Stamping Tutorial by Anna-Karin Evaldsson. With Watercolor Flowers stamps by Gina K Designs.

One of my favorite things with the Watercolor Flowers set is that it contains lose leaf stamps. Stamp these to the stems, again misting with water first. For variation, I also used some of the leave stamps attached to stems, but wiped off the ink from the stem before stamping.

Layers of ink - Watercolor Stamping Tutorial by Anna-Karin Evaldsson. Paint watercolor grass.

Paint a grassy base with watercolor paint or Distress Inks. I used water to soften the edge on the left-hand card, while leaving a sharper edge on the right-hand card. Splatter some brown and green paint on the background for texture.

Layers of ink - Watercolor Stamping Tutorial by Anna-Karin Evaldsson. With Watercolor Flowers stamps by Gina K Designs.

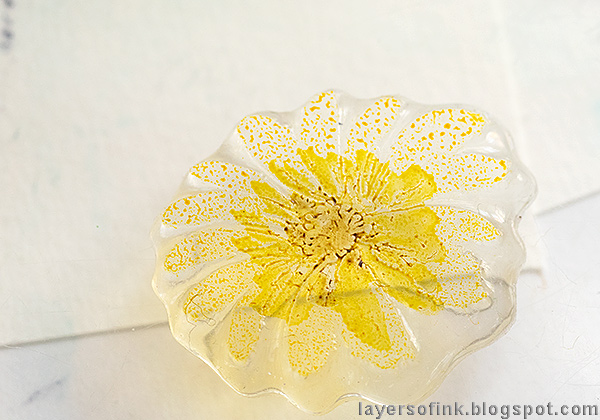
Stamp a sentiment with brown ink and distress the edges. Add dimension and shine with the Crystalline Drops. I hadn't used these before and was impressed with how easy it was to get perfectly round drops, even tiny ones.

Layers of ink - Watercolor Stamping Tutorial by Anna-Karin Evaldsson. Die cut words with Tim Holtz Sizzix dies.

Adhere Sizzix Permanent Adhesive to white card. Die cut words using the Tim Holtz Sizzix Celebration Words Script and Adventure Words Script sets.

Layers of ink - Watercolor Stamping Tutorial by Anna-Karin Evaldsson. Apply foil to the words.

Remove the adhesive covering and rub Ranger's Vintage Shiny Transfer Foil on top. I used soft vintage gold for one of the cards and a darker metallic brown for the other.

Layers of ink - Watercolor Stamping Tutorial by Anna-Karin Evaldsson. With Watercolor Flowers stamps by Gina K Designs.

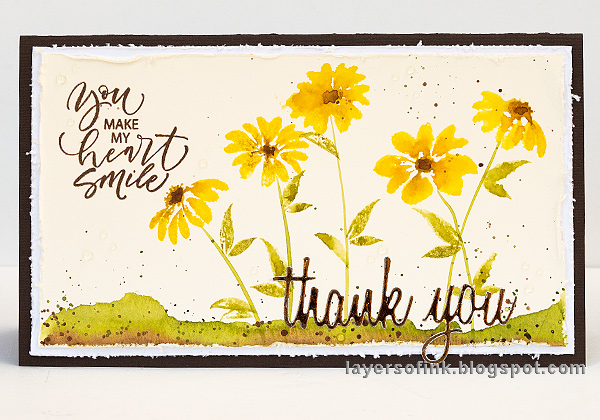
I made one horizontal thank you card, already having left space for the sentiment stamp.

Layers of ink - Watercolor Stamping Tutorial by Anna-Karin Evaldsson.

You can always add more details with watercolor paint. I added some brown paint to the centers of some of the flowers, which made a difference especially to the flower that was stamped with too much water.

Layers of ink - Watercolor Stamping Tutorial by Anna-Karin Evaldsson. Add details with watercolor paint.

All the flowers and leaves will look different, which is one of the fun parts of the watercolor stamping technique.

Layers of ink - Watercolor Stamping Tutorial by Anna-Karin Evaldsson. Foiled words.

The foil gives a great shine to the words, and has a lovely vintage look.

Layers of ink - Watercolor Stamping Tutorial by Anna-Karin Evaldsson. Crystalline drops.

Here's a look at the harder, more defined, grassy edge of the horizontal card.

Layers of ink - Watercolor Stamping Tutorial by Anna-Karin Evaldsson. With Watercolor Flowers stamps by Gina K Designs.

The second card was given a lighter look and feel and was mounted on white and green cardstock. I added foil around the edges of a white cardstock matte, to coordinate with the word. Simply apply adhesive along the edge and rub a foil sheet on top. I used my ATG gun and just applied a thin line of tape along the edge.

Layers of ink - Watercolor Stamping Tutorial by Anna-Karin Evaldsson. Foil details.

Here you can see the foil edge better. I wanted it to look a little distressed and scraped it here and there to reveal the white paper. On the second card, I used clean water to soften the edge of the grass, which gives a different look to the harder edge of the first card.

Layers of ink - Watercolor Stamping Tutorial by Anna-Karin Evaldsson. DIY paper Bookmark.

When stamping the two cards, I tried out how much water was needed on a couple of scrap papers, one of them was this tall paper, which I decided to turn into a bookmark. The panel was layered on brown and white cardstock and I used a We R Memory Keepers Angle Corner Chomper to cut the upper corners. The edges were not distressed, since I wanted the bookmark to be as flat as possible.

I hope you will join us this week in our Don't Be Fooled, Be Foiled challenge. As always, you have a chance to win a $50 gift voucher to do some fun shopping at Simon Says Stamp. You have until next Monday 8am Ohio time. 1pm UK time, 2 pm CET to join in.


Don't forget to follow Simon Says Stamp on Instagram, they post great stuff daily. 


Do you use Instagram? If so please add #sssmchallenge so we can see your entries there too.


Thank you so much for taking the time to visit my blog today!  

Happy crafting!

Anna-Karin

Supplies:

* Please note: the links are affiliate links, for which I receive a small percentage of sales generated by the link, at no extra cost to you.