Tuesday, November 15, 2016

Cranberry Christmas 3D Storage

Hi everyone! This month the Eileen Hull Inspiration Team has a blog hop together with DCWV and the team got to use some really lovely patterned papers. 


Layers of ink - Cranberry Christmas 3D Storage by Anna-Karin, with Sizzix dies by Eileen Hull and DCWV Cranberry Christmas
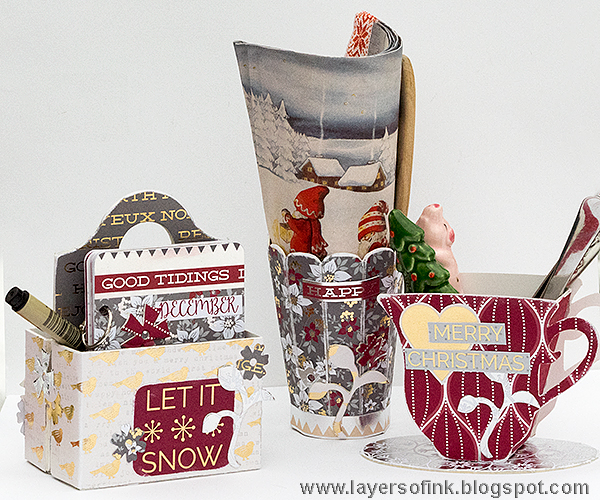
I couldn't pick which die to use and decided to make a little table center piece using three of Eileen's dies. I imagine these three standing in the middle of our table, carrying some Christmas items and supplies. The Caddy Bag holds a little notebook, ready to jot down Christmas memories, shopping lists, funny things the kids say, or anything else. I sure hope they will remain on the table, because Leo can now reach far and loves finding treasures on the table to play with. From Eileen's dies, I used the: Caddy Bag, 3-D Vase, 3-D Tea Cup and the Recipe Card.

Layers of ink - Cranberry Christmas 3D Storage by Anna-Karin, with Sizzix dies by Eileen Hull and DCWV Cranberry Christmas
I used the beautiful Cranberry Christmas paper pad by DCWV.

Layers of ink - Cranberry Christmas 3D Storage by Anna-Karin, with Sizzix dies by Eileen Hull and DCWV Cranberry Christmas
To start with, I covered mat board with patterned papers, adhering it with Distress Matte Medium. Here you can see the shapes needed for the Tea Cup. The ScoreBoards dies both cuts and scores the material, making assembly very easy. 

Layers of ink - Cranberry Christmas 3D Storage by Anna-Karin, with Sizzix dies by Eileen Hull and DCWV Cranberry Christmas
All the shapes were sanded before assembly.

Layers of ink - Cranberry Christmas 3D Storage by Anna-Karin, with Sizzix dies by Eileen Hull and DCWV Cranberry Christmas
I also die cut a whole bunch of flowers and branches, from the Caddy Bag die, from left-over pieces of patterned paper covered mat board, and from just patterned paper.

Layers of ink - Cranberry Christmas 3D Storage by Anna-Karin, with Sizzix dies by Eileen Hull and DCWV Cranberry Christmas
To continue with the cup, I stamped the piece between the two cup die cuts with Tim Holtz Holiday background stamp.

Layers of ink - Cranberry Christmas 3D Storage by Anna-Karin, with Sizzix dies by Eileen Hull and DCWV Cranberry Christmas
To assemble the Tea Cup, just add adhesive along the flaps on the center piece and position it between the two cup pieces. I added some embellishments and words to the front and back.

Layers of ink - Cranberry Christmas 3D Storage by Anna-Karin, with Sizzix dies by Eileen Hull and DCWV Cranberry Christmas
I placed some tea spoons into the cup. You could also use it for tea bags, or perhaps some treats.

Layers of ink - Cranberry Christmas 3D Storage by Anna-Karin, with Sizzix dies by Eileen Hull and DCWV Cranberry Christmas
The silver place-mat for the cup looks really pretty and is very reflective.

Layers of ink - Cranberry Christmas 3D Storage by Anna-Karin, with Sizzix dies by Eileen Hull and DCWV Cranberry Christmas
These are the pieces that you need for the Caddy Bag. You can make it one sided, but I wanted a compartment on each side.

Layers of ink - Cranberry Christmas 3D Storage by Anna-Karin, with Sizzix dies by Eileen Hull and DCWV Cranberry Christmas
The bird paper was stamped with the same background stamp that I used for the cup, with with Shadow Grey ink, for a subtle effect.

Layers of ink - Cranberry Christmas 3D Storage by Anna-Karin, with Sizzix dies by Eileen Hull and DCWV Cranberry Christmas
I made a little mini-book to place in the Caddy Bag, using the Recipe Card die.

Layers of ink - Cranberry Christmas 3D Storage by Anna-Karin, with Sizzix dies by Eileen Hull and DCWV Cranberry Christmas
The papers were adhered together back to back to make the pages double-sided.

Layers of ink - Cranberry Christmas 3D Storage by Anna-Karin, with Sizzix dies by Eileen Hull and DCWV Cranberry Christmas
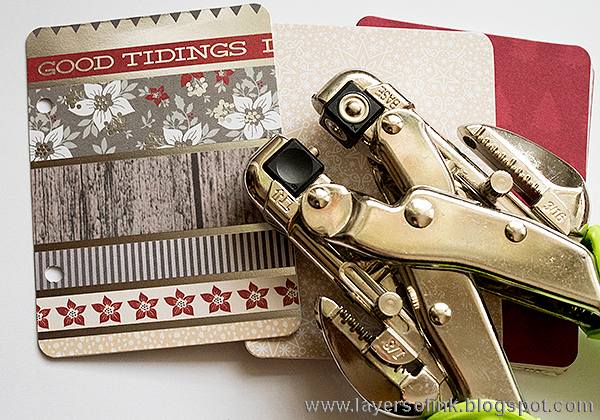
And then I simply punched holes with my Crop-a-Dile.

Layers of ink - Cranberry Christmas 3D Storage by Anna-Karin, with Sizzix dies by Eileen Hull and DCWV Cranberry Christmas
The Caddy Bag is easy to assemble, just add a strong adhesive along the flaps. I added some embellishments here and there, and sentiments from the paper pad. There is also a pen, since I always end up looking for pens everywhere, whenever I need one.

Layers of ink - Cranberry Christmas 3D Storage by Anna-Karin, with Sizzix dies by Eileen Hull and DCWV Cranberry Christmas
In the back compartment, I placed some double-sided tape, in case I wanted to quickly adhere something into the album. You could use the Caddy Bag to store a lot of other items too, and it is a great storage for craft supplies too. I have one on my desk with pens.

Layers of ink - Cranberry Christmas 3D Storage by Anna-Karin, with Sizzix dies by Eileen Hull and DCWV Cranberry Christmas
The metallic elements of the Cranberry papers are really great, and give a festive look to the project.

Layers of ink - Cranberry Christmas 3D Storage by Anna-Karin, with Sizzix dies by Eileen Hull and DCWV Cranberry Christmas
I added some flowers to the side of the Caddy Bag too.

Layers of ink - Cranberry Christmas 3D Storage by Anna-Karin, with Sizzix dies by Eileen Hull and DCWV Cranberry Christmas
Here's a better look at the little album. Tim Holtz small binding rings were the perfect size for this album. I used this gorgeous sample paper for the back and front covers, just adding some flowers and a word cut from the patterned paper.

Layers of ink - Cranberry Christmas 3D Storage by Anna-Karin, with Sizzix dies by Eileen Hull and DCWV Cranberry Christmas
The back looks like this.

Layers of ink - Cranberry Christmas 3D Storage by Anna-Karin, with Sizzix dies by Eileen Hull and DCWV Cranberry Christmas
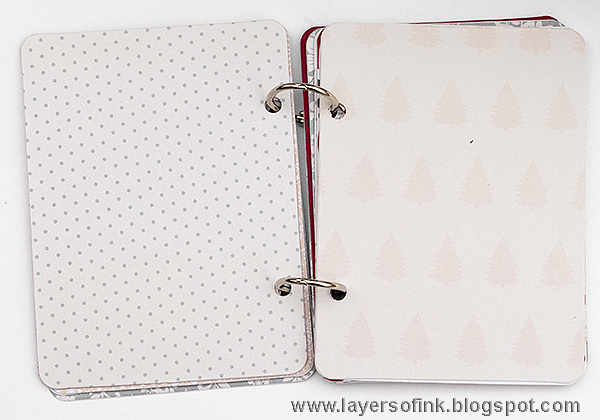
I picked mainly neutral papers for the inside pages, to make sure that it is possible to add text, photos and other bits and pieces, without them being overpowered by the papers.

Layers of ink - Cranberry Christmas 3D Storage by Anna-Karin, with Sizzix dies by Eileen Hull and DCWV Cranberry Christmas
Another of the page spreads.

Layers of ink - Cranberry Christmas 3D Storage by Anna-Karin, with Sizzix dies by Eileen Hull and DCWV Cranberry Christmas
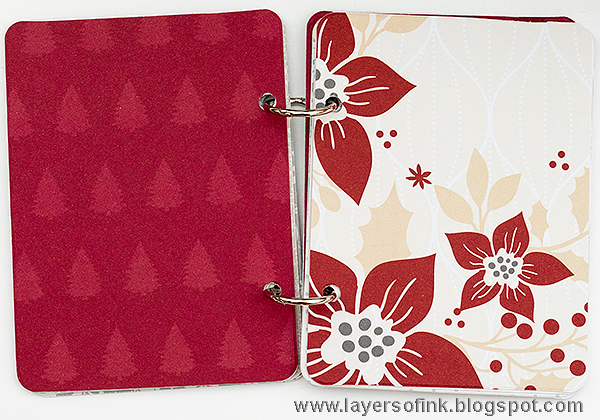
Some of the pages have more colour though, for the sake of variation and interest.

Layers of ink - Cranberry Christmas 3D Storage by Anna-Karin, with Sizzix dies by Eileen Hull and DCWV Cranberry Christmas
Finally, to the vase. These are the two pieces you need to assemble the vase. It is very easy to assemble.

Layers of ink - Cranberry Christmas 3D Storage by Anna-Karin, with Sizzix dies by Eileen Hull and DCWV Cranberry Christmas
Isn't this flower patterned paper pretty? I also added a paper border, some flowers and a word.

Layers of ink - Cranberry Christmas 3D Storage by Anna-Karin, with Sizzix dies by Eileen Hull and DCWV Cranberry Christmas
I rolled up serviettes and tucked into the vase, but it is great for other items too. You could also make some paper or felt flowers to place in the vase - check out my Felt & Wire Flower tutorial for some inspiration. 

Layers of ink - Cranberry Christmas 3D Storage by Anna-Karin, with Sizzix dies by Eileen Hull and DCWV Cranberry Christmas
I also placed a traditional Swedish wooden butter knife into the vase, mainly because I really like the handle of this one with the hearts.

Layers of ink - Cranberry Christmas 3D Storage by Anna-Karin, with Sizzix dies by Eileen Hull and DCWV Cranberry Christmas
You can easily make these in colours that fit your decor, or give them as a gift to someone special. They can also be filled with treats or little gifts. Items made from mat board last well, just to give one example, I made Anton a whole little monster set of 3D items when he turned three and almost four years later, they are still going strong and he uses them to store little things in on his bed-side table.

Don't miss all the inspiration during this month both on Eileen's blog at at DCWV.

Happy crafting!

Anna-Karin

Supplies:

Patterned paper: DCWV: Cranberry Christmas Premium Stack


Monday, November 14, 2016

Birch Tree Mixed Media Tutorial

Hello everyone! We had a quite a week with an early winter snowstorm, which turned everything into a winter wonderland in just a day. The snow is quite deep and it is really pretty outdoors.


At the Simon Says Stamp Monday Challenge we have a Thanks/Thanksgiving theme. I hope you will have time to join us. Our guest designer during November is the very creative Anita Houston. 

Layers of ink - Birch Tree Mixed Media Tutorial by Anna-Karin
I interpreted the theme a little differently and thought about thankfulness and people I am thankful for, which turned into a mixed media panel for my dad. It was Father's Day here in Sweden yesterday. I just love this photo of my dad as a kid, skiing with very long sticks. Birch trees are some of my favourite trees and I enjoyed creating a forest of them as my background. Last week for my Deer Winter Shadow Box, I wrote about how I like to depict snow in different ways on my projects, and here you'll find a couple of additional manners to do that. I took a few step photos. 

Layers of ink - Birch Tree Mixed Media Tutorial by Anna-Karin
I worked on a canvas panel (7.5 x 9.5 in) and started out coating it in gesso. When that was dry, I painted it with Dina Wakley's white paint, because I wanted a really white surface to work on. Using Tim Holtz gorgeous Birch stencil, I sponged acrylic paint through the stencil, dabbing some of it off on scrap paper first. I mixed white into the Elephant and Sky paint to make lighter versions. Repeat to cover the whole panel. 

Layers of ink - Birch Tree Mixed Media Tutorial by Anna-Karin
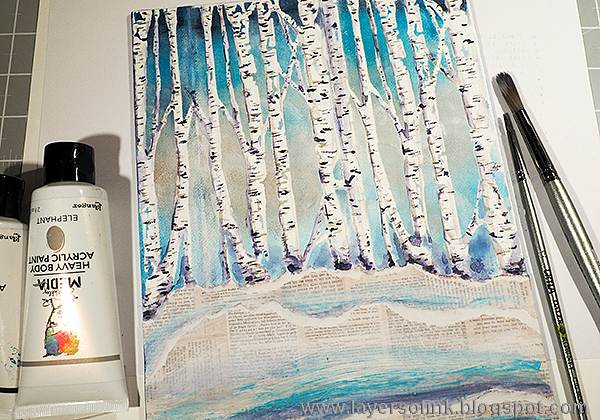
I built hills with torn text paper from Tim Holtz Tidings Mini Stash and adhered with Distress Medium Matte, applying it on top of the papers too. They were painted with a thin layer of gesso. When the paint was dry, I started adding the characteristic marks of birch trees, using Elephant and Night paint and a thin brush.

Layers of ink - Birch Tree Mixed Media Tutorial by Anna-Karin
After that, I added shadows and shading to the trees, using the same two paints, but slightly watered down. The light is coming from the right, so most of the shadows are on the left-hand side of the trees. I also painted the hills with the same colours used for the sky, but not covering up all of the text.

Layers of ink - Birch Tree Mixed Media Tutorial by Anna-Karin
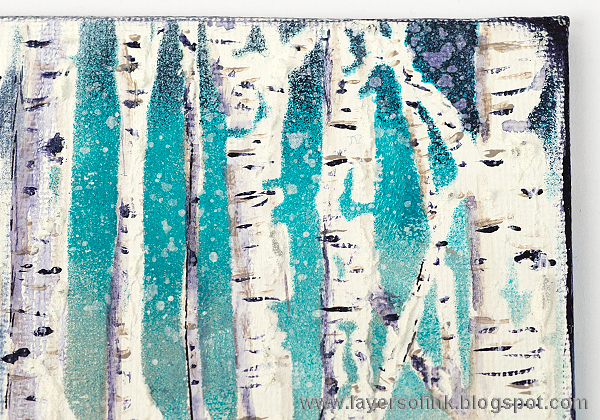
 I wanted more snow, and splattered Picket Fence paint on the background with a splatter brush.

Layers of ink - Birch Tree Mixed Media Tutorial by Anna-Karin
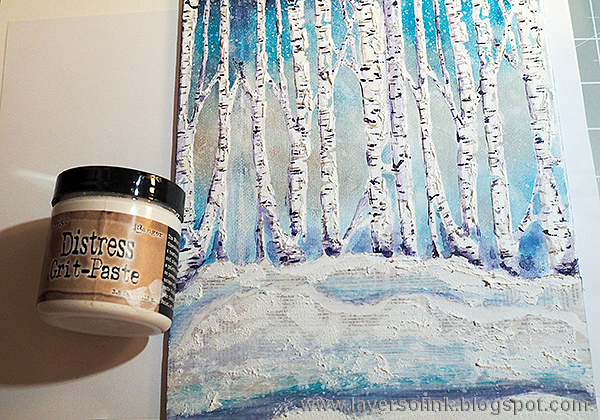
Next, I used Distress Grit-Paste, which gives a great snowy look and applied it here and there on the trees, using a tooth pick. It was applied more generously on the hills.

Layers of ink - Birch Tree Mixed Media Tutorial by Anna-Karin
Here and there on the trees, I added a few pen marks. For more birch tree inspiration, check out my Winter Birch Trees tutorial and my Winter Journal tutorial, from last year.

Layers of ink - Birch Tree Mixed Media Tutorial by Anna-Karin
As some final touches, I dry-brushed a little paint over the grit-paste, and also added a touch of silver with a Krylon marker. Since I love natural elements such as mica, I couldn't help myself but to add some mica flakes too, again using the Matte Medium.

Layers of ink - Birch Tree Mixed Media Tutorial by Anna-Karin
The sentiment comes from Tim Holtz Scribble Woodland set and I also used one of his idea-ology Christmas Word Keys, with a little Picket Fence rubbed into it.

Layers of ink - Birch Tree Mixed Media Tutorial by Anna-Karin
I like that you see some of the text through, while the direction of the brush strokes adds movement to the hills.

Layers of ink - Birch Tree Mixed Media Tutorial by Anna-Karin
 The white paint splatters create lovely random looking snow.

Layers of ink - Birch Tree Mixed Media Tutorial by Anna-Karin
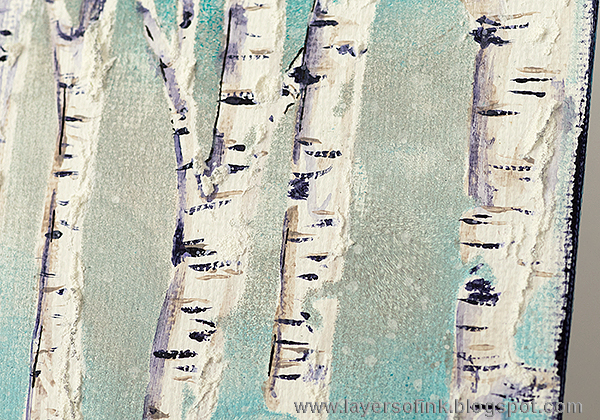
I don't know if you see the areas of grit-paste on the trees better here, they were hard to capture on photo. It is the type of texture that you want to reach out and touch.

Layers of ink - Birch Tree Mixed Media Tutorial by Anna-Karin
Here you might see the touches of silver a better, they are mainly on the ridges created by the paste.

I hope you will join us in our Thanks/Thanksgiving challenge. As every week, you have a chance to win a $50 gift voucher from Simon Says Stamp. You have until Monday 8am Ohio time. 1pm UK time, 2 pm CET to join in.


If you want to, follow Simon Says Stamp on Instagram, they post great stuff daily. 


new-instagram-icon22

Do you use Instagram? If so please add #sssmchallenge so we can see your entries there too.


Thank you so much for stopping by today!

Happy stamping!

Anna-Karin

Supplies: