Hello crafters! My walks were windy this weekend, apart from Friday when we had great weather. I have also enjoyed time crafting and working on Christmas projects.
Please note: this post has affiliate links, for which I receive a small percentage of sales generated by the link, at no extra cost to you.
I made a Christmas in the City card this week, which both sparkles and shines. There are lots of fun techniques on this card. I used both dry and heat embossing, since I couldn't pick just one. The background is dry and heat embossed and many of the die cut elements are heat embossed with several layers of clear embossing powder. The background, moon and light post lamp sparkles from Distress Spritz.
Start by dry embossing watercolor paper in Simon Says Stamp Star Lattice embossing folder.
Apply embossing ink to the stars with an ink-blending tool. Cover with white embossing powder, return the excess to the jar and carefully heat emboss.
Mist the background with Distress Spritz. Start with Saltwater Taffy, continue with Tumbled Glass and finish with just a little Uncharted Mariner.
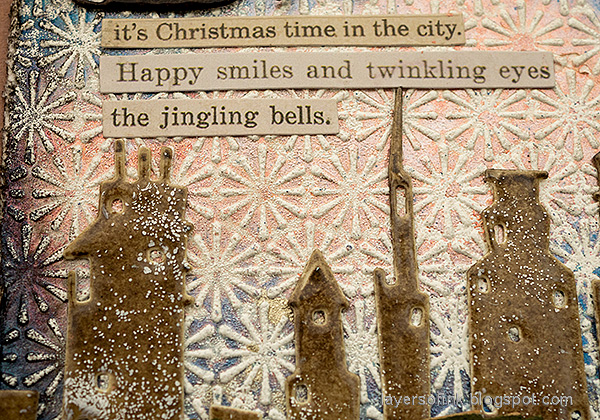
Die cut Santa's sleigh, the city silhouette and the cars from heavystock cardstock with Tim Holtz Vault Christmas Magic set. Ink with Distress Ink by applying the ink directly to the paper with the ink pad. Emboss with several layers of clear embossing powder. Be very careful and never touch the melted powder until it has cooled down completely. Finish but sprinkling just a little white embossing powder on Santa's sleigh and the city.
Die cut trees and the lamp post. The lamppost was die cut from silver paper and from black kraft-stock paper. I misted a small piece of paper with Antique Linen Distress Spritz and placed it behind the silver lamp post as a sparkling light.
Die cut the moon from heavystock paper. Ink the base with Lost Shadow. Only add a tiny bit of Mustard Seed to the front part. Then mist with Antique Linen.
Ink the edges with Scorched Timber.
It is difficult to capture the Distress Spritz shimmer on a photo, but you can see some of it here. The edges of the embossed paper were distressed.
Santa's sleigh and the deer were colored with Scorched Timber. Scorched Timber gets very dark when applied directly to the paper, I didn't want to use black since that might have been too stark.
The speckles of white embossing powder on the cityscape are meant to look like snow.
I found three clippings stickers to use as sentiment in Tim's Christmas Sticker Book.
The cars are embossed with several layers of embossing powder, but I used cardstock for the wheels and the trees, for contrast. The cars were inked with Saltwater Taffy and Abandoned Coral.
Join us this week in our Emboss It challenge! You have a chance to win a $25 gift voucher to do some fun shopping at Simon Says Stamp. You have until Monday 8am Ohio time. 1pm UK time, 2 pm CET to join in.


%20(1).jpg)


Such a beautiful card using these new TH dies!! Gorgeous work and I've pinned it for myself to try it! Thank you for all of the inspiration!
ReplyDeleteThank you so much for the kind comment!
DeleteThis is beautiful made
ReplyDeleteThank you so much Dora! It is good to hear from you. I hope you are well! / Anna-Karin
Delete