
Hello friends! I hope you are well and that you are enjoying July. Today I have a summery beach themed project to share, with stamped and watercolored shells.

This week we have an A Day At The Beach theme at the Simon Says Stamp Monday Challenge Blog. I hope you can join us! And don't miss the project by our July guest designer Sheila with her blog Sheila Wy's 216 Alchemy Lane.

My project started out as a card, but was turned into a wall-hanger instead. It is always good to have some ready gifts at home. I used the new Tumbling Shells background stamp from the Simon Says Stamp Send Happiness release. I colored the shells with watercolors and let them be the main focus of this project.
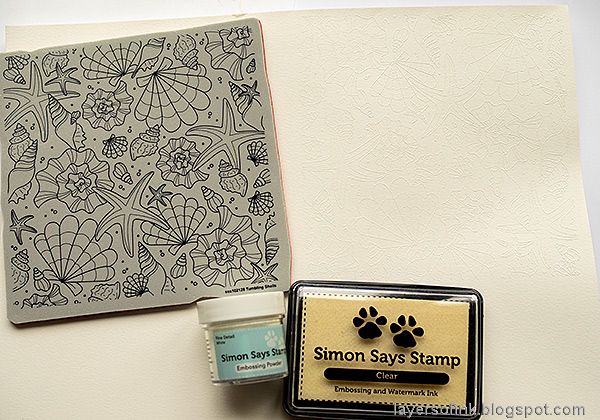
Start by white embossing the Tumbling Shells on watercolor paper.

I wanted to paint on a tinted base, while also avoiding having to paint in between all the shells, to paint the sandy background. Paint over the entire background with diluted Yellow Ochre paint.
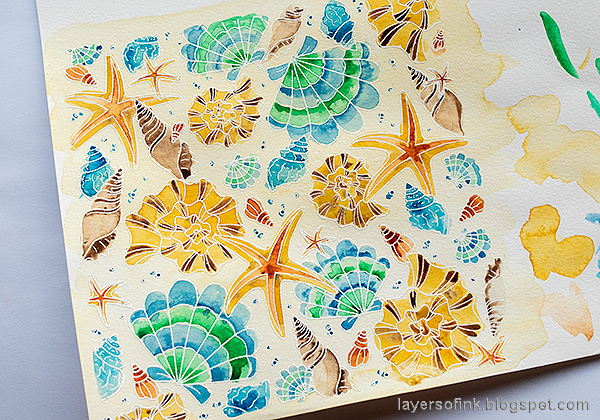
Mix up a darker Yellow Ochre, and mixes of brown, green and teal. Paint the shells. I painted the same type of shell in the same colors, but you can of course mix it up if you want to. As you can see, I use the remainder of the paper to test the colors before painting.

Add a faint shadow on one side of the shells to give the look of dimension.
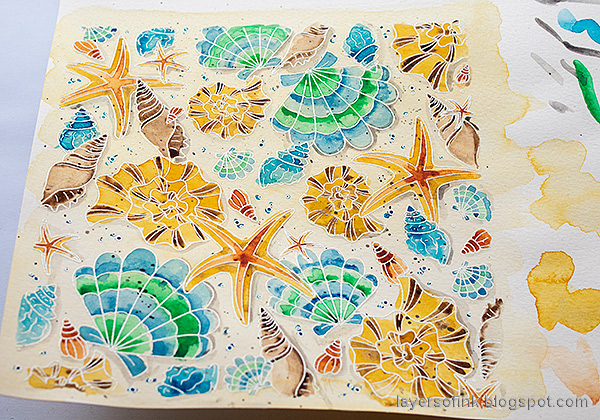
Splatter the background with a brown paint.
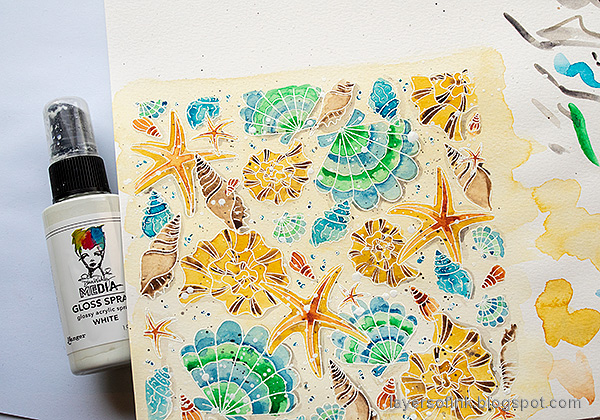
Splatter White Glass Spray on the background.

I love how easy it is to get white splatters with the gloss spray. And since it is acrylic and opaque it shows well on the background.

Drop in darker shades of color before the first layer is dry.

I used a Theories Quote Chip for my sentiment and layered two pieces of mummy cloth underneath it.

Distress the edges and layer on a white cardstock, also with distressed edges. Finish with a base of mat board or glue to a canvas board.
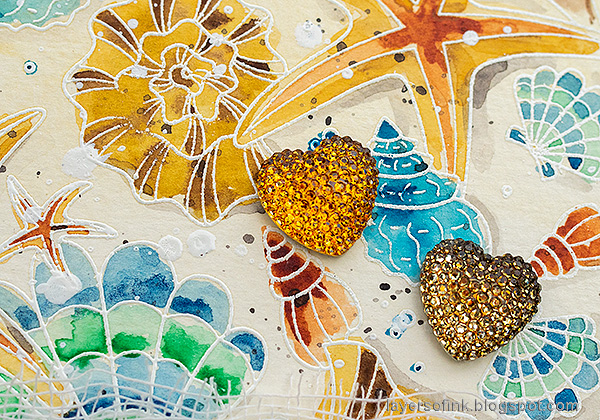
I used Butterscotch and Latte alcohol ink to color the gumdrop hearts.
I hope you will join us this week in our A Day At the Beach challenge. You have a chance to win a $25 gift voucher to do some fun shopping at Simon Says Stamp. You have until next Monday 8am Ohio time. 1pm UK time, 2 pm CET to join in.


Do you use Instagram? If so please add #sssmchallenge so we can see your entries there too.


Thank you so much for taking the time to visit my blog today!
Happy crafting!
Anna-Karin
Supplies:
* Please note: the links are affiliate links, for which I receive a small percentage of sales generated by the link, at no extra cost to you.
* Please note: the links are affiliate links, for which I receive a small percentage of sales generated by the link, at no extra cost to you.

This is so beautiful Anna-Karin! I just love how you colored the shells with watercolors. It is a such a lovely card you created! Thank you for sharing!
ReplyDeleteIt's cool and fresh (in FRANCE we says that, i don(' know if it has any meaning in English)
ReplyDelete