
Hello friends! Today I have a borderless watercolor tutorial to share with you. I used a floral stamp, but the technique works for other images too, and for any type of project.
I hope you aren't missing all the inspiration at Simon Says Stamp during STAMPtember®. Today, the brand of the day is Memory Box, and I used one of their lovely stamps here.

This started out as an art journal page, but then I changed my mind and framed it instead, so that I can give it as a gift to someone. I had a cheap frame that I got in a sale box at our local grocery store recently. This project might look hard, but it is much easier than what it looks like. I used a beautiful Rose Bouquet stamp set by Memory Box.

Working on watercolor paper, start by stamping the floral stamp with Antique Linen ink. We want to use a light ink, so that the edges will almost disappear. For a different effect, emboss with white embossing powder, or stamp with waterproof black ink.
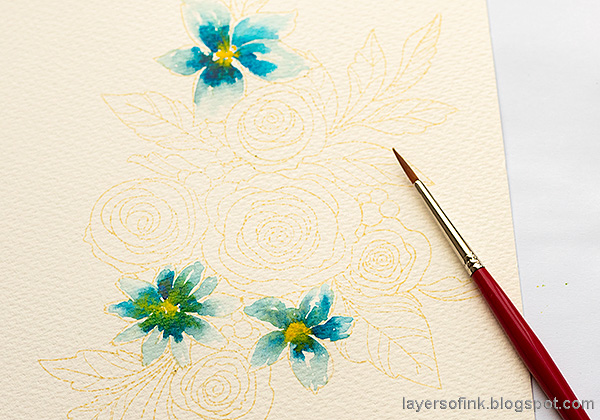
Mix up some watercolor paint. I always test my paint on scrap paper first, to make sure I have the shades that I want. Start with the lighter blue and then drop in a darker blue towards the center. Before the blue paint dries, drop in yellow in the center. You can also do the same technique with Distress Ink, by smearing the inks on a craft sheet, mist with water and pick up with a paint brush.

Continue with the roses and the leaves. Don't cover the whole design with paint, but instead leave some of the paper showing, which creates highlights, and gives the coloring a loose look. I decided that the light was coming from the top left, and made the roses and leaves lighter on that side.

Continue with the rest of the design.

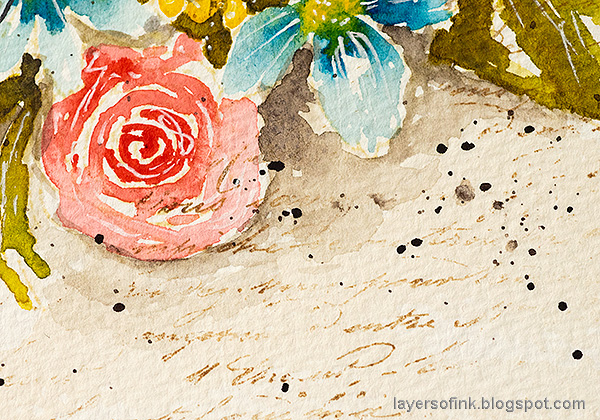
The background was painted with very watery light brown paint, since I wanted it to be a little darker. I forgot to take a photo of the shading step. Mix a relatively light shade of grey and paint a shadow on the darker side of the arrangement. This grounds the flowers to the paper and adds dimension. When everything was dry, I decided to add some lines and highlights with a white gel pen too.
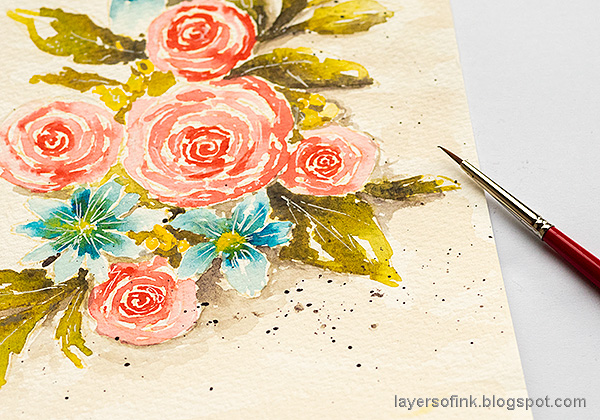
Splatter a tiny bit of dark grey watercolor paint on the background, focusing on the shadow areas.

Stamp randomly with a script stamp with a light brown ink. I used Vintage Photo Archival Ink and stamped once on scrap paper first. The script stamp comes from Tim Holtz's French Marketplace set.

I stamped the sentiment on a different paper first and cut it out, but then decided it would look better stamped directly on the background. It comes from Simon Says Stamp Uplifting Thoughts.

Here's a closer look at the shadows and the white gel pen work.
If you don't want to add the script, you can skip that step.

Some of the lines still show, and I liked that, since they almost look like a soft shadow. If you want them to be invisible, paint over them.

I cut the paper down to 8 x 6 in, so that it would fit into my frame. You can leave the paper a little larger if you want to, with more space around the flowers.

Thank you so much for taking the time to visit my blog today!
Happy crafting!
Anna-Karin
Supplies:
* Please note: the links are affiliate links, for which I receive a small percentage of sales generated by the link, at no extra cost to you.
* Please note: the links are affiliate links, for which I receive a small percentage of sales generated by the link, at no extra cost to you.
Thank you for sharing your beautiful painting. I feel that I could create this project with your directions. Well done!
ReplyDeleteYour project is absolutely stunning! I cannot wait to try it. I love your style and have followed you for a long time. Thank you for the inspiration.
ReplyDeleteI am just getting into water color and this makes a stunning frame able piece look doable. Thanks for the inspiration!
ReplyDeleteWhat a delightful beautiful watercolor! Your card is fabulous. So glad to have found you through the Memory Box linky party with SSS.
ReplyDeleteWow Anna-Karin, fabulous watercoloring of these lovely flowers! (and framing, what a great idea as the final composition and colors are so beautiful!!!)
ReplyDeleteHugs, Coco