
Hello friends! I hope your weekend was fun. My dad and I went to see a concert with Rod Stewart and it was really great, not only the music, but also the graphics, images and light effects. I was amazed to see scrapbooking and mixed media inspired illustrations. There were torn patterned papers, old letters, and cool retro designs.

This week at the Simon Says Stamp Monday Challenge Blog our theme is Use Stencils. I hope you will join us! Don't miss the project by our May guest designer Ashley with her fantastic blog She Is Crafty.

Stencils are so versatile and take almost no space to store. They can be used for many different techniques and this week I wanted to try something I hadn't done before. I was curious about how Scribble Sticks would work if applied directly to the stencil and was really happy with the result. This is a very easy technique and you get lots of background in one go.

I used the SSS Triangle Blast stencil. Apply Scribble sticks generously over the entire stencil. Don't worry about the little bits of pigment that gets rubbed off, we will use that too, so don't through it away. In fact, you could place the stencil on top of watercolor paper and use that paper too. I only thought of this when I was done.
I used Night and Lapis Scribble Sticks, from Dina Wakley Scribble Sticks 1 and Scribble Sticks 2.
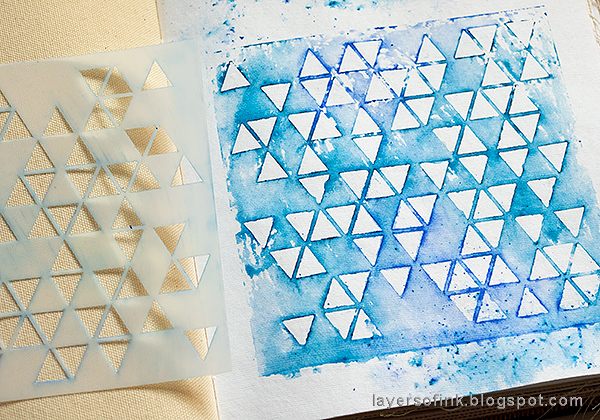
Mist the stencil generously with water and press down on watercolor paper. I used one of the cotton-rag watercolor pages in my Dina Wakley Media Journal. The stencil was cleaned before this photo was taken. There is plenty of pigment on it left to repeat the process at least four times.
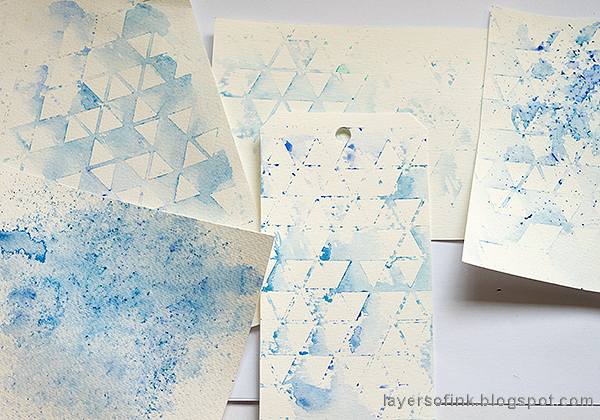
I continued misting the stencil and pressing it down on watercolor papers, until almost all the pigment was gone. Remember those shavings of Scribble Sticks from the first step? They can be sprinkled over the still wet paper (the paper to the far right), or over paper misted with water (the paper to the bottom left).
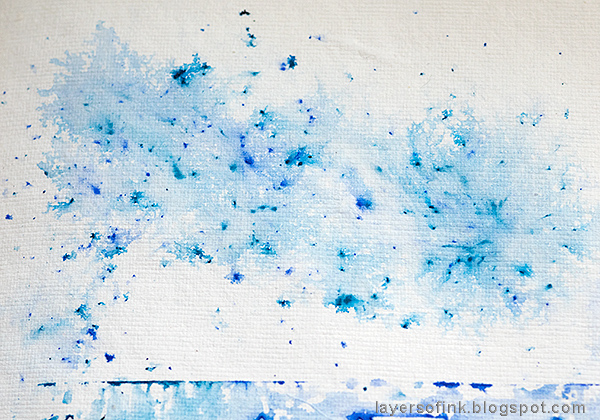
On the journal page itself, I misted a little water and sprinkled the shavings. Misting more water if needed. This gives a really cool effect and is a great way of avoiding to waste any pigment.

The lovely butterflies come from the Aall & Create Stamp set 45, designed by Tracy Evans. Stamp the butterflies on watercolor paper with Jet Black ink.
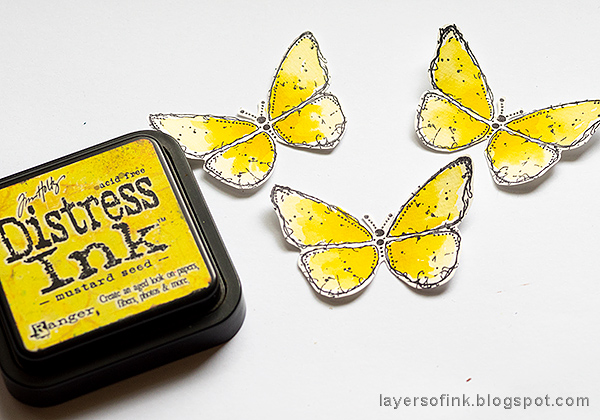
Smear Mustard Seed Distress Ink on a craft sheet, mist with water and paint the butterflies. I wanted Brimstone butterflies, since they are commonly seen in spring. We call them 'lemon butterflies'.

The yellow looks nice together with the blue background.

This is a really fun technique and you will get a slightly different result every time. My favorite part is the darker areas around the triangles, created by pigment being stuck to the edges of the stencil.

I really like the speckled effect of using up the pigment shavings. If you don't want to see the speckles, just use more water.
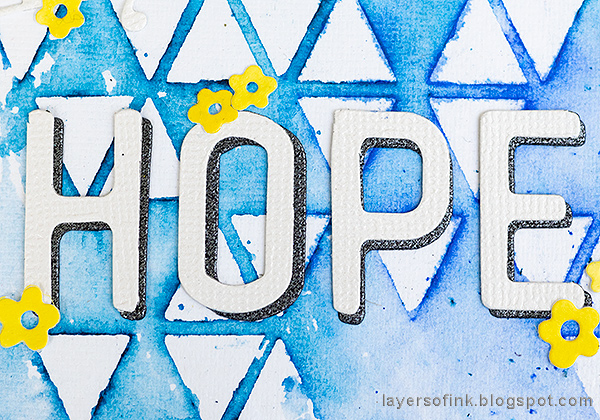
The title was die cut with Tim Holtz's Letterboard die, using SSS Glimmery White Diamond and Glimmery Coal cardstock.

I die cut trails for the butterflies using Tim's Adorned die, and SSS Glimmery White Diamond paper. The yellow flowers were die cut from a paper first colored with Mustard Seed ink, using the Funky Floral 2 set.

I printed the sentiment, also on White Diamond paper, and cut into strips.
I hope you will join us this week in our Use Stencils challenge. As always, you have a chance to win a $50 gift voucher to do some fun shopping at Simon Says Stamp. You have until next Monday 8am Ohio time. 1pm UK time, 2 pm CET to join in.


Do you use Instagram? If so please add #sssmchallenge so we can see your entries there too.


Thank you so much for taking the time to visit my blog today!
Happy crafting!
Anna-Karin
Supplies:
* Please note: the links are affiliate links, for which I receive a small percentage of sales generated by the link, at no extra cost to you.
* Please note: the links are affiliate links, for which I receive a small percentage of sales generated by the link, at no extra cost to you.
Beautiful page with the yellow butterflies on the blue, very clean and fresh! Sounds like Rod Stewart has some similar interests to us, Anna-Karin! SO cool you and your dad went! hugs, Maura
ReplyDeleteThis is great Anna-Karin. Love the graphic design from the stenciled background and I really love the quote, very nice work.
ReplyDeleteGlad you got to enjoy the concert with your Dad, what a special memory!