
Hello and welcome to my blog! I hope you had a fun weekend. We had lovely spring weather, and spent a lot of time outdoors. My dad and I also went to a show, which was fun and something I don't do often.

This week at the Simon Says Stamp Monday Challenge we have a Handmade Flowers theme, something I really like to do.
Don't miss our guest designer Linda Kunsman and the pretty projects that she made this week.

I find quilling to be very relaxing and quilled fringed flowers are both fun and easy to make. For this project, I made a bouquet of them and placed them in a stamped mason jar. I also had fun making a background with Tim Holtz new design tapes, and to alter the frame. I took some step photos, mainly of the background and frame process. I am working on something a little bigger regarding showing the process of making fringed flowers, which I hope to post in about two weeks.

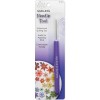
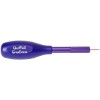
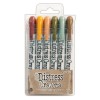
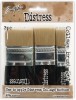
All my flowers were made with 3/8 in white paper by Quilled Creations, colored with Distress Inks. It is easy to color quilling paper with ink. The centers were made with small pieces of 1/8" paper I had in a box, but you can also cut your own thin strips. Cut thin slits into the wider paper paper, glue the thinner paper to the end and start rolling from the thin side. I use a needle tool when quilling, to get a neat round center, but you can also use a slotted quilling tool.

The Tim Holtz Mini Framed Panels frame and back piece were covered with two layers of white gesso, letting it dry in between.
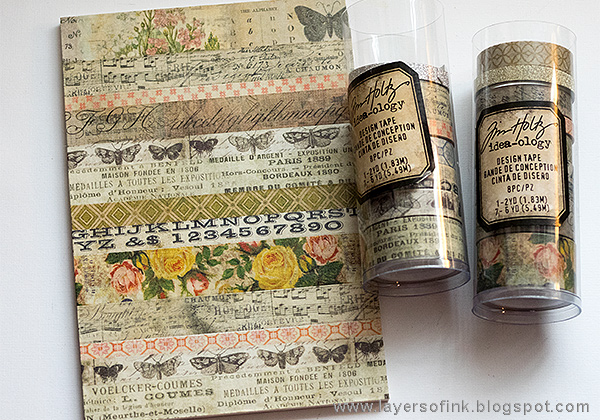
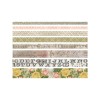
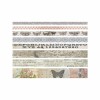
I applied a thin layer of Matte Distress Collage Medium to the background, to make sure the tapes would be stuck down real well. Make a stripe pattern with different tapes, folding the ends around the back.

Add a layer of Matte Medium on top of the tape too.

Paint a thin layer of gesso on the background to tone down the tape a little where the flowers will be.

I painted the frame with Dina Wakley's new Rosy paint. I love this paint - as well as the other two new ones Ancient and Medieval. When I ordered the paint, I hadn't realized that it was perleascent and I got a nice surprise when discovering that it has a lovely vintage pearly look.

It is hard to capture the look of this paint on a photo, but here you can maybe see both the pearlescent effect better, and the vintage look. It is like the paint has more than one shade.

When the paint was dry, I added thin layers of Crazing Medium, but not covering the entire frame. Leave to dry.

When the Crazing was dry, I rubbed Gathered Twigs Distress Crayon into the cracks to make them stand out more. I also dry-brushed a little Ancient paint here and there on the frame.

Add a tiny amount of Ancient paint here and there on the background.

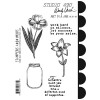
The mason jar comes from Wendy Vecchi's Art In A Jar set and was stamped on Clearly For Art Modeling Film. Cut it out.

I used my heat gun to soften the plastic so that I could shape it. Be careful not to burn yourself. The film keeps it's shape perfectly.

I also inked the flowers slightly with Ground Espresso and dry-brushed some Ancient paint on the edges. Thin (1/8 in) strips of beige paper were inked and shaped into stems, leaves and tendrils.

There is enough space behind the mason jar for the stems.

Here's a look from the side, so that you can better see what the mason jar looks like.

You can vary the size of the flowers by using longer or shorter pieces of quilling paper. My larger flowers were made with the full 16 in paper, while the smaller ones were made from 11 inches, plus the center.

I like the look of the patterns of the tape peeking through.

The sentiment was stamped on mixed media cardstock and cut into strips. The strips were inked with Ground Espresso.

I glued a piece of lace trim to the background, to give my mason jar vase something to stand on. Here you can see the texture of the frame better.

It was hard capturing the look of the vintage pearlescent frame.

Quilling is one of the oldest paper crafts and for someone who loves paper, it is such fun to create shapes and designs out of only strips of paper. On this photo, you can see the dimension of the piece better.
I really hope you will join us in our Handmade Flowers challenge. As every week, you have a chance to win a $50 gift voucher from Simon Says Stamp. You have until Monday 8am Ohio time. 1pm UK time, 2 pm CET to join in.

Don't forget to follow Simon Says Stamp on Instagram, they post great stuff daily.


Happy crafting!
Anna-Karin
Supplies:


Your project is absolutely gorgeous!!! Quilling is one thing I have never tried. Your flowers are amazing.
ReplyDeleteStunning! Love everything about this, the frame, the taped background, the stamped sentiment(so true)and the gorgeous flowers! Oh, and the darling jar!
ReplyDeleteI just love this! I have never tried Quilling before. The flowers are beautiful. I was wondering what glued you used to attach the mason jar to the board. TFS!
ReplyDeleteThank you so much Cherie! I used Distress Matte Medium to glue the mason jar to the board. It holds it well and is totally invisible. When forming the jar, I made sure that the sides were even, which makes it easier to glue it down.
DeleteGreat project! Love the retro look of it and the washi tapes background. The flowers are so sweet and pretty! Hugs, Marzena
ReplyDeleteI love this Anna-Karin! The flowers are so pretty and the plastic jar, genius. The crazing on the frame is amazing. Love it!
ReplyDeleteCathie ♥
This comment has been removed by the author.
ReplyDeleteoops! typo! this is lovely! thanks for the great tutorial!
DeleteGeorgous artwork, really a dream! I like how you put the flowers in the jar, great idea. Wonderful composition.
ReplyDeleteGreetings
Sabine
This is absolutely stunning Anna-Karin, beautiful piece!
ReplyDeleteBTW, so nice you and your Dad spent some special time together. I just lost my Dad in late Oct. and I really miss him!
Thank you so much Teresa. I am so sorry to hear about your Dad. Hugs!
DeleteGorgeous project - I just love that design tape background, and the moulded jar to hold your delightful flowers.
ReplyDeleteAlison x
This project is wonderful! I love the colors you chose!
ReplyDeleteLove, love, love your project. What fun. Your flowers are absolutely perfect. TFS
ReplyDeleteI truly love this piece! The quilled flowers and mason jar add so much dimension! I love the way the painted frame turned out the crazing and crayon give it such a nice texture and aged effect. I look forward to seeing your future post about the quilled flowers, I did a lot of quilling many many years ago and would like to try again. Thank you for sharing your wonderful creation!
ReplyDeleteWhat an amazing canvas, Anna-Karin! Love how you colored the quilling paper with the inks, and your flowers are wonderful! They look awesome in the jar you made, and love that saying! hugs, Maura
ReplyDeleteGorgeous panel Anna-Karin, the quilled flowers and fronds are absolutely stunning! LOVE it :-)
ReplyDeleteluv
Lols x x x
What a lovely piece filled with soft and dimensional details! I love the way you made the jar and those flowers are blooming right off the page! You always put things together in such innovative and pretty ways.
ReplyDeleteI think this has to be my favourite project you've ever made, Anna-Karin...it's just beautiful and so different! The soft pastel colour palette and the way you've put all the elements together creates a perfect piece of artwork! :)
ReplyDeleteStunning project Anna-Karin! love love love the dimensional flowers! The jar is fabulous and colors you used absolutely incredible! So delicate and sophisticated!! barbara
ReplyDeletewonderful project Anna-Karin...love the design tape background and those quilled flowers are so pretty...hugs kath xxx
ReplyDeleteWow.. this is such a fantastic creation, Anna-Karin. Those flowers are just stunning! Love the beautiful background and great sentiments, too. :)
ReplyDeleteThank you so much for sharing how you created this wonderful piece of art! I have never done paper quilling and I have always wanted to try it. I can't wait for your flower tutorial! Thank you so much for the inspiration!
ReplyDelete-Miranda
TheCraftyCritter.com
Such a pretty project, Anna-Karin! Love the colors and the pretty flowers, and of course the washi tape background. Hugs, Sandra
ReplyDeleteSo pretty. Your work is beautiful. I made one similar but couldn't get the frame to crackle like yours. I followed your instructions and used the same product. Any suggestions?
ReplyDeleteThanks