
Hi everyone and welcome to my blog! It's a new week and we woke up to snow. We haven't had snow for a while, so it is a welcome change since it brightens up the world.

This week at the Simon Says Stamp Monday Challenge Blog we have a Young At Heart theme. Since it is the first Monday of a new month, the team is showcasing a specific designer/company, and this week it is Simon Says Stamp Exclusive products. SSS has a great range of stamps, dies, ink, papers products and more, and new products are added frequently. You can find them all here.
Don't miss our guest designer this month, Nicola, with her blog Paper Profusion. Nicola makes gorgeous layered projects with lots of wonderful details. I am really looking forward to seeing the projects she will create during this month.

I made a Valentine's Day card, using a bunch of SSS stamps and dies, as well as Tim Holtz idea-ology products. The card started out with the Occasions Found Relatives image, and I had playing around with a watercolor distress technique for that image. The result is pretty cool, so I decided to record a little tutorial video of my process, which you will find below. There are also some step photos.
The watercolor distress technique started out with me having some left-over brown watercolor paint and I just happened to spot some Photobooth images on my desk and wanted to try something out with them.

I used Mixed Media cardstock for the background of the card and white embossed the SSS Drawn Heart background on the card front.

The card was inked with Distress Inks and then I misted droplets of water for extra texture.

I really like the handwritten 'love' from the Love set, from the Hey Love collection, and white embossed it on the Occasions Relatives card.

I didn't let the card dry quite enough before doing the white embossing, so some powder strayed, but I decided that, in this case, I liked that look, since it added texture. I also applied rub-ons to the card.

Here you can see one of the rub-ons.

For the sentiment, I used a piece of mixed media cardstock that was coloured with Antique Linen and Pumice Stone. Isn't this sentiment stamp great? It's from the Love & Quotes set. I wanted the sentiment to be a tag, so I used the Crop-a-Dile Angle Corner Chomper tool to cut the angles at the top. I love this tool and how easy it makes it to create tags in any size. The hole was punched with my Crop-a-Dile.

The background was stamped with a splatter stamp for even more texture. I rounded the corners with the original Corner Chomper, and stamped words from Love and All My Love here and there.

The Clipping Heart was die cut from shimmer cardstock.

These hearts also come from the Clipping Heart die and are die cut from shimmer cardstock.

The sentiment was stamped from All My Love and I used a rub-on to add the year. At the bottom of the card, you'll find a piece of design tape and a Valentine's ribbon.

Here's a look at some of the distressed Photobooth images I showed in the video.

Every distressed image will get a different look to it. I love techniques that have somewhat unpredictable results.

You can easily remove more watercolour paint from the image, if you think it is too distressed.
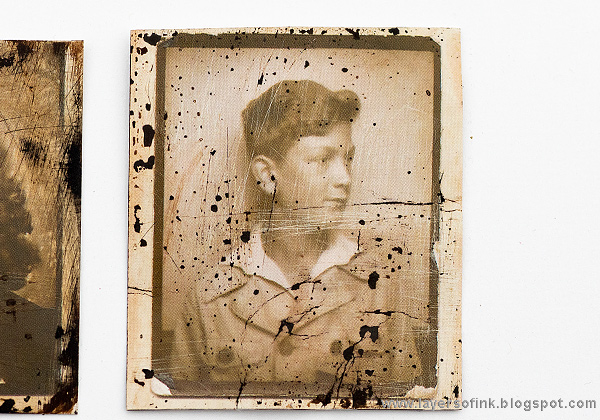
This image was done a little differently than the others (I didn't mention that in the video). I used Distress Micro Glaze on parts of the image, after sanding. If you let watercolour paint dry on the glaze, it gets the dotted look you see here.

This is the Found Relatives image, I distressed in the video. I like the mix of brown and dark grey paint.

The sanded and folded areas add so much texture to the distressed image.
I really hope you will join us in our Young At Heart challenge. As every week, you have a chance to win a $50 gift voucher from Simon Says Stamp. You have until Monday 8am Ohio time. 1pm UK time, 2 pm CET to join in.

If you want to, follow Simon Says Stamp on Instagram, they post great stuff daily.


Thank you so much for visiting today! Have a lovely week!
Happy crafting!
Anna-Karin
Supplies:


Really gorgeous Anna-Karin! Love how this all came together. Hugs, Autumn
ReplyDeleteBeautiful card, Anna-Karin. I loved seeing the process you used to on the photo cards. So pretty!
ReplyDeleteCathie ♥
This looks fantastic Anna-Karin!! Thank-you too for the lovely welcome. You've included heaps of gorgeous ingredients and techniques and they all look amazing together. I'm going to pop back later to check out your video properly. Nicola x
ReplyDeleteabsolutely gorgeous card Anna-Karin, the whole design of this is brilliant! I love all of the textures and layers and the distressed images are fabulous! LOVE it :-)
ReplyDeleteluv
Lols x x x
Wow! The distressing of photos is stunning. I was terrified watching how you covered the pic with paint and dried it. That was fantastic and the final look is amazing. Thanks for sharing! Hugs xxx
ReplyDeleteI really enjoyed the technique video showing the watercolor distress. I will try that next time I have out my watercolor paints for sure! I think I am slightly in love with that background stamp! Your card has such a beautiful composition. All of the layers and details work together so perfectly. Thank you so much for sharing this project! You are very talented
ReplyDeleteWonderful card!!!
ReplyDeleteVery nice Anna-Karin.
ReplyDeleteThis is gorgeous, Anna-Karin! I especially like the fairy tale quote you used! Wonderful layers, and thanks for sharing your technique with the watercolor distress! hugs, Maura
ReplyDeletegorgeous vintage Valentine! thank you for the video tutorial--great technique that I'm going to give a try! Hugs!
ReplyDeleteWhat a great project, as always! I really like the details on the photos especially and I was so excited to see the holiday ribbon at the bottom of the project! I've had some of that holiday ribbon forever and have never figured out a way to incorporate it, so thank you for the inspiration!
ReplyDeletebeautiful card ....
ReplyDeleteThis is perfect, Anna-Karin! I love how you pieced this together so beautifully :)
ReplyDelete*mwah*
Steph
Simon Says Stamp!
what a beautifully distressed and vintage project-love!
ReplyDeleteI just love how much texture and layering you have managed to get in to this project-is gorgeous! Lou x
ReplyDeleteWow, what a stunning Valentine project! I adore all the layers and love how you've distressed the photos, I'll be trying that technique asap! Gorgeous work as always, Anna-Karin! :)
ReplyDeleteLove the beautiful background you created, and all the embellishments are gorgeous, Anna-Karin. This is such a fabulous Valentines day card! :)
ReplyDeleteEveryone of your projects is full of techniques and details, fantastic way to work on Found relatives! Gorgesouse vintage carrd! barbara
ReplyDeletegorgeous card Anna-Karin with so many great techniques I'll be trying out...thanks for sharing your wonderful creativity...hugs kath xxx
ReplyDeleteGorgeous piece of art, Anna-Karin! And love the technique you've shared, it looks fabulous! Hugs, Sandra
ReplyDelete