I love to make containers of various kinds and this week I made a container for a hidden little treasure. My Mom has a very old photo album and we don't know who a lot of the people in it are, which is such a pity. If only someone would have written down names and dates. I hope we can figure it out since we knew who it belonged to and therefore I made a little book to document family history details and photos, which is being kept inside this box.
I scanned one of the photos in the album and you can see it here on the cover. The box itself was made by Tim Holtz Vignette Box and Panel.

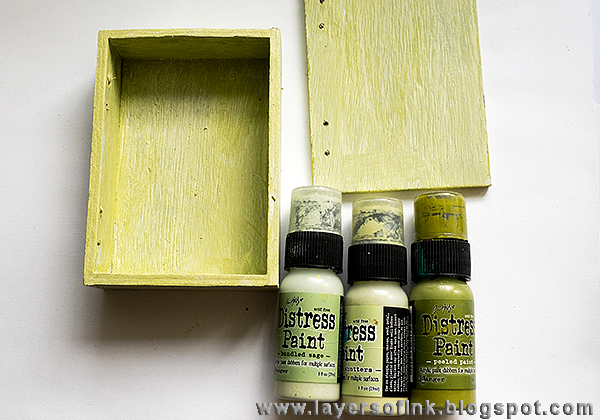
Start by coating a Vignette Box and the corresponding Panel with gesso. You can do this with any of the four Vignette Boxes. I used the second biggest one (3.3 x 4.7 in).

Next, I drilled holes for the hinges. You might want to wait with this step. If I redid the project, I would drill the holes later.

Paint with Bundled Sage, and add a little Shabby Shutters and Peeled Paint. I wanted the box to have the colour of an old faded green book.

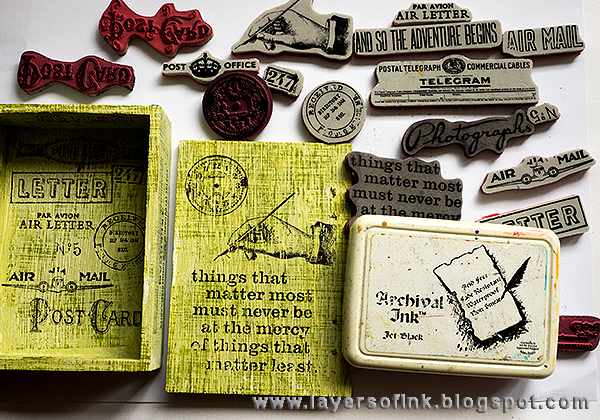
Stamp with the Linen background and Fern Green ink. This gives the box the look of fabric.

Stamp the box on the inside cover, on all the sides, and on the inside. I used a mix of sentiment, postal and image stamps.

Smear Distress Collage Medium Crazing all over the box and cover. You want to coat everything with the medium, but don't make it equally thick everywhere. The thicker the medium, the larger the cracks. I used a palette knife first, to make sure everything was covered, and then added thicker patches with my finger. Let dry.

When the crazing medium is dry, add colour to the cracks by rubbing Distress Crayon into them. Start with the white one and then continue with Peeled Paint and Vintage Photo. Remove excess with a slightly moist cloth.

Sand a small Sophisticated Cabinet Card.

Ink the card and the ink will stick to the sanded parts.

This is the little book that you'll find inside the box. Isn't it cute? You can customize it to work with any theme. My cover comes from a Tim Holtz ephemera card.

Use a paper trimmer to cut pages. The ATC sized panels from Tim's paper pads work really well for this, you just need to cut each panel a little thinner. The pages are 2.6 x 3.9 in.

Punch holes with a Crop-a-Dile. I love my Crop-a-Dile and I have had it for about nine years now.


On the inside, I used postal stamps from the Postcards and Correspondence sets. Use any stamps that fit with your theme. As you can see, I added the crazing medium to the thin edges of the box too.

The inside sides are stamped too.

Here's the box from the top.

You could make this project for any theme, by using different papers, stamps and embellishments. If you don't want to make a book, use the box for a small gift, or for a small family heirloom or important keepsake.
I hope you will join us in our Try to Contain Yourself challenge. A random participant will win a $50 gift voucher from Simon Says Stamp. You have until Monday 8am Ohio time. 1pm UK time, 2 pm CET to join in.
I hope you will join us in our Try to Contain Yourself challenge. A random participant will win a $50 gift voucher from Simon Says Stamp. You have until Monday 8am Ohio time. 1pm UK time, 2 pm CET to join in.
If you want to, follow Simon Says Stamp on Instagram, they post great stuff daily.

Happy crafting!
Anna-Karin
Supplies:


This is so beautiful! I love how you have made this treasure of a box to store your treasured photos in. The lid is gorgeous with that fabulous photo of an unknown member of your family. Hugs, Chris
ReplyDeleteYour box is gorgeous, Anna-Karin! It's a perfect place to store treasured keepsakes and I love all the fine details you put into it. Beautiful!
ReplyDeleteCathie ♥
what a great idea! The box looks really nice, I love the colors and the old photograph!
ReplyDeleteFabulous box Anna-Karin, the details and vintage photo are gorgeous and I love the little booklet inside, the whole design is stunning! LOVE it :-) ❤️
ReplyDeleteluv
Lols x x x
Anna-Karin, this is absolutely perfect! Each detail is so thoughtful and in its place. Love the distress of the box with Medium Collage and Crayons. Perfect result. Great stamps mix, I am especially amazed by the effect which gives the linen stamp, I didn't expect that. Fabulous project! Hugs, Marzena
ReplyDeleteYour project is amazing! The linen stamp is perfect for what you intended showing some stamps have multiple uses. Love the colors and your "lost" relatives. They are best kind as they don't know your secrets. lol! A great keepsake box and now you have my mind thinking about a project for each of my grandchildren.
ReplyDeleteThe detail of this album and box is so stunning! WOW!
ReplyDelete*mwah*
Steph
Simon Says Stamp!
Your box is beautiful, so love the colors you chose! So many layers, love how vintage it really looks. Amazing!
ReplyDeleteI absolutely love this project Anna-Karin, it is brilliant. Love the crackle effect that the crazing medium creates and the photo on the front is beautiful. Like you, I have pictures left by my mum and don't know who they are, it is so sad.... Hugs, Anne xx
ReplyDeleteI bet you had so much fun making this--it turned out just crackly-good and amazing! I really like the black cabinet cards and would like to get some. I'm surprised I haven't seen more of them in use. It's also the first project I've seen using the hinges with the vignette boxes and the addition of the baroque frame really pulls it together. Thanks for sharing all the steps to complete it!
ReplyDeletethis is stunning Anna-Karin...love the idea of putting a lid on the box and love your little hidden book hugs kath xxx
ReplyDeleteAnna-Karin, just let me pick up my jaw from the floor! This is amazing, from the textures to images to the idea. Your creative brain is amazing!! hugs, maura
ReplyDeleteSpeechless! love this work, it's one of my favourite of yours! The idea to hid a book inside the vignette box it's amazing! Colors and design are stunning as always! barbara
ReplyDeleteThis is stunning Anna-Karin ~ there is so much beautiful work in this project and so much wonderful detail, it's fabulous!! :)
ReplyDeleteWow! This is incredible and what a treat to see so many detail shots! This is gorgeous from every angle and I especially love how you stamped the box. What a great idea to build a box out of these pieces! LOVE this hinged beauty!
ReplyDeleteThis is such a stunning creation Anna-Karin. Love all those beautiful details on the box, and the book is awesome. :)
ReplyDeleteThis is fabulous Anna-Karin! Love that it holds a lovely album. So much details! Great tutorial too! It's really amazing! Hugs, Sandra
ReplyDeleteThis is fabulous! You have made it look like an heirloom with the sanding and use of crackle medium. And of course, you are the queen of using stamps so effectively. I love this!
ReplyDelete