Hello friends! I always try to get the most out of my dies and to use them in sometimes unexpected ways. Anton is soon turning six, and I can hardly believe that he is already so big. He is going to have a pirate party and I wanted to make him something as a memory, which he can hang on his wall. This is a Sizzix tutorial.

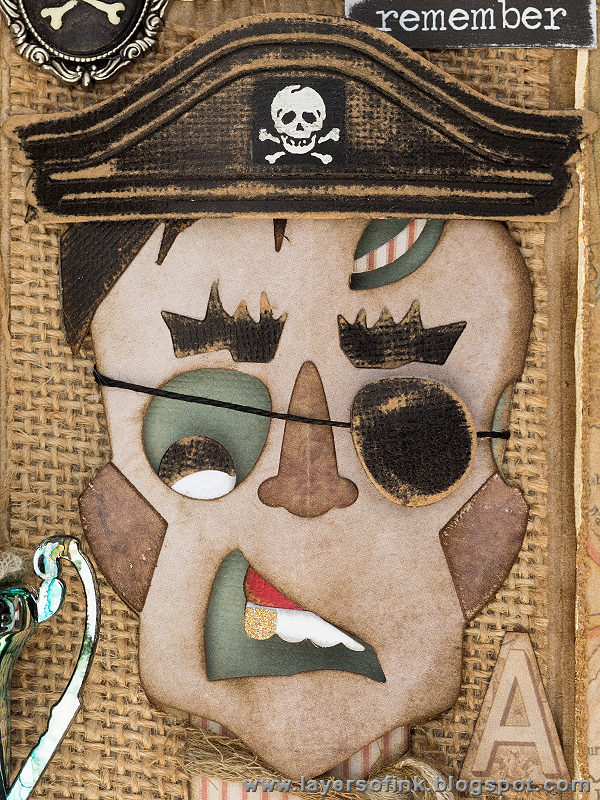
One way of getting the most out of your dies, is to use seasonal dies all year around and last week when I was thinking of Anton's party, I got the idea of turning Tim Holtz Zombie die into a pirate. Doesn't he make a cool pirate? I love the fun Zombie die and I was happy to use it again. Anton loves it too - you can see some of his own zombies in this post. This was lots of fun to make and I was particularly pleased with my idea for the pirate hat.

These are the pieces you need to make the pirate - or if you rather want to - a zombie. I later changed a few of the smaller pieces to other colours. Use this sandwich: Sizzix Magnetic Platform, Cutting Pad, paper, die facing down, second Cutting Pad.

Ink the edges of the pieces. I used the Pumice Stone on the white pieces (eye, teeth) and Ground Espresso on everything else.

Assemble the zombie using foam adhesive and Glossy Accents. The dies make faint imprints in the paper where the smaller pieces should be, so it is easy to assemble. Anton and his friends loves to assemble zombies and monsters. I die cut pieces in lots of colours for them and they make their own zombies. One of his friends recently visited after not having been here for quite some time and immediately talked about the crafting they did last time.

As I was thinking of how to do the hat, I remembered Tim Holtz Pediments die and thought it had a good shape. And I was happy to see that I remembered correctly, it has a perfect pirate hat shape! Black kraft-core cardstock was glued to grungeboard.


After I took the photos, I fixed the left eye, because I glued it a little weirdly at first. I decided that he had to wear an eye-patch, and die cut a new eye from black kraft-core and glued it down with some twine going across. It is best to do this before adhering the head to the background.


I am looking forward to seeing Anton's reactions to this wall hanging. He is going to love it, I think.
Thank you so much for looking! I hope you enjoyed the tutorial and that it inspired you to look at your dies in new ways.
Happy crafting!
Anna-Karin
Supplies:

Love your pirate Anna-Karin, I love how,you used the pediment die for his hat, very clever. Tracy x
ReplyDeletewhat a great idea Anna-Karin!! Love the pirate hat - so perfect!!!
ReplyDeleteThis is adorable! The hat is brilliant, the eyepatch, too. How fun for your son's birthday!
ReplyDeleteI love the cool things you devise for your son - and the peidmont pirate hat - so cool!!!
ReplyDeleteWhat a lucky boy Anton is to be getting something so wonderful!
ReplyDeleteSally
Absolutely brilliant! Love this to bits! TFS! Claudia x
ReplyDeleteTee hee - he's hilarious - and the whole piece is just packed with fantastic details - brilliant!
ReplyDeleteAlison x
An amazing card and the right for a little boy. Wonderful creation!Makes me smile.
ReplyDeleteHappy Birthday for your son!
Greetings
Sabine
I'm in love! brilliant project! i love so much every little detail! Barbara
ReplyDelete