

Start by die cutting a Layered Bee and a Layered Dragonfly from grungeboard. Cutting sandwich: cutting pad, die facing up, grungeboard, second cutting pad.
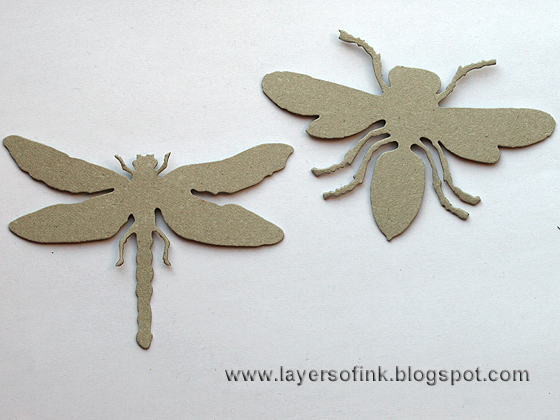
This is what they look like. Both these dies are steel-rule dies which means you can die cut thick materials.
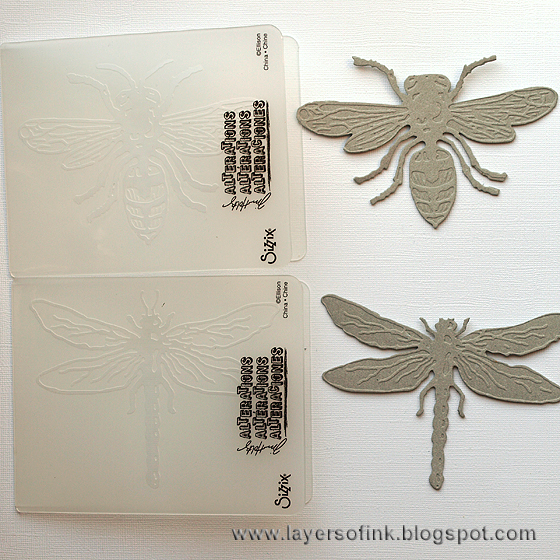
Included with the die is a coordinating embossing folder. Love the instant texture and detail.
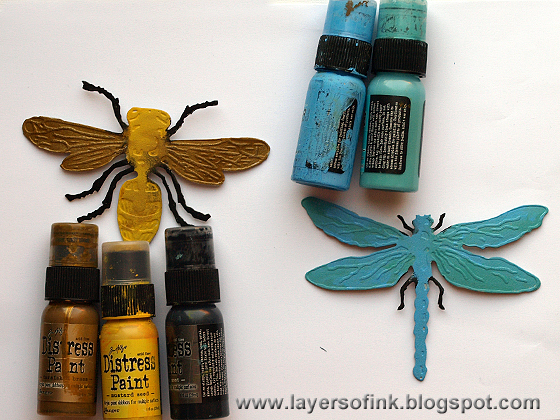
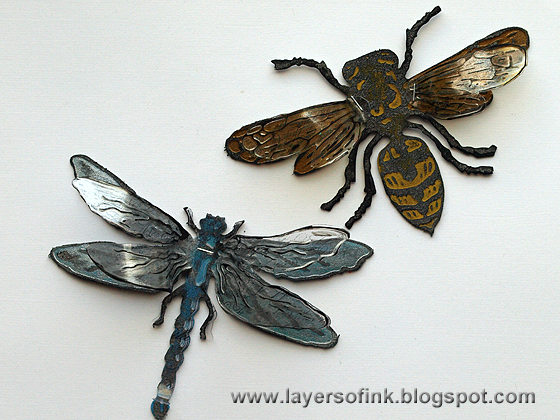
Paint with Distress Paint. I used Tarnished Brass for the wings of the fly, Mustard Seed for the body and Black Soot for the legs. The dragonfly was painted with Salty Ocean and Peacock Feathers.
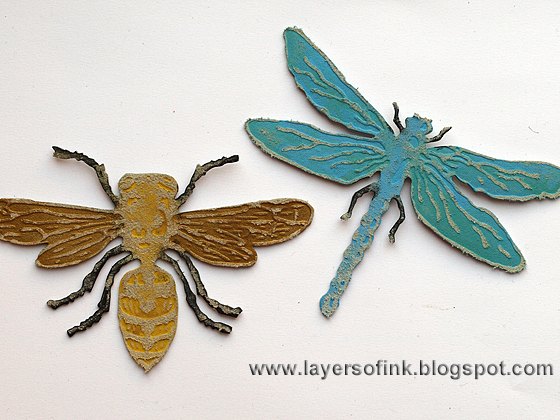
When the paint is dry, sand to remove some of the paint from the embossed areas.
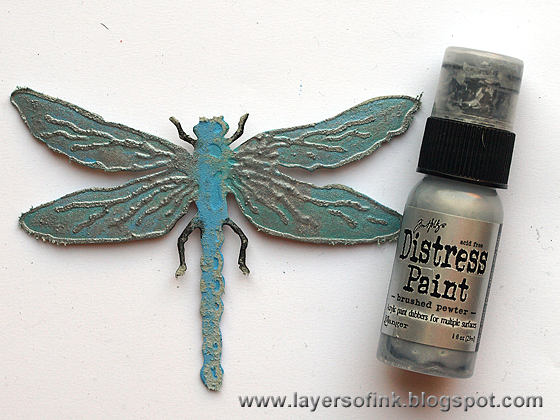
Later, I changed my mind and painted the wings of the Dragonfly with Brushed Pewter. After it was dry, I sanded the wings again. The metallic shine adds a really nice touch.
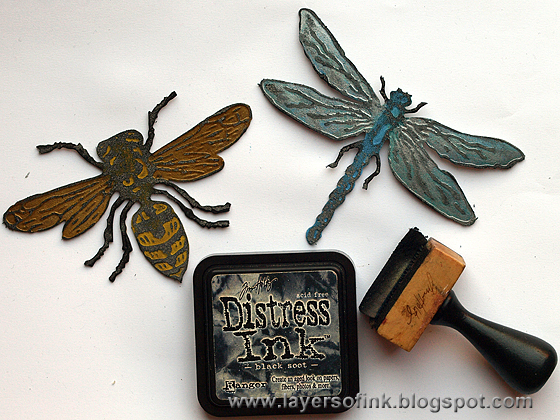
Ink with Black Soot. The ink will stick better to the sanded parts and if you want to, you can wipe if off from the paint.

Die cut from Clear Modeling Film and stamp partially with a script stamp. As you can see, I didn't die cut the entire bee, because I was only planning to use the wings.
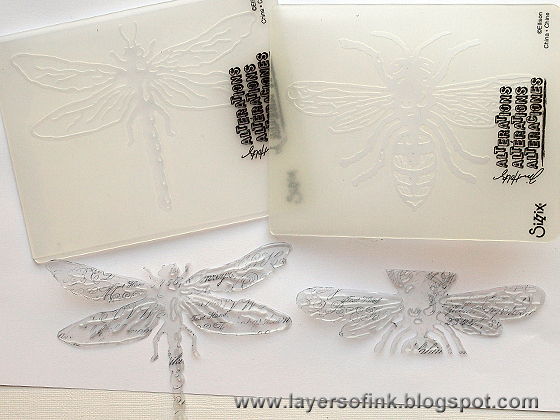
Emboss with the coordinating embossing folders. Modeling Film embosses beautifully.
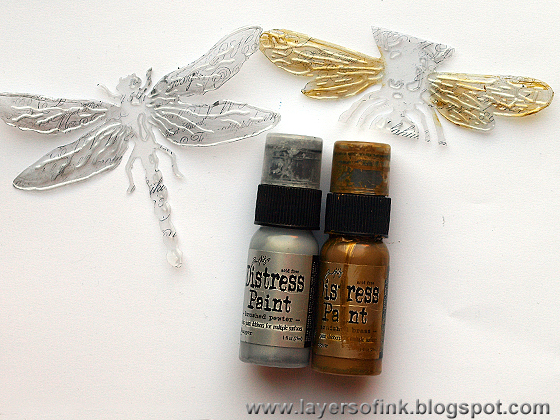
Swipe the wings on the back with Brushed Pewter and Tarnished Brass, for a touch of metal and shine.
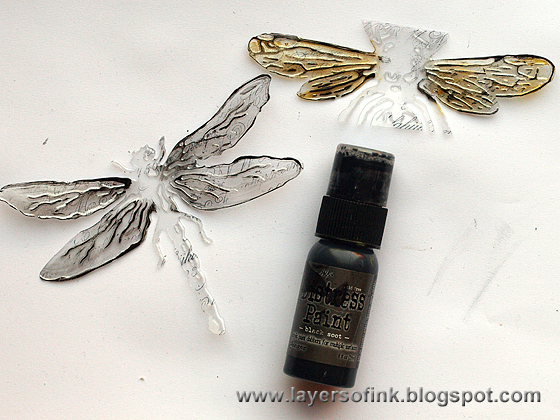
With your finger, apply some Black Soot paint along the embossed ridges.
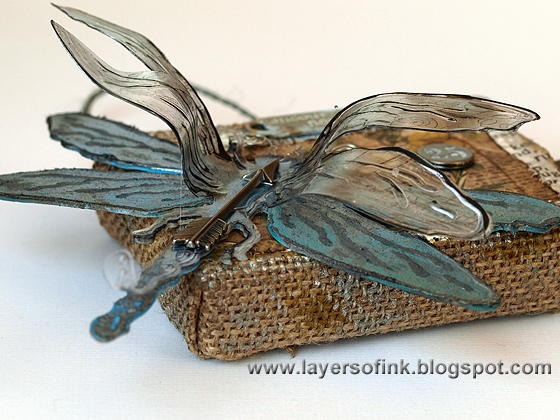
Heat the wings with your heat gun (be careful not to burn yourself) and shape them. Modeling Film keeps its shape perfectly. Staple the film dragonfly to the grungeboard one. Cut off the wings of the bee and staple them to the bee. If you want to you can also use a full film shape for the bee, but I wanted the bee's body to have a matte look.
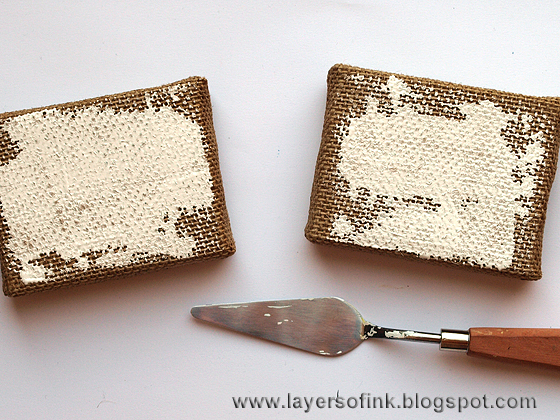
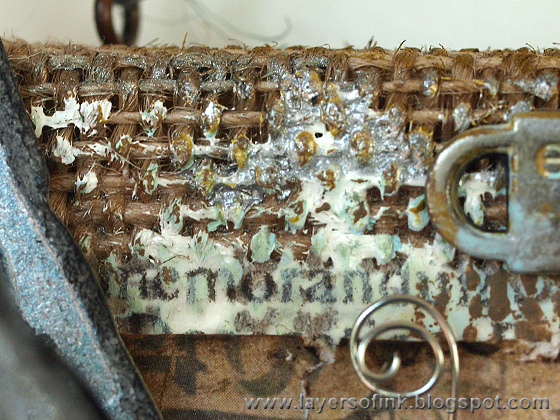
The mini burlap panels come in a pack of four, I used the two rectangular ones. Smear some gesso on them with a palette knife. Leave to dry.
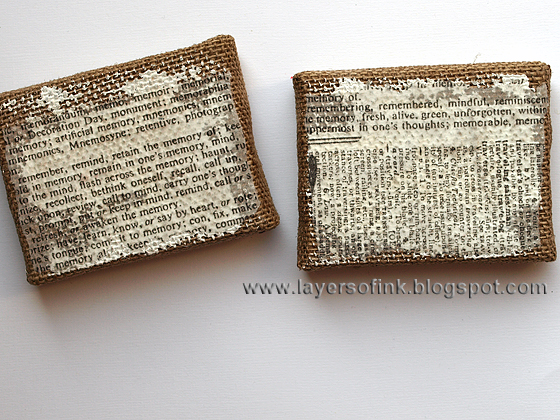
Tear two rectangles tissue wrap and adhere to the canvases with Matte Multi Medium. Add a layer of multi medium on top of the tissue paper too. As you can see, the gesso makes the tissue paper stand out better.
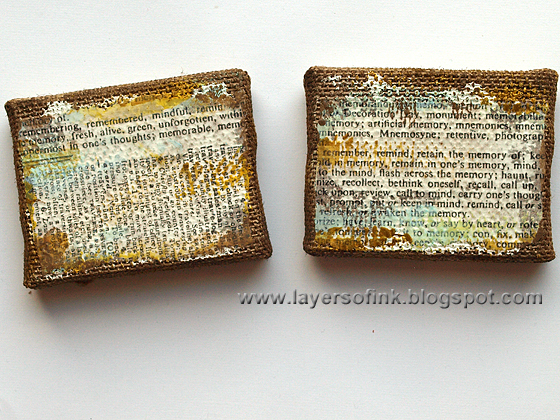
Smear some Distress Paint here and there on the canvases. I used Tumbled Glass, Mustard Seed, Tarnished Brass and Walnut Stain. I later added more silver to the dragonfly canvas.
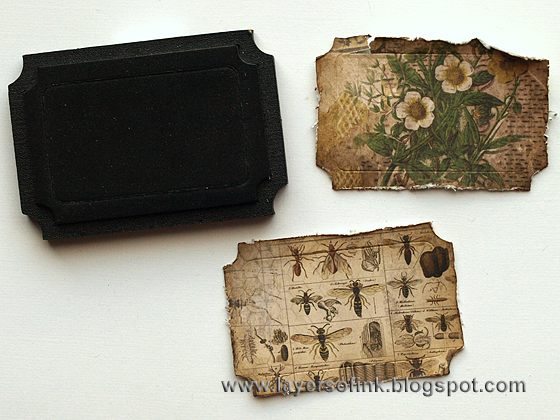
Die cut two tickets from patterned papers. I used papers from the Wallflower stash. Ink and distress the edges.

Embellish with a Word Band, Letterpress letter and Number brad. I like the combination of materials and textures on these canvases.
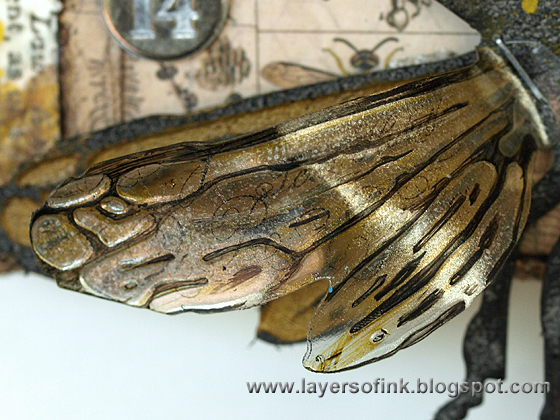
The combination of stamping, embossing, metallic and black paint on the wings look really nice.
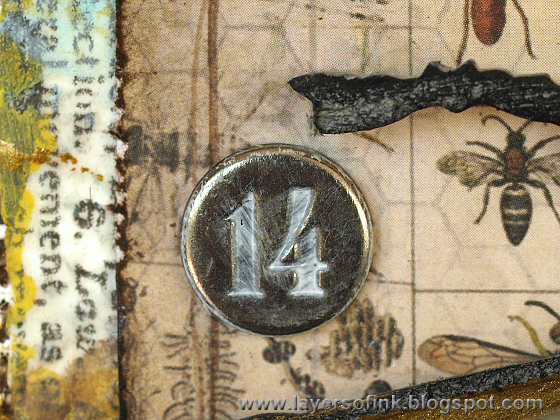
Paint was rubbed into the numbers.
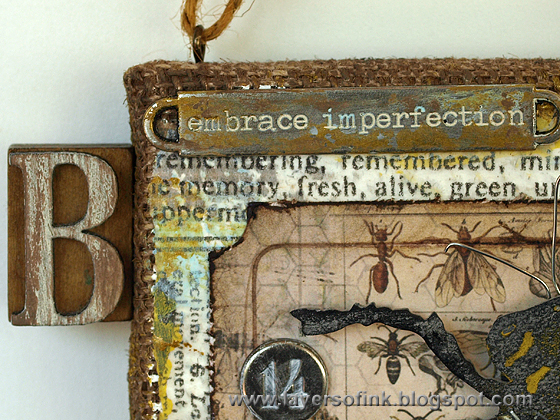
I also added some paint to the Letterpress Letters and the Word Bands, to distress them.
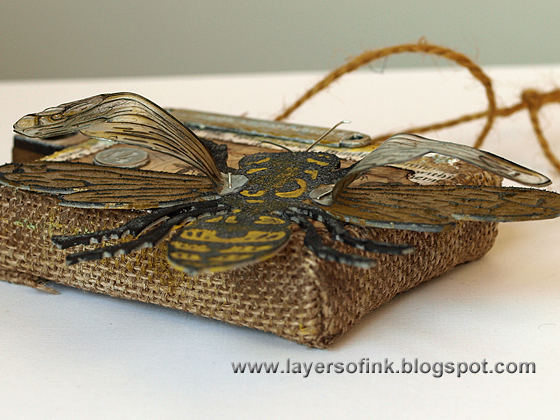
Here you can better see the dimension of the wings.

The dragonfly canvas is embellished in a similar way.
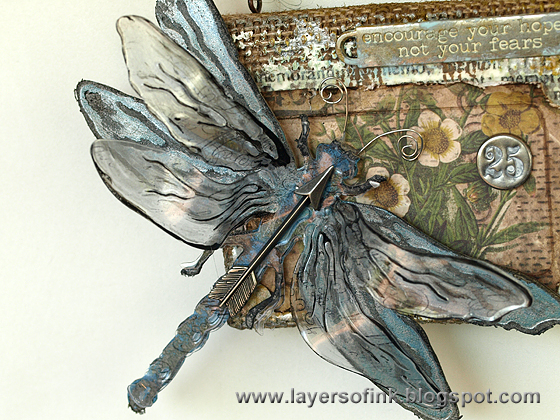
I glued a metallic arrow to the dragonfly.
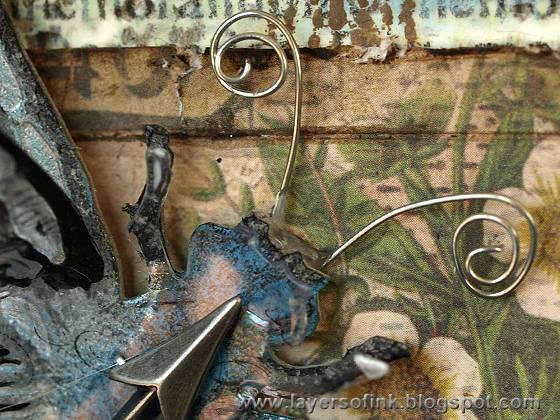
Roll some wire for the antennae.
The letter was painted with Salty Ocean and Walnut Stain.
The burlap panels are made of wood, which I really like. It makes it easy to attach things and to hang them. Screw a Screw Eye on each side and tie some jute string as a hanger.
The paint, gesso and tissue paper look nice on the burlap background.
Here you can better see the dimension of the wings. I love Modeling Film.
There is also a Layered Butterfly die, and I'll share a tutorial using that die on the Sizzix blog next week.
Thank you so much for stopping by today!
Happy crafting!
Anna-Karin
Supplies:
Surfaces: Tim Holtz idea-ology: Mini Burlap Panels, Grungeboard, Wallflower Paper Stash, Melangie Tissue Wrap; Stamper's Anonymous Wendy Vecchi: Clearly For Art Clear Modeling Film
Dies: Sizzix: Layered Bee, Layered Dragonfly, Mini Tickets
Stamps: Stamper's Anonymous Tim Holtz: Merchantile
Ink: Distress Ink: Black Soot, Gathered Twigs; Archival Ink: Jet Black
Paint: Distress Paint: Black Soot, Picket Fence, Salty Ocean, Peacock Feathers, Mustard Seed, Tarnished Brass, Brushed Silver, Tumbled Glass, Walnut Stain
Medium: Ranger Dina Wakley: White Gesso; Ranger Multi Medium Matte
Embellishments: Tim Holtz idea-ology: Jute String, Word Bands, Letterpress, Numbered Brads, Arrows Adornments, Screw Eye
Anna-Karin, your burlap panels are awesome. I love the layered wings. Thanks so much for sharing. Jean.x
ReplyDeleteAbsolutely beautiful!!
ReplyDeleteLove
Amanda x
This is such a cut project Anna-Karin! Love the bee and dragonfly. NancyD
ReplyDeleteFlapdangle, those are super duper! I've been trying out different mediums for the insects but hadn't tried the modeling film yet. The dies and matching embossing folders make creating art so much fun!
ReplyDeleteWELL DONE!!
ReplyDeleteboth are beautiful!
Gorgeous ?Anna-Karin, I love the use of tissue tape and the bee and dragonfly are fantastic. Tracy x
ReplyDeleteThis is amazing. Really really love this. Your dragonfly and bee is gorgeous. This is a piece of ART for me.
ReplyDeleteThanks so much for showing and your explanation Anneke.
Absolutely gorgeous panels! Love the way you used the CfA on the wings, they look so realistic and I love the antennae you gave the dragonfly - a very nice touch! Anne x
ReplyDeleteWhat absolutely beautiful burlap panels!
ReplyDeleteSally
I love these!
ReplyDeleteNormally, I'm not a fan of bugs...but these are gorgeous!
A fantastic tutorial Anna-Karin and two beautiful burlap panel creations. Love the stamping on the acetate wings in particular. Jenny x
ReplyDeleteFantastic. Such beautiful details, so well thought out. Thanks again for a wonderful tutorial.
ReplyDeleteWhat a brilliant tutorial Anna Karin,beautiful details and fantastic step by step photos! The layered wings really look amazing and I loved the little detail of stamping on them too! Two fabulous panels!!
ReplyDeleteI again love these both... and they are so fun to look at and to see all the layers of love you have put onto these two mini canvases... GREAT ART... Love ,light and Peace...Bonnie
ReplyDeleteAbsolutely stunning & what a tutorial.... thorough & very inspiring
ReplyDeleteI love these panels! The insects look so real in an artistic sort of way, and all the details in these panels are fascinating to me. I recently purchased the butterfly set, which is still in the shipping carton (I hope). You have inspired me to create something with that. Now I will have to get the dragonfly and bee, too!!! Love your work! Sara Emily
ReplyDeletePS Thank you for the tutorial, as well. Sara Emily
ReplyDeleteAnna-Karin, of course, I love everything about these guys! I love dragonflies and bees, and these are just fabulous! Great techniques to glean from! Thanks so much for sharing!
ReplyDeleteThis is gorgeous! Clever you!
ReplyDeleteThank you so much for showing how to do this. You make it look so easy. I might now buy that bee and dragonfly and have a go! Thanks again.
Amazing pieces Anna-Karin! Love to see how you create your art. Thanks for sharing!
ReplyDeleteFantastic project and thanks so much for the tutorial.
ReplyDeleteHappy crafting, Angela x
WoW...very nice. I like it a lot. Great technique...and the metallics?.....awesome. Really, really GREAT!
ReplyDeleteSimply stunning!!!
ReplyDelete~Linda
Your work is amazing - I wish I could do this.
ReplyDeleteYour work is amazing - I wish I could do this.
ReplyDeleteThank you for your wonderful tutorial, what wonderful panels! I'd not heard of Wendy's modeling film, looks like I am going to have to get some!
ReplyDeleteI really love what you have created here it's very inspirational Dee x
ReplyDeleteWow those are great looking!! Thanks for the steps to create them.
ReplyDeletegreat projects!!! as always very inspiring ^.^
ReplyDelete