Monday, June 19, 2023

Mixed Numbers Tag

Hello friends! I hope you are well and had a good weekend. We went on a fun outing on Saturday and was happy to get a little bit of rain on Sunday, but more rain is needed.

Please note: this post has affiliate links, for which I receive a small percentage of sales generated by the link, at no extra cost to you.

This week at the Simon Says Stamp Monday Challenge Blog we have a Pick a Number theme. I hope you will join us! Don't miss the stunning project by our June guest designer Kerry B.

Layers of ink - Mixed Numbers Tag Tutorial by Anna-Karin Evaldsson.

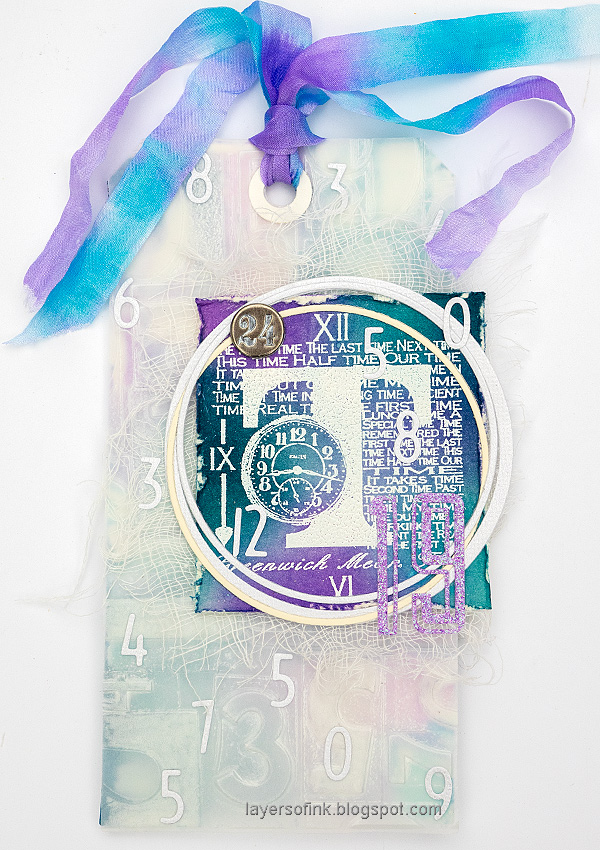
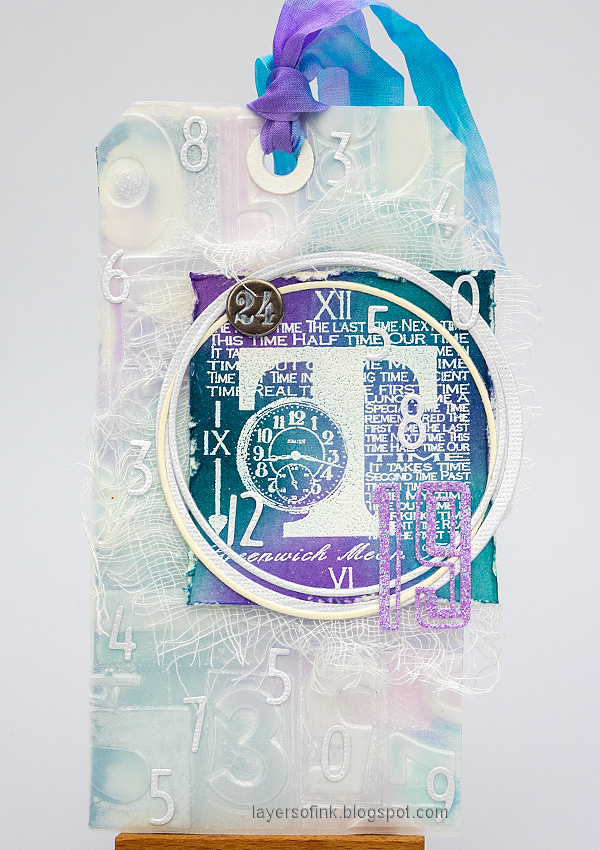
I made a tag with lots of different numbers, dry embossed, die cut and stamped. I used the Numbered 3-D embossing folder by Tim Holtz for the background and a mix of dies for the rest of the numbers. 

Layers of ink - Mixed Numbers Tag Tutorial by Anna-Karin Evaldsson. Dry emboss the vellum.

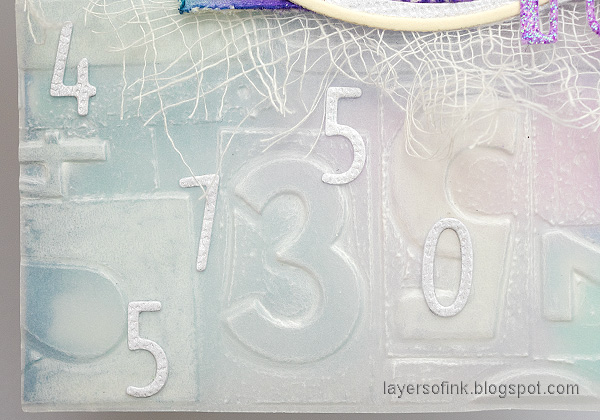
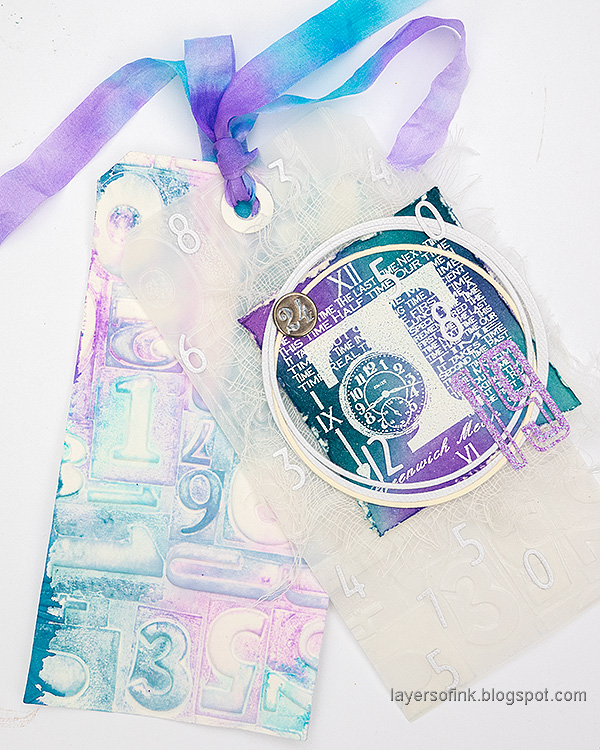
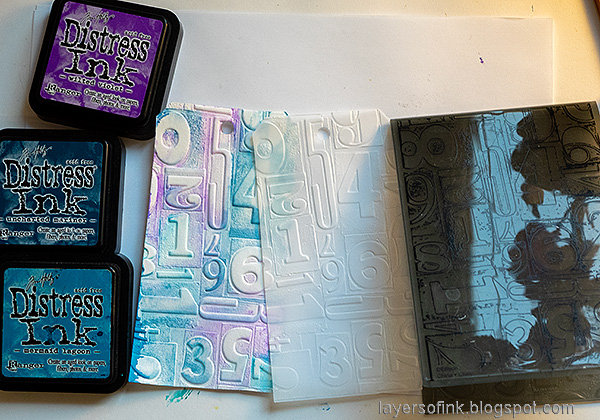
I used two tags, one die cut from watercolor paper and one from vellum. Apply ink to the embossing folder and mist the watercolor tag with water. Emboss in Tim's Numbered  3-D folder. Also emboss the vellum tag. Try to position it in the same way as the watercolor tag.

Layers of ink - Mixed Numbers Tag Tutorial by Anna-Karin Evaldsson.

Add some work with a white pencil on the back of the vellum tag.

Layers of ink - Mixed Numbers Tag Tutorial by Anna-Karin Evaldsson.

White emboss T for time from Stamper's Anonymous Classics #15, on heavystock paper.

Layers of ink - Mixed Numbers Tag Tutorial by Anna-Karin Evaldsson.

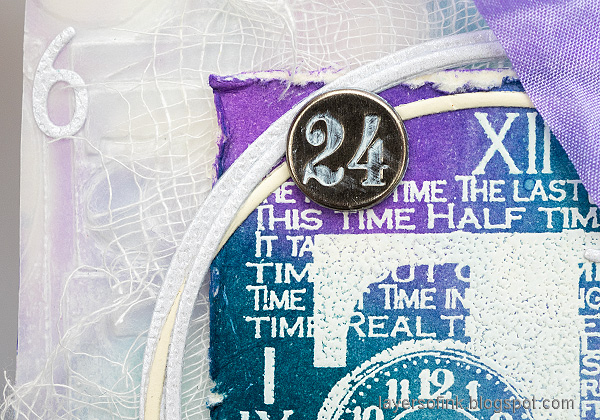
The small numbers were die cut with Tim Holtz Collector set, from Simon Says Stamp white glimmery cardstock.

Layers of ink - Mixed Numbers Tag Tutorial by Anna-Karin Evaldsson.

The stamped panel was inked with the same three Distress Inks used on the watercolor tag.

Layers of ink - Mixed Numbers Tag Tutorial by Anna-Karin Evaldsson.

The glitter letters were die cut with Tim's Alphanumeric Emporium dies, from Simon Says Stamp glitter paper.

Layers of ink - Mixed Numbers Tag Tutorial by Anna-Karin Evaldsson.

The circle frames were die cut from heavystock and glimmer paper with Simon Says Stamp Thin Frames.

Layers of ink - Mixed Numbers Tag Tutorial by Anna-Karin Evaldsson.

The small numbers were glued here and there, as if they had fallen out in a jumble from the clock.

Layers of ink - Mixed Numbers Tag Tutorial by Anna-Karin Evaldsson.

The watercolor tag is only partially visible through the vellum, but since the tags are just tied together, it can still be seen.

Layers of ink - Mixed Numbers Tag Tutorial by Anna-Karin Evaldsson.

The ribbon was dyed with Mermaid Lagoon and Wilted Violet.

I hope you will join us this week in our Pick a Number challenge. You have a chance to win a $25 gift voucher to do some fun shopping at Simon Says Stamp. You have until Monday 8am Ohio time. 1pm UK time, 2 pm CET to join in.


Do you use Instagram? If so please add #sssmchallenge so we can see your entries there too.


Thank you so much for stopping by here today! 

Happy crafting!

Anna-Karin

Supplies:

* Please note: the links are affiliate links, for which I receive a small percentage of sales generated by the link, at no extra cost to you.


Monday, June 12, 2023

Distressed Brick Wall Card

Hi crafters! It is Monday and I have a card to share made for this week's Simon Says Stamp Monday challenge.

Please note: this post has affiliate links, for which I receive a small percentage of sales generated by the link, at no extra cost to you.

Our theme this week is Masculine. Don't miss the stunning project by our June guest designer Kerry B


Layers of ink - Distressed Brick Wall Card Tutorial by Anna-Karin Evaldsson.

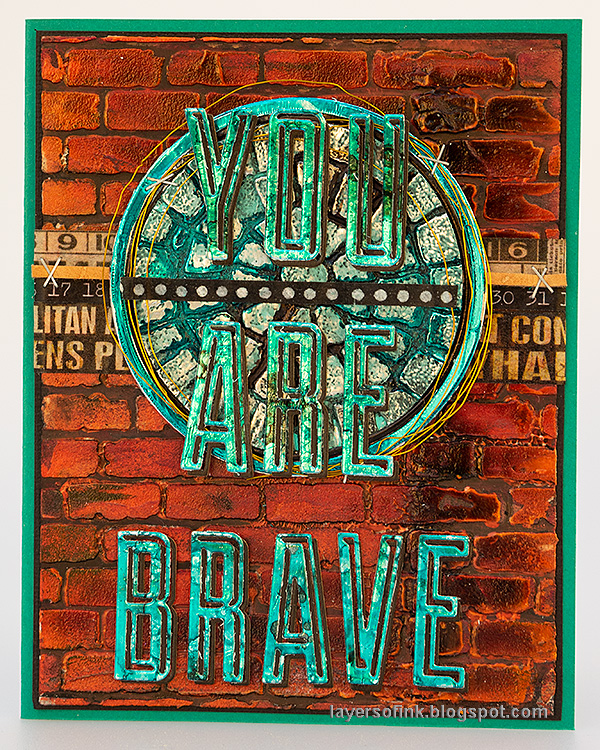
I made a card for my eldest son. He has handle to a very heavy load of hospital and doctor's visits, as well as the daily struggle of autoimmune diseases and does it with such bravery and strength. The background is done with a stencil by Tim Holtz and a fun resist technique.

Layers of ink - Distressed Brick Wall Card Tutorial by Anna-Karin Evaldsson. Apply texture paste through Tim Holtz Bricked stencil.

Apply texture paste through Tim's Bricked stencil, working on heavystock cardstock. 

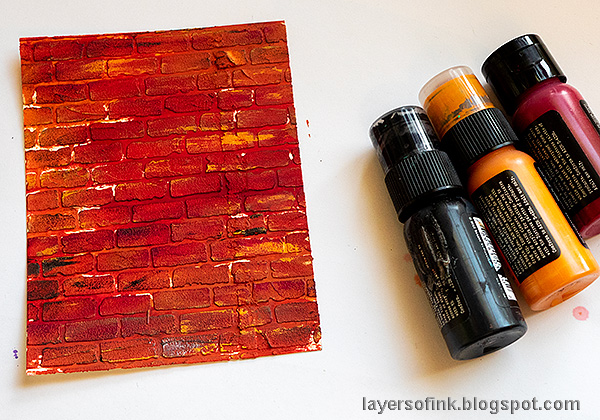
Layers of ink - Distressed Brick Wall Card Tutorial by Anna-Karin Evaldsson. Paint with Distress Paint.

Paint with Distress Paints in red and orange shades. I used Candied Apple, Lumberjack Plaid and Crackling Campfire.

Layers of ink - Distressed Brick Wall Card Tutorial by Anna-Karin Evaldsson.

When dry, dry brush with more paint to get a varied look. 

Layers of ink - Distressed Brick Wall Card Tutorial by Anna-Karin Evaldsson.

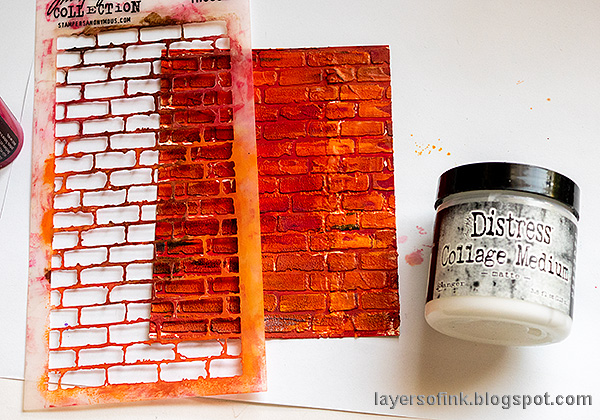
Place the stencil back over the design and apply Matte Collage Medium with a palette knife. Don't worry about getting a perfect result.

Layers of ink - Distressed Brick Wall Card Tutorial by Anna-Karin Evaldsson. Mist with Distress Spray Stain.

When dry, mist the entire background with Black Soot Distress Spray Stain. Leave for a while and then wipe off the stain from the areas with matte medium. 

Layers of ink - Distressed Brick Wall Card Tutorial by Anna-Karin Evaldsson. Die cut with Simon Says Stamp Thin Frames.

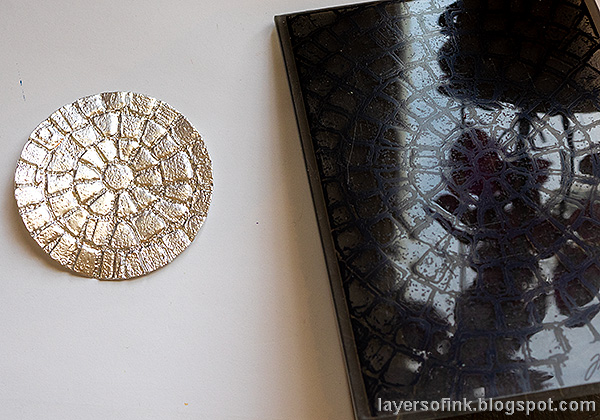
Apply foil tape sheets to cardstock and die cut the circle frame from Simon Says Stamp Thin Frames.

Layers of ink - Distressed Brick Wall Card Tutorial by Anna-Karin Evaldsson.

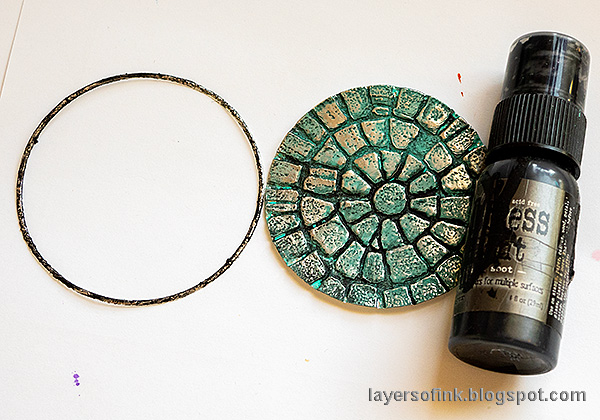
Dry emboss the circle with Tim Holtz Mosaic 3-D embossing folder.

Layers of ink - Distressed Brick Wall Card Tutorial by Anna-Karin Evaldsson.

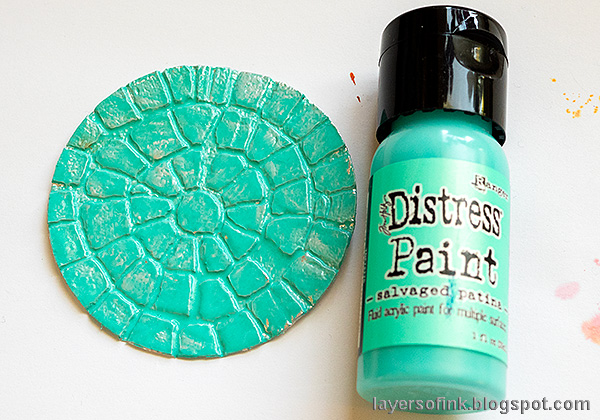
Paint with Salvaged Patina. 

Layers of ink - Distressed Brick Wall Card Tutorial by Anna-Karin Evaldsson.

Before the turquoise paint is completely dry, wipe most of it off with a cloth.

Layers of ink - Distressed Brick Wall Card Tutorial by Anna-Karin Evaldsson. Color with alcohol ink.

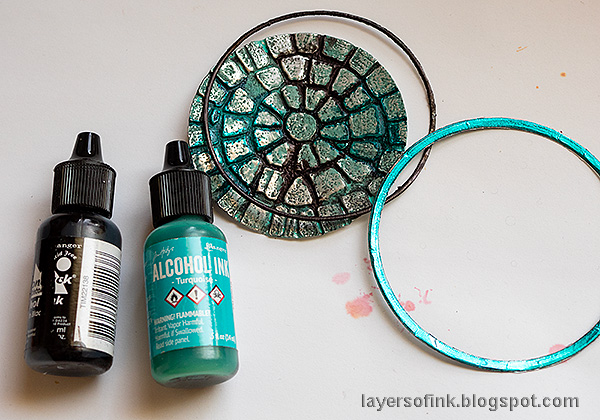
I thought the circles needed a bit more color and colored the thin frames with alcohol ink. I also dropped a little alcohol ink on the embossed circle.

Layers of ink - Distressed Brick Wall Card Tutorial by Anna-Karin Evaldsson.

For the letters, apply foil tape sheets to cardstock and color with alcohol ink.

Layers of ink - Distressed Brick Wall Card Tutorial by Anna-Karin Evaldsson.

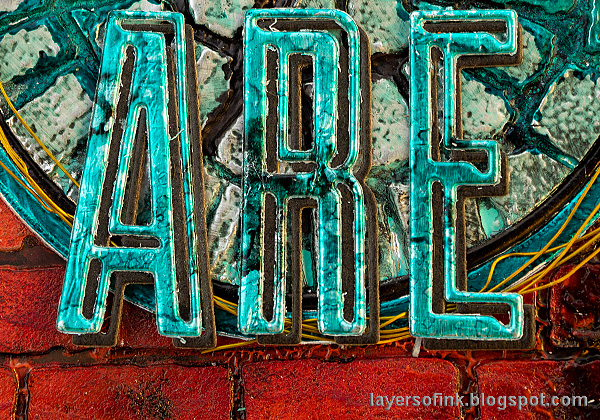
Die cut the letters with Tim Holtz Alphanumeric Emporium dies, from both the colored foil sheet and from black cardstock.

Layers of ink - Distressed Brick Wall Card Tutorial by Anna-Karin Evaldsson.

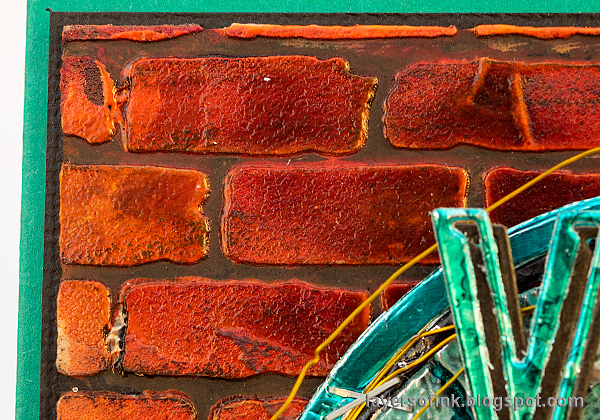
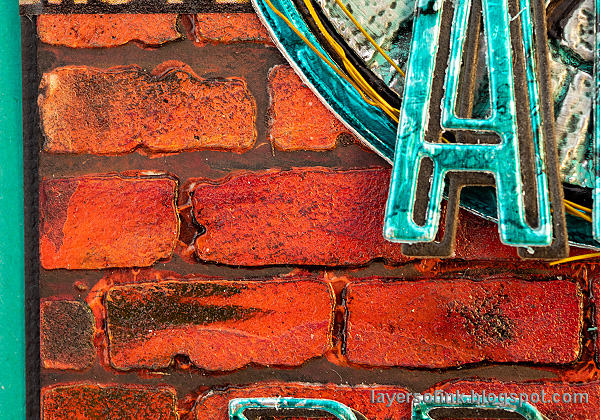
The resist technique leads to distressed looking bricks and the bricks themselves have a slight gloss shine.

Layers of ink - Distressed Brick Wall Card Tutorial by Anna-Karin Evaldsson.

I used a thin wire to make one more frame and add movement. 

Layers of ink - Distressed Brick Wall Card Tutorial by Anna-Karin Evaldsson.

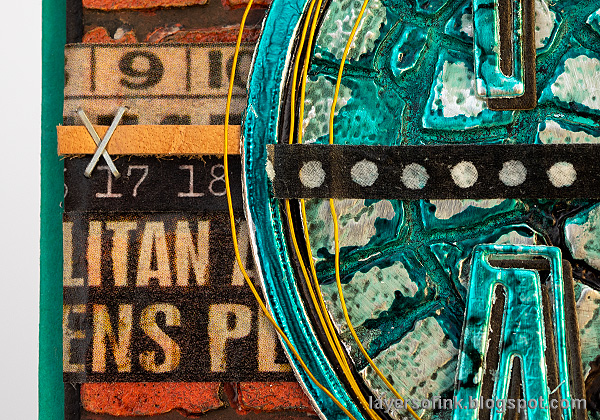
There are strips of Design Tape in the background and across the circle.

Layers of ink - Distressed Brick Wall Card Tutorial by Anna-Karin Evaldsson.

At first, I was going to use only black letters, but they disappeared too much on the background. 

Layers of ink - Distressed Brick Wall Card Tutorial by Anna-Karin Evaldsson.

I hope you enjoyed this project and technique. 

I hope you will join us this week in our Masculine challenge. You have a chance to win a $25 gift voucher to do some fun shopping at Simon Says Stamp. You have until Monday 8am Ohio time. 1pm UK time, 2 pm CET to join in.


Do you use Instagram? If so please add #sssmchallenge so we can see your entries there too.


Thank you so much for stopping by here today! 

Happy crafting!

Anna-Karin

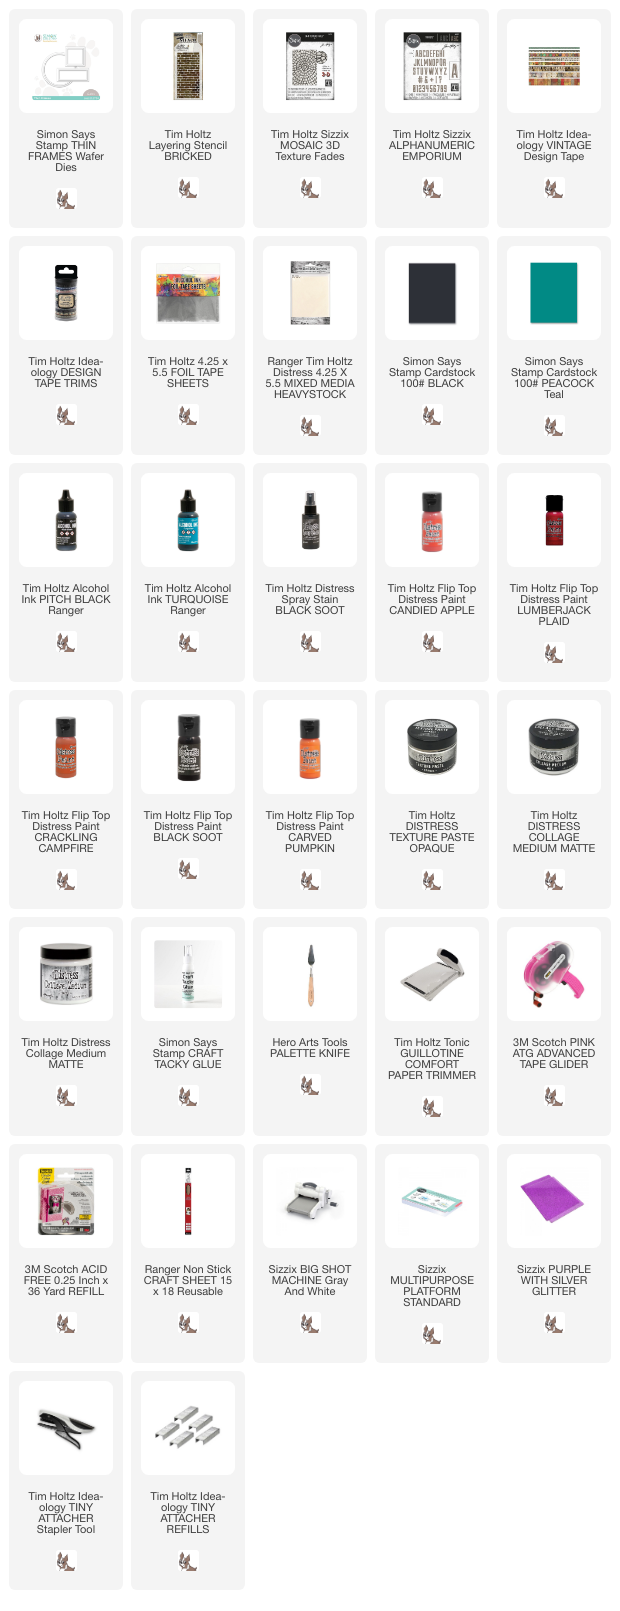
Supplies:

* Please note: the links are affiliate links, for which I receive a small percentage of sales generated by the link, at no extra cost to you.

Monday, June 5, 2023

Butterfly Journey Art Journal

Hi crafters! I can't believe that it is already June, May went by so fast. I hope you had a good weekend. 

Please note: this post has affiliate links, for which I receive a small percentage of sales generated by the link, at no extra cost to you.


This week our theme at the Simon Says Stamp Monday Challenge Blog is Not a card. I hope you will join us! Since this is the first Monday of a new month, the team is showcasing products from a specific designer and this week it is Tim Holtz. Here you can find Tim's fantastic range of stamps, dies, stencils, tools, inks, paint, embellishments and much more.

Don't miss the gorgeous project by our June guest designer Kerry B

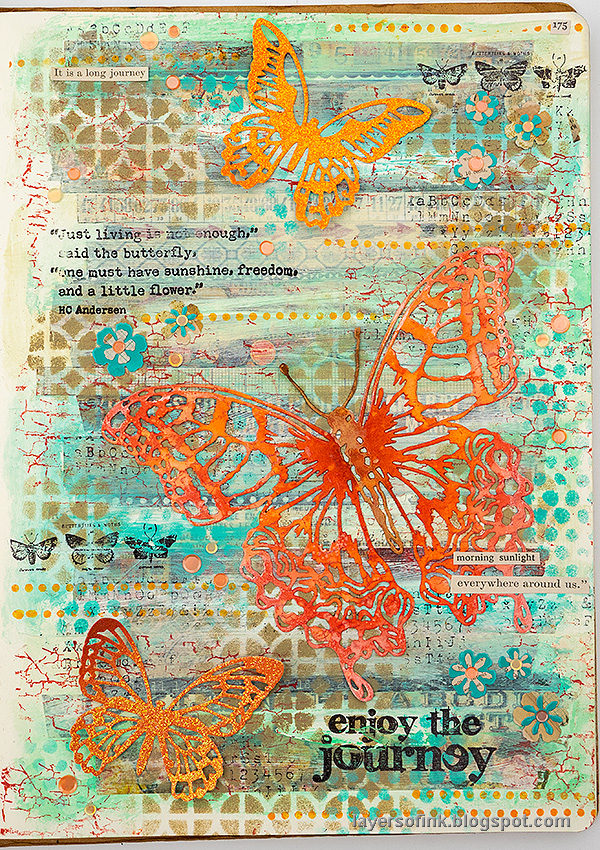
Layers of ink - Butterfly Journey Art Journal Page Tutorial by Anna-Karin Evaldsson.

I made an art journal page this week, in my large Dylusions journal. The page has a butterfly theme and quite many layers of design tape, paint and stamping in the background. I really like the large Perspective Butterfly, especially on larger pages like this one.

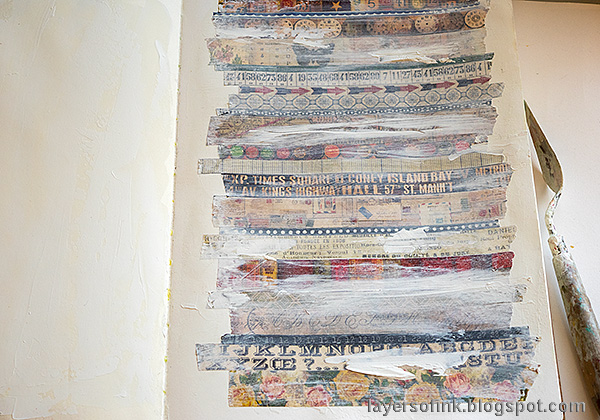
Layers of ink - Butterfly Journey Art Journal Page Tutorial by Anna-Karin Evaldsson. Cover background with Tim Holtz design tape.

My page had previously been coated with gesso. I used matte medium to glue down strips of Design Tape and added another layer of medium on top.

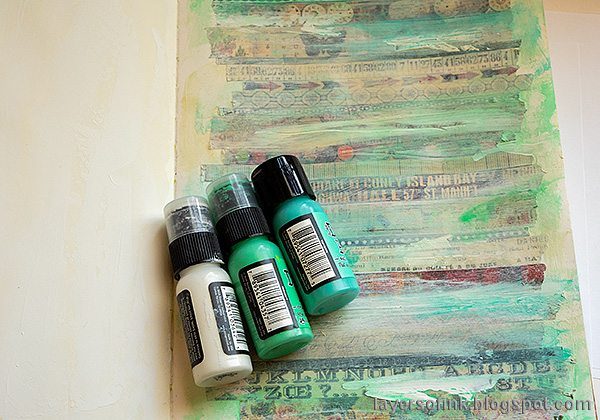
Layers of ink - Butterfly Journey Art Journal Page Tutorial by Anna-Karin Evaldsson. Coat with gesso.

Paint with gesso and rub most of it off with a cloth.

Layers of ink - Butterfly Journey Art Journal Page Tutorial by Anna-Karin Evaldsson. Paint with Distress Paint.

Paint with Distress Paints.

Layers of ink - Butterfly Journey Art Journal Page Tutorial by Anna-Karin Evaldsson. Tim Holtz Focus stencil.

Sponge Frayed Burlap through Tim's Focus stencil.

Layers of ink - Butterfly Journey Art Journal Page Tutorial by Anna-Karin Evaldsson.

Do the same with the Bubble stencil and Salvaged Patina.

Layers of ink - Butterfly Journey Art Journal Page Tutorial by Anna-Karin Evaldsson.

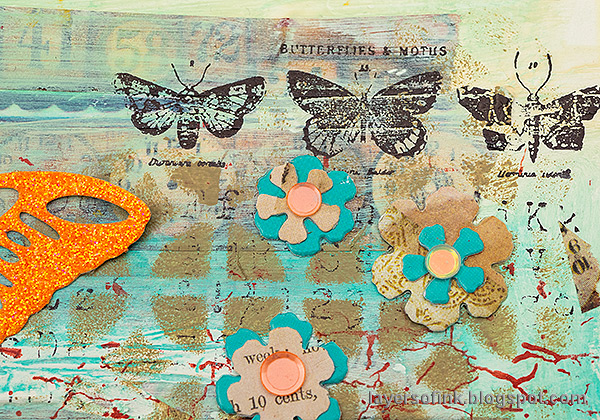
Stamp the background with sentiment stamps, butterflies, and an alphabet background stamp. I also stamped with Simon Says Stamp Crackle Background and Candied Apple Distress Oxide Ink.

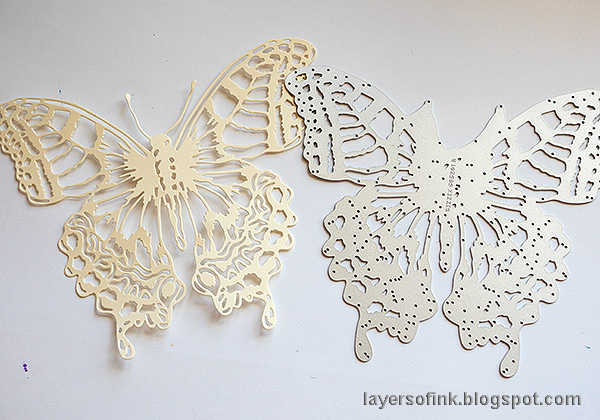
Layers of ink - Butterfly Journey Art Journal Page Tutorial by Anna-Karin Evaldsson. Die cut Tim Holtz Sizzix Perspective Butterfly.

Die cut the Sizzix Perspective Butterfly from heavystock paper.

Layers of ink - Butterfly Journey Art Journal Page Tutorial by Anna-Karin Evaldsson. Ink the butterfly with Distress Ink.

Ink with Distress Ink and mist with water. Next, I smeared Candied Apple and Spiced Marmalade Distress Oxide inks on a non-stick craft sheet and pressed the butterfly into the ink (I forgot to take a photo of that step).

Layers of ink - Butterfly Journey Art Journal Page Tutorial by Anna-Karin Evaldsson.

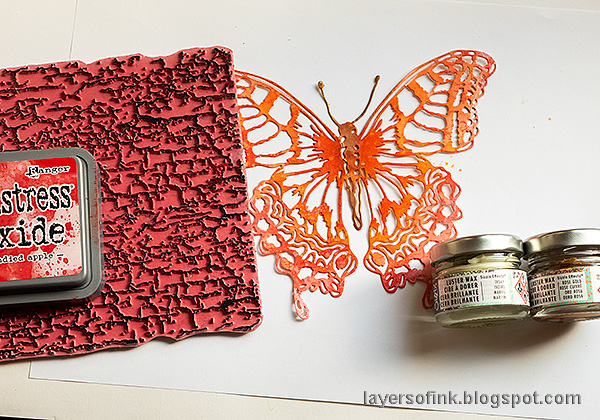
Stamp with the Crackle Background and Candied Apple. Rub a little Sizzix Luster Wax Gold on the butterflies body and Ivory on the wings.

Layers of ink - Butterfly Journey Art Journal Page Tutorial by Anna-Karin Evaldsson.

Die cut little flowers with Tim's Small Tattered Florals, from Journal Cards and Simon Says Stamp color blend cardstock.

Layers of ink - Butterfly Journey Art Journal Page Tutorial by Anna-Karin Evaldsson.

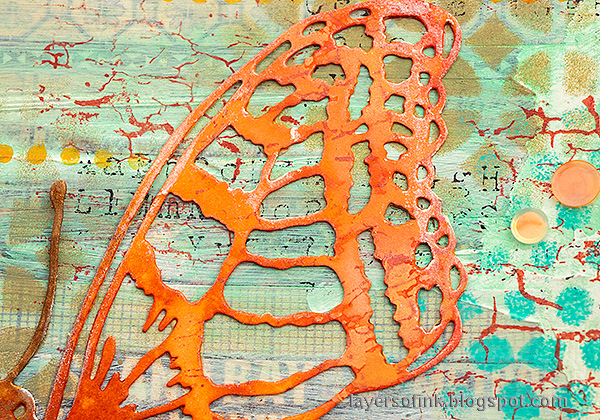
The Luster Wax is hard to photograph, but it makes the butterfly shimmer.

Layers of ink - Butterfly Journey Art Journal Page Tutorial by Anna-Karin Evaldsson.

I like how you can see the design tape peak through all the layers, here and there. 

Layers of ink - Butterfly Journey Art Journal Page Tutorial by Anna-Karin Evaldsson.

I used a large sentiment for the title, so that it would stand out.

Layers of ink - Butterfly Journey Art Journal Page Tutorial by Anna-Karin Evaldsson.

And a few Clippings Stickers.

Layers of ink - Butterfly Journey Art Journal Page Tutorial by Anna-Karin Evaldsson.

The light application of the Gold Luster wax on the body of the butterfly lets the orange shine through.

Layers of ink - Butterfly Journey Art Journal Page Tutorial by Anna-Karin Evaldsson.

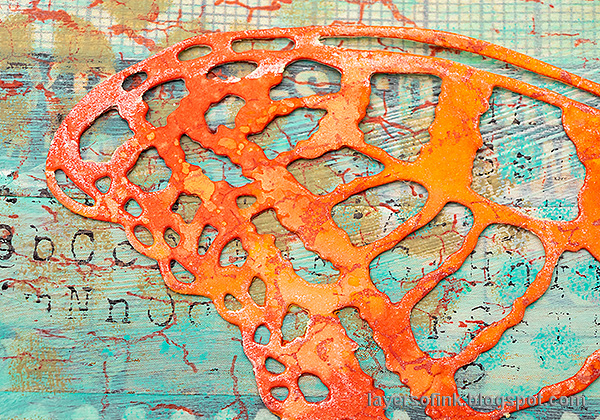
The Distress Ink, Distress Oxide ink, stamping and Luster Wax gives texture to the butterfly.

Layers of ink - Butterfly Journey Art Journal Page Tutorial by Anna-Karin Evaldsson. Die cut with Tim Holtz Detailed Butterflies.

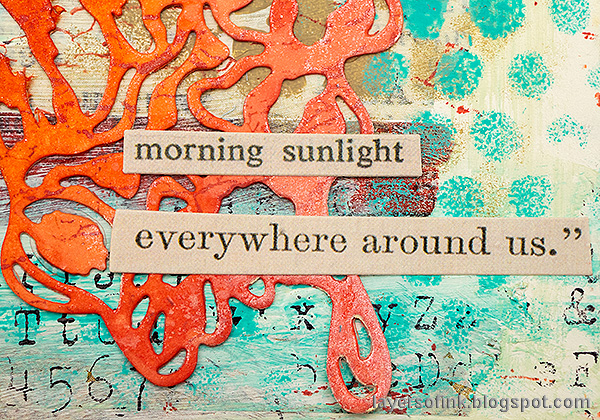
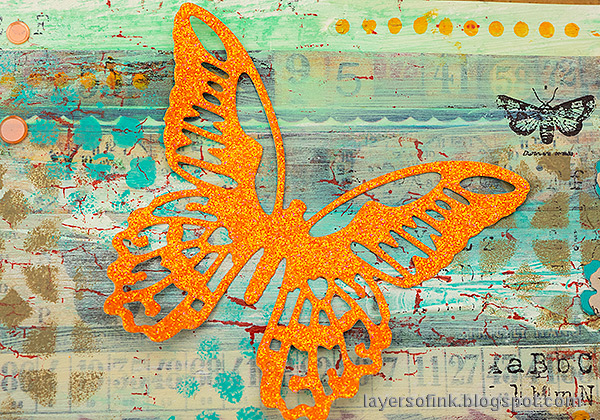
The Tim Holtz Detailed Butterflies were die cut from two shades of orange glitter paper.

Layers of ink - Butterfly Journey Art Journal Page Tutorial by Anna-Karin Evaldsson.

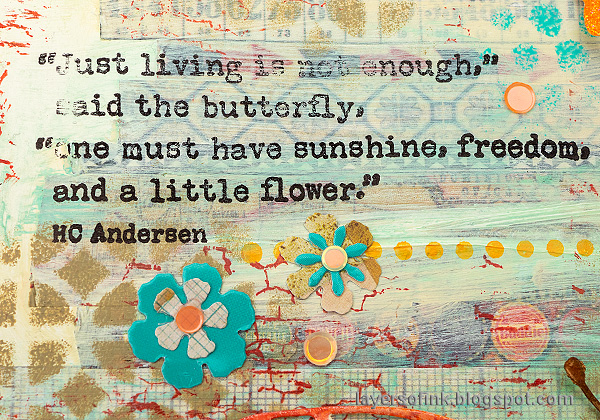
The quote stamp comes from Simon Says Stamp Thoughtful Flowers.

Layers of ink - Butterfly Journey Art Journal Page Tutorial by Anna-Karin Evaldsson.

I added Poppy Bloom sequins to the flowers and here and there on the page. If you make a card instead, shape the flowers to give them dimension. I try to keep the page fairly flat in my art journals and didn't do that.

Layers of ink - Butterfly Journey Art Journal Page Tutorial by Anna-Karin Evaldsson.

I also stamped the page with a dot border stamp using orange Distress Oxide ink.

I hope you will join us this week in our Not a Card challenge. You have a chance to win a $25 gift voucher to do some fun shopping at Simon Says Stamp. You have until Monday 8am Ohio time. 1pm UK time, 2 pm CET to join in.


Do you use Instagram? If so please add #sssmchallenge so we can see your entries there too.


Thank you so much for stopping by here today! 

Happy crafting!

Anna-Karin

Supplies:

* Please note: the links are affiliate links, for which I receive a small percentage of sales generated by the link, at no extra cost to you.