Saturday, December 28, 2024

Winter Forest Decoration

Hello friends! I hope you had a wonderful Christmas! Today I am sharing a winter decoration. We have had very little snow so far this season, but hopefully it will come.

Please note: this post has affiliate links, for which I receive a small percentage of sales generated by the link, at no extra cost to you.

Layers of ink - Winter Forest Ornament Tutorial by Anna-Karin Evaldsson.

I like having winter decorations which aren't Christmas themed. When Christmas is over, I keep the winter themed decor items out until spring time. Here is a little family of deer in a snowy forest. The base is a wood slice and I used idea-ology items to create the scene, in addition to my favorite way to make snow.

Color the deer with alcohol ink.

The deer from Tim Holtz Salvaged Reindeer were colored with alcohol ink. I like how the alcohol ink brought out the great texture of the deer. They also stay shiny. You can use Distress Paint instead of alcohol ink.

Paint the trees with acrylic paint.

The three Tim Holtz Woodland Tree Lot were colored in an ombre fashion using Distress Paint. Mist the tree with water. Place the paint in a plastic bag and place the tree in the bag. Press to make sure you get paint everywhere. Let dry.

Add texture paste and glitter for snow.

When the paint and the deer were dry, I applied texture paste mixed with a tiny bit of white paint to the trees and to the deer. Sprinkle with Mica Flakes and then with Rock Candy Glitter.


Apply a thick layer of texture paste to the wood slice and press the deer and the trees into the paste. The paste will act as a glue. Sprinkle with Mica Flakes first and then with Rock Candy Glitter.

Deer in snow.

The snow looks thick since the deer sink into it.

Add idea-ology baubles to the snow.

I also added Tim Holtz Baubles here and there. Apply a little Distress Matte Medium on top and sprinkle with glitter.


You can add even more snow to the trees, but I wanted the ombre colors to still be visible.


I really like the shapes of these Salvaged Reindeer. 


When I took these photos, we did have some snow, but it is all gone again now. 

Layers of ink - Winter Forest Ornament Tutorial by Anna-Karin Evaldsson.

You can of course use a different base and make your forest even bigger.


Thank you for visiting!

Happy Christmas crafting!

Anna-Karin

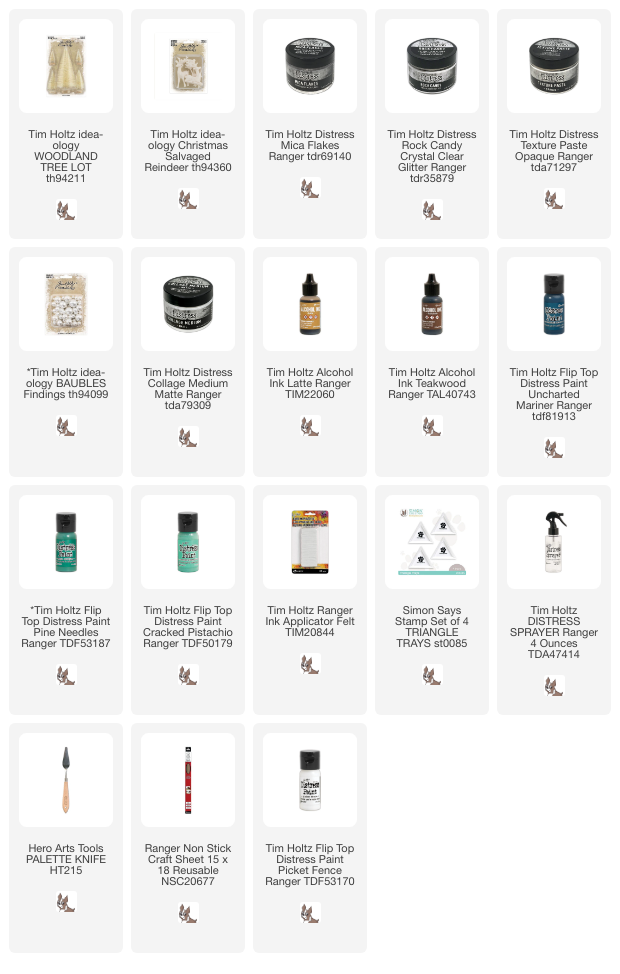
Supplies:

* Please note: the links are affiliate links, for which I receive a small percentage of sales generated by the link, at no extra cost to you.


Monday, December 23, 2024

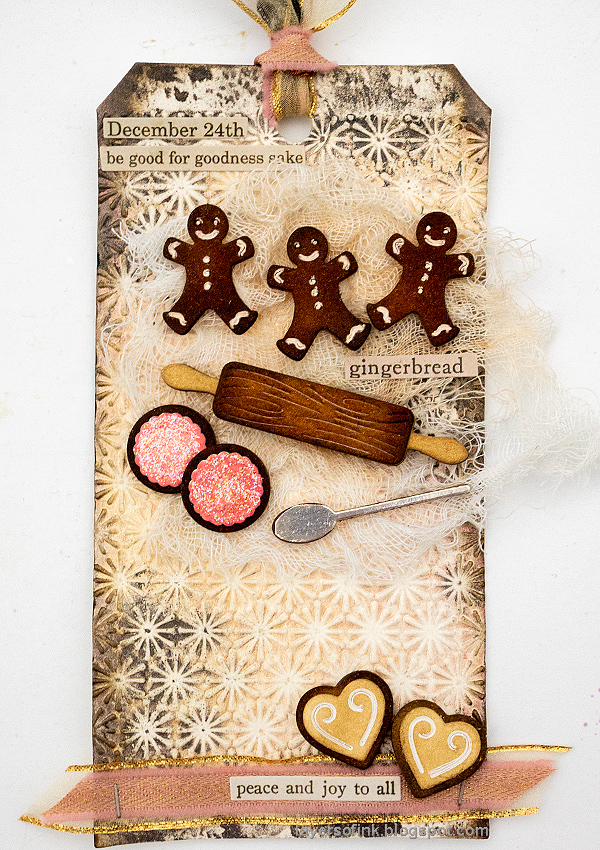
Gingerbread Cookies Tag

Hi stampers! I hope you had a good weekend! How can it already be this late in December?!

Please note: this post has affiliate links, for which I receive a small percentage of sales generated by the link, at no extra cost to you.


This week we have a Cold and Frosty theme at the Simon Says Stamp Monday Challenge Blog. I hope you will join us! Don't miss the last project by our December guest designer Anita Rao. This challenge runs for two weeks and we will be back in the new year with a new challenge. 

Layers of ink - Gingerbread Tag Tutorial by Anna-Karin Evaldsson.

I made a gingerbread tag with a frosty background and frosting on the cookies. The background glimmers and so does some of the cookies. We usually bake gingerbread cookies before Christmas and this tag celebrates that.

Die cut Simon Says Stamp Holiday Baking.

Start by die cutting a lot of Simon Says Holiday Baking Essentials from heavystock paper.

Ink and assemble the cookies.

Glue them together to form dimensional cookies and utensils. Ink the top layers with Distress Ink. I die cut the top layer of the spoon from silver kraft-stock paper.

Add glitter to the cookies.

Add frosting with a white gel pen and glitter with Stickles.


Emboss a watercolor tag in Simon Says Stamp Star Lattice folder.

Apply Micro Glaze.

Apply Distress Micro Glaze to the tag.

Mist with Distress Spritz.

Mist with Distress Spritz inks. The Distress Glaze will resist the ink and create a textured background.


You need to go over them a few times with the white gel pen, since the brown ink will bleed through. I glued some cheesecloth under the pieces as a baking or table cloth.


I used stickers from Tim Holtz Christmas sticker book for sentiments.


The cookies with the glittery pink frosting look almost good enough to eat.


Overlap some of the cookies for more dimension.

Add frosting to the cookies with a gel pen.

I added two ribbons at the bottom of the tag.


It is hard to see the shimmer effect, but it is pretty cool in real life.


Apply some Distress Micro Glaze to the edges too, for even more texture.


Do you use Instagram? If so please add #sssmchallenge so we can see your entries there too.


Thank you so much for visiting my blog today! 

Happy crafting!

Anna-Karin

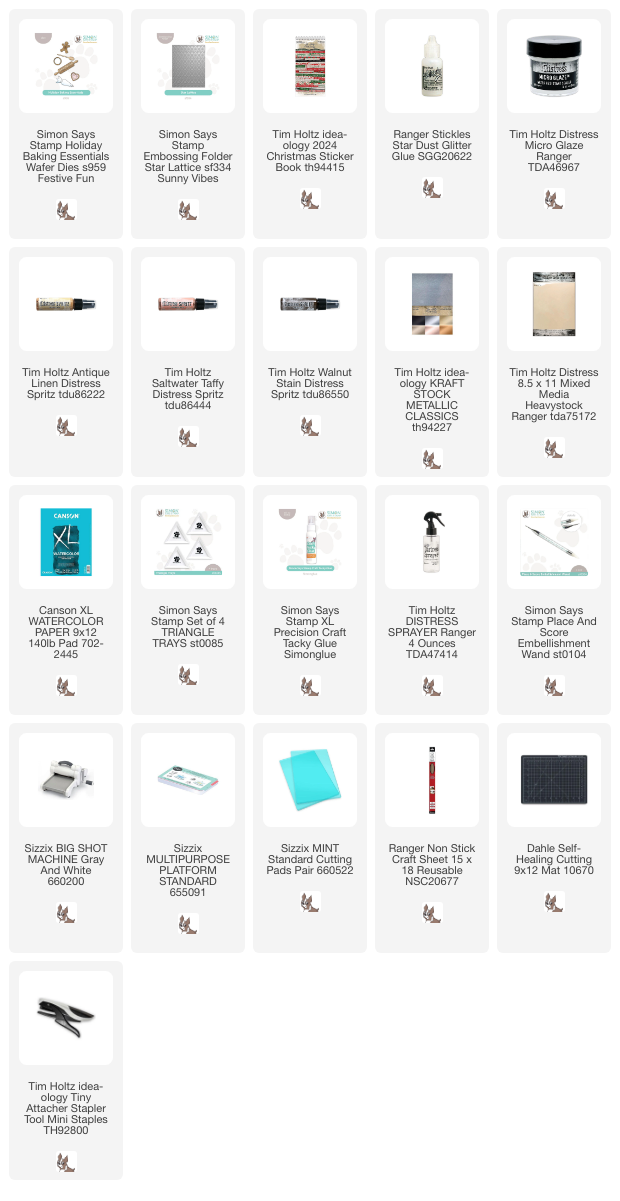
Supplies:

* Please note: the links are affiliate links, for which I receive a small percentage of sales generated by the link, at no extra cost to you.


Saturday, December 21, 2024

To Love Gift Box

Hi friends! I am taking a little break in all the Christmas crafting and preparations to share a gift box made with Simon Says Stamp new To Love release.

Please note: this post has affiliate links, for which I receive a small percentage of sales generated by the link, at no extra cost to you.


You can find the entire To Love release here. The release has a Valentine's theme, but hearts and messages of love are really great all year around. I am also very happy to have designed some of the products in the To Love release, namely the Outline Hearts stamp and Outline Hearts Stencils, the Love Letter stamp set, the Retro Hearts stamp set and the Groovy Love die. I won't be using them in this post, but I am looking forward to crafting with them soon. 

Layers of ink - To Love Gift Box Tutorial by Anna-Karin Evaldsson.

I made a little gift box, which can hold a small gift or perhaps some candy. For the box, I combined the Simon Says Stamp Sweethearts Box and Friends Furever set, both from the To Love release. The box was watercolored and I just added some gems and hearts die cut from glitter paper.

Die cut the gift box.

Start by die cutting the Sweethearts Box from watercolor paper and fold along the score lines.

Stamp with Simon Says Stamp Friends Furever.

Stamp one of the stamps from Simon Says Stamp Friends Furever on the front of the box. This cute stamp fits perfectly. This is a really cute stamp set.

Die cut with the heart from the same set.

Use one of the hearts from the Sweethearts Box set and die cut a window in the stamped heart balloon.

Paint with watercolors.

Watercolor the image. Leave some of the paper showing for highlights.

Stamp more balloons.

I decided to add some sentiment stamps and more heart balloons. By mistake, I dropped the heart balloon stamp on the project...not a fun thing to do if you are a stamper. Later, I managed to cover most of it with a gel pen.


Watercolor the rest of the box. Add a light layer of blue for the sky.

Add vellum to the window.

I glued a piece of Simon Says Stamp vellum behind the heart window.

Splatter paint on the background.

Splatter some watercolor paint on the project.


This box closes in a very clever way.

Balloons with vellum heart window.

I die cut the small heart from Simon Says Stamp White Glitter cardstock too and added some Pawsitively Dazzling Peachy gems.


Use a white gel pen to add dots as highlights.

Die cut the sentiment.

This sentiment also comes from the Sweethearts Box set and was die cut from left-over painted paper and white glitter paper.


I stamped one of the sentiment down the side of the box.

Handmade gift box.

Assemble with a strong adhesive, such as Red Line Tape.

Layers of ink - To Love Gift Box Tutorial by Anna-Karin Evaldsson.

When the box is open, you can see the sentiment at the top too.


Thank you for visiting!

Happy crafting!

Anna-Karin

Supplies:

* Please note: the links are affiliate links, for which I receive a small percentage of sales generated by the link, at no extra cost to you.