Hello crafters! I hope your weekend was nice. We had really good and sunny weather and went looking for blue and white anemone flowers. Blue anemone flowers are protected here and when I was a child, I hardly ever saw one. They are easier to find now, especially if you know where to look.
This week we have a Bright and and Cheerful Colors theme at the Simon Says Stamp Monday Challenge Blog. I hope you will join us and don't miss the stunning project by our April guest designer Autumn Clark.
Please note: this post has are affiliate links, for which I receive a small percentage of sales generated by the link, at no extra cost to you.
Working on
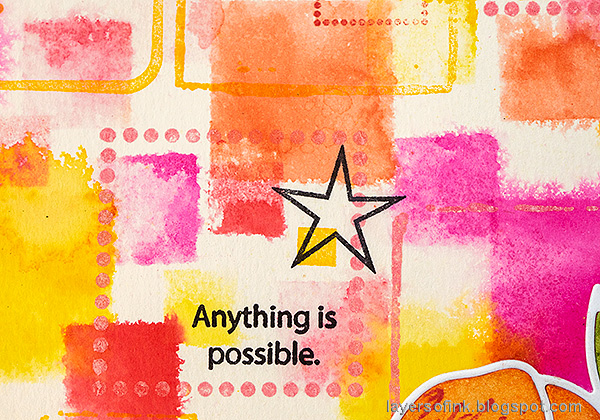
watercolor paper, use the solid squares from
Mix and Match Squares and ink them with various shades of yellow, pink, orange and red Distress Ink. Mist with water about three times before stamping. I used three sizes of solid squares here, the smallest one was used a little later. Mist the paper with extra water when you are done stamping and the squares will blend into each other. Let dry.
Next I stamped with Distress Oxide ink and this time without adding water. Stamp with various frame or outline squares from Mix and Match Squares. I also used the smallest solid square. Use stamps in different sizes. The stamps in the set are designed to coordinate and you can create many different patterns and layered effects with them.
Glue the white outline on the background and ink a piece at a time from the heavystock flower. Glue into the outline to create an inlay look.
I was in a bit of a hurry and had ink on my fingers, which is why the white outline is no longer completely white. To avoid that, let the pieces dry a bit first (and wash your hands).
I stamped sentiments and star from
Mix and Match Squares on the background with black ink, adding a few other sentiments too.
The watercolor look of the solid Distress Ink squares combine very well with the opaque Oxide stamping.
Bright colors are great for a cheerful and uplifting project.
Here's the second butterfly. Apply glue only under the more solid embossed area to prevent the glue from showing through.
The title was die cut with
Simon Says Stamp Beautiful die using M
emory Box Frosted Glitter paper.
I hope you will join us this week in our Bright and and Cheerful Colors challenge. You have a chance to win a $25 gift voucher to do some fun shopping at Simon Says Stamp. You have until Monday 8am Ohio time. 1pm UK time, 2 pm CET to join in.
Do you use Instagram? If so please add #sssmchallenge so we can see your entries there too.
Thank you so much for taking the time to stop by here today!
Happy crafting!
Anna-Karin
Supplies:
* Please note: the links are affiliate links, for which I receive a small percentage of sales generated by the link, at no extra cost to you.


Oh my! This is such a beautiful citrusy colored art journal page. You have packed a lot of goodness into this one Anna-Karin! hugs, Maura
ReplyDeleteWhat a fun-to-make, beautiful, colorful project, Anna-Karin! Thank you for always showing such great step-by-step photos! You will be receiving a notification that I have unsubscribed from email notifications, but I am still following using different options, just wanted you to know. hugs, de
ReplyDelete