
Hello friends! I hope you are well! We had a great week, which included time at the sea and a visit from old friends whom I hadn't seen for over eight years.


I like having some handmade notebooks and mini-books around, which can be used for quick gifts. My supply was running low, so I decided to make three new ones. Tim Holtz's Layers Remnant cards are so pretty that you hardly want to cover anything of them up, which also made them perfect notebook covers. Just pick you favorite ones and use them for the covers.

The flower card to the left was a little bit too small, so I layered it on another card. Cut two covers from mat board for each notebook. Glue the images to the mat board with Matte Medium and leave under a heavy book until dry. For the backs, I used patterned papers.

Round two of the corners with a Corner Chomper tool, for a finished look and sand the covers slightly, especially the edges.

Ink the edges. The ink will stick more to the sanded areas.

The best thing with making your own notebooks, is that you can fill them with your favorite papers. Do you want a watercolor journal, pick watercolor paper. For a sketch book or ordinary notebook, pick sketchbook or another smoother paper. Punch holes with a Crop-a-Dile.

Bind the notebooks with Tim's Mini Book Rings.

I didn't want to cover too much of the papers up, and die cut Adventure Words from kraft core paper, sanding them slightly.

I kept this notebook for myself, since I really like the vintage butterfly print. Perfect for small sketches and little notes.

For the back of the notebooks, I used patterned papers. This is the back of the butterfly notebook.
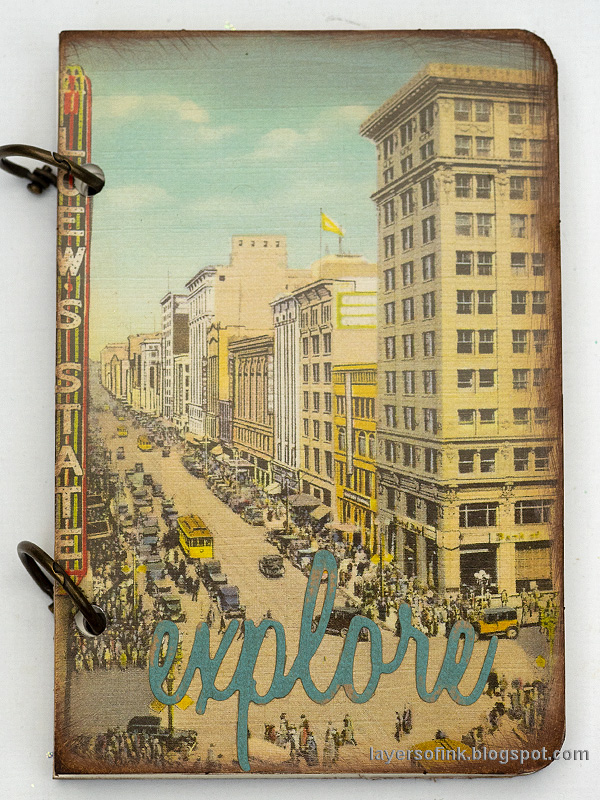
Here's a notebook for travelling adventures, or maybe just exploring the little things close by.

Here you can see the effect of the sanding and then inking. The ink is darker where the top surface has been sanded off.

The back of the explore journal.

The third notebook has a pretty floral image. If you want to use an image that is too small for a notebook on the cover, just mount it on a larger neutral Layers Remnants image or patterned paper.

And a floral patterned paper for the back of the notebook.

You can make these in any theme and they are great for using leftover patterned papers too, especially those papers that are almost to pretty to cover up with something. As a notebook cover, the images and papers can shine on their own. I also prefer notebooks that don't have 3-D embellishments, which tend to hook on things if you carry them around. These fit easily in a small handbag or even in a pocket.
I hope you will join us this week in our Not A Card challenge. As always, you have a chance to win a $50 gift voucher to do some fun shopping at Simon Says Stamp. You have until next Monday 8am Ohio time. 1pm UK time, 2 pm CET to join in.


Do you use Instagram? If so please add #sssmchallenge so we can see your entries there too.


Thank you so much for taking the time to visit my blog today!
Happy crafting!
Anna-Karin
Supplies:
* Please note: the links are affiliate links, for which I receive a small percentage of sales generated by the link, at no extra cost to you.
* Please note: the links are affiliate links, for which I receive a small percentage of sales generated by the link, at no extra cost to you.
Excellent tutorial! Thank you!
ReplyDeletecute notebooks for sure - I am a paper freaks so things like this are right up my alley - hehe - nice work and walk-through Anna-Karin
ReplyDeleteWhat a great idea to use the cards to make notebooks with!!
ReplyDelete