
Hello friends! It's a new Monday and the sun is shining. I hope you get some crafty time in during summer. I was hoping to have done more watercolor painting, but there is still time for that.

This week at the Simon Says Stamp Monday Challenge Blog we have an Animal Magic theme. We also have a special Tim Holtz feature this week, and as I am sure you already know, I love to craft with Tim's wonderful stamps, dies, stencils, embellishments, papers, inks and paints. You can find them all here. You don't have to use Tim's products to join, but it is always fun if you do.

Tim Holtz is also the Brand of the Month at Simon Says Stamp during July, and don't miss all the inspiration and surprises.

I have one dinosaur crazy little boy at home and he loves Tim's Prehistoric set. I used the set to make three dinosaur cards. You will see the third one later in this post, I could only fit two into the photo. The dinos are such fun to die cut, color and assemble, and you can make them in lots of colors.

Start by die cutting the T-Rex, Stegosaurus and Brachiosaurus from watercolor paper. Try to keep the pieces together.
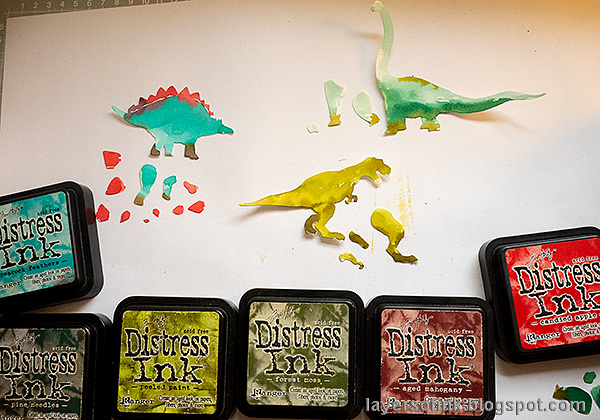
Smear Distress Inks on a non-stick craft sheet, mist with water and watercolor the dinos.

When dry, stamp the T-Rex and Stegosaurus with a crackle texture stamp, and the Brachiosaurus with a splatter stamp.

Assemble the dinos, using foam dots for some of the pieces, such as the legs. Use a pen to give each one an eye.

For the background, I used a piece of watercolor paper on which I had pressed down the Gradient Dot Stencil, after having used it with Distress Resist Spray on another project. You can see the process and that project here in my Mist Resist Tags post. The papers were colored by smearing Distress Inks on a craft sheet and misting with water, using similar inks as for the dinos.

I also embossed three pieces of brown kraft cardstock in the 3-D Lumber Texture Fade, and later sanded them.


The stamped texture adds a great element to the dinos. The darker color on the Brachiosaurus is Pine Needles, a Distress Ink color that I should use more often.
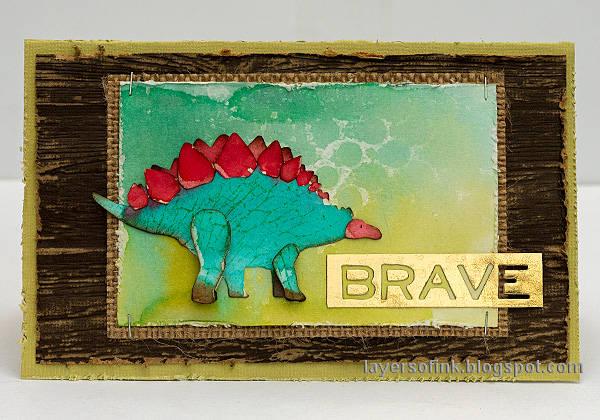
The second card features a brave Stegosaurus, with pretty red plates.
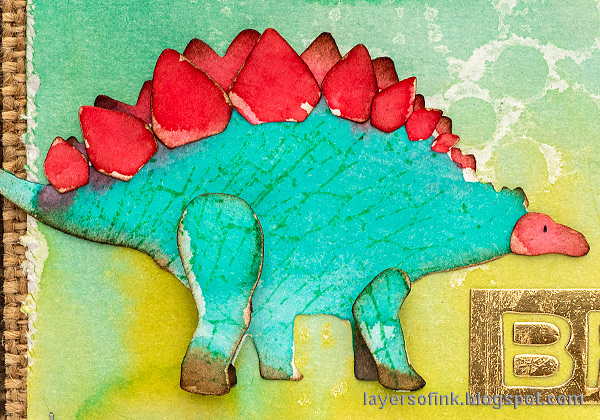
Fold the top plates out a bit and place small pieces of foam adhesive underneath, to add dimension.

I glued the inside pieces of the letters into the shape, since I have always preferred letters with the inside pieces, and not just an open space.

And finally, the friendly (?) T-Rex comes to say 'hello'. Distress the edges of the panels to add instant texture and to give a nice feel to the card.

Here you can see the different layers, embossed lumber paper, burlap, and the Distress Resist Spray paper. I just love the random distressed effect of this technique.
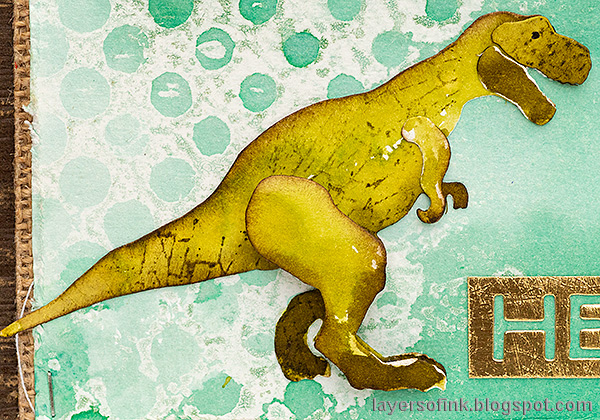
For a fiercer look, give her some sharp teeth.
I hope you will join us this week in our Animal Magic challenge. As always, you have a chance to win a $50 gift voucher to do some fun shopping at Simon Says Stamp. You have until next Monday 8am Ohio time. 1pm UK time, 2 pm CET to join in.


Do you use Instagram? If so please add #sssmchallenge so we can see your entries there too.


Thank you so much for taking the time to visit my blog today!
Happy crafting!
Anna-Karin
Supplies:
* Please note: the links are affiliate links, for which I receive a small percentage of sales generated by the link, at no extra cost to you.
* Please note: the links are affiliate links, for which I receive a small percentage of sales generated by the link, at no extra cost to you.
Awesome!! What a great way to do this dino's. Very Beautiful to see how it is done!
ReplyDeletewhat a cute set!! I need these dies now!! I absolutely LOVE them :-)
ReplyDeletehope you have a great week!
Luv
Lols x x x
Awesome dinosaur cards! I bet the boys are not letting these get away! Maura
ReplyDeleteWonderful dinosaur cards, TFS your process, Cathy x
ReplyDeleteI came to the right place. Now that I haver baby and toddler nephews, I need help making some of your wonderful little boy cards. I just bought this set of dies. Wish me luck.
ReplyDeleteThank you so much Daria! My sons love this die set and I believe they kept most, if not all, of these cards.
Delete