Hello friends!! This month the
Eileen Hull Inspiration Team are showcasing Eileen's new Sizzix Paper Flower Party collection.
I just found out that emails haven't been sent out for my posts lately. I am so sorry about that, and I don't know how I missed it. I think I have fixed it now and there should be an email coming soon, if anyone is still not getting emails, please let me know.
I made an alphabet sewing box for my son. Since I made my
Vintage Cantilever Sewing Box earlier this year, Anton has been asking me to make him a blue one. To give it a different twist, I turned it into an alphabet box. He walked in on me when I was busy putting it together, before I had glued on the flowers and added anything to the boxes, and thought it looked pretty, but 'needed something more'. Funny. If you want to see another example of flower-making using a different Eileen Hull die, check out my
Yellow Flower card.
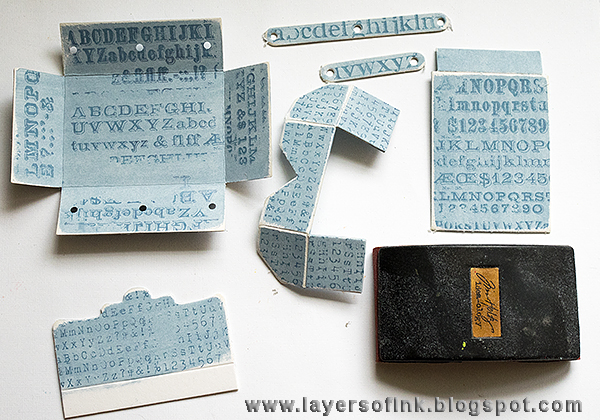
These are the pieces you need for
one sewing box. They were die cut from white Little Sizzles Mat Board.
I painted all the pieces with
Stormy Sky Distress Paint. This is one of my least used blue shades of Distress Paint and I was wondering why I use it so rarely, since it is a great neutral blue.
When the paint was dry, I stamped the pieces with three different alphabet stamps by
Tim Holtz. I love alphabet stamps, the
School Desk one is my most used stamp and the new
Typo background stamp is awesome and if you use just one row of it, it looks like many different stamps.
Sand all the edges. I ended up not using the piece at the bottom left - which is die cut from the Recipe Card Box. I used it on my
Vintage Sewing Box as a divider between the two upper compartments and if you want to, check that post out for how to use it.
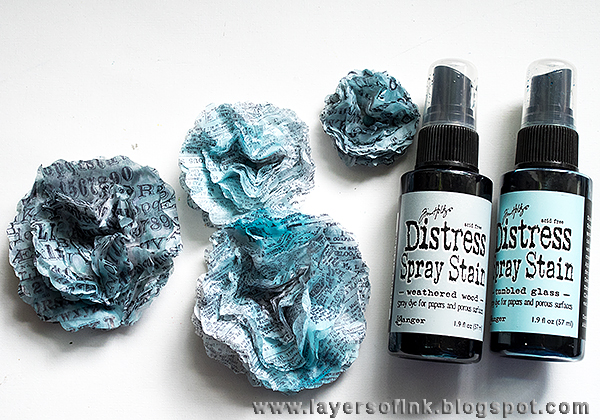
A piece of ordinary tissue was stamped with the
Newsprint and Typo stamps and Jet Black ink and then I die cut flowers from it using the
Romance Flower die. There are four differently sized flowers on the die. You can die cut quite a lot of flowers in one go, since the tissue is so thin. I die cut a lot more flowers than what you see here.
Layer the flowers together and add a brad to the middle. You need quite a lot of layers to make the flowers look full. Crumble up and then separate the sheets.
Mist two of the flowers with Tumbled Glass and two with Weathered Wood.
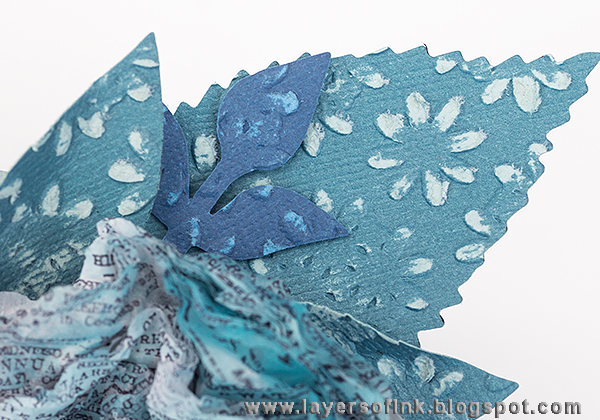
Die cut leaves from color-core cardstock. The
Spring Leaves die has four great leaf shapes, making it a very versatile die, and since it is a Bigz die, you can die cut the leaves from thick materials too.
Emboss in the
Daisy Wreath folder, and then sand.
To fill the boxes, I die cut a lot of different letters and numbers, so that he can write words and practice. Some of them were die cut from fun foam, and some were die cut from mat board which was first painted with Distress Paint. I used Tim Holtz: Alphabet Typo Upper, Vintage Market XL, Billboard, Word Play and Block Talk Lowercase dies. That way, he can practice on how letters and numbers look in different fonts, capital and lowercase.
It is easy to assemble the box and since I showed all the steps in my
Vintage Sewing Box tutorial, I won't repeat them here, but if you aren't sure, just check out that post.
The flowers and leaves were glued to the top of the box.
I was really happy with the look of these text tissue flowers and they are easy to make.
Layer the leaves under the flowers.
Here's the smaller of the
Newsprint flowers, you could also mix the two stamped patterns, or use something like a polka dot stamp instead. I used the same Newsprint stamp on the background of yesterday's
mixed media layout.
I used Tim Holtz
Alpha Dies as handles, from the front, you see the letters 'A' and 'B'.
I used some matte blue brads that I found in my stash. I have a lot of coloured brads that I got years ago.
This is what it looks like open, although you can of course open it even more.
The boxes are filled with the letters and numbers.
I need to die cut some more of the common letters, because he already ran out of a's.
To make the top lid close, I did the same thing that I did on my
Vintage Sewing Box, namely to die cut the back part of the lid one more time, and use that as a closing mechanism.
And there is is done. Mat board projects last real well, even with pretty heavy use. Anton has
boxes and containers that I made over three years ago, and which he uses for storage of little things. They are all still in perfect order even though they are handled a lot.
I hope you enjoyed this tutorial! Thank you so much for stopping by!
Happy crafting!
Anna-Karin
Supplies:


WOW Anna! You totally rocked it girl! TFS
ReplyDeleteI love this! It is so pretty, and the flowers are beautiful. If anyone wants to encourage learning and creativity in their children, they should see this and your other projects you have made for Anton. All those letters and numbers in different colors, sizes and fonts. Brilliant! Of course, I love all of your stamping on this box, too.
ReplyDeleteThank you so much Marci!! I would have loved getting all those letters myself as a child.
DeleteThis comment has been removed by the author.
ReplyDeleteThis is one of my most favourite of Eileen's dies and I love how you made it suitable for Anton, the blue is beautiful and I really do love how you did the flowers too. I am sure Anton will have great fun with this! Anne xx
ReplyDeletei absolutely and totally love this!!! beautiful as always Anna-Karin!!
ReplyDeleteI love the blue! I'll bet Anton has fun opening the box up and playing with it. Great idea to store letters in there!
ReplyDeleteMy goodness such an awful lot of pieces for this box! But it is so very clever with all of it's drawers - I love the alphabet and text stampings on the pieces and blooms and all the BLUE! what a fun box for Anton!
ReplyDeleteBloody hell this is amazing. You are so clever and although I haven't visited for ages I do always look at what you are doing. This is seriously incredible. Your stash must be huge and you always seem to have the perfect stuff to make your projects. I want to make something like this for the twins.... will have to recycle a box or something. This is amazing Anna-Karin and your stuff always makes me want to create <3
ReplyDeleteThank you so much Val!! You could use chipboard instead too. The twins would love it!
DeleteBoy oh boy did this sewing box come out fabulous! You nailed this Anna-Karin! I may have to just order those stamps, love the look of them!
ReplyDeleteBoy oh boy did this sewing box come out fabulous! You nailed this Anna-Karin! I may have to just order those stamps, love the look of them!
ReplyDeleteSo glad to see a die now to make this cute sewing basket. I've seen these baskets out in blog land but dies always make the projects go faster. Just letting you know that the only link in the email that I received that worked was the link to the Make A Wish Layout. Could you see if there is something wrong. Thanks.
ReplyDeleteThank you so much! Yes, the die makes it so much faster and easier. Thank you for letting me know about the links. When I checked my own email, all the links seemed to work - except for the very first ones, which are more of a list of the projects in the email, rather than direct links. I hope there won't be any problems in the future, when there will just be one project per email. / Anna-Karin
Delete