
Hello friends!! I hope you are having a good Easter weekend! It is Monday and a new Simon Says Stamp Monday challenge. We are doing a letter challenge this week, A is for.... I did a watercolour canvas tutorial.

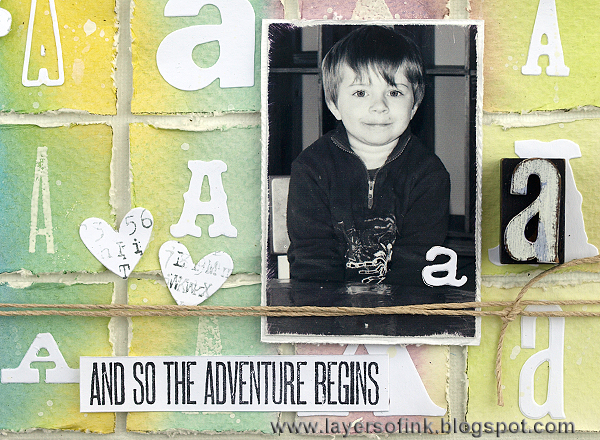
'A' happens to be the favourite letter of two of our family members (Anton and me), since our names start with 'A'. Anton is very interested in letters and how to write different words, so I thought I would make him a canvas where his own letter is the star. The canvas is an 8 x 10 in board, coated with gesso and painted white. The striped background was inspired by one of Anton's art works and uses almost the same colours as his piece did. I liked the background and would probably not have thought of it without this inspiration. I had fun using most of my alphabet dies.
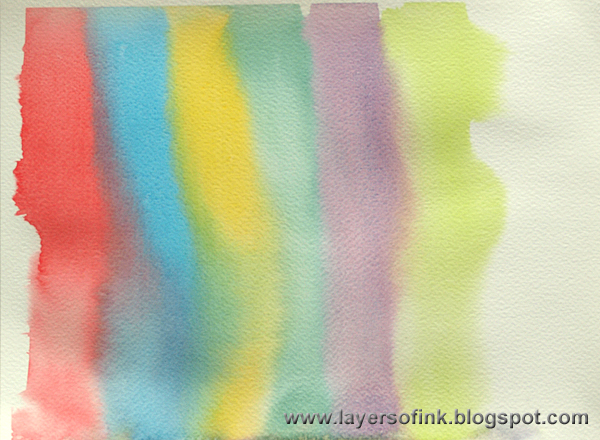
Mix up six colours watercolour paint. All the mixes have to be ready before you start since you need to work quite fast. Test your colours on a piece of scrap paper first, to make sure that they don't create mud when placed next to each other. Use a broad paintbrush and paint broad lines of each colour. Let them flow into each other, amd don't go back over an area where you have already coloured, leave it to let the watercolour paint do its magic. If you fiddle around with the paint, you will get run-backs (cauliflowers).
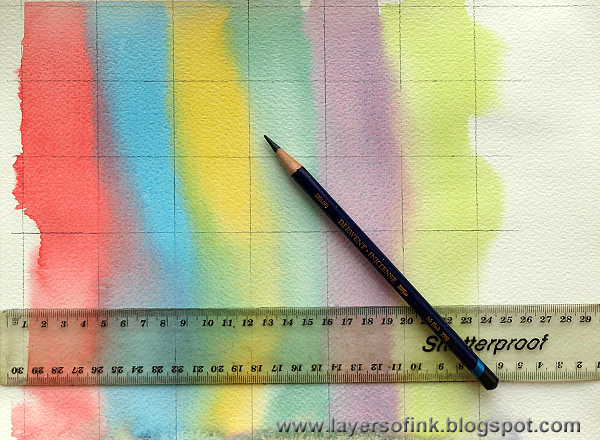

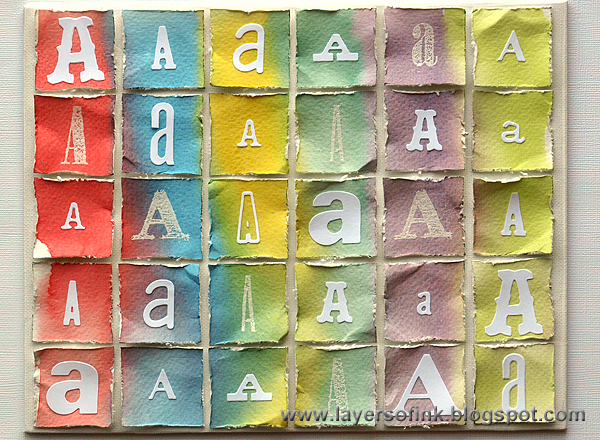
Cut the squares with a craft knife, making sure to keep them in their original order. If they get messed up, it will be quite a puzzle to get everything in the right place again. Distress all the edges with an edge distress tool. I was planning for more of the pencil marks to show, but then decided that I wanted the extra texture you get from distressing the edges of watercolour paper.

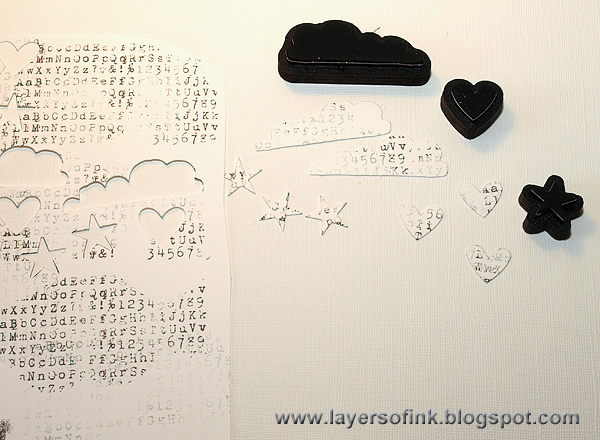
Stamp a piece of white paper with an alphabet background stamp, using Watering Can ink. I mainly used second and third generation stamping, stamping it off on scrap paper first. I die cut clouds with the new Airplane & Cloud Movers and Shapers die, and hearts and stars with the Tiny Shapes dies.

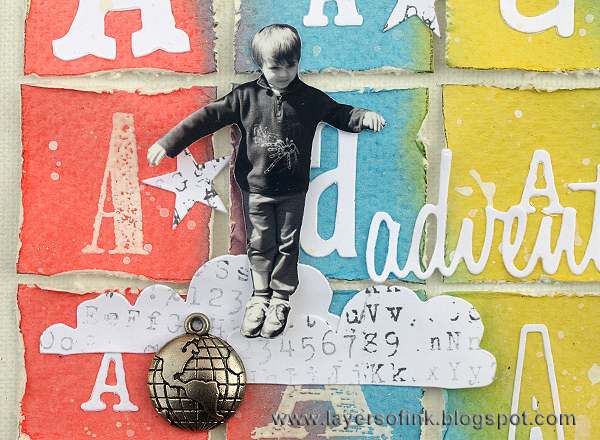
For a fun touch, I cut out another photo and placed it up among the clouds, fitting with the adventure theme of the canvas. Isn't that new globe idea-ology embellishment great?
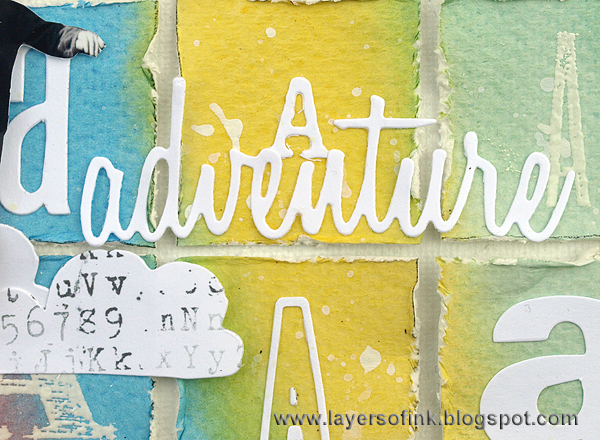
This word was die cut with the Adventure Words set.
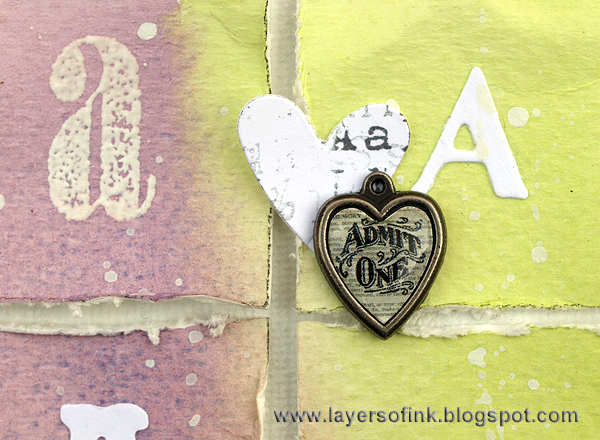
I also used a heart charm, with another sentiment starting with an 'A'.

The mixture of all the different 'A's together looks so much fun and it is also good for him to see that the same letter can be written in many different ways. I also really like the added dimension from the distressed edges. It takes a while to distress all the edges, but totally worth it, and you also don't need to worry as much about placing all the squares out evenly, since the distressed edges hide any mistakes.
I hope you will join us this week in our 'A' challenge, it is an easy letter to be inspired by and I am sure you can come up with lots of interesting ideas. As always, one random participant wins a $50 gift voucher from Simon Says Stamp.

Thank you for stopping by today!
Happy crafting!
Anna-Karin
Supplies:


Your layouts always inspire! I love how you think about the details, quotes and then intersperse the sweet photos! Beautiful
ReplyDeleteThis canvas is fantastic, you had a very original idea! The color palette is a real rainbow, it's so amazing to see how many ways you can represent a letter.
ReplyDeleteWow... this is such a fun and beautiful design! Anna- Karin. Love the colors and great photos :)
ReplyDeleteThis comment has been removed by the author.
ReplyDeleteA brilliant design and a stunning canvas!
ReplyDeleteSweet photo! I love way you colored and made your background tiled! It really adds a lot of interest :)
ReplyDelete*mwah*
Steph
Simon Says Stamp!
one more amazing project! really inspiring idea ^.^ Thank you for sharing Anna-Karin
ReplyDeleteAnna-Karin I love this!!!
ReplyDeleteI left a comment when this first posted, but it isn't showing, so I will try again. What a great page! Love the watercolors, the way you did the squares, all the 'a's, just fabulous.
ReplyDeleteThis is just gorgeous! It has inspired several projects- thank you for the creative jolt!
ReplyDeleteShine on!
Kelley
Gorgeous colorful canvas! Love the different fonts of the letter A! And both pictures are so cute! Hugs, Sandra
ReplyDeleteOh! So many excellent projects this week including this one! Great tutorial and very inspiring layout. Thank you for sharing such a great idea.
ReplyDeleteThis is a great idea, absolutely great idea! love soft colors and, as always, your layouts are totally wonderful! barbarayaya
ReplyDeleteWow, Anna-Karin!! There is so much work and wonderful detail in this piece and as always, it's so inspiring! I adore the watercoloured background which is genius and it's just a beautiful piece of artwork!
ReplyDeleteHow wonderful is this? Watercoloring, alphas, grids, sweet photos...just fabulous! Thanks so much for sharing and inspiring!
ReplyDeleteSuch a clever background! I don't think that I've ever seen anything like it before. I love it!
ReplyDeleteI love seeing your work. I find it so inspiring. Thank you for that. :)
Love your layout Anna-Karin, what a fabulous background technique! Great pictures of Anton too, A+ :O)
ReplyDeleteThis is so utterly clever! What a great idea to cut your background into squares and to repeat the letter A as a background technique. It looks unexpected, yet totally logical, which I love!
ReplyDelete