Hello and welcome! I have a
Sizzix tutorial to share with you today, made with
Tim Holtz new Frameworks dies. These dies are so fun and very versatile.
I made an art journal page, but the technique works just as well on a card, tag or scrapbooking layout. I thought it would be fun to use the Frameworks die to get a mosaic look. A great base for that is
Wendy Vecchi's Embossing Paste, which works both as adhesive and grout in this project. The Frameworks die that I used is the
Honeycomb one, but you can get the same effect with any of the other Frameworks dies.
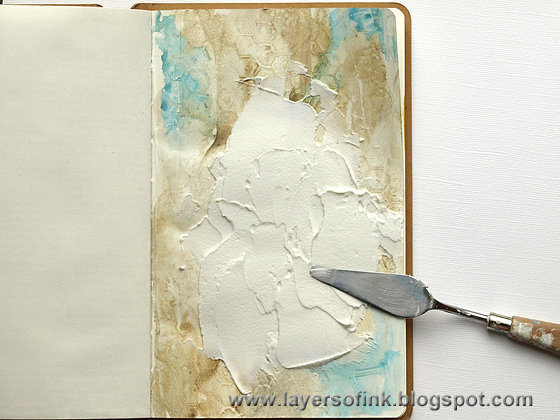
I worked in my Small Creative Journal and smeared gesso with a palette knife. A piece of paper had been embossed in the
Honeycomb embossing folder and I pressed it repeatedly into the gesso to make a soft textured pattern. You can also use the embossing folder itself, but then you have to clean it immediately. I also wanted the random gesso effect on the embossed paper. Leave to dry.
Water down some Distress Paint and paint the page. Mist with water for even more texture. Leave to dry.
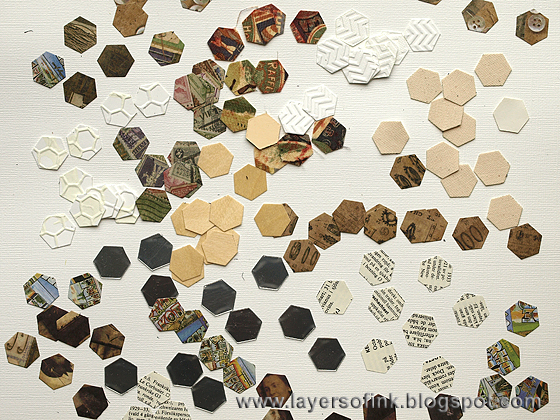
Die cut Honeycomb Frameworks from different papers and materials. I used: natural sticky-back canvas, Mirrored Sheet, wood veneer paper, dictionary paper, the embossed honeycomb paper from earlier, Eclectic Elements Fabric which had been glued to cardstock and various Tim Holtz patterned papers. These are the inside pieces, I will use the frame pieces in a tutorial soon.
Ink the edges.
Ink the honeycomb embossed paper with Tumbled Glass and wipe off with a moist cloth. The random spots of gesso resist the ink.
Smear
Embossing Paste on your page in a medium thick layer.
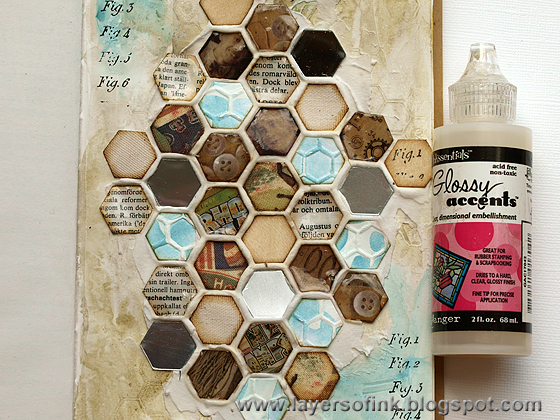
Start placing your honeycomb pieces into the paste, leaving the same space between all the pieces. The paste doesn't dry too quickly, so you have enough time. I made sure to vary the materials. Press the pieces down a bit to make the paste come up in between them.
Continue until you have covered the paste. I left some paste uncovered because I thought it gave a cool look. Leave to dry.
Cover all the paper pieces (not the mirrors, wood, canvas, fabric or embossed paper) with Glossy Accents. This gives a great glossy look to them and even more interest and variation to the mosaic pieces. Leave to dry.
Ink the paste here and there with Gathered Twigs.
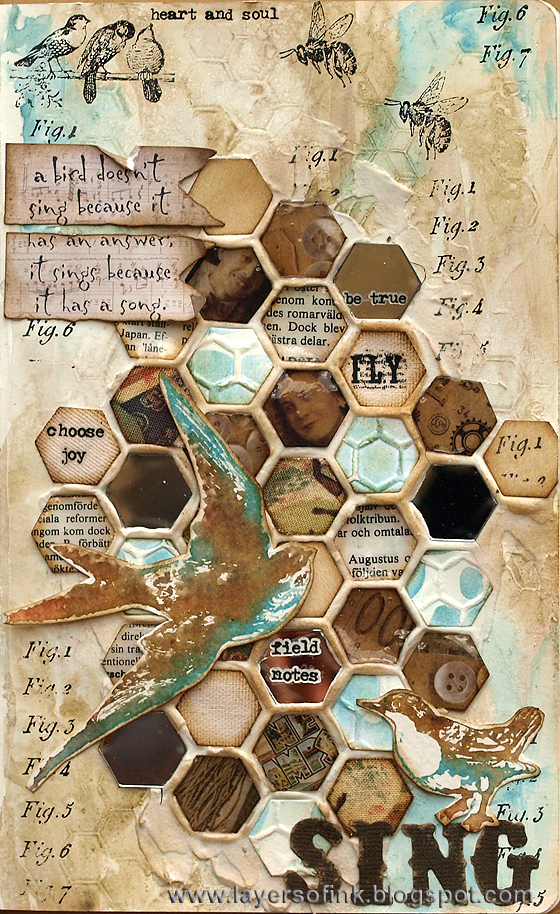
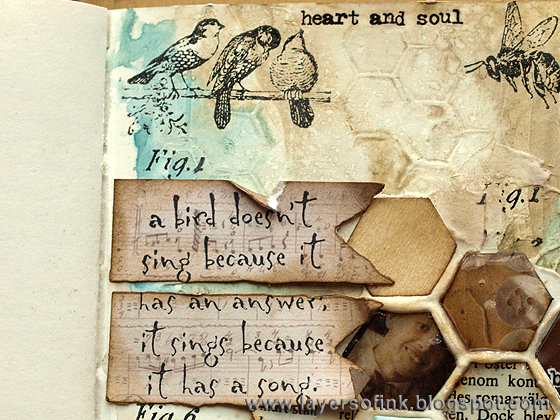
I stamped the background with a few Tim Holtz stamps. Here you can see the honeycomb texture in the gesso.
The sentiment was stamped on two
Ribbon Flags. The stamp comes from a
Darkroom Door set.
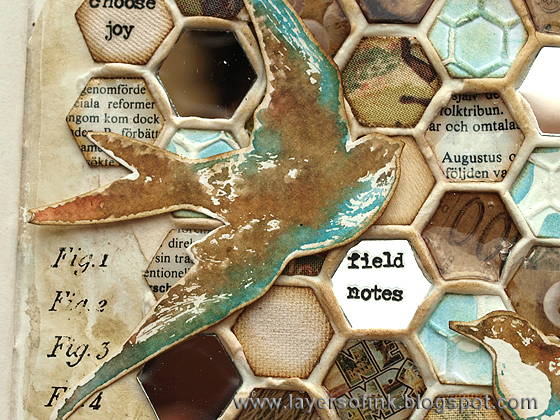
I added rub-ons to some of the tiles. The combination of different surfaces in the tiles makes for a very interesting project. The mirror pieces look like real mirrors (they are hard to photograph).
I just got Tim Holtz Bird Feather set and wanted to ink up this great bird stamp. It was inked with Broken China and Gathered Twigs, misted with water four or five times and stamped on watercolour paper.
The little bird is a Hero Arts stamp and was stamped in the same way as the larger one. The title was die cut with the
Vintage Market Sizzlits die.
Thank you for looking!
Have a great weekend, I hope you get some time to be creative.
Anna-Karin
Supplies (affiliate links used):











How very beautiful this is! I love it!
ReplyDeleteWow this looks fabulous Anna Karin! Nicola x
ReplyDeleteI LOVE the colors...
ReplyDeleteI LOVE the design...
I LOVE every detail...
it's PERFECT!
Wow! So cool idea!!! Thank you for inspiration!!!)))
ReplyDeleteFabulous in every way.... love how the paste rises up around all your different tiles. Gorgeous!
ReplyDeleteAmazing!!
ReplyDeleteGorgeous& thanks for the tutorial!
ReplyDeleteWOW...Jus loved it a lot...Thanks for sharing this tute :)
ReplyDeleteA wonderful creation and your step by step for me is very precious, thanks for sharing!
ReplyDeleteThis is freaking amazing Anna-karin. I love it....
ReplyDeleteThis is for sure a piece of art. Love it a lot. I don't have tim's honeycomb die but I think it is going on my next purchase. Thanks for sharing!
ReplyDeleteTotally stunning! A piece of art absolutely beautiful! Great great tutorial! BArbarayaya
ReplyDeleteWow this is brilliant , from the gorgeous colours and textures to the wonderful and very cool idea! LOVE IT! hugs x trace x
ReplyDeleteFabulous! I love the colors, the techniques and how beautiful the end result is!!!
ReplyDeleteYou rock! Always and again...
ReplyDeleteFabulous, fabulous. I wish I weren't so tired right now 'cause I want to go try this technique RIGHT NOW. Love the colors you used and the entire piece. Thanks for the inspiration.
ReplyDeleteAbsolutely stunning - such inventive use of the Frameworks die with the texture paste, and I love the watercolour stamping of the birds... wonderful page!
ReplyDeleteAlison xx
So beautiful. Love your work.
ReplyDeleteSigal (Israel)
LOVE the way you've pushed the die cuts into the paste for this. So inspiring. Jenny x
ReplyDeleteJust love this. Thanks for sharing.
ReplyDeletegreetings from Holland!
with love,
Ineke
This is SOOO beautiful I love the softness of the colors. And using the embossing paste as a kind of grout is genius!
ReplyDeletereally love all of your work. The colours you choose really speak to me. Thank you so much for being so generous in sharing your myriad talents. It is inspiring for those of us who love arty things but are natural talent challenged!
ReplyDeleteWonderful!
ReplyDeleteThis is stunning, I have already pinned it Anna Karin and now Tim loves it too, Congratulations on your Blogworthy link.
ReplyDeletehugs Brenda xx
Anna-Karin...huge congratulations on being named to Tim's Spring Blogworthy Links. Your art journal page is beyond gorgeous and I really want to study your tutorial. I am totally in LOVE with this! Your art never ceases to amaze me! <3 Candy
ReplyDeleteYou totally inspired me with this Anna-Karin and now you get even more deserved recognition - huge congratulations on your Blogworthy link! Jenny x
ReplyDeleteThis is just awesome!
ReplyDeleteGorgeous!
ReplyDeleteBig Congrats on being one of Tim's blogworthies Anna-Karin, no wonder, this is an amazing piece!!
ReplyDeleteLove the colors and your work is impeccable!
ReplyDeleteSo gorgeous. I never thought about using the paste like that. Congratulations on being a blogworthy link!
ReplyDeleteLove your idea...colors and technique!! Awesome job!
ReplyDeleteAnna, what a great project. I just love Tim's frameworks. I'm going to try your techniques. Thanks for sharing.
ReplyDeleteHow creative Anna Karin. I might try this in my journal. Thanks for sharing. CONGRATULATIONS for making it to Tim's blog worthy list. Karen.x
ReplyDeleteI am going to try this technique. Just got the die today.
ReplyDeleteI am in love with this piece - texture, color, design! Fabulous!!!
ReplyDeleteJust beautiful Anna-Karin, love the texture and the theme!
ReplyDeleteJust beautiful Anna-Karin, love the texture and the theme!
ReplyDeleteabsolutely beautiful! The texture and details are just incredible!
ReplyDeleteТак много интересных творческих моментов.Результат потрясающий !
ReplyDeleteHi Anna Karin. Fabulous :) By the way, I love the picture at the top of your blog, it's beautiful. Take care.
ReplyDeleteVery creative piece!Great colours and texture!
ReplyDeleteHuge congratulations on being one of Tim's Blogworthy Links for this beautiful creation! Anne x
ReplyDeletelove love love it....xx
ReplyDeleteGreat to have found you via Tim's blogworthy links...I am delighted to be your newest follower. This mosaic project is amazing, thanks for sharing x
ReplyDeleteWOW! Your page is amazing and I love all your special touches! Thank you for sharing this inspirational piece of art!!!
ReplyDeleteThis is awesome. Thanks for sharing your creativity with us.
ReplyDeleteGoodness gracious, this is beautiful! It is like a Tim Holtz Puzzle! I love the colors!
ReplyDeleteSo beautiful and creative.
ReplyDeleteThanks for the great tutorial!!
Congrats on receiving a well deserved shout out on tim's blogworthy links 2014-04-25
ReplyDeleteTruly a work of heart and art....Love it!
ReplyDeleteJan
Tim was right!
ReplyDeleteThis comment has been removed by the author.
ReplyDeleteSuch an inspired way to use the frameworks dies with the paste. Love your style. :)
ReplyDeleteSuch an inspired way to use the frameworks dies with the paste. Love your style. :)
What a really cool idea, I think I could even do that!
ReplyDeleteVery inspirational; just love it!!
ReplyDeleteBeautiful! Thanks for sharing this great technique, looks like it will be lots of fun to try out! :o)
ReplyDeleteStunning project Anna Karin...congrats on the blogworthy link xxx
ReplyDeleteAbsolutely stunning. I can't wait to try this on a piece of canvas. Tim's Frameworks are my favorite die to use in so many ways.
ReplyDeleteI love this page. Beautifully done. I just purchased one of the framing dies, but haven't been able to use it yet. This is just the inspiration I needed to make time to get it done. Thanks for sharing.
ReplyDeleteJust love this technique, and thanks for the tutorial, It is now on my list of things to do!!!
ReplyDeleteLove this gorgeous cover - so very cool. Thanks for sharing your process. Going to try this myself.
ReplyDeleteAbsolutely beautiful Karin!
ReplyDeleteAbsolutely beautiful Karin!
ReplyDeleteGorgeous. Love all that texture.
ReplyDeleteMakes you just wanted to run your fingers over it! Thanks for sharing your creativity and techniques.
ReplyDeleteCheers,
Thanks for sharing your creativity! Great inspiration!
ReplyDeleteLovely page! Great idea to use the embossing paste for mosaics. Love it!
ReplyDeleteAnna-Karin,
ReplyDeleteFabulous as always, what a great way to use the paste, love the colors. Here from Tim's blog :)
Loved this at the time and love it now too! Congratulations... am so happy to be a Blogworthy alongside you!
ReplyDeleteAlison xx
I was attracted to it right away because of the birds and the "song" comments! Thank you for writing all the details..I'd like to get some of these supplies and try something like it! You rock!
ReplyDeletePen
I will be looking for Wendy's embossing paste today. This is a beautiful piece. Love all the textures you have going on. So glad I stopped by Tim's blog this a.m. and saw the recommendation of your blog. I will be back. Thanks for sharing.
ReplyDeleteThis is a wonderful project! I'm happy to see you in the Blogworthy links! Totally deserved! Congrats! BArbarayaya
ReplyDeleteWhat an awesome journal page ... I LOVE IT ! Great tutorial I'm gonna try this one! And yes those frameworks dies ARE so cool !!
ReplyDeleteWow! This a fantastic! I am in love with your ideas and techniques! I love how you did the framework pieces laid into the embossing paste! Thanks for the inspiration to try something new. :)
ReplyDeleteYou did an awesome job! I love all your details!
ReplyDeleteReally gorgeous!I love your style.Love too the colours you chose.Fabulous!!!Bravoooo
ReplyDeleteBeyond FABULOUS!!! LOVE everything, especially the colors and the bird!
ReplyDeletelove this, going to have to try this one a canvas :) thanks for the inspiration :)
ReplyDeleteAbsolutely beautiful and thanks for showing how you made this.
ReplyDeleteAbsolutely beautiful and thanks for showing how you made this.
ReplyDeleteque c est beau, j adore
ReplyDeleteThis is awesome! Thanks for the tutorial! Love your artwork! :)
ReplyDeleteMerci beaucoup, c'est très joli
ReplyDelete