Monday, October 9, 2023

Explore Art Journal Page

Hi stampers! I hope you had a good weekend! We had sunny and crisp autumn weather.

Please note: this post has affiliate links, for which I receive a small percentage of sales generated by the link, at no extra cost to you.


This week our theme is 'Explore' at the Simon Says Stamp Monday Challenge Blog. I hope you will join us. We have two guests this week: Teresa York and Gitta Roolf.

Layers of ink - Explore Art Journal Page Tutorial by Anna-Karin Evaldsson.

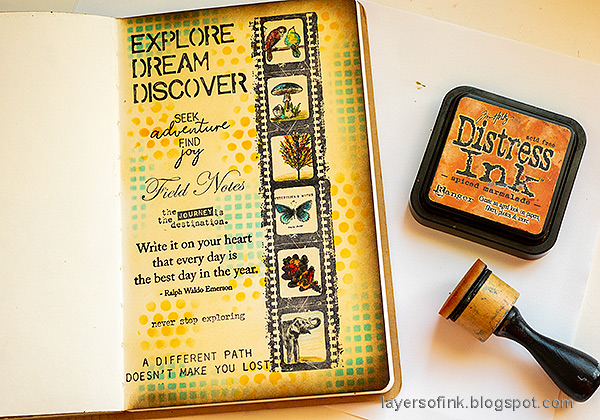
I made an art journal page this week with the theme of exploring through the lens of a camera. I stamped a negative strip and filled it with small images. Most of them are images of things I see and photograph on my walks, both large and small items, but the elephant breaks the pattern. I wanted to include a bit of South Africa too. 

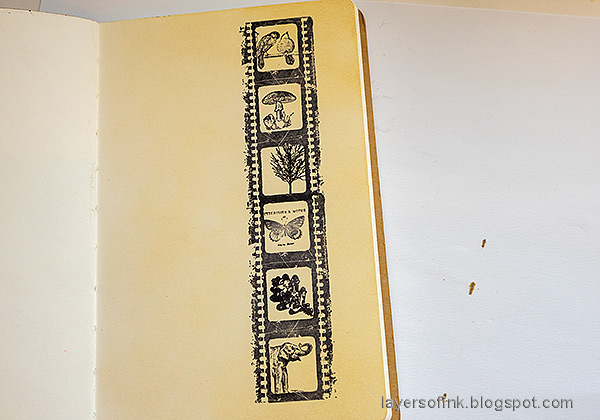
Layers of ink - Explore Art Journal Page Tutorial by Anna-Karin Evaldsson. Stamp Tim Holtz Captured Moments twice.

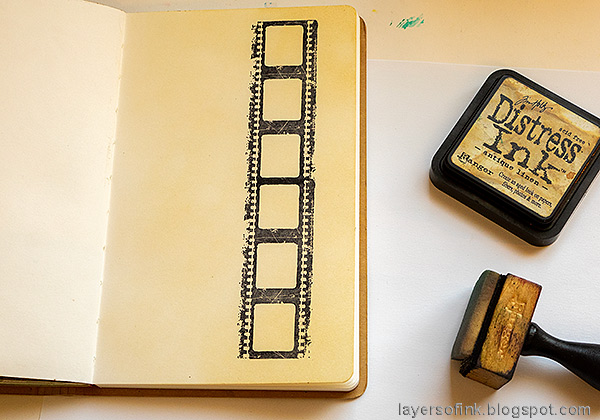
Start by stamping the film strip from Tim Holtz Captured Moments twice down the length of a page in the Small Creative Journal.

Layers of ink - Explore Art Journal Page Tutorial by Anna-Karin Evaldsson. Ink with Distress Ink.

Ink with Antique Linen to tint the paper.

Layers of ink - Explore Art Journal Page Tutorial by Anna-Karin Evaldsson. Mask and stamp images.

Stamp the film strip on Simon Says Stamp Masking Paper and cut out the windows. Stamp small images in the windows. 

Layers of ink - Explore Art Journal Page Tutorial by Anna-Karin Evaldsson. Stamp more images.

Continue until you have filled all the windows. I used stamps from Tim Holtz Tiny Things 1 and Tiny Things 2, Attic Treasures, Simon Says Stamp All Seasons Tree and Simon Says Stamp Real Leaves.

Layers of ink - Explore Art Journal Page Tutorial by Anna-Karin Evaldsson. Color with Prismacolor pencils.

Color the images with colored pencils. I used Prismacolor pencils

Layers of ink - Explore Art Journal Page Tutorial by Anna-Karin Evaldsson. Ink through stencil.

For texture, use Tim Holtz Linen stencil and ink through it with Mermaid Lagoon.

Layers of ink - Explore Art Journal Page Tutorial by Anna-Karin Evaldsson. Stamp sentiments.

Plan where to place each sentiment before you start stamping. 

Layers of ink - Explore Art Journal Page Tutorial by Anna-Karin Evaldsson. Add more ink through Bubbles stencil.

I felt that the page needed more color and used Tim's Bubble stencil together with orange ink.

Layers of ink - Explore Art Journal Page Tutorial by Anna-Karin Evaldsson. Birds.

This little bird stamp is an old favorite of mine.

Layers of ink - Explore Art Journal Page Tutorial by Anna-Karin Evaldsson. Colored mushroom.

I colored the images loosely. 

Layers of ink - Explore Art Journal Page Tutorial by Anna-Karin Evaldsson. Stamped sentiment.

You can use a different theme with the same layout too, just change the images and sentiments. This sentiment is from Tim's Life Quotes.

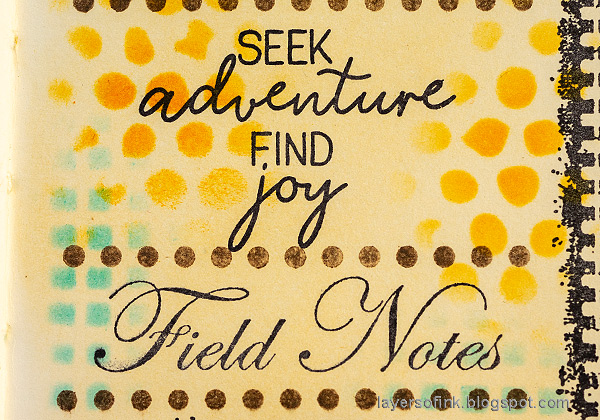
Layers of ink - Explore Art Journal Page Tutorial by Anna-Karin Evaldsson. Stamp borders between the sentiments.

The top sentiment comes from Impression Obsession Pooh Easter Joy and the bottom one is from Stamper's Anonymous Classics #17. I stamped a dotted border from Simon Says Stamp Mix and Match Circles between some of the sentiments. 

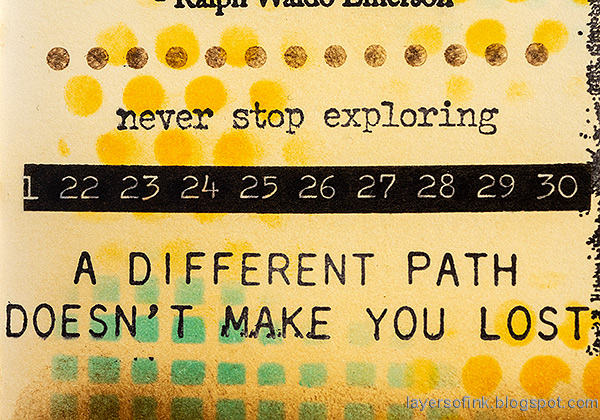
Layers of ink - Explore Art Journal Page Tutorial by Anna-Karin Evaldsson. Add design tape.

These two sentiments are from Tim Holtz Odds & Ends and Simon Says Stamp Document It.

Layers of ink - Explore Art Journal Page Tutorial by Anna-Karin Evaldsson.

These sentiments are from Tim Holtz Tiny Text and Nature's Wonder.

Layers of ink - Explore Art Journal Page Tutorial by Anna-Karin Evaldsson. Autumn Tree.

The tree from All Seasons Tree was colored with autumn shades.

Layers of ink - Explore Art Journal Page Tutorial by Anna-Karin Evaldsson. Elephant.

I added some strips of Tim Holtz Design Tape Trims to the page too.

I hope you will join us this week in our Explore challenge. You have a chance to win a $25 gift voucher to do some fun shopping at Simon Says Stamp. You have until Monday 8am Ohio time. 1pm UK time, 2 pm CET to join in.


Do you use Instagram? If so please add #sssmchallenge so we can see your entries there too.


Thank you so much for stopping by here today! 

Happy crafting!

Anna-Karin

Supplies:

* Please note: the links are affiliate links, for which I receive a small percentage of sales generated by the link, at no extra cost to you.


Saturday, October 7, 2023

Simon Says Stamp Season of Wonder Blog Hop

Hi and welcome to my blog! I am so happy to take part in the Simon Says Stamp Blog Hop to celebrate the new Season of Wonder release. If you are following along in the hop, you should have come here from my friend Cheiron Brandon.

Please note: this post has affiliate links, for which I receive a small percentage of sales generated by the link, at no extra cost to you.

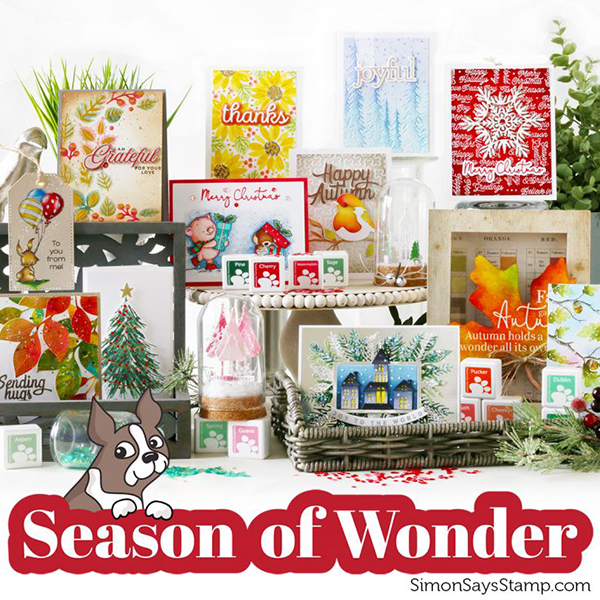
Simon Says Stamp Season of Wonder


The Season of Wonder release is full of wonderful new and versatile stamps, stencils, dies, ink and sequins, perfect for fall, winter and holiday crafting. You can find the entire Season of Wonder release here. If you use the code HOLLY you can get the Graceful Holly 3D embossing folder with any $25 or more purchase until 10/8 at 11:59 pm EDT. While supplies last.
Simon Says Stamp Season of Wonder

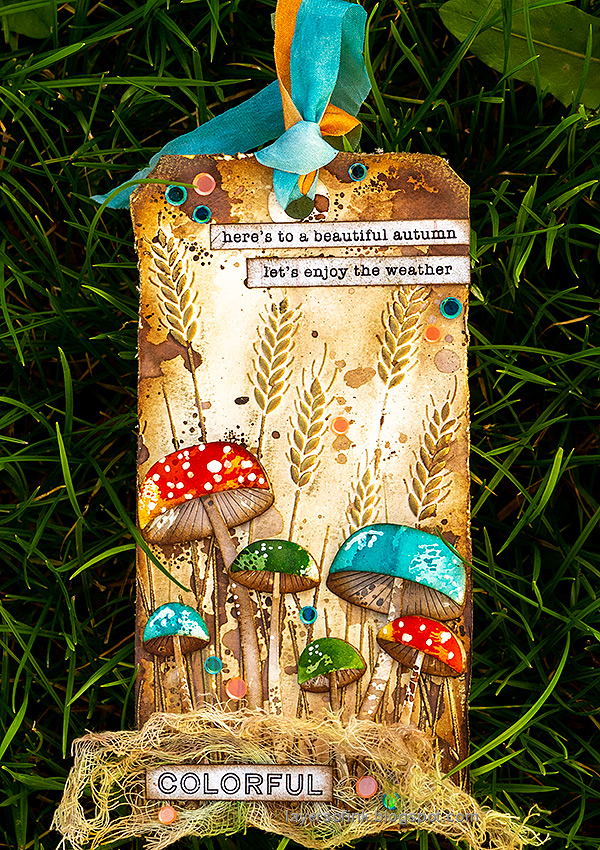
I made a tag inspired by autumn.

Layers of ink - Autumn tag with mushrooms and wheat tutorial by Anna-Karin Evaldsson.

I made a tag inspired by the beautiful autumn weather we are having at the moment. It was fun to combine the Wheat Stems embossing folder with the Tall Mushrooms die set and to use a mix of neutral and brighter colors. Mushrooms are such fun shapes and you can color them in almost any way. 

Layers of ink - Autumn tag tutorial by Anna-Karin Evaldsson.

I used watercolor paper for the tag. Start by smearing Distress Ink on a craft sheet and mist with water. Press the tag into the ink and immediately emboss it in the Wheat Stems folder.

Layers of ink - Autumn tag tutorial by Anna-Karin Evaldsson. Ink the embossed paper.

When the tag is dry, add more ink with an ink-blending tool. 

Layers of ink - Autumn tag tutorial by Anna-Karin Evaldsson. Add more ink.

Next, I wanted more texture and smeared some Ground Espresso ink on my non-stick craft sheet. Mist with water and press the tag into the ink, but only here and there.

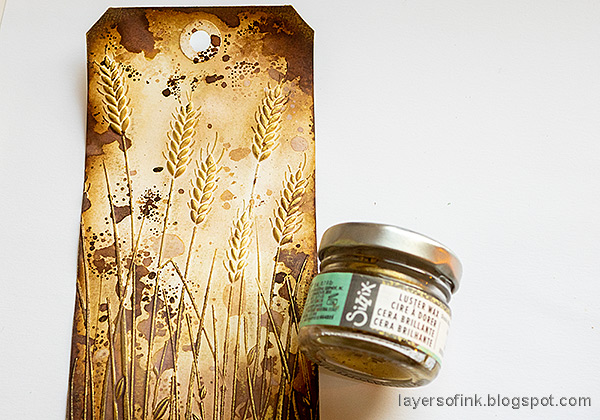
Layers of ink - Autumn tag tutorial by Anna-Karin Evaldsson. Add gold wax.

When dry, add Sizzix Gold Luster Wax to the embossed parts with your finger.

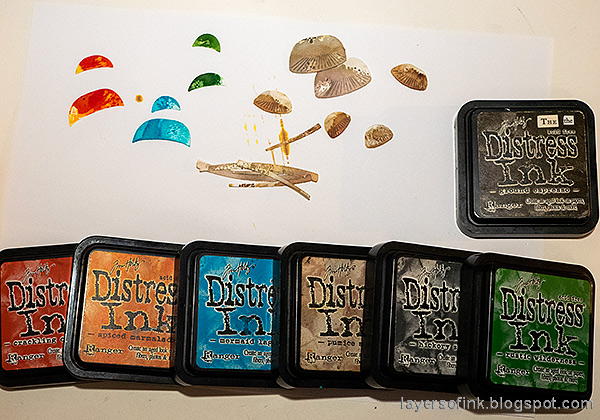
Layers of ink - Autumn tag tutorial by Anna-Karin Evaldsson. Ink with Distress Ink.

The Simon Says Stamp Tall Mushrooms die set includes three mushrooms. Die cut twice from watercolor paper. Smear Distress Inks on a non-stick craft sheet and press the pieces into the ink. Let dry and repeat until you are happy with the look.

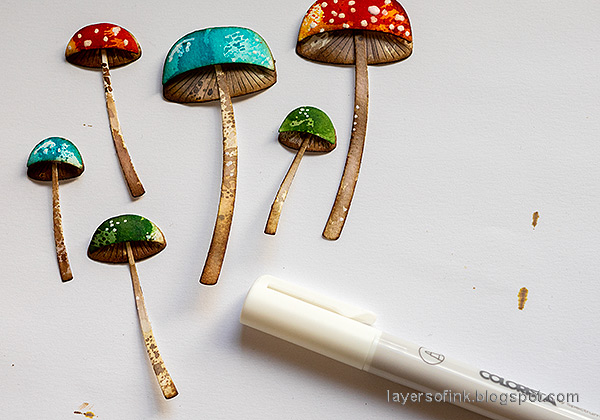
Layers of ink - Autumn tag tutorial by Anna-Karin Evaldsson. Add highlights.

I used a white paint pen to add dots to the mushrooms. Shape them with an Tim Holtz Shaping Kit and adhere the hat with Simon Says Stamp Pawsitively Perfect Foam tape.

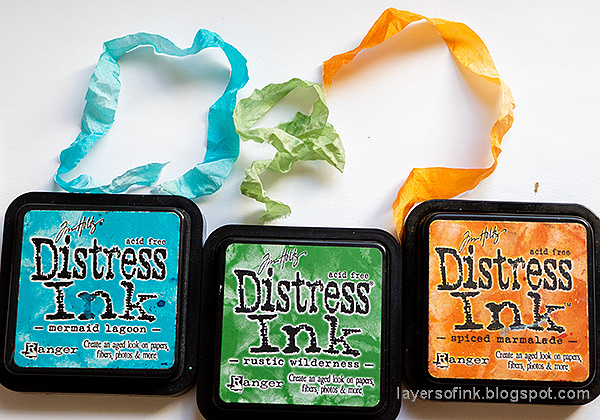
Layers of ink - Autumn tag tutorial by Anna-Karin Evaldsson. Dye ribbon with Distress Ink.

The ribbon was dyed with Distress Ink to coordinate with the mushrooms.

Layers of ink - Autumn tag tutorial by Anna-Karin Evaldsson. Place Simon Says Stamp sequins.

I have liked sequins ever since I was a child and often add them to my projects. They give a touch of color, bling and interest. This is my set up for adding them: Simon Says Stamp glue and the Place and Score Wand, which picks up sequins like nothing I have every tried before. When working, I pour the sequins into the Triangle Trays and it is very easy to just pour them back into the plastic bags when you are finished.

Layers of ink - Autumn tag tutorial by Anna-Karin Evaldsson.

Stamp sentiments on Tim Holtz Halloween Backdrops paper. The stamps come from Simon Says Stamp Season's Greetings.

Layers of ink - Autumn tag tutorial by Anna-Karin Evaldsson. Stamp sentiments.

The combination of inky, inky dots and gold works well together,

Layers of ink - Autumn tag tutorial by Anna-Karin Evaldsson. Gold wax on wheat.

You can see the gold effect on the wheat better here.

Layers of ink - Autumn tag tutorial by Anna-Karin Evaldsson. Dimensional paper mushrooms.

I enjoy seeing mushrooms out in nature, but it is even more fun to create mushrooms from paper.

Layers of ink - Autumn tag tutorial by Anna-Karin Evaldsson.

I placed the stems the other way around compared to the images on the die packaging. They work well both ways depending on if you want to the top or bottom of the stem to be narrow.

Layers of ink - Autumn tag tutorial by Anna-Karin Evaldsson. Glue mushrooms to the tag.

The golden stems of the wheat creates a backdrop for the mushrooms. 

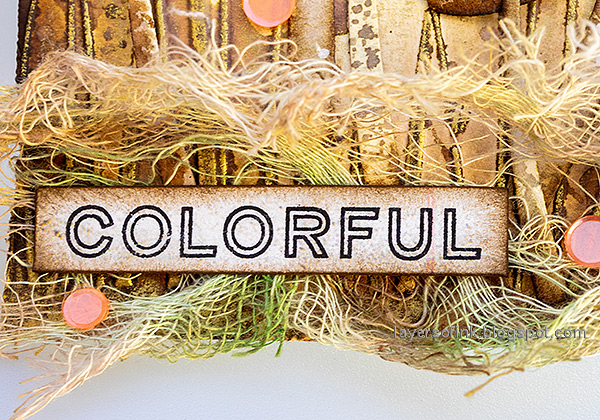
Layers of ink - Autumn tag tutorial by Anna-Karin Evaldsson. Colorful.

I dyed some cheese cloth as a base for the tag and the mushrooms. The sentiment comes from Simon Says Stamp All Seaons Tree.

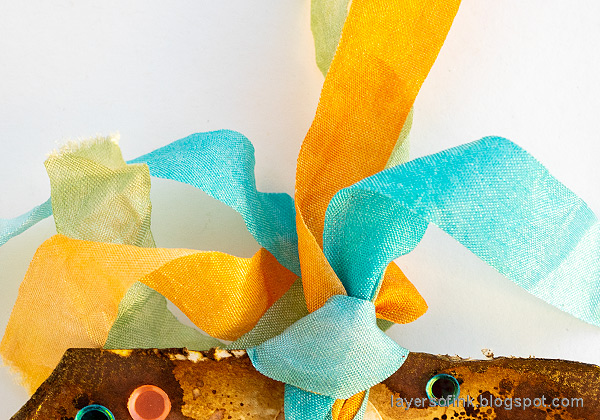
Layers of ink - Autumn tag tutorial by Anna-Karin Evaldsson. Ribbon dyed.

Colorful ribbon is always fun.

Layers of ink - Autumn tag with mushrooms tutorial by Anna-Karin Evaldsson.

The mushrooms were adhered with Simon Says Stamp foam tape, for dimension.

Layers of ink - Autumn tag with mushrooms tutorial by Anna-Karin Evaldsson.


Don't miss all the inspiration along the hop. There are of course prizes to be won too, and at each stop on the hop SSS is giving away a $25 coupon, randomly drawn from those who leave a comment. The winners will be posted post on the Simon Says Stamp store blog on Wednesday the 11th of October.

Your next stop on the hop is Heather Ruwe. Don't miss to see the wonderful project she has created. If you get lost along the way, here are all the stops:


Anna-Karin Evaldsson (you are here)

For more inspiration, remember to check out the Season of Wonder gallery at Simon Says Stamp, and if you make something with products from the range, it is fun if you post it in the galleries too. There are galleries for all releases, and for the card kits, full of inspiration.

This is the second Season of Wonder blog hop, don't miss blog hop number day number 1, which was yesterday.


Thank you so much for stopping by here today! 

Happy crafting!

Anna-Karin

Supplies:

* Please note: the links are affiliate links, for which I receive a small percentage of sales generated by the link, at no extra cost to you.


Monday, October 2, 2023

Birch Forest Watercolor Tag

Hello crafters! I hope you had a good weekend and got some crafty time. It is already October.

Please note: this post has affiliate links, for which I receive a small percentage of sales generated by the link, at no extra cost to you.


We are back with a new Simon Says Stamp Monday Challenge and this week our theme is Add some texture. Adding texture with different techniques is a favorite of mine. So many options!

Since it is the first Monday of a new month, the team is showcasing a specifik company or designer and this week it is Katzelkraft. You can find Katzelkraft's wonderful range of products here. You don't have to use their products to join in the challenge, but it is fun if you do. 

This month we have two guest designers: Teresa York and Gitta Roolf. Don't forget to stop by their Instagram accounts to see what they have created.

Layers of ink - Birch Forest Watercolor Tag Tutorial by Anna-Karin Evaldsson.

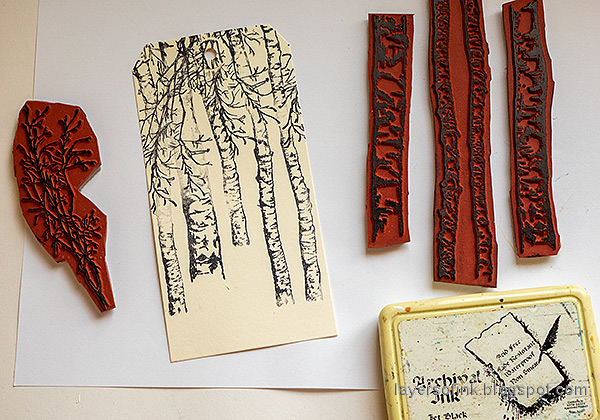
On one of my walks, I walk past this groove with only birch trees, which also happens to be be one of my favorite trees. The light often hits the trees in such a great way and that spot was the inspiration for this tag. The leaves of birch trees turn yellow at autumn, but many are still green. I used Katzelkraft's Birches Forest set.

Layers of ink - Birch Forest Watercolor Tag Tutorial by Anna-Karin Evaldsson. Stamp the birch trees.

I planned the scene on scrap paper first. Start by stamping the branches. Next stamp the trunks. As you can see, I wiped off a lot of the ink from the trees where the branches would be, since the trunks had to be mainly behind the branches. It would look weird if all the branches were behind the tree trunks. Mask off one of the thinner trees with printer paper when inking, to only get a single thin tree.

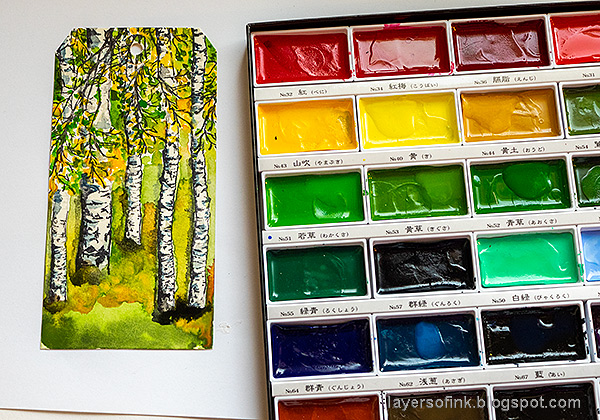
Layers of ink - Birch Forest Watercolor Tag Tutorial by Anna-Karin Evaldsson. Watercolor with Zig Kuretake Gansai Tambi.

The tag was colored with Zig Kuretake Gansai Tambi watercolors, using both paint mixed with water in a watercolor palette (not shown here) and paint right from the pans. Add drops of water to the pans.

Layers of ink - Birch Forest Watercolor Tag Tutorial by Anna-Karin Evaldsson. Add pen work.

I used a black pen to add back details to the trunks where I had wiped most of the ink off the stamp and to add some more marks for extra texture. Later I also added some details with a white gel pen. 

Layers of ink - Birch Forest Watercolor Tag Tutorial by Anna-Karin Evaldsson.

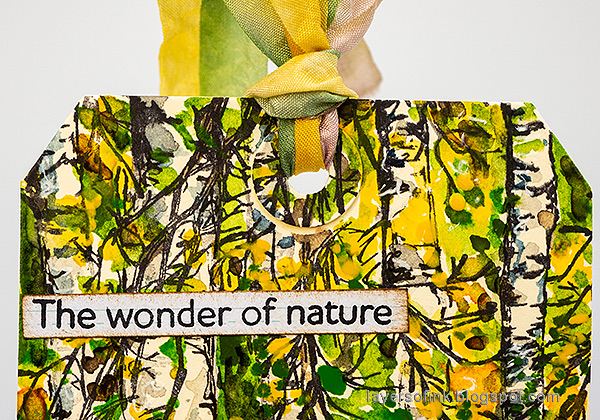
The sentiments were stamped on Tim Holtz Journal cards, cut into strips and inked. This sentiment is from Simon Says Stamp Forest Scenery. I use it a lot.

Layers of ink - Birch Forest Watercolor Tag Tutorial by Anna-Karin Evaldsson. Stamp sentiments.

The larger sentiment comes from Tim Holtz Nature's Wonder and the smaller are from Simon Says Stamp Document It and All Seasons Tree.

Layers of ink - Birch Forest Watercolor Tag Tutorial by Anna-Karin Evaldsson.

The leaves and various paint marks give a lot of texture to this tag. 

Layers of ink - Birch Forest Watercolor Tag Tutorial by Anna-Karin Evaldsson.

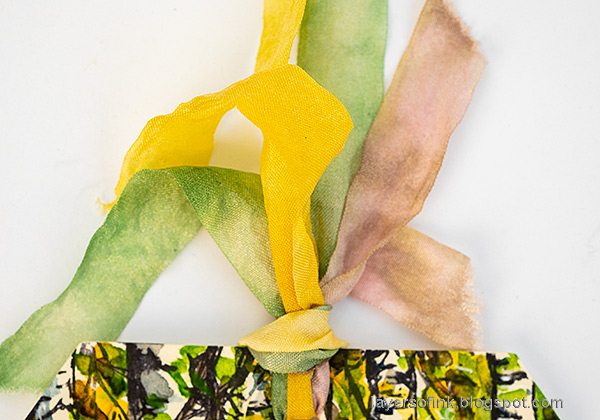
The ribbon was dyed with coordinating Distress Inks.

Layers of ink - Birch Forest Watercolor Tag Tutorial by Anna-Karin Evaldsson.


I hope you will join us this week in our Add Some Texture challenge. You have a chance to win a $25 gift voucher to do some fun shopping at Simon Says Stamp. You have until Monday 8am Ohio time. 1pm UK time, 2 pm CET to join in.


Do you use Instagram? If so please add #sssmchallenge so we can see your entries there too.


Thank you so much for stopping by here today! 

Happy crafting!

Anna-Karin

Supplies:

* Please note: the links are affiliate links, for which I receive a small percentage of sales generated by the link, at no extra cost to you.