Pages

Monday, December 31, 2018

Favorite Projects of 2018

Hello friends! It is the last day of 2018, and it is a time to reflect on the year that has passed. I have often felt ambivalent regarding New Year's Eve, probably because it is the end of something, but at the same time it is the beginning of something new and I have some fun plans for 2019 that I hope will become a reality.

At the end of the year, I do a post or two with some of my favorite projects from the year. It is always fun to look through all the projects, and think about when they were made. The actually picking of favorites, is a little random though, and had I picked them tomorrow, I might not have picked quite the same projects. I posted a part one of my favorites a couple of days ago, focusing on projects using Sizzix dies by Eileen Hull. You can find that post here.

A big thank you to everyone who look at my projects, posts comments here and on my social media channels and click on affiliate links. I really appreciate it and I always look forward to hearing what you think about a project and hope that my projects inspire creativity and art making.

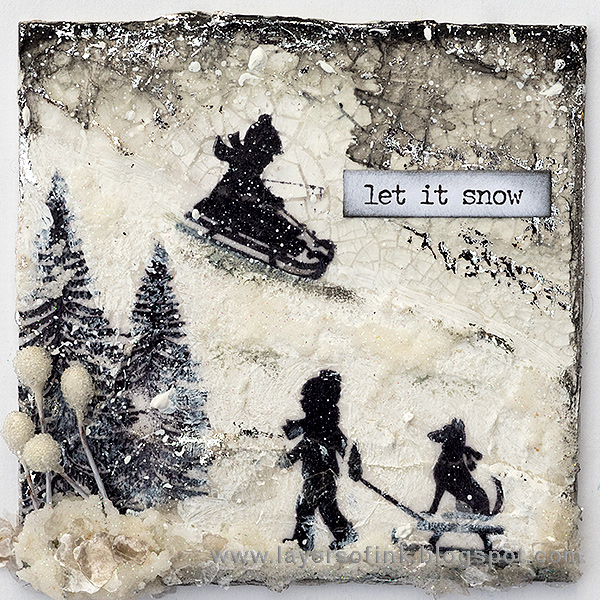
Layers of ink - Sleigh Ride Mini Canvas by Anna-Karin Evaldsson.

Let's start with a frosty project, a Sleigh Ride Mini Canvas, which was made with several fun techniques and shines and glimmers. I used the adorable Hero Arts Winter Silhouettes set. The canvas now hangs in Anton's room.

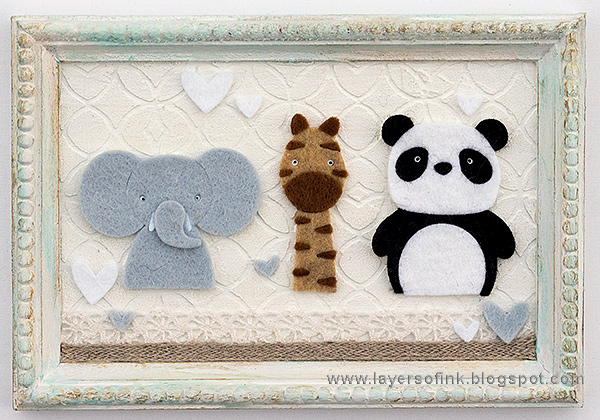
Layers of ink - Framed Animals Baby Gift by Anna-Karin Evaldsson.

This Framed Animals Baby Gift is very sweet with the Simon Says Stamp Picture Book animals die cut from felt. It fits perfectly in my nephew's room.

Layers of ink - Layered Shaker Card by Anna-Karin Evaldsson.

This layered shaker card was such fun to make and contains a whole bunch of techniques. I also did a similar cream version, which was given away as a wedding card. It was made with the the Bohemian Heart Impresslits folder from Sizzix.


Layers of ink - Miniature Shadow Box by Anna-Karin Evaldsson.

I picked the miniature shadow box, because it is tiny and I enjoyed fitting all those small details into the box to create a little springtime scene.

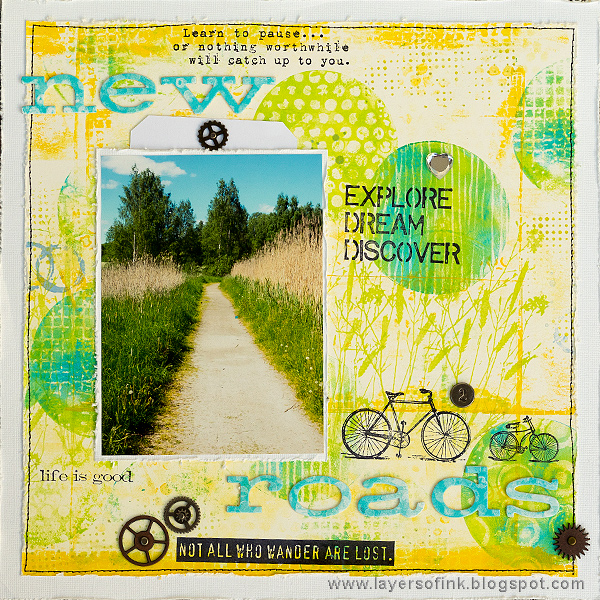
Layers of ink - Gel Printed Circle Background Tutorial by Anna-Karin Evaldsson.

Here's a cheerful layout about bike trips, and I had such fun doing all the gelli printing for the background. I also like all the yellow and green shades.

Layers of ink - Flower Power Tag by Anna-Karin Evaldsson.

This Flower Power tag, with flowers die cut from left-over papers in all colors, has such a happy and cheerful feel to it. I used Tim Holtz Funky Floral 1 and Funky Floral 2 to die cut all the shapes. Tim's Funky dies were some of my favorite dies from this year.

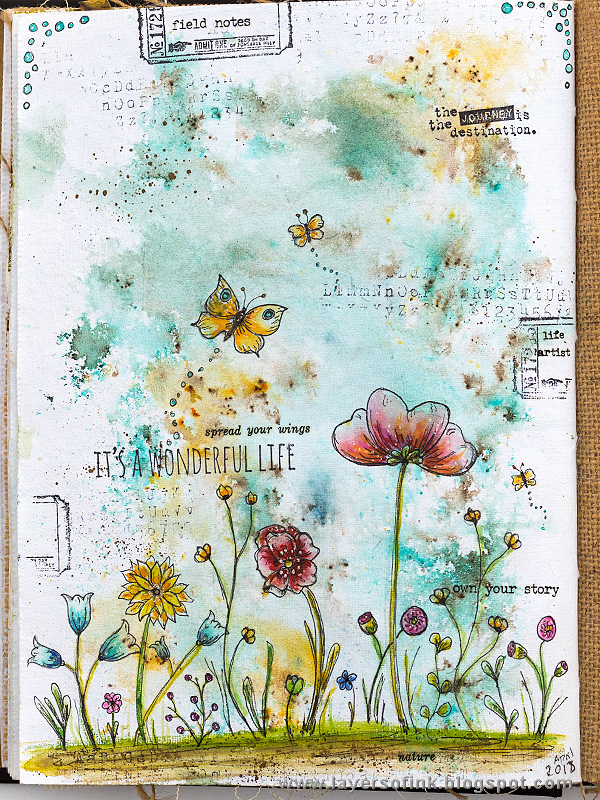
Layers of ink - Doodled Wildflowers Journal Page by Anna-Karin Evaldsson.

I picked this Doodled Wildflowers Journal page, since I had such fun drawing those flowers and butterflies.

Layers of ink - Mini Watercolor Panels by Anna-Karin Evaldsson.

I also couldn't help but to pick this watercolor mini panels layout, partly because I had such fun painting the mini watercolor panels (and I did a whole lot more than these), and partly because of the topic. The layout is about story time and the stories I make up for the children, long and elaborate stories, with made up worlds, travel through time, adventures etc. 

Layers of ink - Woodplank Background Tutorial by Anna-Karin Evaldsson.

The woodplank background on this tag, was such fun to make and I like the yellow, brown and gold color combination here, as well as the beautiful sentiment.

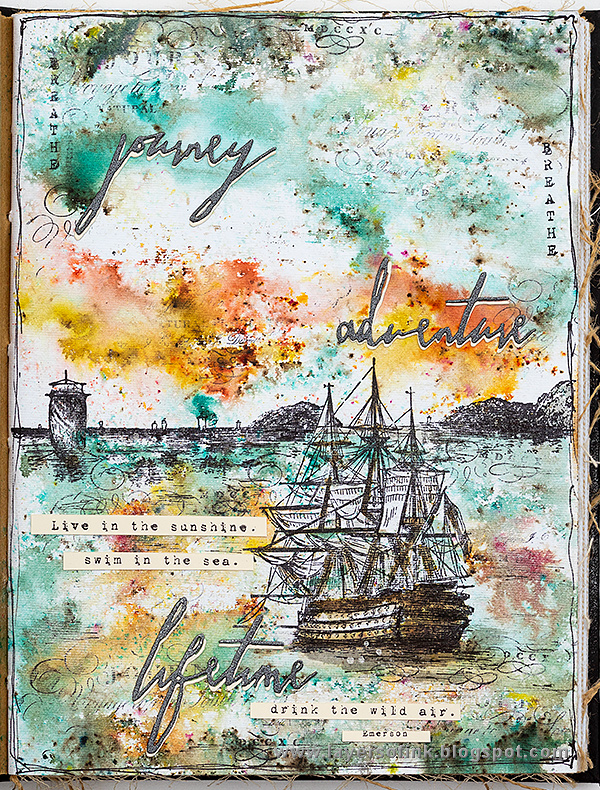
Layers of ink - Dramatic Seascape Journal Page by Anna-Karin Evaldsson.

A summer project was this Dramatic Seascape Journal page, using one of my favorite quotes and gorgeous Paper Artsy Eclectica3 Scrapcosy 11 stamps.

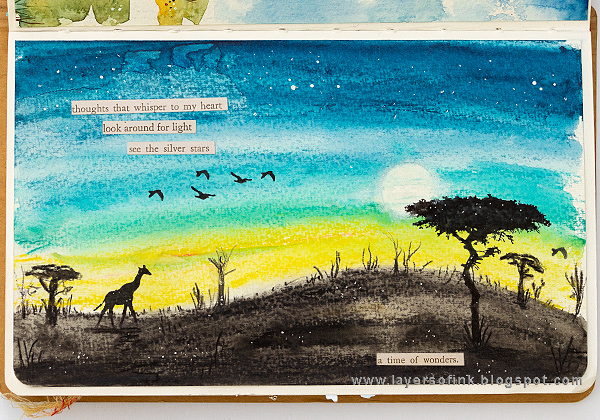
Layers of ink - African Night Watercolor Tutorial by Anna-Karin Evaldsson.

From July, I picked my African Night Watercolor journal page, since I really like the colors, and it brings back memories from South Africa. The stamps are by Darkroom Door. 


Layers of ink - Sparkly Tropical Beach Tutorial by Anna-Karin Evaldsson.

Another summery tag is this Sparkly Tropical Beach, which is super sparkly in real life.


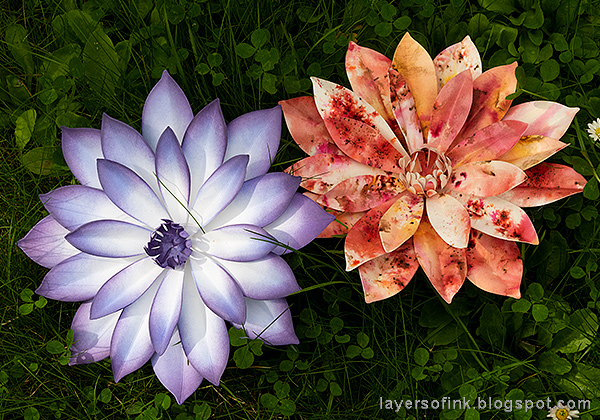
Layers of ink - Dahlia Dimensional Paper Flowers Tutorial by Anna-Karin Evaldsson.

From August, I picked my Dahlia Paper Flowers tutorial, just because dimensional paper flowers are gorgeous and fun to make. They were made with David Tutera's Sizzix Dahlia set.

Layers of ink - Embossed Acetate Tag Tutorial by Anna-Karin Evaldsson.

One of my favorite project from autumn was this Embossed Acetate Tag, with all its texture and yummy colors. Another favorite autumn project, using the same Funky Foliage dies by Tim Holtz, were my Autumn Gift Bags.


Layers of ink - Misted Galaxy Tutorial by Anna-Karin Evaldsson.

This dreamy Misted Galaxy was definitely one of my favorites from this year, and it was quick and easy to make.


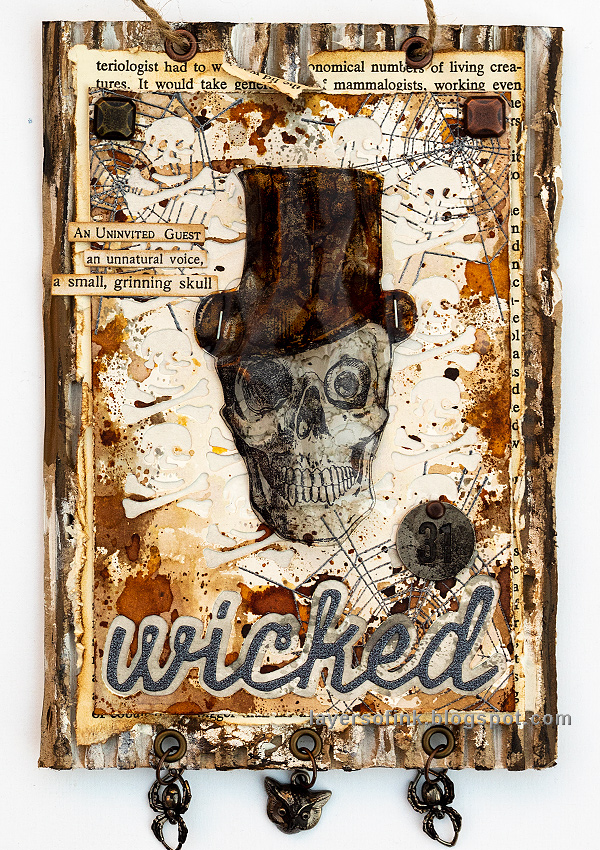
Layers of ink - Dimensional Skull Tutorial by Anna-Karin Evaldsson.

My Dimensional Stamped Skull wall-hanger might be my favorite Halloween project from 2018, with its cool transparent and dimensional skull, the neutral colors and all the texture. Another favorite Halloween project was the Dimensional Laboratory.


Layers of ink - Embossed Cityscape Tutorial by Anna-Karin Evaldsson.

This Embossed Cityscape tag also had to be included here, with all its embossing and cool textures. I don't want to live in a big city, since I value being close to nature, but cityscapes at night are pretty cool.


Layers of ink - Embossed Snowflake Tag Tutorial by Anna-Karin Evaldsson.

And here's another tag using lots of embossing powder. One of my favorite winter projects is this Embossed Snowflake Tag with Dome, with a background that is entirely heat embossed.


Layers of ink - Winter Birch Forest Tutorial by Anna-Karin Evaldsson.

My December Daily journal always makes it onto the favorites list, and this year was no exception, with a Winter Birch Forest theme. It is now filled with memories.

Layers of ink - Vintage Christmas Altered Tin Tutorial by Anna-Karin Evaldsson.

I was planning to have stopped picking projects by now, but I just had to include my Vintage Christmas in a Tin too, since I was really happy with how it turned out. I also made a second altered winter tin.

Looking through my projects from the year also made me realise that even though it feels like time flies by, if you start looking at details and remembering events, it slows down.

Again, thank you so much for all your support thoughout this year. I want to wish you all a Happy New Creative Year 2019!!

Anna-Karin

* Please note: the links are affiliate links, for which I receive a small percentage of sales generated by the link, at no extra cost to you.

Sunday, December 30, 2018

New Year's Decorations: Intricate 3-D Flowers

Hi crafters! This year is almost over and it is soon time to celebrate the start of a new year with new adventures, opportunities and challenges. I have a tutorial on the Sizzix blog today, for intricate 3-D paper flowers. The flowers are much easier to make than what they might look like.

Layers of ink - New Year's Decorations: Intricate 3-D Flowers Tutorial by Anna-Karin Evaldsson.

I made two different dimensional flowers, which can be a part of table decorations for a New Year’s Party and gifts to the guests. I used the Sizzix Celebrations release by David Tutera, which has gorgeous flower and fan designs. The flowers have a magnet at the back, and can therefore also easily become home décor items. Make the same flower for each guest, or give everyone a different flower. If you add names to the flowers, they can function as place cards. You could also arrange flowers as a centerpiece on the table. I gave my flowers away as small gifts.

You can find the tutorial, the second flower and close-ups on the Sizzix blog.

Here's a funny behind-the-scenes story. I had planned to do a little table set-up outdoors to take this photo, but it was raining, so instead I set up a mini table underneath the little roof right over our front door. It would have looked quite amusing for anyone who happened to have walked past.

I'll see you again tomorrow with my favorites from 2018 post.

Thank you so much for visiting today!

Happy crafting!

Anna-Karin

* Please note: the links are affiliate links, for which I receive a small percentage of sales generated by the link, at no extra cost to you.

Thursday, December 27, 2018

Eileen Hull Favorite Projects 2018

Hello crafters! I hope you had a lovely Christmas! We had a wonderful time with lots of fun, good food, spending time with relatives and meeting Santa. During December, the Eileen Hull Inspiration Team has shared their favorite projects from the past year. I always do a recap post or two at the end of the year, so today I will share only my favorite projects with Eileen's die, and in a couple of days, there were be a second, more general, post.


I am not good at picking favorites, since I usually like each project in its own way. This Mini Book Storage Container is one of my favorites from the year, also since it is completely full with little books and we use it a lot. I need to make a second one and perhaps even third one, partly since the boys had an advent calender with these little books, so we now have 24 new ones. It was made with the Card Box, Planner Storage & Organizer Scoreboards die.


Another favorite project, is this Guest Book tutorial, made with  Journal Die and the lovely Simon Says Stamp Brushed Branches tree stamp. The cute little flowers come from Eileen's Bookmark, Tag & Pocket set. It doesn't have to be a guest book, but could work for many themes.

Layers of ink - Nautical Mini-Book by Anna-Karin Evaldsson.

A summery project that I made, was this Nautical Mini Album, filled with photos taken almost ten years ago. I printed those photos in small sizes with the thought of using them for a mini-album, so I am happy that they are finally in an album. The album was made with the Book Binding die and with Eileen's Flowers & Leaves Journaling Cards, and Heart Journaling Cards.

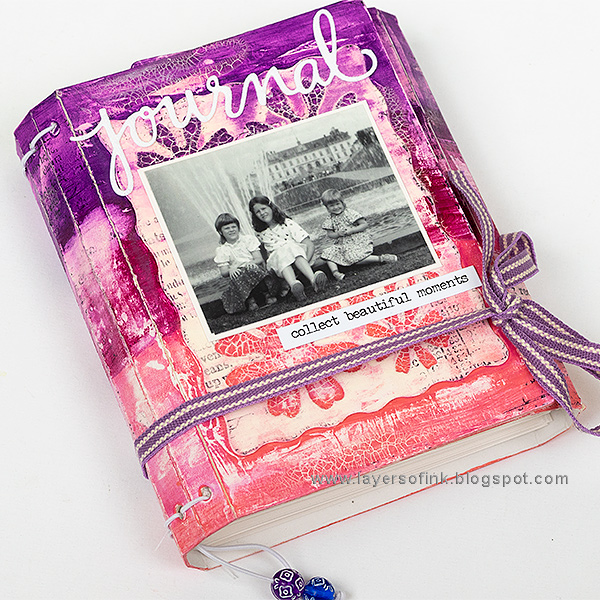
Layers of ink - Wrapped Journal by Anna-Karin Evaldsson.

I also made five wrapped journals this year, and I couldn't pick a favorite among them, since they are all pretty different. Above is the first one, a mixed media journal. There is also a Blue Textured Journal, a Wrapped Leather Journal, a Felt Journal and an In The Forest Journal. All of them were made with the Wrapped Journal.


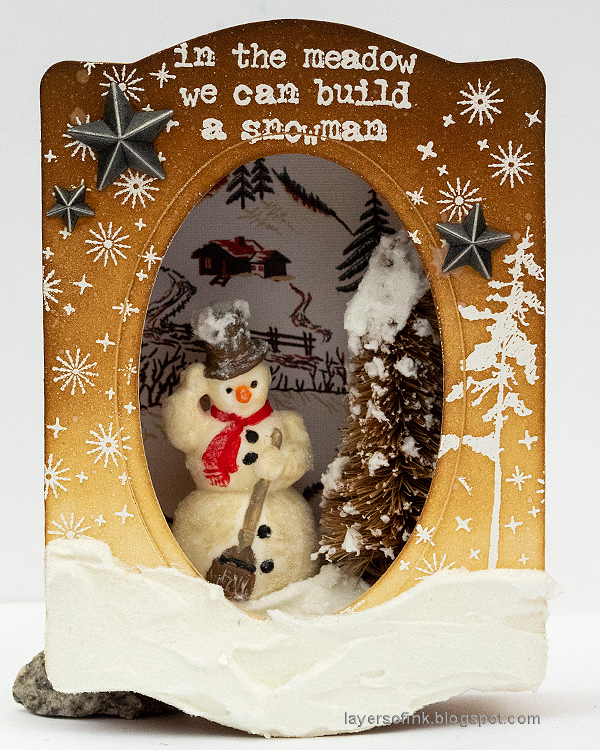
And let's finish the post with a Christmas project, namely my Winter Wonderland Shadow Box. It was made with the Trinket Box & Frame, Book & Pages and filled with snow and happiness.

Thank you so much for stopping by today! I will see you soon again.

Happy crafting and enjoy the last day of the year.

Anna-Karin

* Please note: the links are affiliate links, for which I receive a small percentage of sales generated by the link, at no extra cost to you.

Monday, December 24, 2018

Celebrate Life Tag

Hello friends! It is Christmas Eve and in Sweden this is our main day of celebrating Christmas. Santa will arrive at here tonight to hand out gifts. He doesn't come through the chimney, but hand delivers, so he is pretty busy on Christmas Eve. Leo has been keeping an eye out for him all morning, but he won't be here until after dark.


It is also Monday and we are having our last Simon Says Stamp Monday Challenge of the year. This challenge runs for two weeks and the theme is 'Party Time'. Don't miss the last project by our December guest designer December guest designer Ann Barnes, with her blog Aksbarchitect Creates

Layers of ink - Celebrate Life Tag by Anna-Karin Evaldsson.

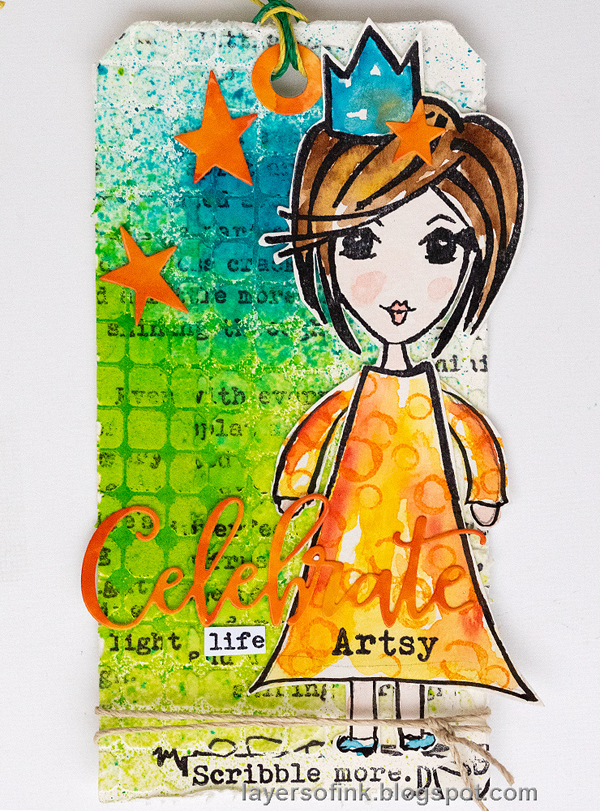
I made a cheerful tag this week, to celebrate New Year and the coming of a new year full of possibilities. The Inky Antics stamps I used are designed by my team mate Andrea Ockey Parr: the Queen's Quips and Muse News. I had such fun stamping with them. I gave the queen a simple dress, legs, feet and arms. The stamp stops about level with her hands. Sorry about the lack of step photos here, I was in a bit of a hurry, with all the Christmas preparations.

Layers of ink - Celebrate Life Tag by Anna-Karin Evaldsson.

The tag was die cut from a paper I had in my scrap box. Texture Paste had been smeared through Tim Holtz Tiles stencil and then the paper was misted with Distress Spray Stains. There are steps for the background in the original Summer Fun post. I stamped it with a text stamp from Andrea's Muse News set.

Layers of ink - Celebrate Life Tag by Anna-Karin Evaldsson.

The queen was stamped on watercolor paper with Jet Black ink and colored with watercolor paint. 

Layers of ink - Celebrate Life Tag by Anna-Karin Evaldsson.

Her dress was given a pattern with the three circle stamps in the Queen's Quips set, and Spiced Marmalade ink. 

Layers of ink - Celebrate Life Tag by Anna-Karin Evaldsson.

I die cut stars with Tim Holtz Sizzix Snowy Stars from glossy paper which had been colored with alcohol ink.

Layers of ink - Celebrate Life Tag by Anna-Karin Evaldsson.

The title was die cut from the same glossy paper, using the SSS Celebrate die. The word 'life' comes from a sentiment stamp from Muse News.

Layers of ink - Celebrate Life Tag by Anna-Karin Evaldsson.

I love the 'scribble more' stamp from Muse News and stamped it at the bottom of the tag, to give her something to stand on.

A big thank you to everyone who has joined our challenges this year, we will be back in January with new challenges and new inspiration. I hope you will join us this week in our Party Time challenge. As always, you have a chance to win a $50 gift voucher to do some fun shopping at Simon Says Stamp. The challenge runs over two weeks, so you have until Monday 7 Jan, 8am Ohio time. 1pm UK time, 2 pm CET to join in. 


Don't forget to follow Simon Says Stamp on Instagram, they post great stuff daily. 


Do you use Instagram? If so please add #sssmchallenge so we can see your entries there too.


I also want to wish everyone a very Merry Christmas! I hope you will have a beautiful time, with lots of joy. Thank you so much for taking the time to visit my blog today!  I will be back again before the end of the year. 

Happy crafting!

Anna-Karin

Supplies:

* Please note: the links are affiliate links, for which I receive a small percentage of sales generated by the link, at no extra cost to you.

Thursday, December 20, 2018

3-D Watercolor Angel Tutorial


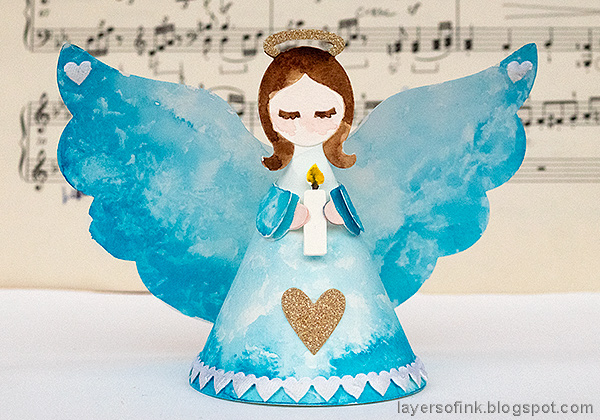
Hi friends! I have another quick Christmas ornament/gift Sizzix tutorial to share with you, following upon yesterday's Tree Lights. If you need a last minute gift, this 3-D angel is quick to make, can easily be customized and is adorable.

Layers of ink - 3-D Watercolor Angel Tutorial by Anna-Karin Evaldsson. With the 3-D Angel die by Sizzix.

I colored my angel with watercolors, but you can also use Distress Ink, or die cut the angel from patterned paper, for an even quicker version. Like yesterday's Light Trees, it is also a great Christmas craft for kids. The angel can stand on its own, or it can hang from a tree. She was made with a single die set, namely the 3-D Angel, from the Holiday Blessings collection by Jen Long.

Layers of ink - 3-D Watercolor Angel Tutorial by Anna-Karin Evaldsson.

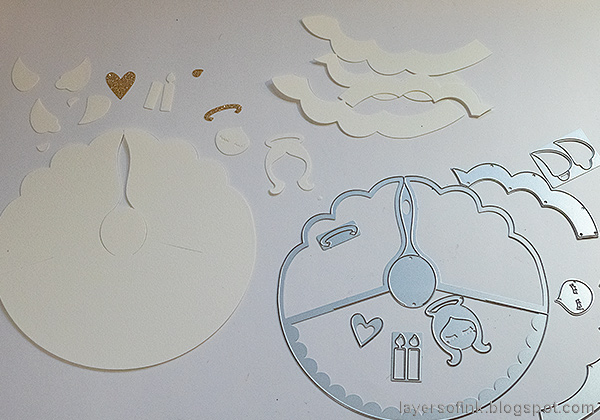
Start by die cutting the angel pieces from watercolor paper. I die cut the heart, gloria and candle from gold deco sheet.

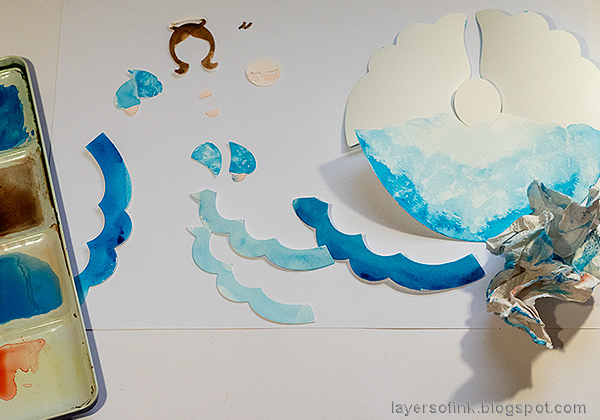
Layers of ink - 3-D Watercolor Angel Tutorial by Anna-Karin Evaldsson. Watercolor the angel.

Paint with watercolors or Distress Inks. You need to paint the back of the wings, since they will become the front as the angel is assembled. To get the texture on the angel, I pressed with a scrunched up paper towel. The paper towel picks up some of the paint and leaves a soft texture. I ended up not using the scalloped pieces, since I liked the soft texture so much, but if you want to use them, they fit perfectly on the wings, and would also look great die cut from a pearlescent or glittery paper.

Layers of ink - 3-D Watercolor Angel Tutorial by Anna-Karin Evaldsson. Assemble the angel.

Assemble the angel by twisting the wings to the back, so that the two slots can join. As you can see, the unpainted wings are now at the back.

Layers of ink - 3-D Watercolor Angel Tutorial by Anna-Karin Evaldsson.

And here's the front, with the painted side of the wings.

Layers of ink - 3-D Watercolor Angel Tutorial by Anna-Karin Evaldsson.

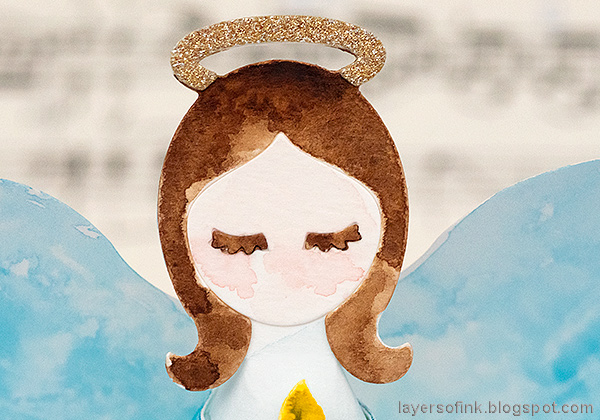
Glue the hair, gloria, and face details in place.

Layers of ink - 3-D Watercolor Angel Tutorial by Anna-Karin Evaldsson.

The sleeves were layered, and I left the ends lose, so that they look more dimensional. I used the Sizzix glue gun to glue the arms to the body, but you can also use a different adhesive. Always take care when using a glue gun so that you don't burn yourself. There is a piece of foam tape behind the candle, to bring it out from the body. I ended up not using the gold candle, but instead painted it.

Layers of ink - 3-D Watercolor Angel Tutorial by Anna-Karin Evaldsson.

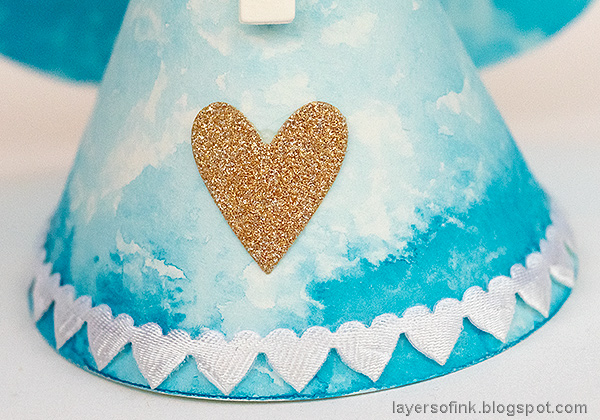
At the base, I glued a piece of heart ribbon that I found in a drawer, and there is also the deco sheet heart.

Layers of ink - 3-D Watercolor Angel Tutorial by Anna-Karin Evaldsson.

The angel is quick to make and you can easily make a whole bunch. Here you can see the dimensions from the top.

Layers of ink - 3-D Watercolor Angel Tutorial by Anna-Karin Evaldsson.

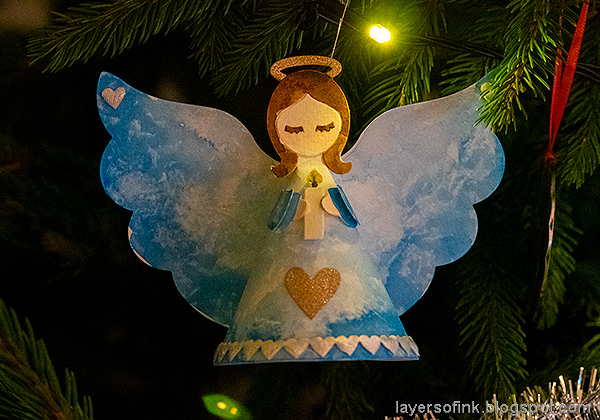
The angel also looks great hanging in a tree, especially if you make more than one. I don't know why our tree lights look green here, they are white in real life.

Happy Christmas Crafting!

Anna-Karin

* Please note: the links are affiliate links, for which I receive a small percentage of sales generated by the link, at no extra cost to you.