Pages

Thursday, February 29, 2024

Colored Pencils on Kraft

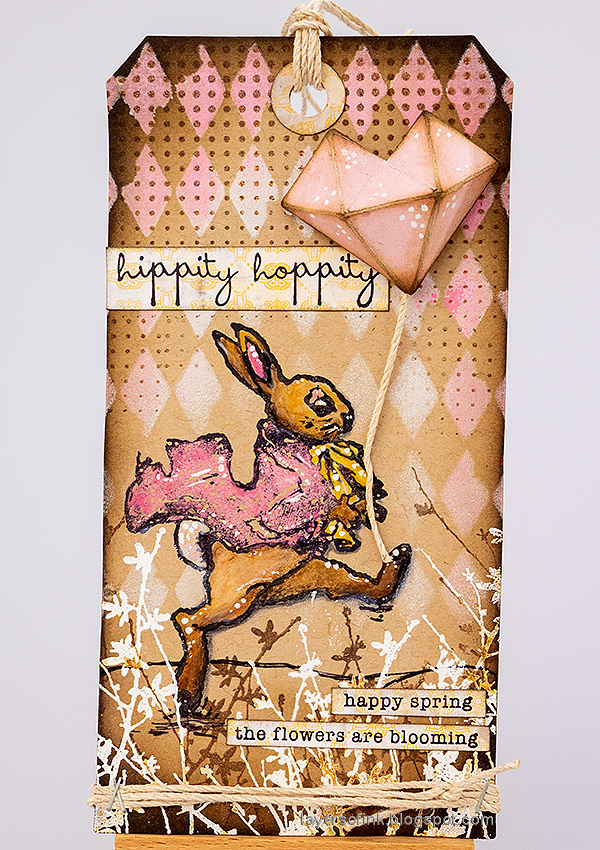
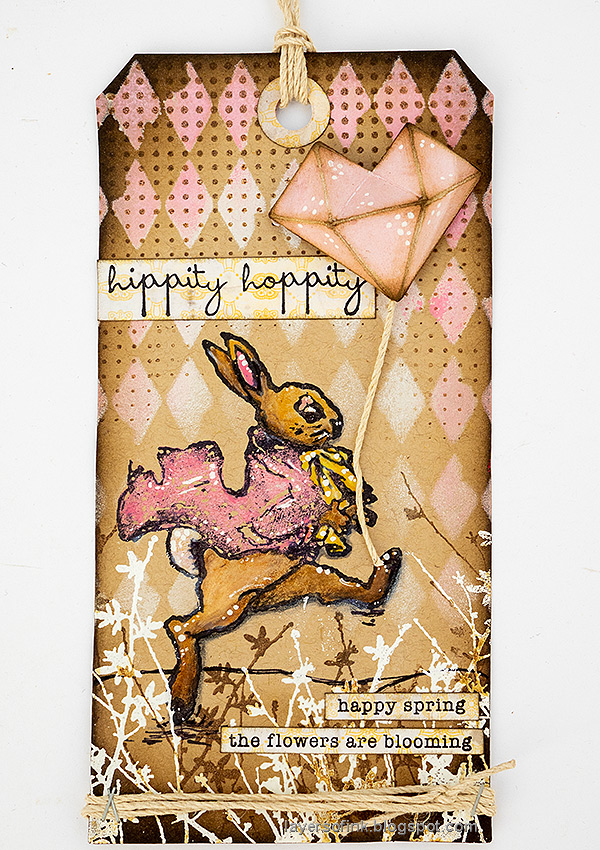
Hi stampers! Today is Leap Day, almost a bonus day and particularly useful in the shortest month of the year. I made an Easter/spring card today since you can start to feel spring in the air. I used colored pencils and Distress Paint on kraft cardstock.

Please note: this post has affiliate links, for which I receive a small percentage of sales generated by the link, at no extra cost to you.

Layers of ink - Colored Pencils on Kraft paper Easter Card Tutorial by Anna-Karin Evaldsson.

I enjoy using colored pencils on kraft cardstock, or almost any kind of tinted cardstock, since it gives a nice effect. For this card I used an older set by Tim Holtz / Stamper's Anonymous called Spring Sprung and combined it with background stamps and a stencil. At first, I planned to place flowers in the bunny's hands, but instead made a dimensional heart-shaped balloon.

Layers of ink - Colored Pencils on Kraft paper Easter Card Tutorial by Anna-Karin Evaldsson. Stamp with Distress Oxide ink.

Die cut a tag from kraft cardstock. I didn't want to jacket to be black, so instead I stamped it with Worn Lipstick Distress Oxide Ink. I used my MISTI to make sure that the tag stayed put during stamping.

Layers of ink - Colored Pencils on Kraft paper Easter Card Tutorial by Anna-Karin Evaldsson. Stamp with Archival Ink.

Leave the stamp and the tag in the same place and ink the stamp with Jet Black ink. Avoid most of the jacket, but add black ink around the edges of the jacket.

Layers of ink - Colored Pencils on Kraft paper Easter Card Tutorial by Anna-Karin Evaldsson. Color with Prismacolor pencils.

Color the image with colored pencils. I used Prismacolor pencils. 

Layers of ink - Colored Pencils on Kraft paper Easter Card Tutorial by Anna-Karin Evaldsson.

Add shading with grey shades. Draw a line to create ground for the bunny to walk on, and add some scribbles.

Layers of ink - Colored Pencils on Kraft paper Easter Card Tutorial by Anna-Karin Evaldsson. Add white highlights.

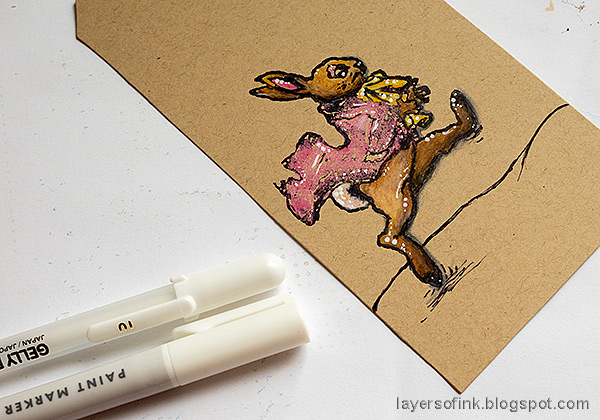
Add highlights with a white paint pen and a white gel pen.

Layers of ink - Colored Pencils on Kraft paper Easter Card Tutorial by Anna-Karin Evaldsson. Die cut Tim Holtz Faceted Heart.

Die cut the faceted heart from Tim's Vault Rosettes set, from Backdrops Vol. 5 paper. Fold along all the fold lines and glue together with Simon Says Stamp craft glue. 

Layers of ink - Colored Pencils on Kraft paper Easter Card Tutorial by Anna-Karin Evaldsson. Sponge white paint through stencil.

Stamp the image on Simon Says Stamp Masking paper and cut out. Use Tim's Harlequin stencil together with white and pink Distress Paint to create the background pattern. 

Layers of ink - Colored Pencils on Kraft paper Easter Card Tutorial by Anna-Karin Evaldsson. Stamp grass.

Leave the mask in place and white emboss foliage from Spring Sprung. 

Layers of ink - Colored Pencils on Kraft paper Easter Card Tutorial by Anna-Karin Evaldsson. Heart Balloon.

I sanded and inked the edges of the heart and glued a string to the back. It was adhered to the background with Simon Says Stamp Pawsitively Perfect Foam Tape. 

Layers of ink - Colored Pencils on Kraft paper Easter Card Tutorial by Anna-Karin Evaldsson.

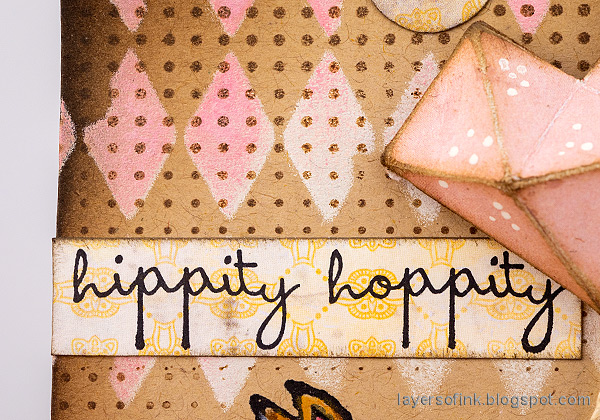
The top of the tag was stamped with Simon Says Stamp Halftone background and Potting Soil ink. Ink the edges of the tag with shades of brown Distress Ink. The sentiment stamp comes from Tim Holtz Crazy Talk.

Layers of ink - Colored Pencils on Kraft paper Easter Card Tutorial by Anna-Karin Evaldsson.

Let the bunny hold the string for the balloon. Here you can also see the effect of the white highlights better. 

Layers of ink - Colored Pencils on Kraft paper Easter Card Tutorial by Anna-Karin Evaldsson.

I restamped the foliage with Potting Soil a couple of times. The sentiments were stamped on Tim's Pocket Cards.

Layers of ink - Colored Pencils on Kraft paper Easter Card Tutorial by Anna-Karin Evaldsson.

The small faceted heart is so cute and works great as a balloon.

Layers of ink - Colored Pencils on Kraft paper Easter Card Tutorial by Anna-Karin Evaldsson.


Thank you for joining me here on this Leap Day 2024. 


See you soon again! 


Anna-Karin

Supplies:

* Please note: the links are affiliate links, for which I receive a small percentage of sales generated by the link, at no extra cost to you.


Monday, February 26, 2024

Vintage letter with feather pen

Hello crafters! We have had another weekend of fun birthday celebrations here. Most of the snow is gone and the first snowdrops have appeared in the garden.

Please note: this post has affiliate links, for which I receive a small percentage of sales generated by the link, at no extra cost to you.


This week we have a Fur or Feathers theme at the Simon Says Stamp Monday Challenge Blog. Fun! Don't miss the last project by our February guest designer Cassie Lynch.


Layers of ink - Vintage Letter with feather pens card tutorial by Anna-Karin Evaldsson.

I went with the feathers theme, but instead of making a bird project, I made feather pens. The feathers are meant to be guinea fowl feathers, a bird I saw often in South Africa. The card has a vintage letter-writing theme, celebrating sending letters, which was once the main means of communication between people who were too far away from each other to meet. 

Layers of ink - Vintage Letter with feather pens card tutorial by Anna-Karin Evaldsson. Die cut feathers with Tim Holtz Feathery.

Die cut three feathers from watercolor paper using Tim Holtz Feathery.

Layers of ink - Vintage Letter with feather pens card tutorial by Anna-Karin Evaldsson. Color the feathers.

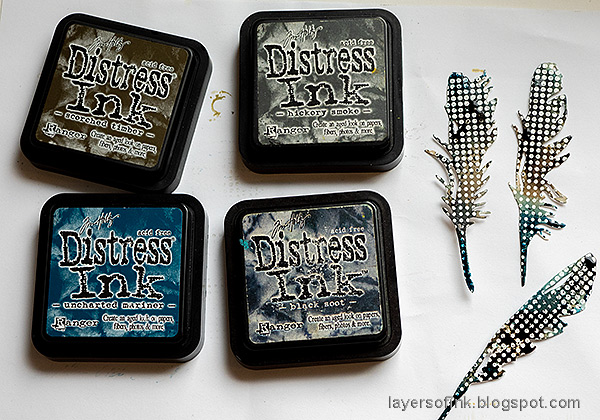
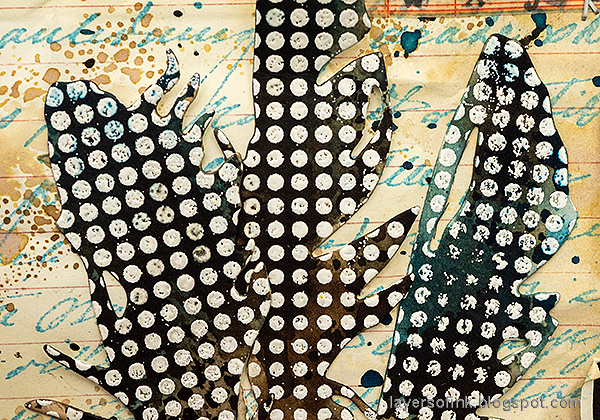
The feathers were white embossed with Simon Says Stamp Halftone Background (I forgot to take a photo of that step). Smear Distress Inks on a non-stick craft sheet, mist with water and press the feathers into the ink.

Layers of ink - Vintage Letter with feather pens card tutorial by Anna-Karin Evaldsson. Stamp with Simon Says Stamp Ledger Background.

I wanted a thin paper for the letter, similar to vintage letter papers and found a thin notebook paper that worked. I stamped it with Simon Says Stamp Ledger Paper background.

Layers of ink - Vintage Letter with feather pens card tutorial by Anna-Karin Evaldsson. Stamp with Simon Says Stamp Old Letter and Cobalt ink.

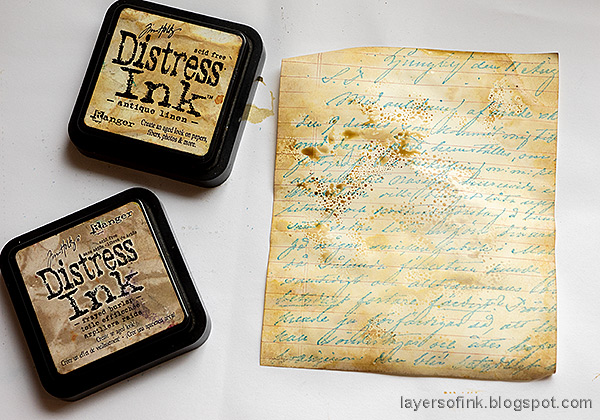
Next it was stamped with Simon Says Stamp Old Letter, using Archival Ink Cobalt. This is one of my oldest ink pads, but it is still working perfectly.

Layers of ink - Vintage Letter with feather pens card tutorial by Anna-Karin Evaldsson. Ink with Distress Ink.

The paper was inked with Antique Linen and Frayed Burlap. 

Layers of ink - Vintage Letter with feather pens card tutorial by Anna-Karin Evaldsson. Ink with Distress Ink.

Then I splattered Uncharted Mariner and Scorched Timber on the letter. 

Layers of ink - Vintage Letter with feather pens card tutorial by Anna-Karin Evaldsson. Assemble the card.

I tucked a second piece of notebook paper behind the letter to make it appear as if the letter had to pages. The sentiment comes from Simon Says Stamp Beautiful Butterflies.

Layers of ink - Vintage Letter with feather pens card tutorial by Anna-Karin Evaldsson. Add vintage buttons.

I added a few pieces of Design Tape Trims to the background.

Layers of ink - Vintage Letter with feather pens card tutorial by Anna-Karin Evaldsson. Ink with Distress Ink.

The feathers have interesting shades of brown, grey and blue, together with the characteristic dots on guinea fowl feathers.

Layers of ink - Vintage Letter with feather pens card tutorial by Anna-Karin Evaldsson.

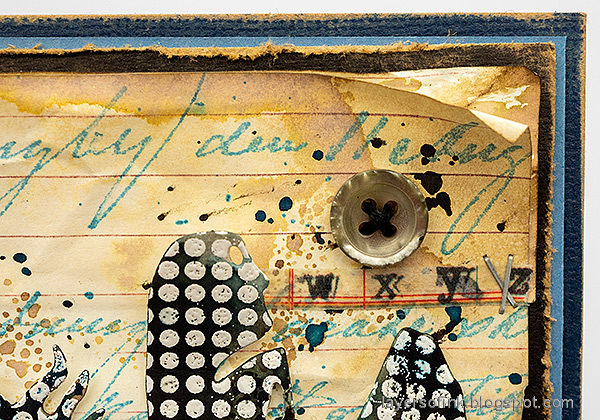
I stitched some old buttons to the card.

Layers of ink - Vintage Letter with feather pens card tutorial by Anna-Karin Evaldsson.

The tips of the feathers were colored with alcohol ink and I also dropped alcohol ink on the card to make it look like ink splotches. Hello friend was stamped with Tim Holtz Crazy Talk set.

Layers of ink - Vintage Letter with feather pens card tutorial by Anna-Karin Evaldsson.

I added three pieces of twine to the card too.

I hope you will join us this week in our Fur or feathers challenge. You have a chance to win a $25 gift voucher to do some fun shopping at Simon Says Stamp. You have until Monday 8am Ohio time. 1pm UK time, 2 pm CET to join in.


Do you use Instagram? If so please add #sssmchallenge so we can see your entries there too.


Thank you so much for stopping by here today! 

Happy crafting!

Anna-Karin

Supplies:

* Please note: the links are affiliate links, for which I receive a small percentage of sales generated by the link, at no extra cost to you.


Friday, February 23, 2024

Wood planks background

 Hi friends! Today I have a card to share with a fun wood plank background.

Please note: this post has affiliate links, for which I receive a small percentage of sales generated by the link, at no extra cost to you.

Layers of ink - Wood Planks Background Tutorial by Anna-Karin Evaldsson.

I wanted to make something like a worn wooden fence or a worn wood plank shed and used an embossing folder together with Distress Ink and gold wax. The flowers were die cut and colored with Distress Ink.

Layers of ink - Wood Planks Background Tutorial by Anna-Karin Evaldsson. Emboss the wood plank folder.

Start by applying shades of brown Distress Ink to a non-stick craft sheet, mist with water and press watercolor paper into the ink. Emboss in Simon Says Stamp Wooden Planks folder.

Layers of ink - Wood Planks Background Tutorial by Anna-Karin Evaldsson. Ink with Distress Ink.

When the ink is dry, add more ink with an ink blending tool. This step will increase the woodgrain texture.

Layers of ink - Wood Planks Background Tutorial by Anna-Karin Evaldsson.

Cut the planks and distress the edges. 

Layers of ink - Wood Planks Background Tutorial by Anna-Karin Evaldsson. Add Sizzix Luster Wax.

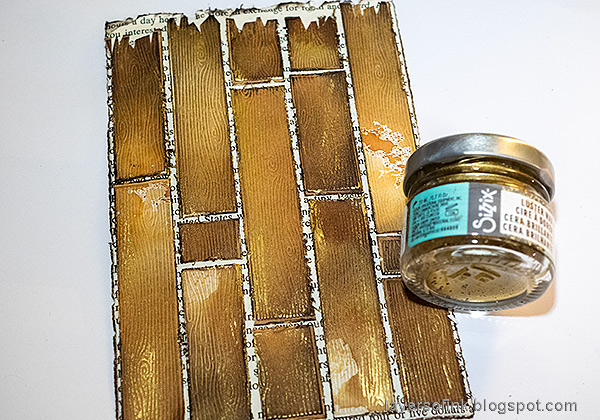
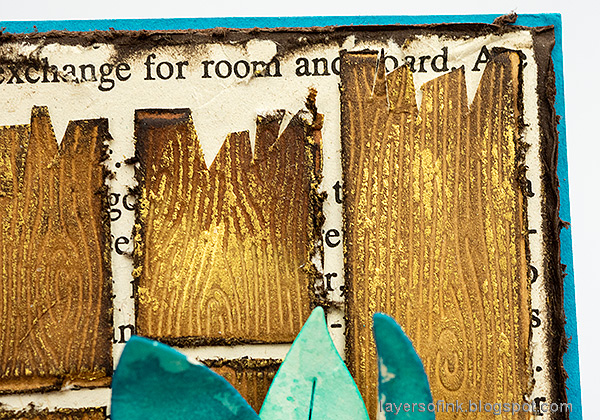
Glue the planks to old book paper. Cut the top planks with a pair of scissors before gluing, to give the image of broken planks. Apply Sizzix Luster Wax Gold here and there.

Layers of ink - Wood Planks Background Tutorial by Anna-Karin Evaldsson. Die cut Simon Says Stamp Fresh Cut Petal.

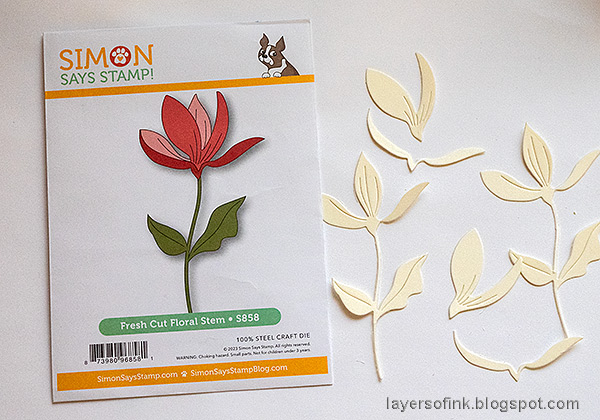
Die cut Simon Says Stamp Fresh Cut Floral Stem from Ranger heavystock paper.

Layers of ink - Wood Planks Background Tutorial by Anna-Karin Evaldsson. Ink with Distress Ink.

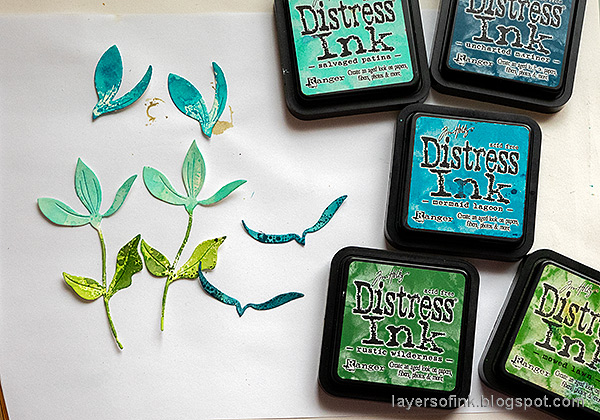
Apply Distress Ink to a non-stick craft sheet and mist with water. Press the flowers into the ink. Let dry and repeat until you are happy with how they look. Make the smaller petals darker.

Layers of ink - Wood Planks Background Tutorial by Anna-Karin Evaldsson.

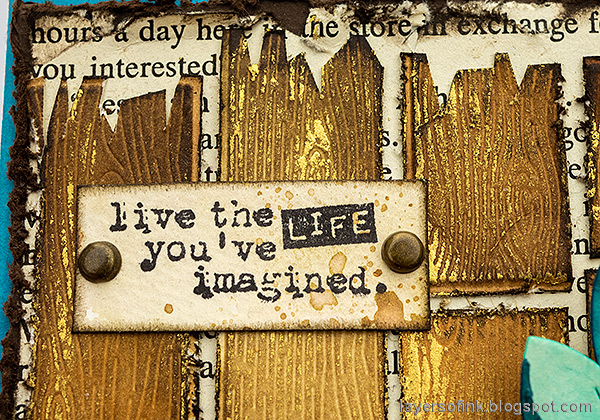
I wanted it to look like someone had nailed the sentiment to the planks. The sentiment comes from Tim Holtz Odds & Ends and was stamped on scrap inky paper. Adhere with Tim's brads.

Layers of ink - Wood Planks Background Tutorial by Anna-Karin Evaldsson. Dimensional flower.

Shape the flowers with a shaping kit before assembling, for extra dimension.

Layers of ink - Wood Planks Background Tutorial by Anna-Karin Evaldsson.

Glue the two flowers to the background. 

Layers of ink - Wood Planks Background Tutorial by Anna-Karin Evaldsson.

I used mummy cloth / cheese cloth, lace trim, a twine ribbon and Small Talk sticker for the base of the card, with just a sprinkle of blue sequins. The latter were added so that the color blue would appear elsewhere on the card, not just in the flowers.

Layers of ink - Wood Planks Background Tutorial by Anna-Karin Evaldsson.

The Luster Wax adds a nice shine to the wood planks. 


Thank you so much for stopping by here today! 


Anna-Karin

Supplies:

* Please note: the links are affiliate links, for which I receive a small percentage of sales generated by the link, at no extra cost to you.


Monday, February 19, 2024

The Neighbourhood Art Journal

Hello stampers! We are in the middle of a birthday period now, with my eldest having celebrated his birthday this weekend. 

Please note: this post has affiliate links, for which I receive a small percentage of sales generated by the link, at no extra cost to you.


We have a Not a Card theme this week at the Simon Says Stamp Monday Challenge Blog. I hope you will join us! Don't miss the stunning project project by our February guest designer Cassie Lynch.


Layers of ink - The Neighborhood Art Journal Tutorial by Anna-Karin Evaldsson.

I made an art journal page this year, celebrating homes and neighborhoods. Apart from the numbers stickers, this is a one layer page. It was done on a grid page in my Dylusions Square Ledger Journal and using the Simon Says Stamp Village stencil set to create the neighborhood scene.

Layers of ink - The Neighborhood Art Journal Tutorial by Anna-Karin Evaldsson. ink with distress ink.

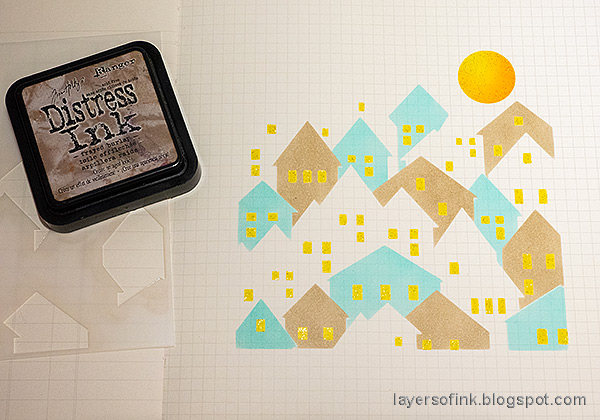
I started with the stencil with the windows and the moon/sun. The windows were inked with Mustard Seed and the moon/sun with Mustard Seed and a little Ripe Persimmon. I used Tim's new Tiny Blending Tool for the inking. The stencil was adhered with Simon Says Stamp Very Very Low Tack Tape. Leave the stencil in place and apply Sparkle Texture Paste over it with a palette knife. This step gives a sparkly look, but most importantly, will also protect the yellow areas from the subsequent inking.

Layers of ink - The Neighborhood Art Journal Tutorial by Anna-Karin Evaldsson.

Continue with one of the house stencils. The grid pattern makes it easy to line the stencils up. Again, I used the Very Very Low Tack Tape to keep in in place. Ink with Salvaged Patina. 

Layers of ink - The Neighborhood Art Journal Tutorial by Anna-Karin Evaldsson. Ink with Frayed Burlap.

Next, continue with Frayed Burlap. As you can see the Sparkle Paste resists the ink.

Layers of ink - The Neighborhood Art Journal Tutorial by Anna-Karin Evaldsson. Ink with Uncharted Mariner.

Next, I used Uncharted Mariner. 

Layers of ink - The Neighborhood Art Journal Tutorial by Anna-Karin Evaldsson.

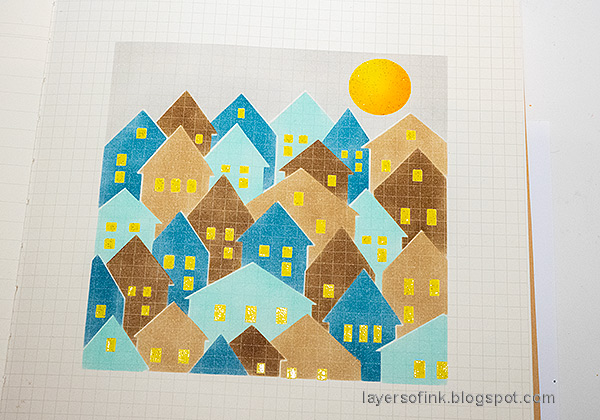
For the last houses, I used Ground Espresso. Aren't the Tiny Blending Tools cute?

Layers of ink - The Neighborhood Art Journal Tutorial by Anna-Karin Evaldsson. Ink the sky with Lost Shadow.

I wasn't sure what color to use for the sky. I imagined this to be very early in the morning and didn't want a too dark sky. Use the stencil to mask out the top buildings. Then create a frame with Very Very Low Tack tape to protect the background. Ink with Lost Shadow. 

Layers of ink - The Neighborhood Art Journal Tutorial by Anna-Karin Evaldsson.

Remove the tape.

Layers of ink - The Neighborhood Art Journal Tutorial by Anna-Karin Evaldsson.

I added a few dots with a white gel pen, but decided to leave the houses as they were, without adding too many details. 

Layers of ink - The Neighborhood Art Journal Tutorial by Anna-Karin Evaldsson. Tim Holtz Worn Text.

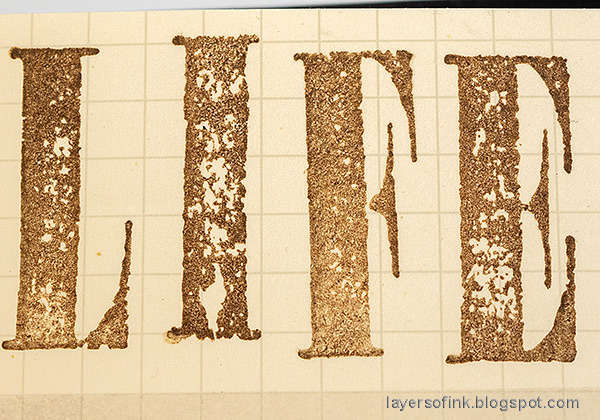
The title was stamped with Tim Holtz Worn Text and Potting Soil Archival Ink.

Layers of ink - The Neighborhood Art Journal Tutorial by Anna-Karin Evaldsson.

I stamped a frame around the village with words and sentiments. They come from Tim Holtz Tiny Text and I placed them out and moved them around before deciding where to stamp each sentiment. The corners around the stamped edges were drawn with a brown Tombow pen.

Layers of ink - The Neighborhood Art Journal Tutorial by Anna-Karin Evaldsson. Add number stickers.

I really like how the ledger grid pattern is visible through the inking, and particularly so on the darker houses. The print ink must create a resist effect.

Layers of ink - The Neighborhood Art Journal Tutorial by Anna-Karin Evaldsson.

I also added a few Clippings Stickers to the background.

Layers of ink - The Neighborhood Art Journal Tutorial by Anna-Karin Evaldsson.

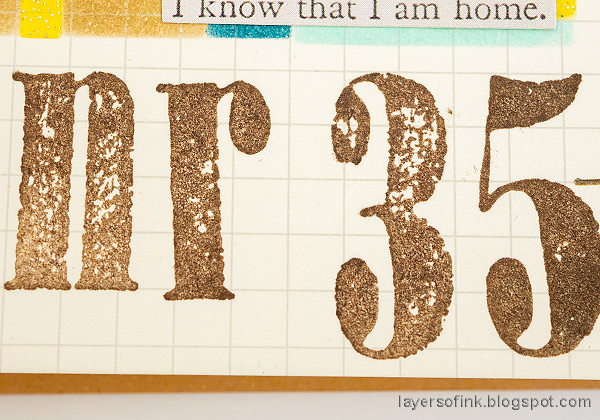
More Worn Text stamping. I stamped and wrote some of the street numbers that I have lived at through the years.

Layers of ink - The Neighborhood Art Journal Tutorial by Anna-Karin Evaldsson.

Don't worry if the alignment of the stencils isn't perfect. My alignment was slightly off once, but that created a nice highlight at some of the houses.

Layers of ink - The Neighborhood Art Journal Tutorial by Anna-Karin Evaldsson.


I hope you will join us this week in our Not a Card challenge. You have a chance to win a $25 gift voucher to do some fun shopping at Simon Says Stamp. You have until Monday 8am Ohio time. 1pm UK time, 2 pm CET to join in.


Do you use Instagram? If so please add #sssmchallenge so we can see your entries there too.


Thank you so much for stopping by here today! 

Happy crafting!

Anna-Karin

Supplies:

* Please note: the links are affiliate links, for which I receive a small percentage of sales generated by the link, at no extra cost to you.