Pages

Monday, November 13, 2023

Thankful Gift Tags

Hello friends! It is a new week and in the middle of November we need some color and shine. 

Please note: this post has affiliate links, for which I receive a small percentage of sales generated by the link, at no extra cost to you.


Our theme this week at the Simon Says Stamp Monday Challenge Blog is Thanks/Thanksgiving. I hope you will join us! Don't miss the gorgeous project by Anita Rao who is our guest designer during November.  

Layers of ink - Thankful Gift Tags Tutorial by Anna-Karin Evaldsson.

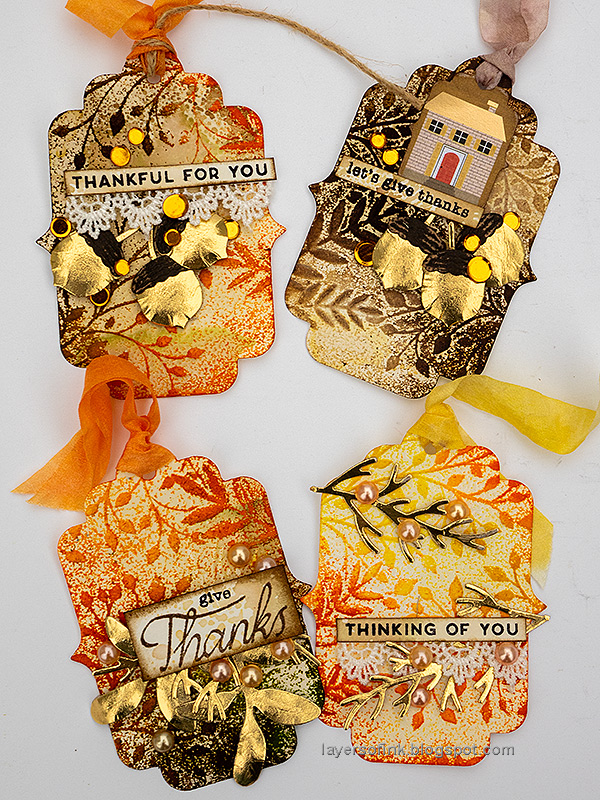
I made four gift tags this week, with a thanks/thankful theme. The backgrounds are both dry and heat embossed, creating a textured resist effect which works very well for autumn. I used bright and warm autumn colors and gold details. The Simon Says Stamp Label Tags and Wistful Leaves embossing folder are from the Cozy Autumn Hugs November Card Kit, but can also be bought separately. 

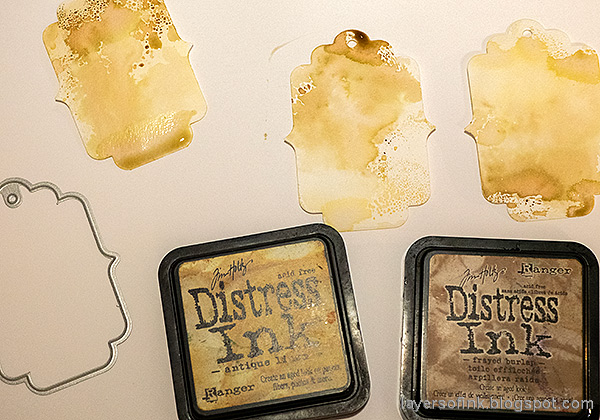
Layers of ink - Thankful Gift Tags Tutorial by Anna-Karin Evaldsson. Ink with Distress Ink.

Start by applying Distress Ink on a non-stick craft sheet, mist with water and press watercolor paper into the ink. Let dry and then die cut tags using the Simon Says Stamp Label Tags die. 

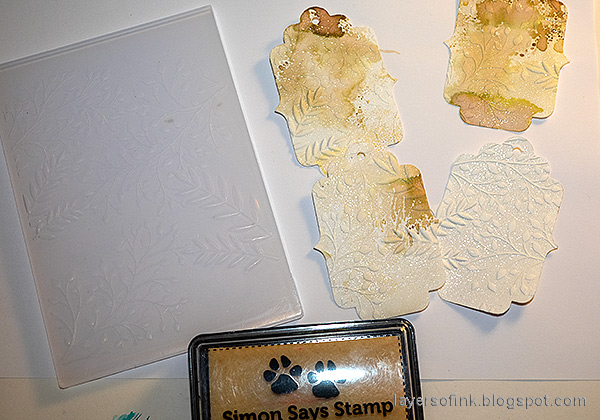
Layers of ink - Thankful Gift Tags Tutorial by Anna-Karin Evaldsson. Emboss in the Simon Says Stamp Wistful Leaves folder.

Apply embossing ink to the Simon Says Stamp Wistful Leaves folder and emboss the tags one at a time. Add more ink before embossing a new tag. Sprinkle with clear embossing powder, flick to remove some of the powder and melt. Always be careful when using a heat tool and do not touch the melted powder until it has cooled down completely. I placed one of the tags the wrong way around in the folder, so that tag has a white background.

Layers of ink - Thankful Gift Tags Tutorial by Anna-Karin Evaldsson. Mist with spray ink.

Mist the tags with Distress Spray Stains. 

Layers of ink - Thankful Gift Tags Tutorial by Anna-Karin Evaldsson.

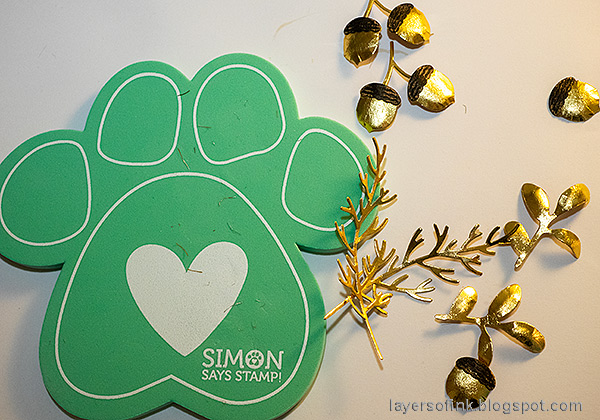
Die cut Simon Says Stamp Acorn Trio and Berry Stems from gold and brown kraft stock paper. Shape with a shape tool on Simon Says Stamp new Pawsitively Perfect Craft Pad.

Layers of ink - Thankful Gift Tags Tutorial by Anna-Karin Evaldsson.

Stamp sentiments on left-over inky paper and glue sentiments, gold elements, sequins and pearls to the tags.

Layers of ink - Thankful Gift Tags Tutorial by Anna-Karin Evaldsson. Branch tag-

This is the tag that I embossed the wrong way around, so that the embossing ink ended up on the side that had no Distress Ink. That's why this tag has a brighter look. 

Layers of ink - Thankful Gift Tags Tutorial by Anna-Karin Evaldsson. Branch tag. Add a gold branch.

I used golden branches from the Berry Stems set on this tag, combined with pearls.

Layers of ink - Thankful Gift Tags Tutorial by Anna-Karin Evaldsson. Add a sentiment and sequins.

The sentiment comes from the Simon Says Stamp Cozy Autumn Hugs set, also from the November Card Kit.

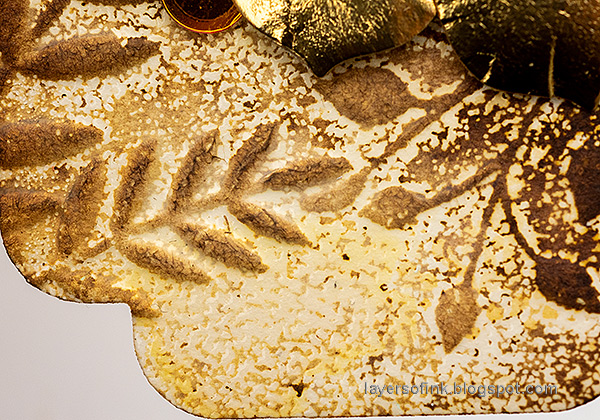
Layers of ink - Thankful Gift Tags Tutorial by Anna-Karin Evaldsson. Texture.

Since the background isn't completely covered with clear embossing powder, you get a whole lot of texture.

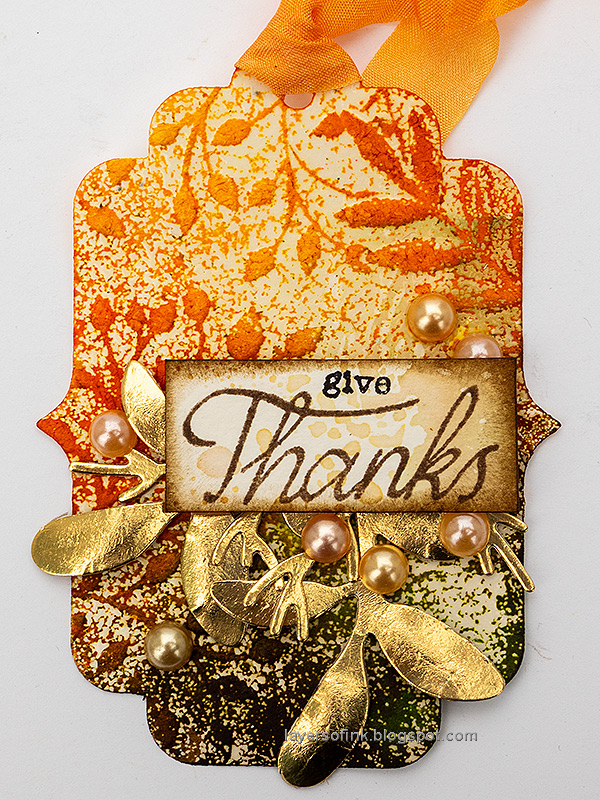
Layers of ink - Thankful Gift Tags Tutorial by Anna-Karin Evaldsson. Give thanks tag.

The second tag is orange at the top and brown/green at the bottom. 

Layers of ink - Thankful Gift Tags Tutorial by Anna-Karin Evaldsson. Give thanks tag. Add acorns and branches.

The sentiment is a mix words from Simon Says Stamp Real Leaves and Cozy Autumn Hugs. It was adhered with foam tape. I used a mix of leaves and branches. All the gold elements were die cut from Tim Holtz Metallic Kraft Stock.

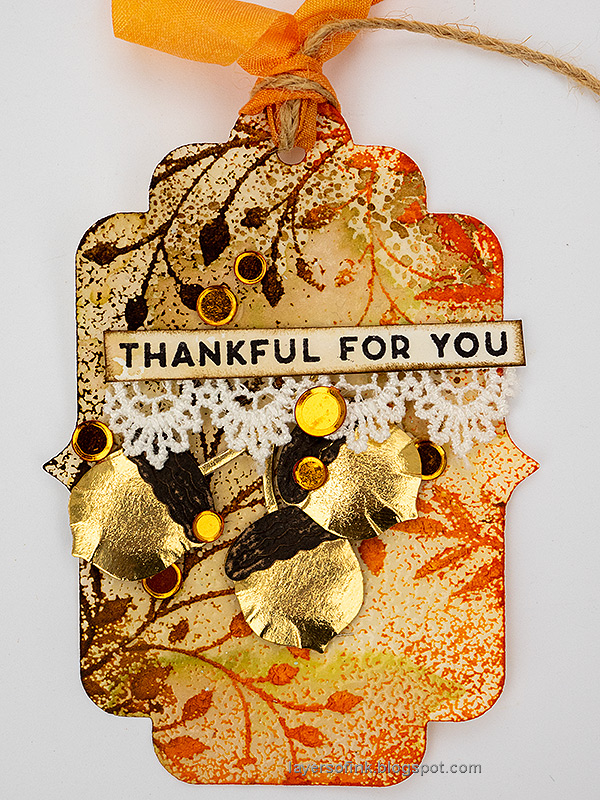
Layers of ink - Thankful Gift Tags Tutorial by Anna-Karin Evaldsson. Thankful tag.

The sentiment on the third tag also comes from Cozy Autumn Hugs. I also added a small piece of lace which I found on my desk.

Layers of ink - Thankful Gift Tags Tutorial by Anna-Karin Evaldsson. Lovely texture.

This part is my favorite of all the tags. I really like the combined texture of the ink in the background, the embossing powder and the ink spray.

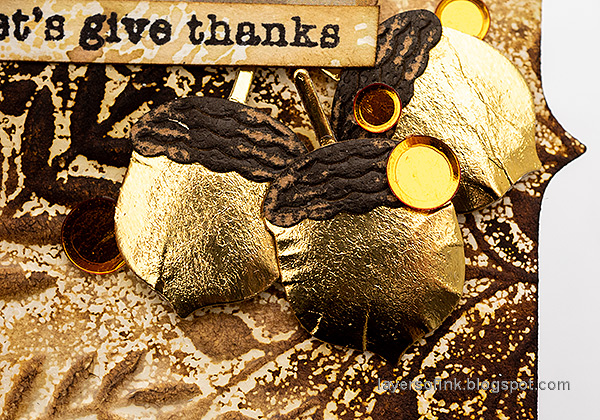
Layers of ink - Thankful Gift Tags Tutorial by Anna-Karin Evaldsson. Thankful tag. Paper acorns.

Giving the acorns some shape adds dimension and interest. Adhere them with foam tape.

Layers of ink - Thankful Gift Tags Tutorial by Anna-Karin Evaldsson. House tag.

The fourth tag has a small Label Tag die cut from the American Crafts Farmstead Harvest patterned paper, also from the Card Kit. The tag was misted only with shades of brown.

Layers of ink - Thankful Gift Tags Tutorial by Anna-Karin Evaldsson. Housetag.

I sanded and inked the edges of the small tag. The ribbons were all dyed with Distress Ink.

Layers of ink - Thankful Gift Tags Tutorial by Anna-Karin Evaldsson. Housetag. More acorns.

Sand the top of the acorns slightly to reveal the kraft core.

Layers of ink - Thankful Gift Tags Tutorial by Anna-Karin Evaldsson. Housetag.

You can use this technique for other projects too, such as the entire background of a card.

Layers of ink - Thankful Gift Tags Tutorial by Anna-Karin Evaldsson.

I hope you will join us this week in our Thanksgiving/Thanks challenge. You have a chance to win a $25 gift voucher to do some fun shopping at Simon Says Stamp. You have until Monday 8am Ohio time. 1pm UK time, 2 pm CET to join in.


Do you use Instagram? If so please add #sssmchallenge so we can see your entries there too.


Thank you so much for stopping by here today! 

Happy crafting!

Anna-Karin

Supplies:

* Please note: the links are affiliate links, for which I receive a small percentage of sales generated by the link, at no extra cost to you.


2 comments:

  1. Gorgeous designs! All my favorite fall elements! These just feel so homey and warm! Thank you so much for sharing and inspiring!

    ReplyDelete
  2. These are amazing. Love the colors you used, the fall elements and the techniques you used. They look like a lot of fun to create. Very pretty.

    ReplyDelete

Thank you so much for leaving a comment! Happy Crafting!