Pages

Sunday, July 31, 2022

Mosaic Heart Tutorial

Hi friends! I hope you are well! I have a tag to share with a paper mosaic technique. 

Please note: this post has affiliate links, for which I receive a small percentage of sales generated by the link, at no extra cost to you.

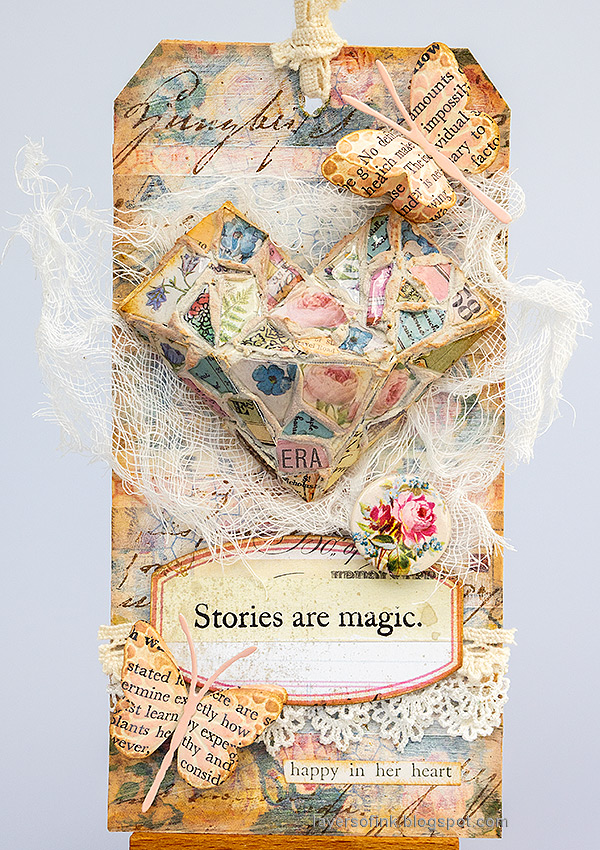
Layers of ink - Paper Mosaic Heart Tutorial by Anna-Karin Evaldsson.

I made a heart, but you can use the technique for different types of projects and surfaces. If you use larger pieces of paper it is easy to cover an entire background with mosaic. This is also a perfect use for small paper scraps. 

Layers of ink - Paper Mosaic Heart Tutorial by Anna-Karin Evaldsson. Die cut Tim Holtz Faceted Heart.

Die cut Tim Holtz Faceted Heart from heavystock paper and assemble. 

Layers of ink - Paper Mosaic Heart Tutorial by Anna-Karin Evaldsson. Apply paper mosaic pieces.

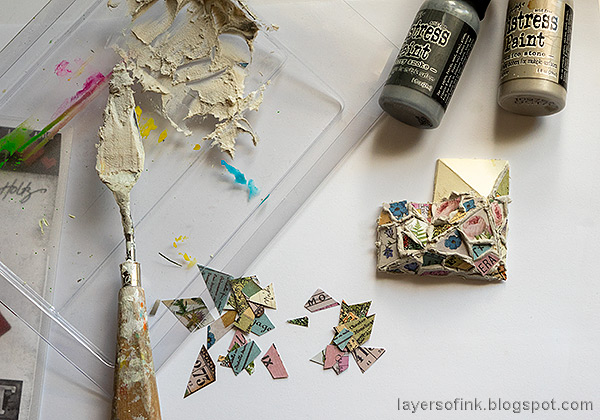
Mix a little Pumice Stone and Hickory Smoke paint into Distress Texture Paste to create grout. Cut paper into small pieces. I used Tim Holtz Pocket Cards and Journal Cards. Work one area at a time. Apply paste with a palette knife and then press the paper pieces into the grout. You might need to cut some of them so that they fit better. 

Layers of ink - Paper Mosaic Heart Tutorial by Anna-Karin Evaldsson.

Continue until you have covered the whole heart. Let dry.

Layers of ink - Paper Mosaic Heart Tutorial by Anna-Karin Evaldsson.

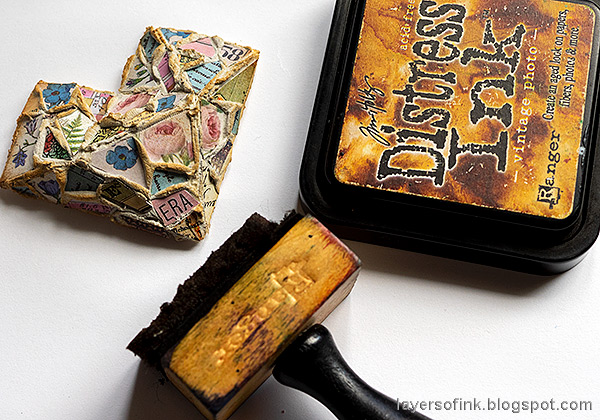
If you want to, you can ink the grout slightly.

Layers of ink - Paper Mosaic Heart Tutorial by Anna-Karin Evaldsson.

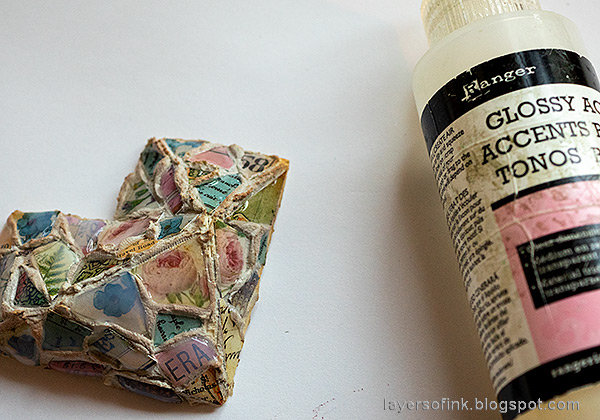
Next, add a relatively thick layer of Glossy Accents to all the paper pieces. This gives them a raised shiny surface and makes the patterns more visible. I worked one area at a time and left to dry for a while at an angle so that the Glossy Accents wouldn't be too uneven.

Layers of ink - Paper Mosaic Heart Tutorial by Anna-Karin Evaldsson. Add Tim Holtz design tape to the background.

Cover the background with Tim Holtz Design Tape. I added a layer of matte medium first and then another one on top, to make sure they were stuck.

Layers of ink - Paper Mosaic Heart Tutorial by Anna-Karin Evaldsson.

White wash with gesso.

Layers of ink - Paper Mosaic Heart Tutorial by Anna-Karin Evaldsson.

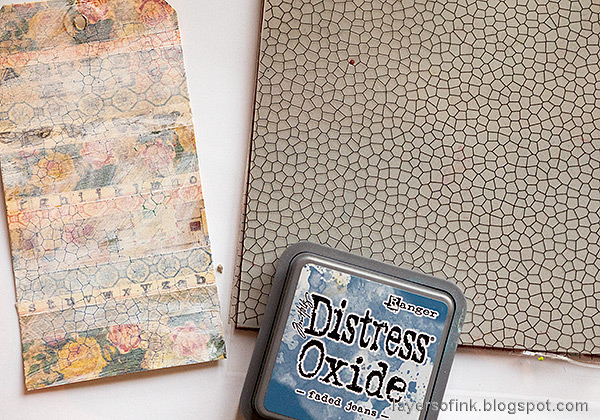
Stamp Simon Says Stamp Stain Glass Background here and there with Faded Jeans Oxide Ink.

Layers of ink - Paper Mosaic Heart Tutorial by Anna-Karin Evaldsson.

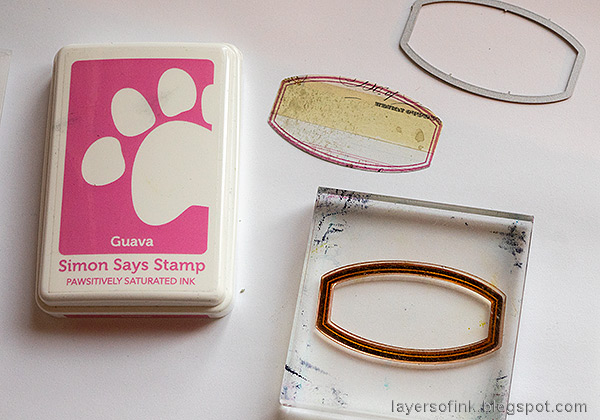
Stamp a label from Simon Says Stamp Mixed Labels with Guava Pawsitively Saturated ink on a piece of Journal Card and die cut with the coordinating die.

Layers of ink - Paper Mosaic Heart Tutorial by Anna-Karin Evaldsson. Die cut and emboss Simon Says Stamp Graceful Butterflies.

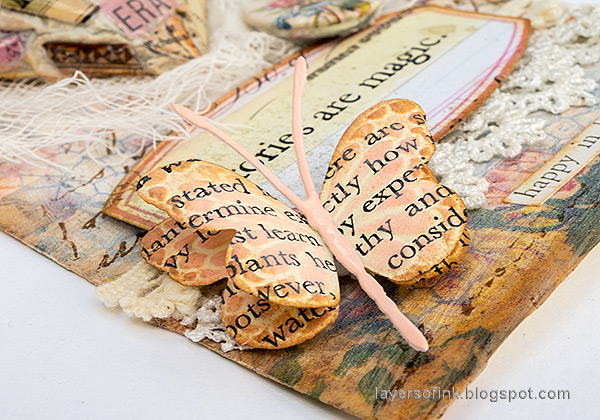
Die cut Simon Says Stamp Graceful Butterfly from old book paper and their bodies from glossy cardstock. The glossy cardstock had been inked with Saltwater Taffy Distress Ink. Emboss in the coordinating folder.

Layers of ink - Paper Mosaic Heart Tutorial by Anna-Karin Evaldsson.

Ink the butterflies with Taffy Saltwater Distress Oxide Ink and a little Vintage Photo ink. Shape the wings and glue together.

Layers of ink - Paper Mosaic Heart Tutorial by Anna-Karin Evaldsson.

I also stamped the background with Simon Says Stamp Old Letter and Potting Soil Archival Ink here and there.

Layers of ink - Paper Mosaic Heart Tutorial by Anna-Karin Evaldsson.

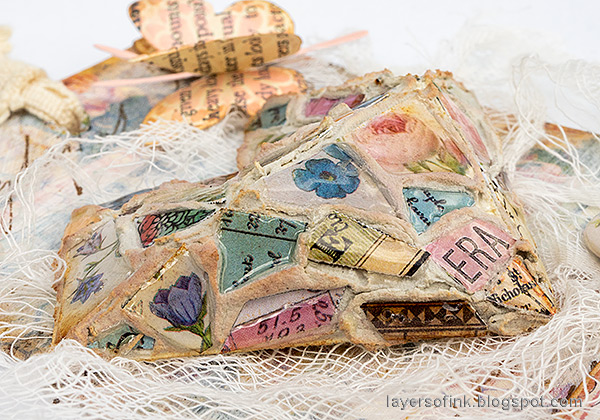
The glossy mosaic pieces look almost like glass or tiles and contrast nicely with the matte grout.

Layers of ink - Paper Mosaic Heart Tutorial by Anna-Karin Evaldsson.

I cut some of the pieces of paper to make sure that small images would show well and here and there you will find a word.

Layers of ink - Paper Mosaic Heart Tutorial by Anna-Karin Evaldsson.

Stamp a sentiment from Simon Says Stamp Mixed Labels. Add a few pieces of lace trim to the background and a Tim Holtz Mini Flair. Adhere the label with Simon Says Stamp 3D Foam Squares.

Layers of ink - Paper Mosaic Heart Tutorial by Anna-Karin Evaldsson.

I glued cheese cloth underneath the heart to separate it better from the background. 

Layers of ink - Paper Mosaic Heart Tutorial by Anna-Karin Evaldsson.

The butterflies were also adhered with foam squares. This Design Tape background is fun to do, and for more inspiration check out my Tape Mixed Media Background.


Thank you so much for taking the time to stop by here today! 

Happy crafting!

Anna-Karin

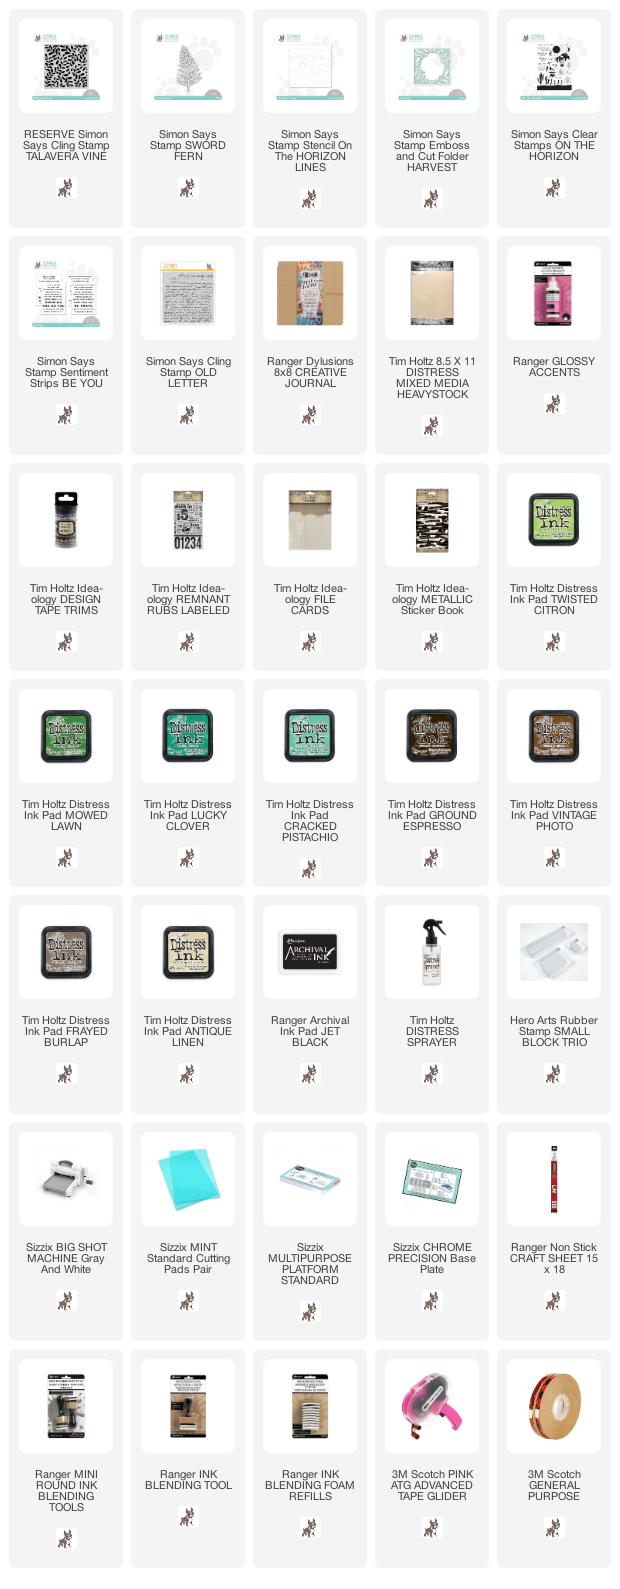
Supplies:

* Please note: the links are affiliate links, for which I receive a small percentage of sales generated by the link, at no extra cost to you.
Friday, July 29, 2022

Scenic Stamping Summer ATC Tutorial

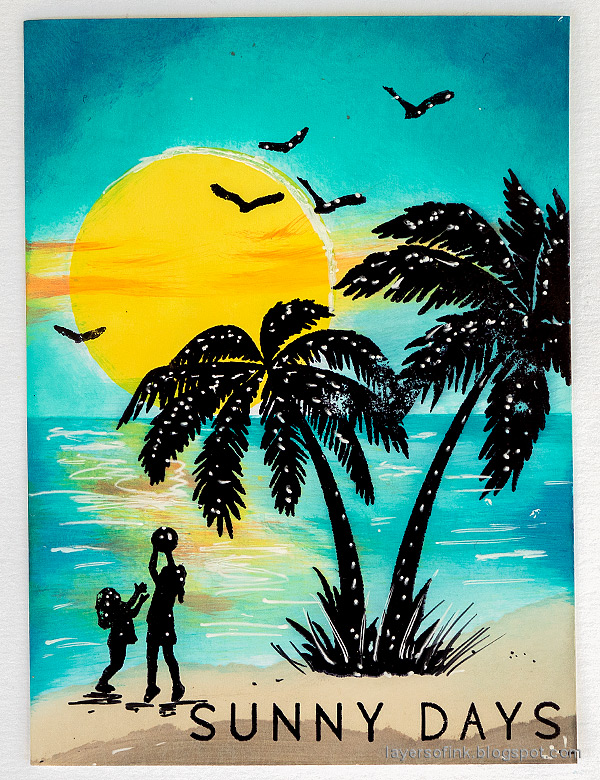
Hi friends! Today I have three Artist Trading Cards to share, with vibrant summer scenes. They are quick and easy to do.

Please note: this post has affiliate links, for which I receive a small percentage of sales generated by the link, at no extra cost to you.

Layers of ink - Scenic Stamping Summer ATC Tutorial by Anna-Karin Evaldsson.

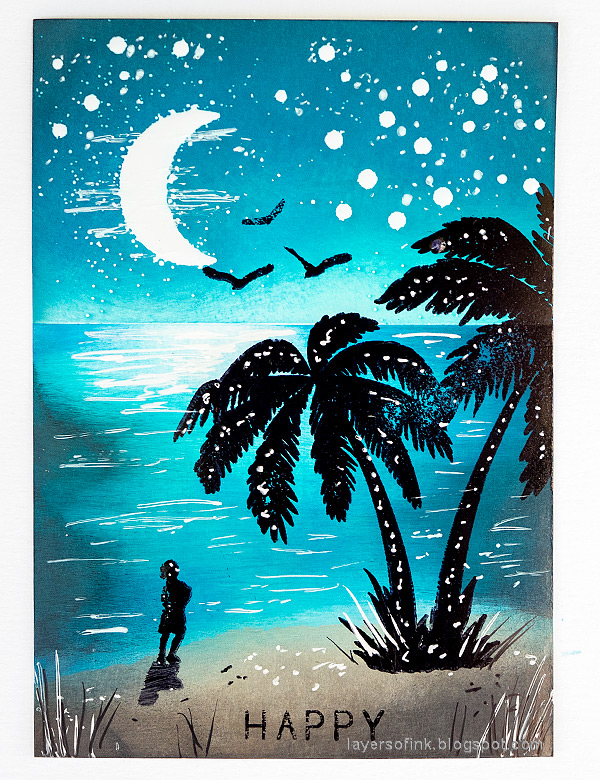
These are the three cards, two day-time scenes and one night-time scene. They are all done on glossy cardstock. I actually almost tossed the card to the left since I had pressed a bit too hard when stamping the palm trees. My son thought I was being too meticulous, so I listened and decided to continue with that card too (even though I still prefer the palm trees on the right-hand card). The left-hand and the right-hand cards were done in different orders, to show you that both ways work.

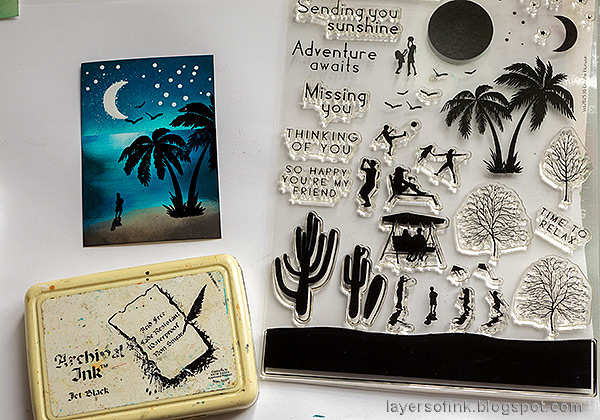
I used stamps and Very Low Tack Tape from Simon Says Stamp new Dream Big release.

Layers of ink - Scenic Stamping Summer ATC Tutorial by Anna-Karin Evaldsson.

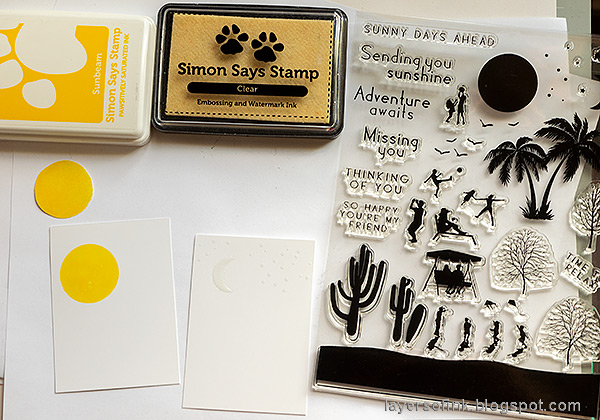
Cut gloss cardstock to 2.5 x 3.5 in. Start by stamping the sun from Simon Says Stamp On The Horizon with Simon Says Stamp Pawsitively Sunbeam ink and the moon and stars with embossing ink. Clear emboss the latter. Stamp the sun on masking paper too and cut out.

Layers of ink - Scenic Stamping Summer ATC Tutorial by Anna-Karin Evaldsson. Stamp on glossy cardstock.

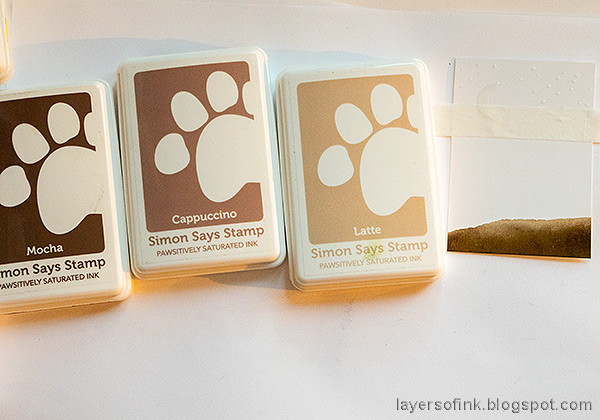
The Very Very Low Tack Tape is perfect for masking. It won't stick to your paper as normal masking tape might do. I tore a piece of the beach and added another piece for the horizon line. The masking tape sun is adhered above the sun.

Layers of ink - Scenic Stamping Summer ATC Tutorial by Anna-Karin Evaldsson. Ink the sand.

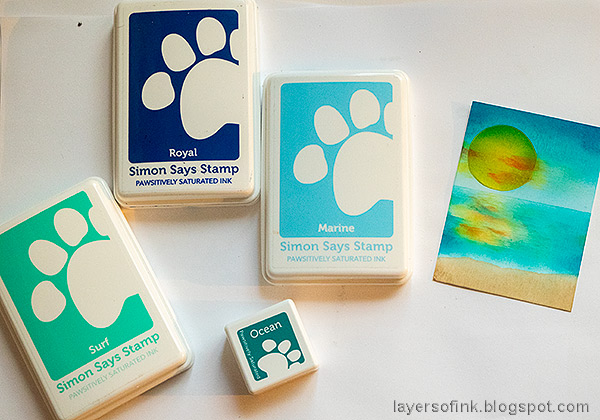
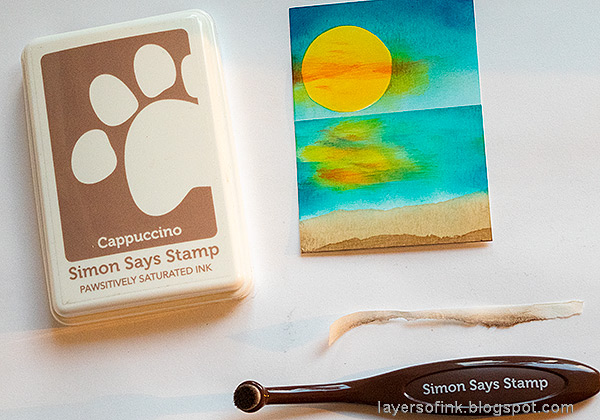
Ink the sand with Simon Says Stamp blending brushes and Latte and Cappuccino inks.

Layers of ink - Scenic Stamping Summer ATC Tutorial by Anna-Karin Evaldsson. Ink the sun rays.

Ink the reflection of the sun in the water. The Detail Round Blending Brushes work great for this. 

Layers of ink - Scenic Stamping Summer ATC Tutorial by Anna-Karin Evaldsson. Ink the sea.

Ink the sea with Marine, Surf, and Ocean Pawsitively Saturated ink.

Layers of ink - Scenic Stamping Summer ATC Tutorial by Anna-Karin Evaldsson.

Continue with the sky, using tape to mask the horizon and the sea.

Layers of ink - Scenic Stamping Summer ATC Tutorial by Anna-Karin Evaldsson.

Remove the sun mask and add some ink over the sun. I didn't cut the circle mask for the sun carefully enough and the sun doesn't look perfectly round because of that. I used left-over torn tape to darken an area of the beach.

Layers of ink - Scenic Stamping Summer ATC Tutorial by Anna-Karin Evaldsson.

Next the night-time card. The beach was done in the same way on the night-time card, making it darker by also adding Mocha ink.

Layers of ink - Scenic Stamping Summer ATC Tutorial by Anna-Karin Evaldsson. Ink the sea.

Mask the sky with the Very Very Low Tack Tape and ink the sea.

Layers of ink - Scenic Stamping Summer ATC Tutorial by Anna-Karin Evaldsson.

Ink the sky. The embossing will resist the ink.

Layers of ink - Scenic Stamping Summer ATC Tutorial by Anna-Karin Evaldsson. Stamp the palm tree and images.

Stamp the palm tree, child and birds from On The Horizon with Jet Black ink.

Layers of ink - Scenic Stamping Summer ATC Tutorial by Anna-Karin Evaldsson. Stamp the palm tree and images. Add details with a white gel pen.

Add stars, grass and highlights with white gel pens.

Layers of ink - Scenic Stamping Summer ATC Tutorial by Anna-Karin Evaldsson. Stamp the trees.

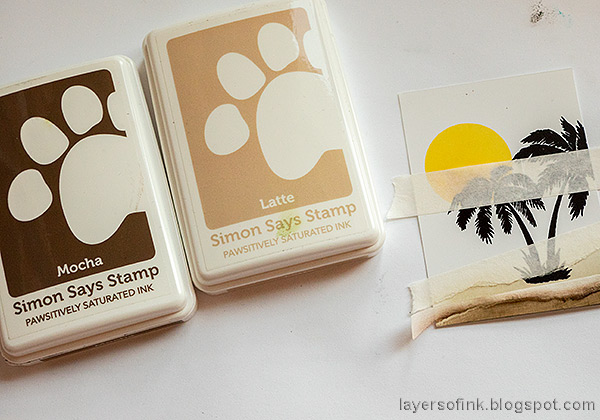
The second day-time scene was done in a slightly different order. Start by stamping the sun and the palm tree from On the Horizon. Sometimes it is easier to position the main stamps before inking.

Layers of ink - Scenic Stamping Summer ATC Tutorial by Anna-Karin Evaldsson. Stamp the palm tree and images.

Add Very Very Low Tack Tape as before. Ink the sand. 

Layers of ink - Scenic Stamping Summer ATC Tutorial by Anna-Karin Evaldsson. Stamp the palm tree and images.

Ink reflections in the water.

Layers of ink - Scenic Stamping Summer ATC Tutorial by Anna-Karin Evaldsson. Stamp the palm tree and images.

And next comes the sea.

Layers of ink - Scenic Stamping Summer ATC Tutorial by Anna-Karin Evaldsson. Stamp the palm tree and images.

Add ink to the sun. I didn't mask the sun here (the mask had gone missing on my desk).

Layers of ink - Scenic Stamping Summer ATC Tutorial by Anna-Karin Evaldsson. Stamp the palm tree and images. Add details with a white gel pen.

Continue in the same way as before and finish the scene.

Layers of ink - Scenic Stamping Summer ATC Tutorial by Anna-Karin Evaldsson.

I added white highlights and details to the day-time cards too.

Layers of ink - Scenic Stamping Summer ATC Tutorial by Anna-Karin Evaldsson.

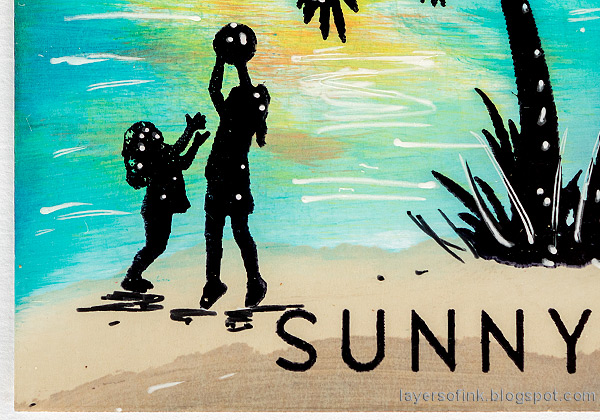
A black pen was used for the shadows and a few dots here and there.

Layers of ink - Scenic Stamping Summer ATC Tutorial by Anna-Karin Evaldsson.

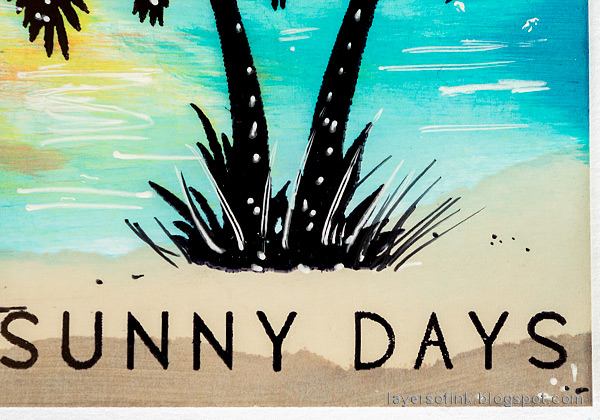
Stamp a sentiment from On The Horizon in the sand. I used the Very Very Low Tack tape to mask out the word 'ahead' when stamping the sentiment.

Layers of ink - Scenic Stamping Summer ATC Tutorial by Anna-Karin Evaldsson.

The card with the slightly smudged palm tree. 

Layers of ink - Scenic Stamping Summer ATC Tutorial by Anna-Karin Evaldsson.

Dye ink looks so vibrant on glossy cardstock and the white scribbles add life to the water.

Layers of ink - Scenic Stamping Summer ATC Tutorial by Anna-Karin Evaldsson.

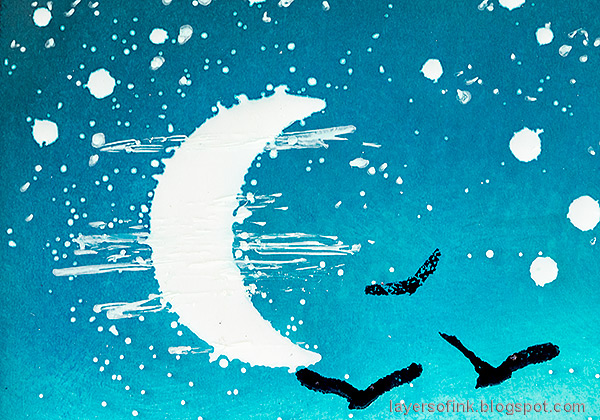
The night-time scene is my favorite, partly since the black stamping blends in so well. I wiped off the ink from the shadow on the stamp of the child before stamping, so that it wouldn't be as solid as the child herself.

Layers of ink - Scenic Stamping Summer ATC Tutorial by Anna-Karin Evaldsson.

The small dots around the moon are from stray embossing powder. I wish there had been even more of that. 

Layers of ink - Scenic Stamping Summer ATC Tutorial by Anna-Karin Evaldsson.

The white scribbles add light to the moonlit areas of the sea.


Thank you so much for stopping by here today! Have a lovely day!

Happy crafting!

Anna-Karin

Supplies:

* Please note: the links are affiliate links, for which I receive a small percentage of sales generated by the link, at no extra cost to you.
Wednesday, July 27, 2022

Greenery Art Journal Page

Hi friends! Today I have an art journal page to share made with products from the newest Simon Says Stamp release which is called Dream Big.

Please note: this post has affiliate links, for which I receive a small percentage of sales generated by the link, at no extra cost to you.

Layers of ink - Greenery Art Journal Page Tutorial by Anna-Karin Evaldsson.

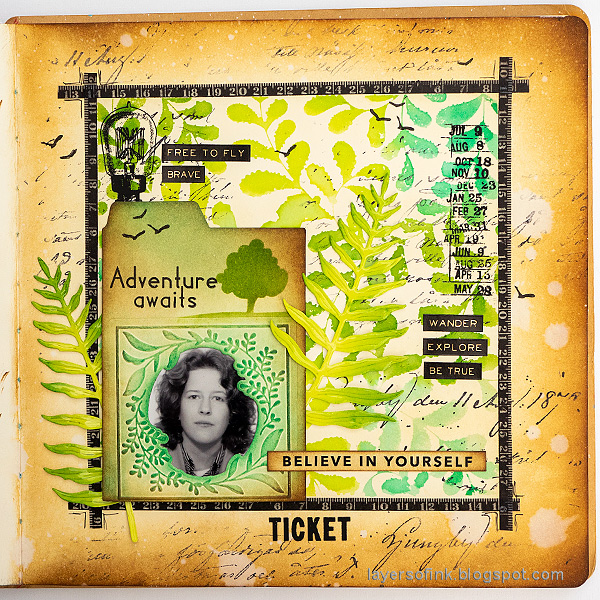
I made a square art journal page in my 8 x8 Dylusions journal, inspired by the idea of using the new Simon Says Stamp Harvest Emboss and Cut folder to cut a frame for a photo. I had this teenage photobooth photo on my desk and thought it would be fun to use. 

Layers of ink - Greenery Art Journal Page Tutorial by Anna-Karin Evaldsson.

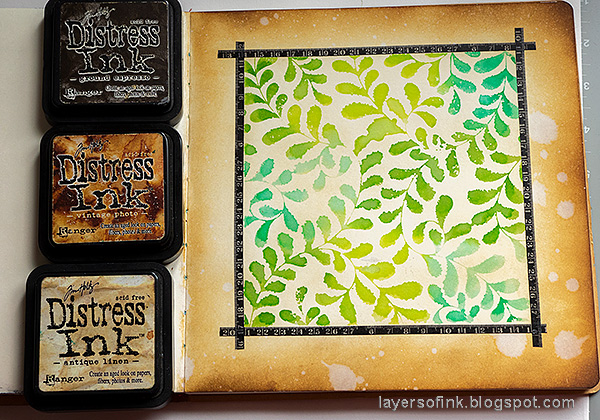
Ink the pretty Talavera Vine background stamp with shades of green Distress Ink. Mist with water and stamp on the page.

Layers of ink - Greenery Art Journal Page Tutorial by Anna-Karin Evaldsson. Ink with Distress Ink.

Add a frame with Tim Holtz Design Tape Trims and ink around it. Splatter some water on the ink. I covered up the center part with a printer paper while splattering.

Layers of ink - Greenery Art Journal Page Tutorial by Anna-Karin Evaldsson. Stamp with Simon Says Stamp Old Letter.

When dry, stamp here and there with Simon Says Stamp Old Letter Background.

Layers of ink - Greenery Art Journal Page Tutorial by Anna-Karin Evaldsson.

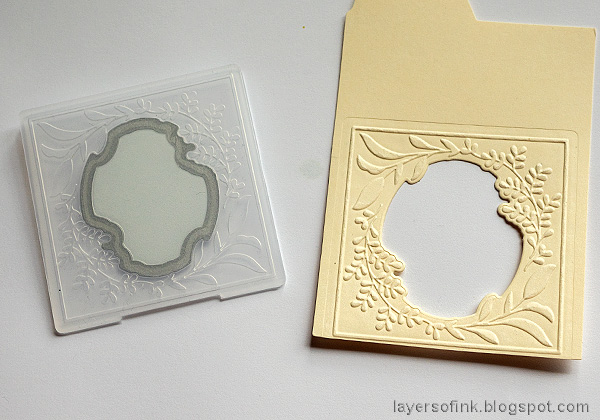
The new cut and emboss folders are such fun. You cut and emboss in one go. I die cut a window from a Tim Holtz File Card with the Harvest cut and emboss folder.

Layers of ink - Greenery Art Journal Page Tutorial by Anna-Karin Evaldsson.

Ink the card with Distress Inks.

Layers of ink - Greenery Art Journal Page Tutorial by Anna-Karin Evaldsson.

Tuck the folder into the Simon Says Stamp Horizon Lines stencil. This is such a clever stencil! Ink the tree and a small area of grass.

Layers of ink - Greenery Art Journal Page Tutorial by Anna-Karin Evaldsson.

Die cut the Sword Fern from Heavystock paper.

Layers of ink - Greenery Art Journal Page Tutorial by Anna-Karin Evaldsson.

Ink with Distress Ink.

Layers of ink - Greenery Art Journal Page Tutorial by Anna-Karin Evaldsson. Coat with Glossy Accents.

Coat with Glossy Accents.

Layers of ink - Greenery Art Journal Page Tutorial by Anna-Karin Evaldsson.

The birds were stamped with the Simon Says Stamp On the Horizon set. I also added some Tim Holtz Labeled Remnant Rubs.

Layers of ink - Greenery Art Journal Page Tutorial by Anna-Karin Evaldsson.

I added extra sentiments with Tim Holtz Metallic Stickers.

Layers of ink - Greenery Art Journal Page Tutorial by Anna-Karin Evaldsson.

The bulb is also a rub-on image.

Layers of ink - Greenery Art Journal Page Tutorial by Anna-Karin Evaldsson.

The sentiment from On The Horizon was stamped on the file card.

Layers of ink - Greenery Art Journal Page Tutorial by Anna-Karin Evaldsson.

As a title I used a Be You sentiment strip and inked it.

Layers of ink - Greenery Art Journal Page Tutorial by Anna-Karin Evaldsson.

Here you can see the effect of the Glossy Accents better. It adds both shine and dimension to this Sword Fern die cut.

Find more Dream Big inspiration in the two Simon Says Stamp blog hops: day 1 and day 2.


Thank you so much for stopping by here today! Have a lovely day!

Happy crafting!

Anna-Karin

Supplies:

* Please note: the links are affiliate links, for which I receive a small percentage of sales generated by the link, at no extra cost to you.