Pages

Thursday, April 30, 2020

Watercolor floral on black background

Hello friends! I hope you are doing well. I have a tutorial to share with you today, with stamped and watercolored floral on a black background. Apart from the sentiment and sequins, it is a one-layer tag. I wanted to create the effect of bright flowers on a black background, without cutting out the flowers, but by keeping it all on one layer. It is easy and gives a cool result. 

Today is Walpurgis Night in Sweden, a celebration of spring. Last year I helped organise one of the big celebrations here, with a bonfire, games for children, raffles, stuff to eat and more. This year, no celebrations will take place, so instead we will look forward to next year's celebration and remember the one from last year.

Layers of ink - Watercolor floral on black background tutorial by Anna-Karin Evaldsson.

I used stamps by Simon Says Stamp for this project, together with black acrylic paint. The combination of the transparent watercolor paint with the white of the paper shining through and the opaque black is striking. You can of course also use other types of images. It would work great as a card too, or an art journal page. Doing the coloring is very relaxing. 

Layers of ink - Watercolor floral on black background tutorial by Anna-Karin Evaldsson. Simon Says Stamp Artful Flowers.

Start by die cutting a tag from Tim Holtz watercolor paper. Stamp the three flowers from Artful Flowers. I stamped my images on the smooth side of the paper.

Layers of ink - Watercolor floral on black background tutorial by Anna-Karin Evaldsson.

Stamp them again on SSS masking paper and cut out. Place on top of the images.

Layers of ink - Watercolor floral on black background tutorial by Anna-Karin Evaldsson. Simon Says Stamp Stronger Together.

Stamp stems, leaves and flowers from both Artful Flowers and Stronger Together. Use a black pen to add lines to the stems of the flowers from Stronger Together, so that each stem has two lines, with an area in between that can be colored. Otherwise, the single-line stems would disappear when you color the project.
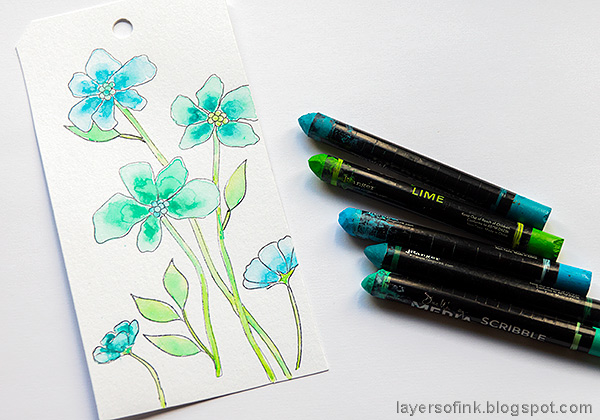
Layers of ink - Watercolor floral on black background tutorial by Anna-Karin Evaldsson. Watercolor the flowers.

I colored the flowers with Scribble Sticks, from both Set 1 and Set 2, you can also use watercolor paint, or Distress Ink. Pick up the color from the tip of a Scribble Stick with a paint brush and color the flowers. If you don't want a black background, you can stop here and just add sentiments.

Layers of ink - Watercolor floral on black background tutorial by Anna-Karin Evaldsson. Paint the background.

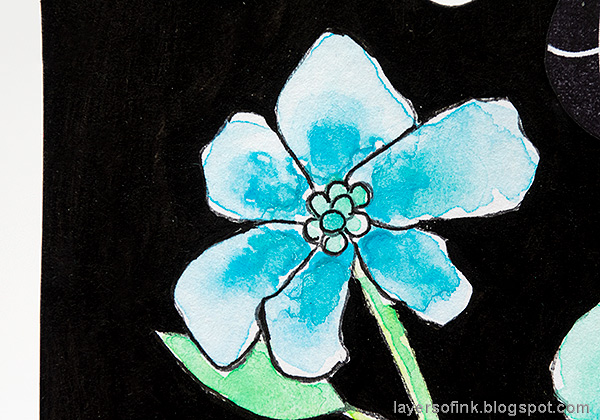
Use black acrylic paint to color the background. I used a combination of thicker and thinner paint brushes. I tested using both Dina Wakley's black paint and Black Soot Distress paint and thought that the former gave a more solid black look. But you hardly notice the difference. My ink needs a reink, so my stamping wasn't perfect. I carefully painted over the imperfect lines.

Layers of ink - Watercolor floral on black background tutorial by Anna-Karin Evaldsson.

Finish painting the whole background. When dry, use a black pen to add back some details which might look less black after the watercolor painting.

Layers of ink - Watercolor floral on black background tutorial by Anna-Karin Evaldsson.

You can also use the Scribble Sticks to color lace, giving you a perfectly color coordinated piece of lace. Mist with water first and then scribble the sticks on top. Mist with more water to blend.
Layers of ink - Watercolor floral on black background tutorial by Anna-Karin Evaldsson.

These flower stamps are so pretty and fun to color.

Layers of ink - Watercolor floral on black background tutorial by Anna-Karin Evaldsson.

I colored them by first adding one thin layer of color and then dropping in darker shades towards the center.
Layers of ink - Watercolor floral on black background tutorial by Anna-Karin Evaldsson.

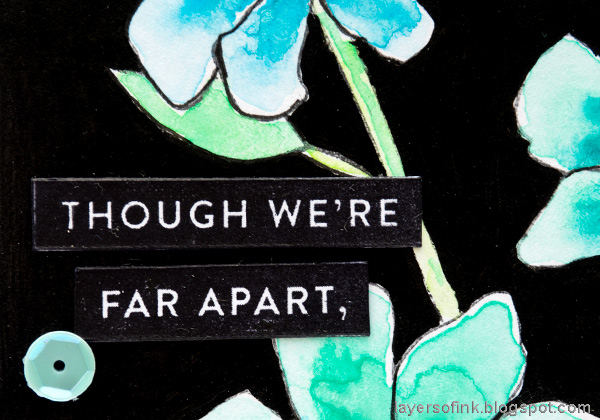
Stamp the sentiment from Stronger Together on white paper, cut out and ink the edges black. The circle sentiment at the top of the tag comes from Just Because Word Mix 2.

Layers of ink - Watercolor floral on black background tutorial by Anna-Karin Evaldsson.

I also glued some SSS sequins to the tag, for just a tiny bit of bling.

Layers of ink - Watercolor floral on black background tutorial by Anna-Karin Evaldsson.

This is such a great sentiment, especially in these times. I also used in on this Heart Layout.


Thank you so much for taking the time to visit my blog today!  

Happy crafting!

Anna-Karin

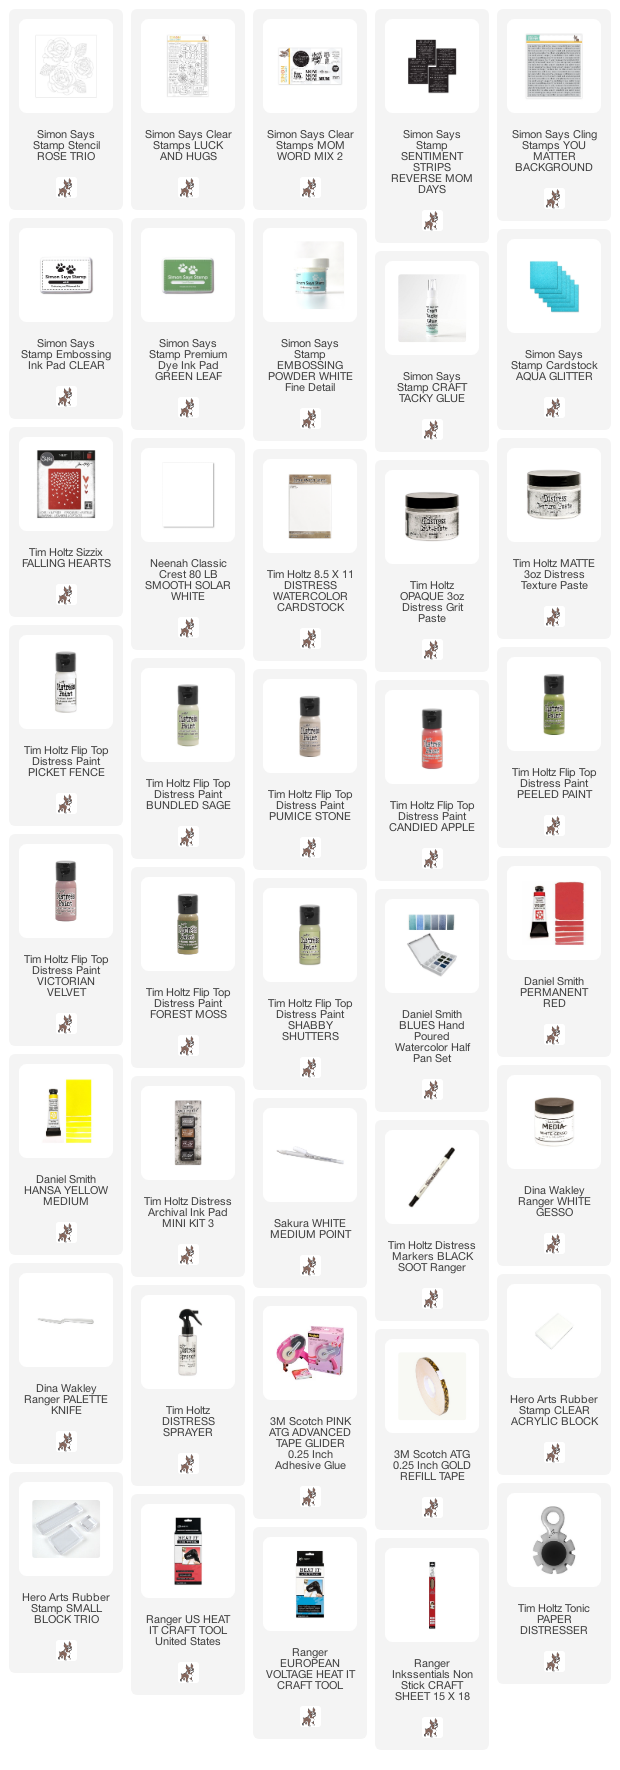
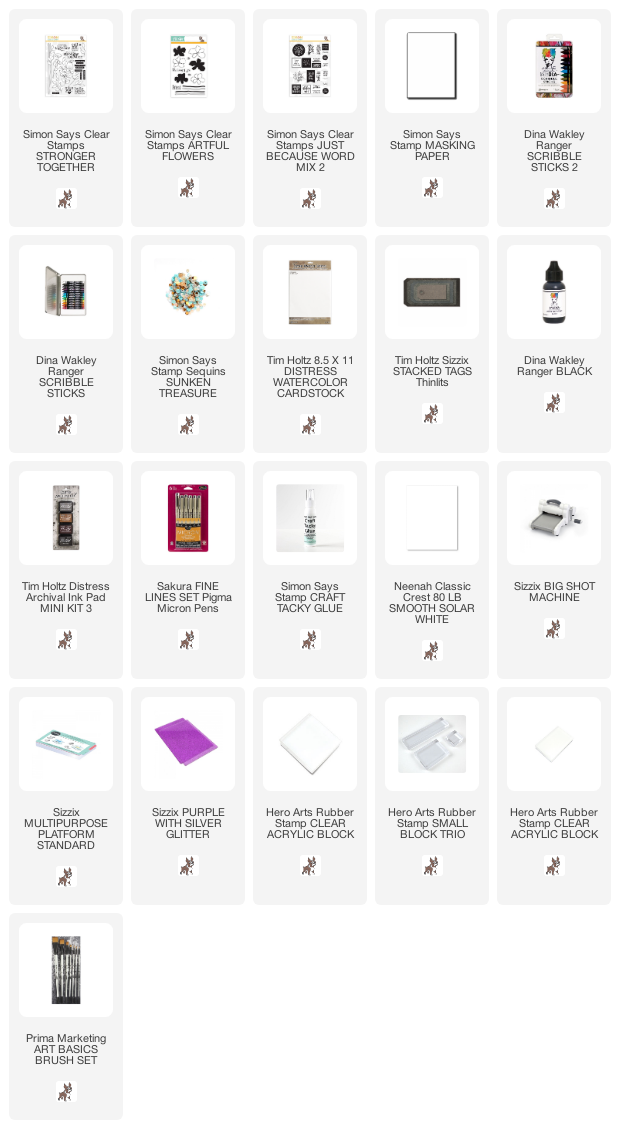
Supplies:

* Please note: the links are affiliate links, for which I receive a small percentage of sales generated by the link, at no extra cost to you.


Monday, April 27, 2020

Vintage Nature Notebook Tutorial

Hello crafters! I hope you are well and that your weekend was good. We went on a bike ride to a lake where there were no other people and we even saw a very cute ermine.


This week at the Simon Says Stamp Monday Challenge Blog we have a Not A Card challenge. Lots of options! I hope you will join us. Don't miss the last project by our April guest designer Tracey Sabella, with her blog Garden of Grace.

Layers of ink - Vintage Nature Notebook Tutorial by Anna-Karin Evaldsson.

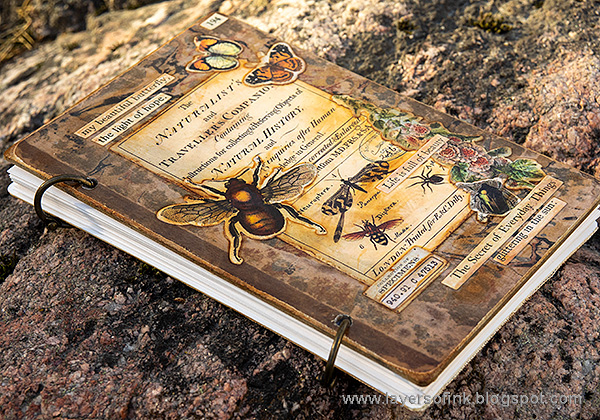
I feel very lucky to live close to nature, in these days particularly, and I really enjoy my long walks. I often take a sketchbook with me and today I made a new nature sketchbook for myself, with a vintage theme. When making these types of books I avoid adding bulky items to the cover, since they might fall off or make it harder to just take the book along in a pocket. This sketchbook goes one step further since all the ephemera on the cover is coated with matte medium, creating something of a decoupage effect. 

Layers of ink - Vintage Nature Notebook Tutorial by Anna-Karin Evaldsson. With Tim Holtz Salvaged Baseboards.

I used one of Tim Holtz Salvaged Baseboards as a base for my book. I love the vintage book look. I also picked a paper from the Field Notes ephemera to give the theme to the book.

Layers of ink - Vintage Nature Notebook Tutorial by Anna-Karin Evaldsson. Ink the ephemera.

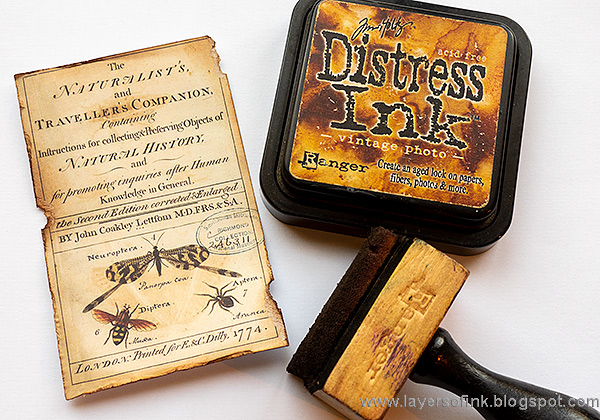
Tear and ink the edges of the paper. I used only Vintage Photo for this project, which is a nice warm brown.

Layers of ink - Vintage Nature Notebook Tutorial by Anna-Karin Evaldsson. With Tim Holtz Field Notes.

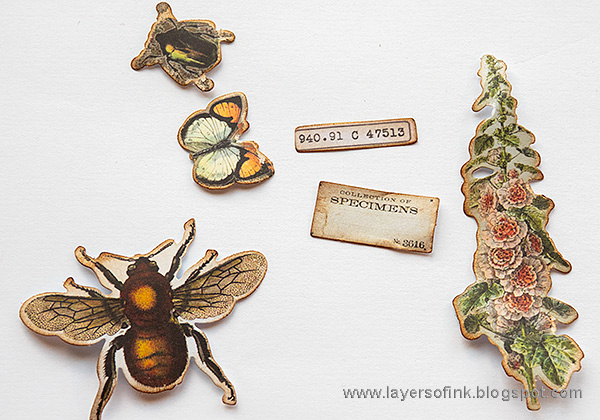
Find additional ephemera pieces from Field Notes and Field Notes Snippets. Sand and ink the edges.

Layers of ink - Vintage Nature Notebook Tutorial by Anna-Karin Evaldsson.

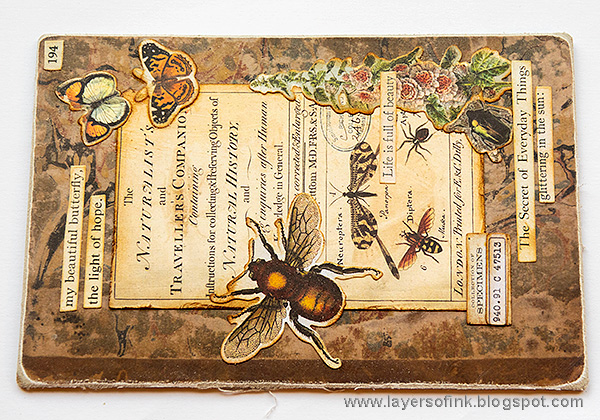
Sand the edges of the cover and then glue the ephemera to the cover using Distress Matte Medium. I also added a bunch of Clippings Stickers.

Layers of ink - Vintage Nature Notebook Tutorial by Anna-Karin Evaldsson.

Ink the sanded edges of the cover and add more ink to the ephemera if needed.

Layers of ink - Vintage Nature Notebook Tutorial by Anna-Karin Evaldsson.

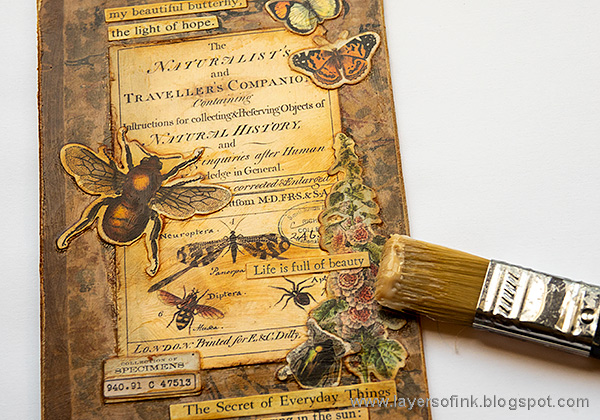
Now comes the fun technique. Scoop out a little matte medium and place in a container. You don't want to repeatedly put the paint brush into the ordinary container, since it might color the medium. The Distress Ink that is already on the cover will react with the matte medium and move around slightly. I also added Vintage Photo Distress Ink with my finger to some areas and rubbed it into the medium. This gives an instant vintage look to the cover in one step. As you can see on the paint brush in the photo, the matte medium is colored by the ink.

Layers of ink - Vintage Nature Notebook Tutorial by Anna-Karin Evaldsson.

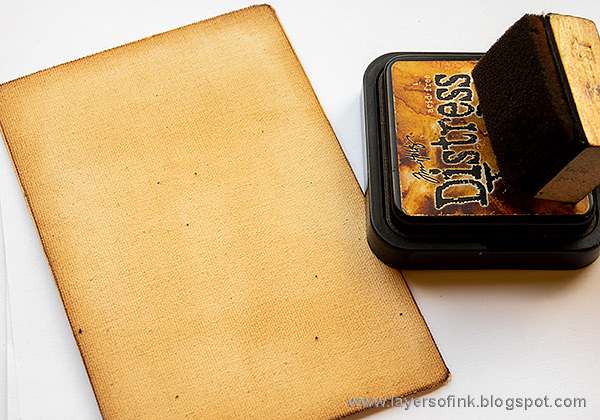
Cut a piece of mat board for the back cover and cover it with natural sticky-back canvas. You can also use another piece of Salvaged Baseboard.

Layers of ink - Vintage Nature Notebook Tutorial by Anna-Karin Evaldsson.

Ink with Vintage Photo.

Layers of ink - Vintage Nature Notebook Tutorial by Anna-Karin Evaldsson.

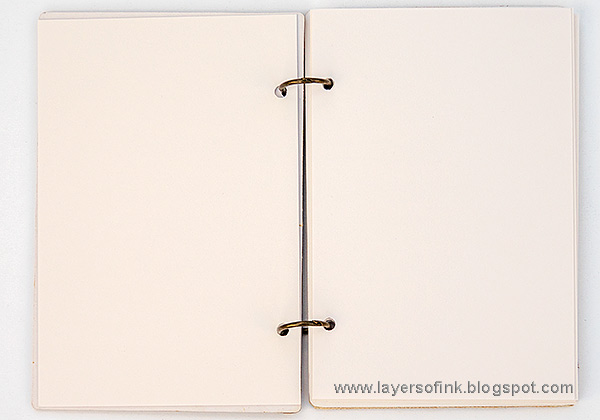
Punch holes with a crop-a-dile and bind with Tim's Mini Book Rings. The best thing with making your own sketchbook is that you can use your favorite paper on the inside. I cut sketchpaper to 3.8 x 5.9 in.

Layers of ink - Vintage Nature Notebook Tutorial by Anna-Karin Evaldsson.

All the pieces are now 'baked' into the cover and will not fall off. It also gives a nice, solid feel to the book.

Layers of ink - Vintage Nature Notebook Tutorial by Anna-Karin Evaldsson.

Here you can see the effect of the ink that I added with my finger into the medium. It collected especially around the shape of the insect. Be careful to clean your finger so that you don't get medium onto your ink pad. An even better method would be to smear the ink on a craft sheet and pick it up from there.

Layers of ink - Vintage Nature Notebook Tutorial by Anna-Karin Evaldsson.

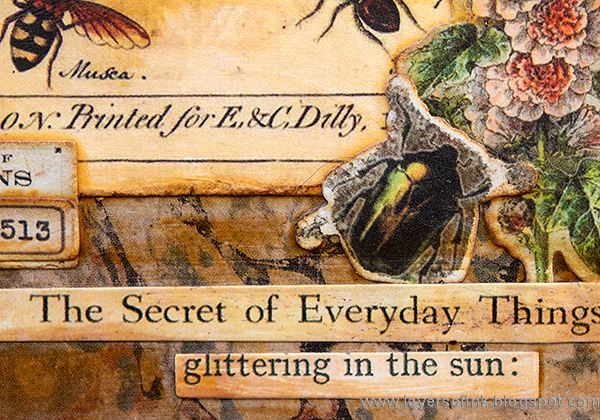
More fun ephemera pieces.

Layers of ink - Vintage Nature Notebook Tutorial by Anna-Karin Evaldsson.

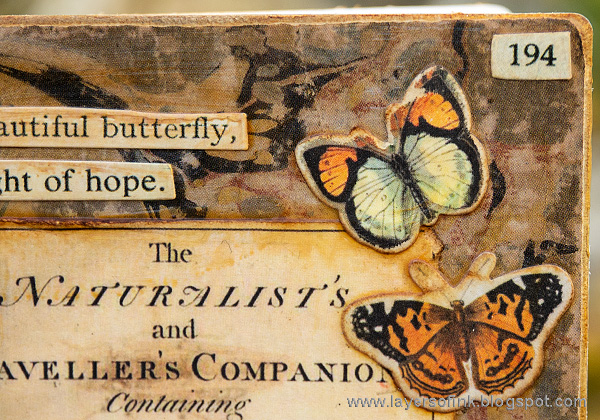
I love to sit with the Clippings Stickers and pick out sentiments, and was particularly happy with the ones I found for this book.

Layers of ink - Vintage Nature Notebook Tutorial by Anna-Karin Evaldsson.

More sentiments and a beautiful insect.

Layers of ink - Vintage Nature Notebook Tutorial by Anna-Karin Evaldsson. Canvas back cover.

You can decorate the back cover too, but I usually like to keep it plain.

Layers of ink - Vintage Nature Notebook Tutorial by Anna-Karin Evaldsson.

Here is my new sketchbook waiting to be filled with nature moments and memories. You can of course make it in other themes too, but just changing the images and text.

I hope you will join us this week in our Not A Card Challenge. As always, you have a chance to win a $50 gift voucher to do some fun shopping at Simon Says Stamp. You have until next Monday 8am Ohio time. 1pm UK time, 2 pm CET to join in.

As you may know, the Simon Says Stamp Store have longer shipping times for the moment due to the coronavirus. With this in mind we have made the difficult decision to suspend the $50 voucher for this challenge.

We know that many people are staying safe at home and we would love it if you would continue to enter the challenges and have fun! We are all in this together!


Don't forget to follow Simon Says Stamp on Instagram, they post great stuff daily. We also have a new hashtag #SSSUnitedWeCraft


Do you use Instagram? If so please add #sssmchallenge so we can see your entries there too.


Thank you so much for taking the time to visit my blog today! Take care!

Happy crafting!

Anna-Karin

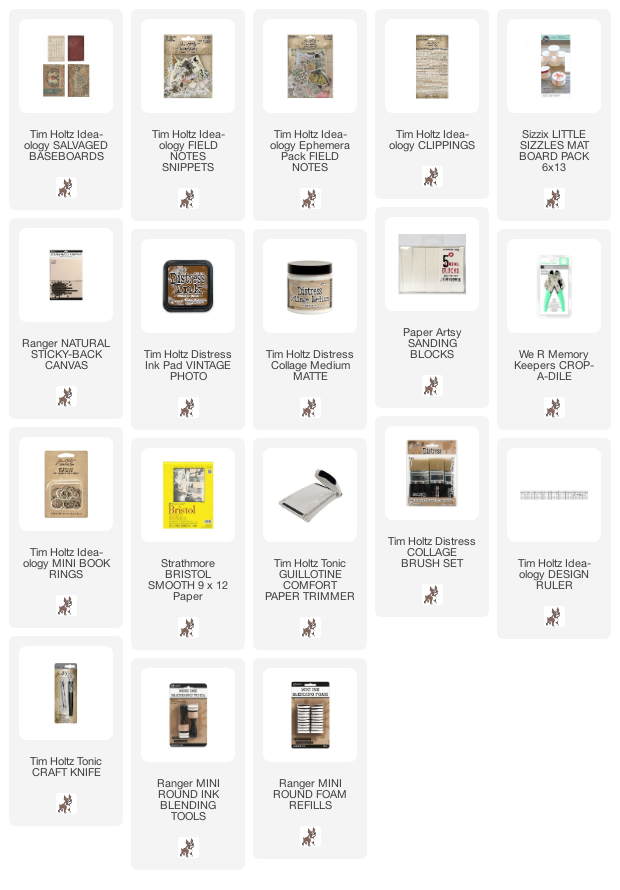
Supplies:

* Please note: the links are affiliate links, for which I receive a small percentage of sales generated by the link, at no extra cost to you.


Saturday, April 25, 2020

SSS Sunny Days Ahead Blog Hop

Hello crafters and welcome to my blog! I hope you are all well and healthy. I am so happy to take part in the Simon Says Stamp Sunny Days Ahead blog hop, to celebrate the new release. You should have come here from the very creative JD Collins.

The Sunny Days Ahead release is filled with wonderful and versatile products. You can see them all here. I think the name for the release is perfect, there are sunny days ahead. You will find gorgeous graduation products, lots of ways to celebrate Mother's Day, and an many pretty spring florals. If you use the code sssink you get a free Intense Black ink pad with any purchase (offer valid until 4/26 at 11:59).


I made two projects for the blog hop and they are very different from each other. There is a mixed media canvas featuring a trio of roses, and a quick stamped and watercolored Mother's Day card.

 Layers of ink - Mixed Media Rose Canvas Tutorial by Anna-Karin Evaldsson.

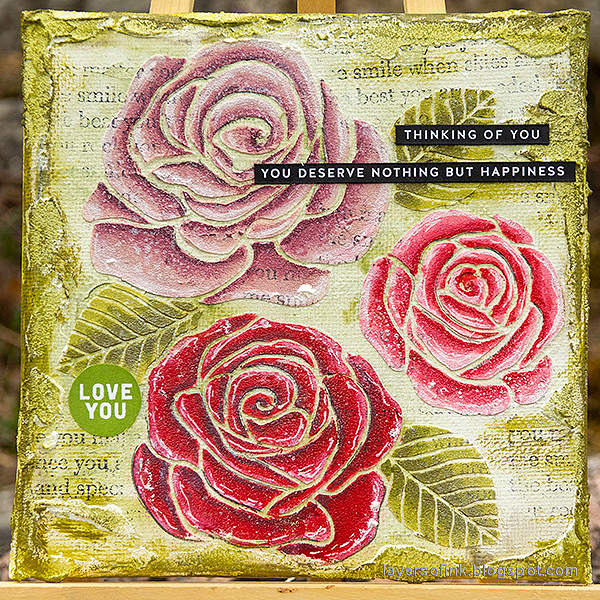
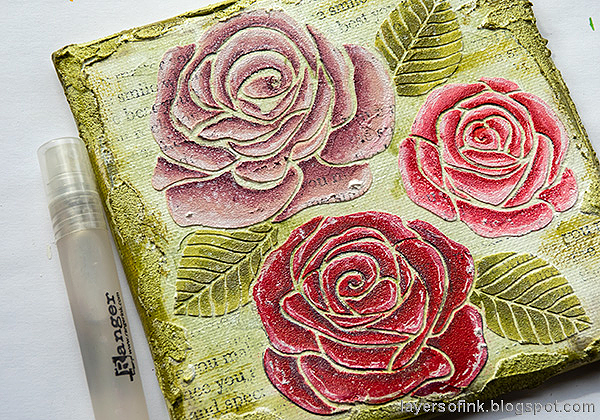
Here's the finished canvas. Mixed media projects look harder to do when you just see the finished product, but if you follow along in the tutorial below, you will discover that it isn't so hard. It is created layer upon layer. This would be a great Mother's Day gift and it is easy to send too, since many of us might not be able to see our mother in person on Mother's Day. Especially in these days. It's a 6 x 6 in canvas, but you can also turn the design into a card, if you use sturdy paper as a base. It was made with the Rose Trio Stencil.

Layers of ink - Mixed Media Rose Canvas Tutorial by Anna-Karin Evaldsson.

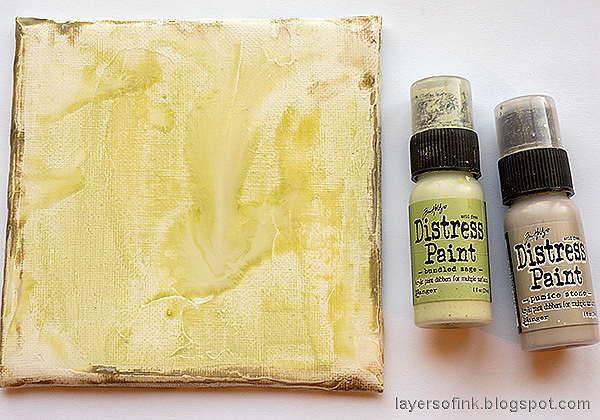
Start with a layer of gesso (I forgot to take a photo of that step) and let it dry. The paint watered-down Distress Paints on the background, misting heavily with water.

Layers of ink - Mixed Media Rose Canvas Tutorial by Anna-Karin Evaldsson. Rose Trio stencil.

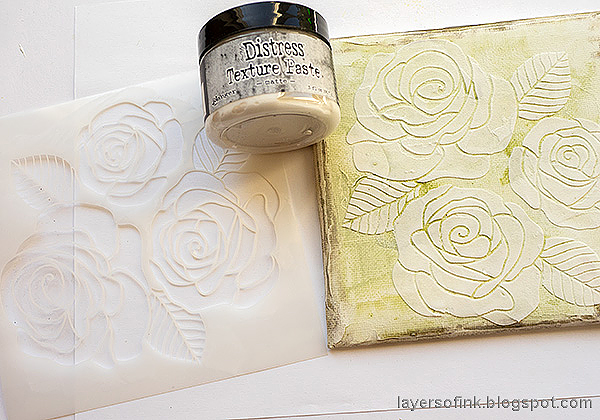
When dry, apply Texture Paste through the Rose Trio stencil.

Layers of ink - Mixed Media Rose Canvas Tutorial by Anna-Karin Evaldsson. Paint the roses.

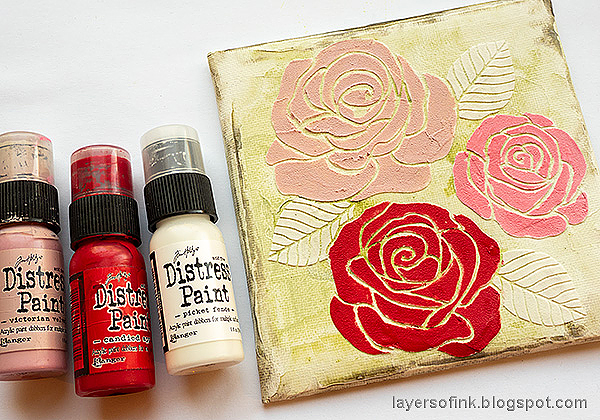
Paint the roses with three shades of pink and red. The pink shade to the right is a mix of Picket Fence and Candied Apple.

Layers of ink - Mixed Media Rose Canvas Tutorial by Anna-Karin Evaldsson.

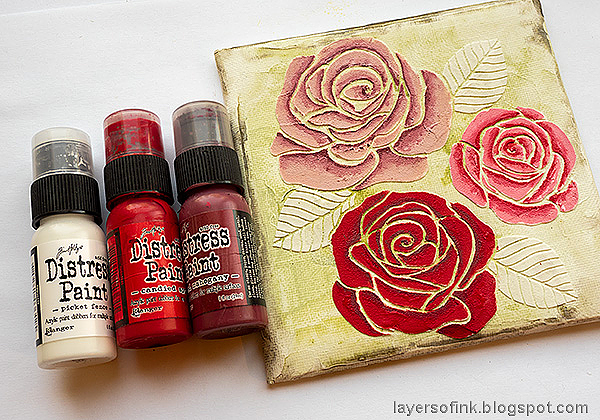
Continue with darker shades, adding shadow areas on the inside of the petals. Blend into the lighter shade by using some of the lighter colors.

Layers of ink - Mixed Media Rose Canvas Tutorial by Anna-Karin Evaldsson.

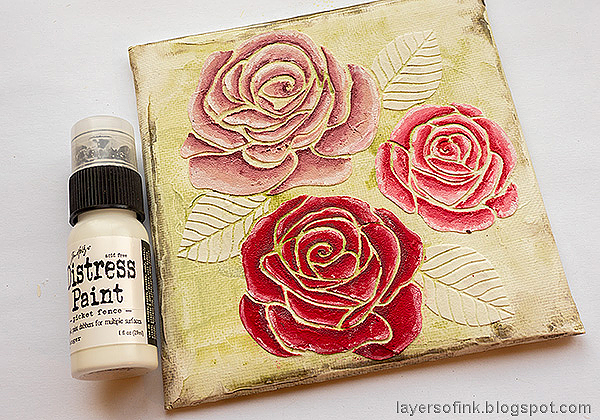
Add a little white for highlights.

Layers of ink - Mixed Media Rose Canvas Tutorial by Anna-Karin Evaldsson. Paint the leaves.

Paint the leaves with three shades of green, starting with the lighter one.

Layers of ink - Mixed Media Rose Canvas Tutorial by Anna-Karin Evaldsson.

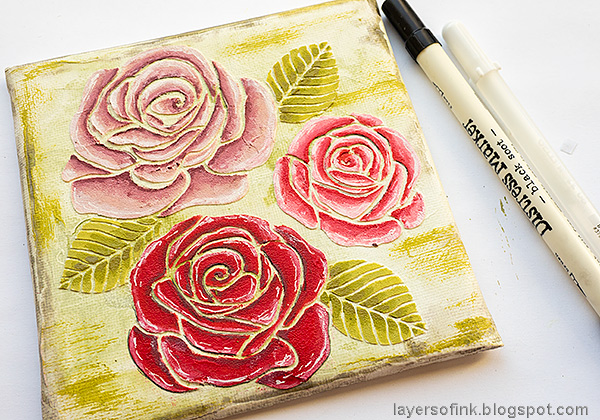
I wanted this canvas to have a light look and didn't add as many shadows as I often do, just a few lines here and there with a black marker. I also scribbled a white gel pen here and there for more highlights.

Layers of ink - Mixed Media Rose Canvas Tutorial by Anna-Karin Evaldsson.

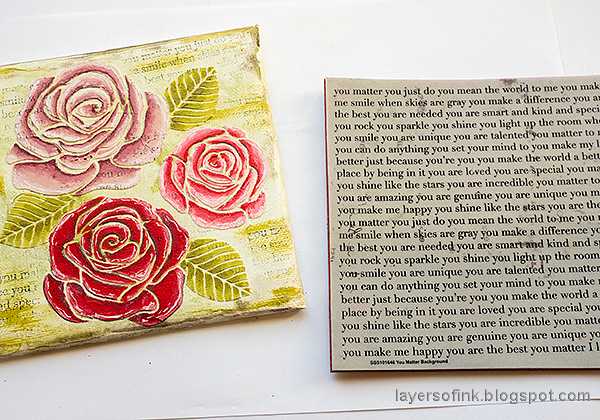
Stamp randomly with the You Matter background stamp. It's an older SSS stamp, and one of my favorites.

Layers of ink - Mixed Media Rose Canvas Tutorial by Anna-Karin Evaldsson. Add grit-paste.

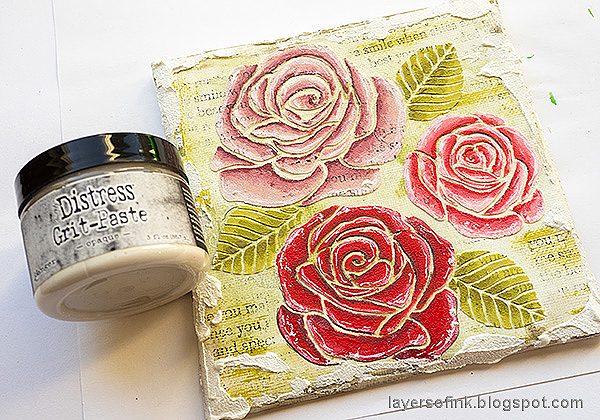
For more texture, apply Opaque Grit-Paste around the edges with a palette knife. You can also use Texture Paste, but it will give a little less texture. Let dry.

Layers of ink - Mixed Media Rose Canvas Tutorial by Anna-Karin Evaldsson.

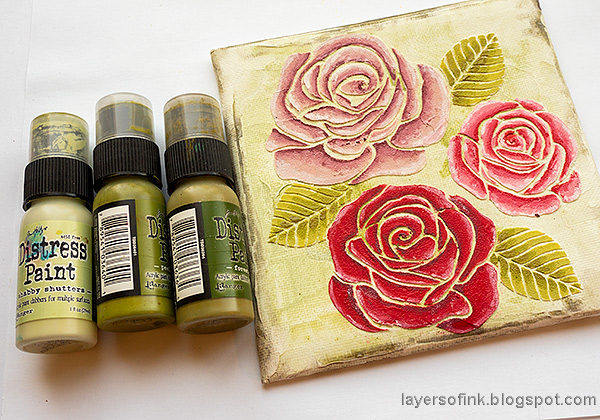
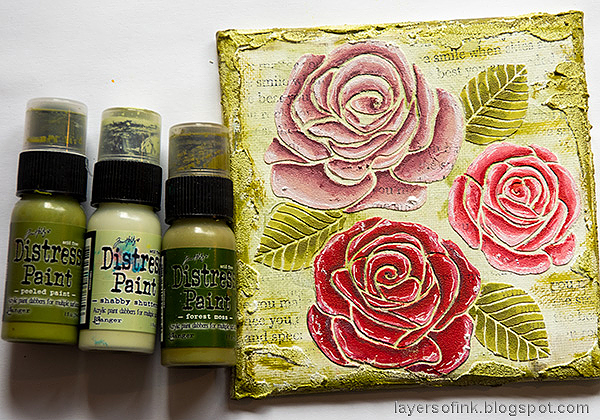
At first, I was going to use brown for the edges, but then I decided that I wanted to skip the brown and have more of a green feeling to the background. So I painted the grit-paste with Shabby Shutters, and added darker shades of Peeled Paint and Forest Moss. You can add paint directly to the grit-paste before applying it, but I usually like to paint it afterwards when it is dry. Some of the white will be visible and you get a better and more varied texture.

Layers of ink - Mixed Media Rose Canvas Tutorial by Anna-Karin Evaldsson.

And for some shimmer, I mixed an ice-cream stick scoop (just the tip of an ice cream stick is enough) of Perfect Pearls into water to make my own shimmer mist, and misted on the project.

 Layers of ink - Mixed Media Rose Canvas Tutorial by Anna-Karin Evaldsson.

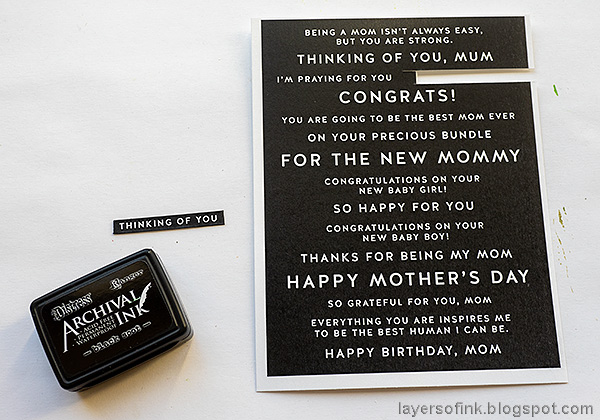
Cut sentiments from the Sentiment Strips Reverse Mom Days and drag a black ink pad along the edge to hide the white cutting line.

Layers of ink - Mixed Media Rose Canvas Tutorial by Anna-Karin Evaldsson.

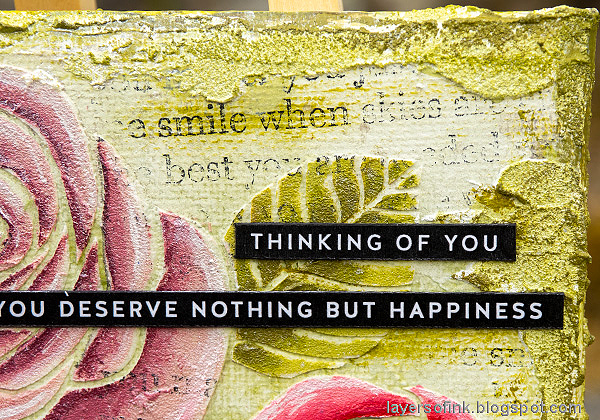
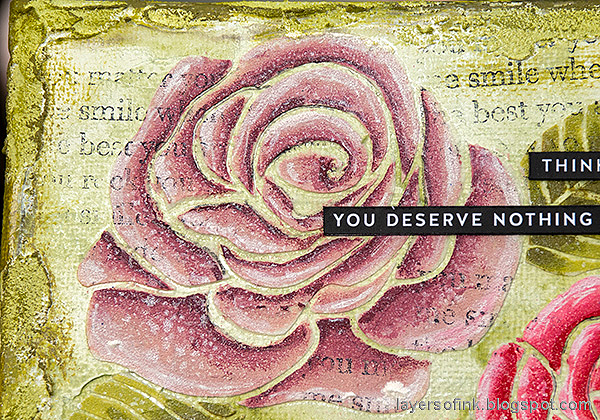
I used two sentiment strips and liked the contrast of the black strips against the background. Here you can see the texture of the grit-paste better.

Layers of ink - Mixed Media Rose Canvas Tutorial by Anna-Karin Evaldsson.

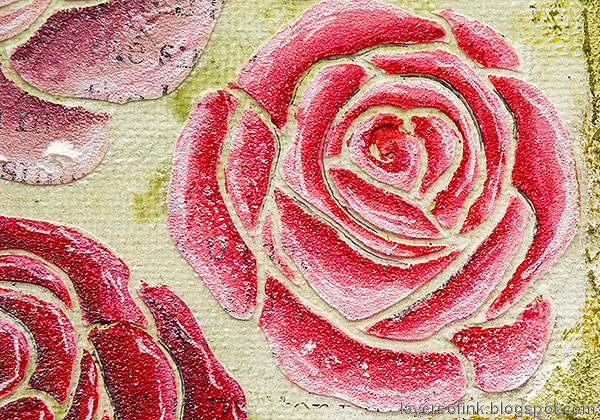
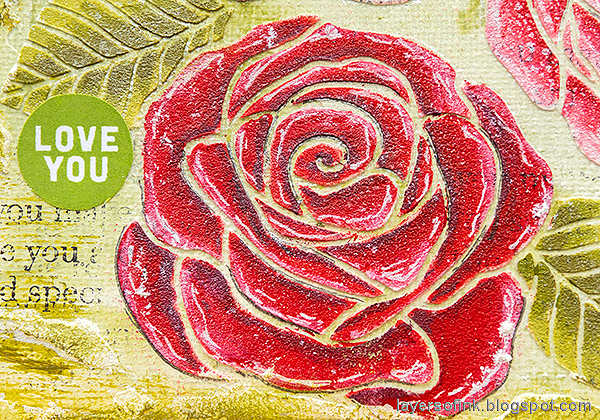
Don't worry too much about mistakes when painting the roses, mistakes won't be visible in the end, especially not when you see the canvas from a little distance.

Layers of ink - Mixed Media Rose Canvas Tutorial by Anna-Karin Evaldsson. Red rose.

You can of course also paint all the roses in the same color, or make them white or yellow instead. The circle words was stamped with the Mom Word Mix 2 and Green Leaf ink.

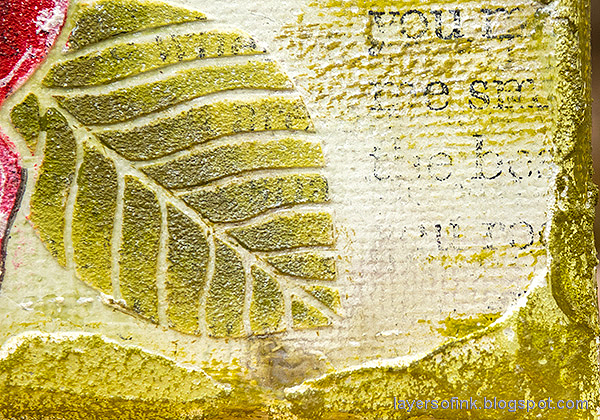
Layers of ink - Mixed Media Rose Canvas Tutorial by Anna-Karin Evaldsson. Texture.

I like the shape of these leaves, with the soft curving lines.

Layers of ink - Mixed Media Rose Canvas Tutorial by Anna-Karin Evaldsson.

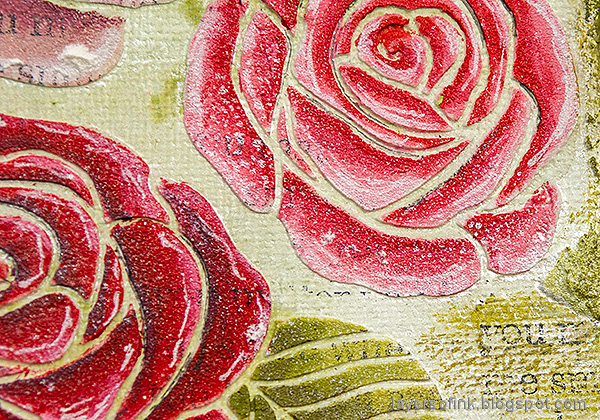
The glimmer is a little hard to capture on photo, but you might see it better here.

Layers of ink - Mixed Media Rose Canvas Tutorial by Anna-Karin Evaldsson.

For a more grungier example with similar techniques, check out my Bouquet of Roses canvas tutorial.

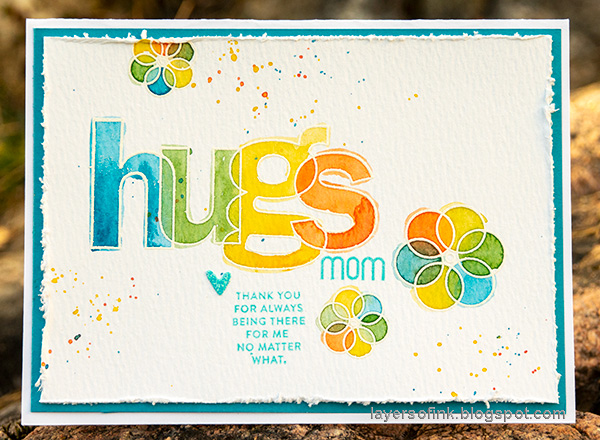
Layers of ink - Hugs Watercolor Card Tutorial by Anna-Karin Evaldsson.

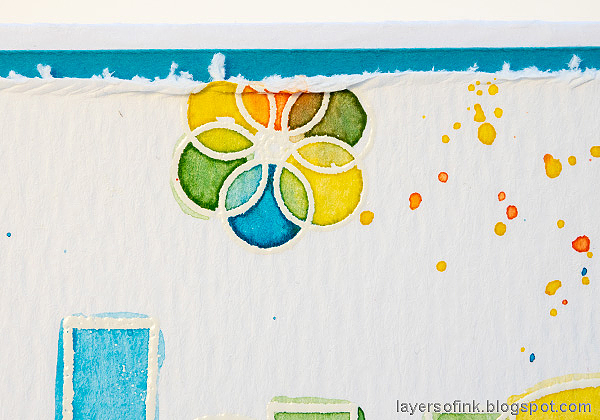
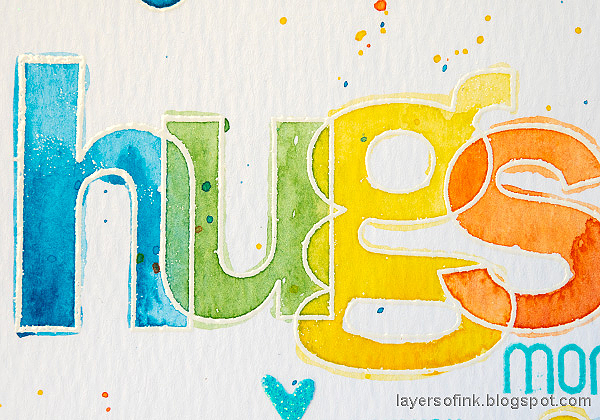
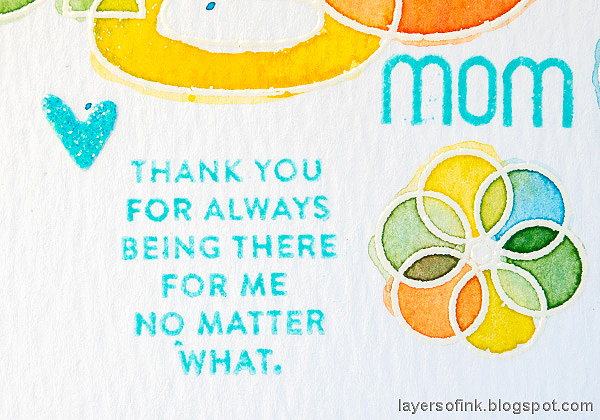
The Mother's Day card is very different from the canvas and is quick and easy to make. You can use any colors that you'd like. I used the wonderful Luck and Hugs set. The circle flowers and overlapping open letters are so cool and fun to color. You can also use Distress Ink instead of watercolor paint.

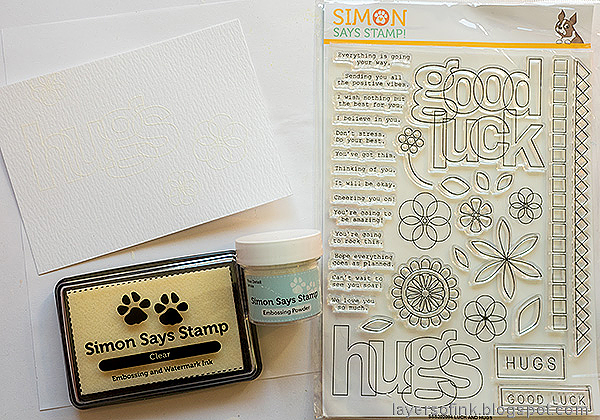
Layers of ink - Hugs Watercolor Card Tutorial by Anna-Karin Evaldsson. Stamp with Luck and Hugs.

Start by white embossing the stamps that you want to use on watercolor paper. As you can see, there are lots of options in this great set, and many different sentiments.

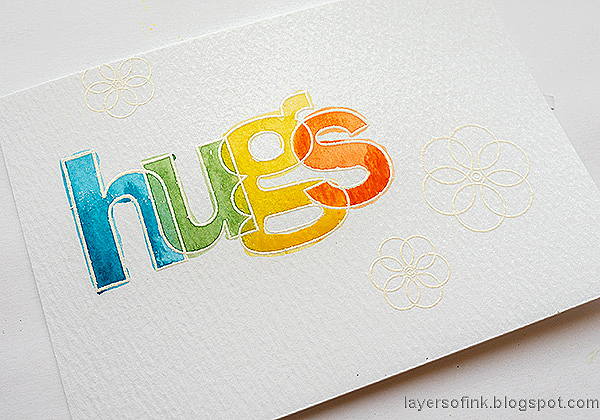
Layers of ink - Hugs Watercolor Card Tutorial by Anna-Karin Evaldsson.

Mix and test watercolors on a piece of scrap paper first. I always test my colors and how they will blend before painting on the actual project. Start with the 'h' and paint the whole letter, also the overlapping part. Continue with the next letter before the 'h' dries. You want the paints to blend. Paint over the edge here and there so that the outline of the letters will be visible.

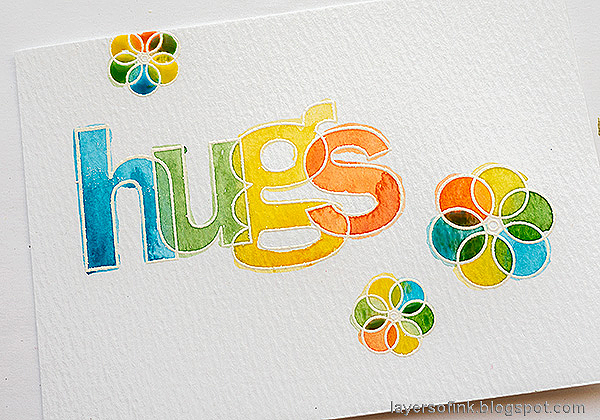
Layers of ink - Hugs Watercolor Card Tutorial by Anna-Karin Evaldsson.

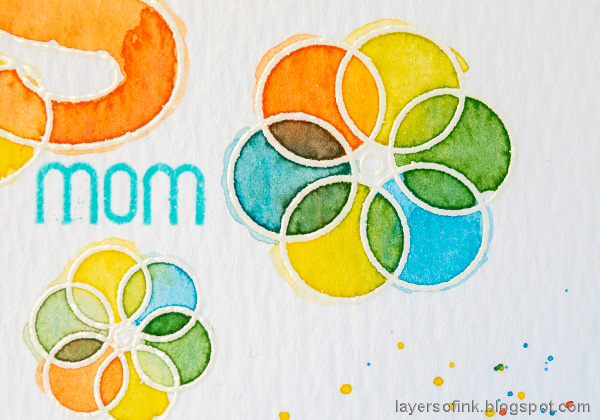
Continue with the flowers. This is also a good exercise in wet-on-wet paint blending. As you can see the orange and the blue create a darkish color, which is why I didn't place them next to each other in the word. On the flowers, the dark areas add interest, but on the word, they would have been too strong.

Layers of ink - Hugs Watercolor Card Tutorial by Anna-Karin Evaldsson.

Splatter a little paint on the card. The stamp the sentiments. They come from the Mom Word Mix 2 set.

Layers of ink - Hugs Watercolor Card Tutorial by Anna-Karin Evaldsson.

Distress the edges of the watercolor panel before adhering it to a piece of blue cardstock and then to folded white cardstock.

Layers of ink - Hugs Watercolor Card Tutorial by Anna-Karin Evaldsson.

You can cover the word when splattering, but I liked having just a few splatters in the letters.

Layers of ink - Hugs Watercolor Card Tutorial by Anna-Karin Evaldsson.

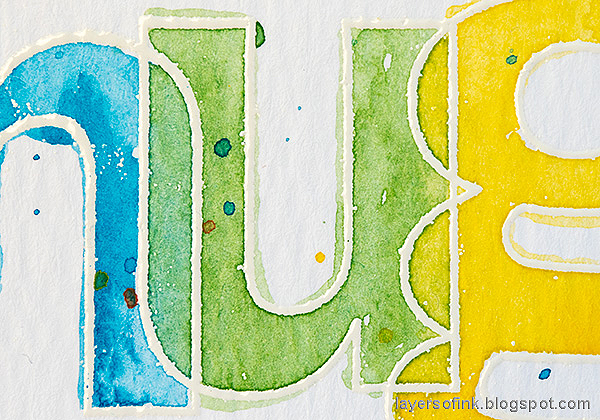
Here you can see how the paints blend with each other on the paper.

Layers of ink - Hugs Watercolor Card Tutorial by Anna-Karin Evaldsson.

These flowers made up by overlapping circles are such a fun design.

Layers of ink - Hugs Watercolor Card Tutorial by Anna-Karin Evaldsson.

The heart was die cut with Tim Holtz Falling Hearts die from SSS glittery paper. It was a left-over from another project.

Layers of ink - Hugs Watercolor Card Tutorial by Anna-Karin Evaldsson.

The colorful splatters add a nice playful touch to the card.

There are of course prizes to be won, and at each stop on the hop SSS is giving away a $25 coupon, randomly drawn from those who leave a comment. The winners will be posted post on the Simon Says Stamp store blog on Wednesday, the 29th of April.

Your next stop on the hop is Amanda Korotkova and she will show you wonderful inspiration using the previously released Mother’s Day, Graduation, and spring floral Simon Exclusive products.

Here are all the stops along the hop:

Anna-Karin Evaldsson (you are here)

ADDITIONAL INSPIRATION using previous released Simon branded products.


For more Sunny Days inspiration, remember to check out the Sunny Days Ahead gallery at SSS, and if you make something with products from the range, it is fun if you post it in the gallery too. There are galleries for all releases, and for the card kits, full of inspiration. Part one of the Sunny Days Ahead blog hop was yesterday, so don't miss all the inspiration there.


Thank you so much for visiting today and I hope you will have a lovely weekend!

Happy crafting!

Anna-Karin

Supplies:

* Please note: the links are affiliate links, for which I receive a small percentage of sales generated by the link, at no extra cost to you.