Hi everyone! I hope you had a fun weekend. I found a walking trail that I had missed on many walks, always thinking that one particular path was a dead end, but instead there was a lovely forest trail hiding around the corner.
This week at the Simon Says Stamp Monday Challenge Blog we have a Wedding/Anniversary theme. Since it is the first Monday of a new month (I cannot believe it is June already), the team is showcasing products by a specific company or designer, and this week the turn has come to Prima Marketing. You can find Prima's lovely range of products here. You don't have to use their products to join in the challenge, but it is always fun if you do.
Our guest designer for June is Jess, with her gorgeous blog Two Mad Dahlias, be sure not to miss her project and blog.

I made a wedding card this week, using mainly neutral colors, with a bit of pink and gold. For the background, I used Prima's Pretty Pale 6 x 6 paper pad, and the papers were all so pretty, that I decided to cut them into squares and create a patchwork effect.

For the layered heart I used Kaleidoscope Heart Layer dies by Birch Press Design. I had never used this type of layered die before and they create a great effect, which looks stunning both with different colors, or in just one color. The design consists of three layers, and I die cut them from the colors you see above, using SSS Glimmery Cardstock (Ruby Red, White Diamond, and Peach).

When you layer them together, with layer C in the bottom and you get this cool kaleidoscope effect. If you don't want a heart, you can just use the floral center piece, or you could leave that out and place a photo in the center of the heart.

The Pretty Pale papers were cut into squares, distressing the edges. Using adhesive in the center of each square only, I adhered them to White Diamond glimmery cardstock and then to vellum, again distressing the edges. Stitch around each square with a sewing machine. Adhere the panel to a folded cardstock base. The card is 6 x 6 in big.

Stamp the background here and there with Prima Finnabair 4 clear stamp.

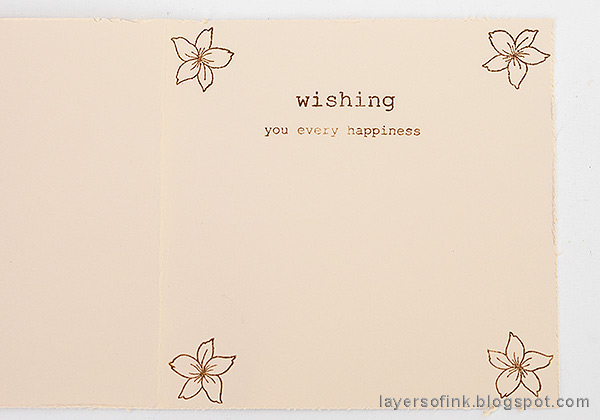
For the inside message, I used the Memory Box Rose Bouquet set.

The card was decorated with Prima's Meadows Pretty Pale flowers.

I hope you can see the glimmery effect of the papers better here.

For the sentiment, I die cut the SSS Outline Congrats word from gold paper. There is also a strip of design tape.

And more flowers. I like neutral flowers, since you can customize them with ink or paint if you want flowers in a different color.

Torn edges, layers and stitching give a shabby chic look to the card.

Here's the inside. I didn't press hard enough on 'every', but decided that it didn't matter, since it is handstamped after all.
I hope you will join us this week in our Wedding/Anniversary challenge. As always, you have a chance to win a $50 gift voucher to do some fun shopping at Simon Says Stamp. You have until next Monday 8am Ohio time. 1pm UK time, 2 pm CET to join in.


So pretty! Love the way you used the papers. It reminds me of the wedding quilt I received from my sisters when I got married.
ReplyDeleteWow! That layered heart is gorgeous! Love the soft palette you used on this lovely piece, Anna-Karin! hugs, Maura
ReplyDeleteLovely card, Anna-Karin! So funny we've used the same paper. Love the romantic feel you gave it. Hugs, Sandra
ReplyDelete